Uživatelská příručka k ovladači Hunter NODE na baterie

FUNKCE UZLU
- Simple push-button programming
- Single-station model (NODE-100) with DC latching solenoid. Single-, two-, four-, or six-station models are also available (solenoids not included).
- Large Liquid Crystal Display (LCD) with easy-to-understand icons
- Operates using at least one standard nine-volt alkaline battery (use two for extended battery life)
- Three programs (A, B, or C) with up to four start times each
- Run times from one minute to six hours
- Manual watering capabilities
- Battery-life indicator
- Wired rain sensor compatible
- Non-volatile memory retains all program information
- Seasonal Adjustment from 10–150%
- Easy Retrieve™ memory allows saving/retrieval of preferred program data
- Manual bypass of rain sensor
- Total Run Time Calculator shows total program irrigation time per program
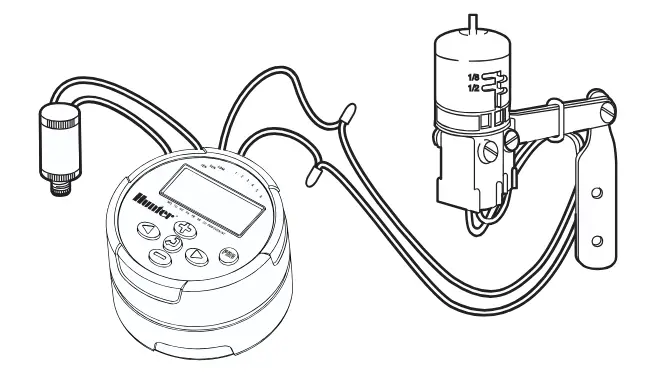
KOMPONENTY UZLŮ
Tato sekce poskytuje přesview některých komponent NODE. Každá položka bude podrobněji probrána později. Tato část však může být užitečná pro seznámení se s různými dostupnými možnostmi.
 Tlačítko – Increases the selected flashing display
 Tlačítko – Decreases the selected flashing display
 Tlačítko – Selects programming function
 Tlačítko – Advances the selected flashing display back to the next item
 Tlačítko – Navigates the selected flashing display back to the previous item
 Tlačítko – Selects the program (A, B, or C)
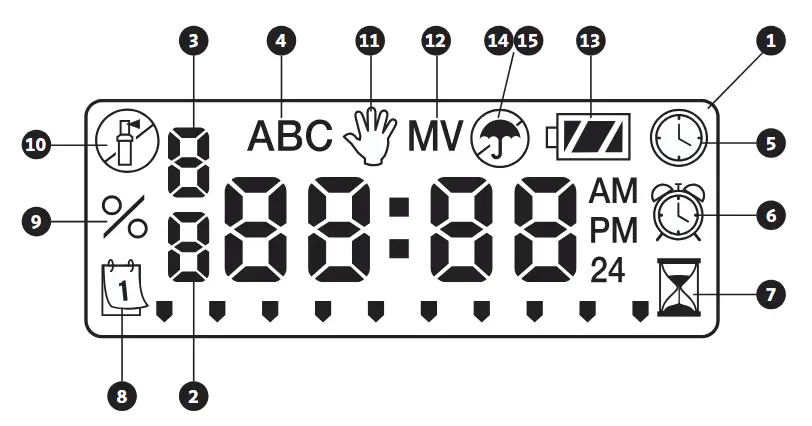
LCD displej
- Hlavní displej – Indicates all program information
- Číslo stanice – Indicates the station number being programmed
- Start Time Number – Indicates the start timer number being programmed
- Naprogramovat – Indicates the program (A, B, or C)
 Current Time/Day – Indicates when current day/time is being set
 Start Times – Indicates when start times are being set
 Run Times – Indicates when Run Times are being set. Allows user to set run times from one minute to six hours.
 Kropící dny – Allows the user to select individual days to water or a selected number of days between watering (interval)
- % Sezónní úprava – Allows the seasonal adjustment to be programmed form 10–150% (default value is 100%)
 Systém vypnutý – Indicates that watering is suspended
 Manuální zapnutí/vypnutí – Indicates when manual watering is programmed. Allows the user to activate the station manually.
- MV – Indicates that station one is set to master valve operation (only available on two-, four-, or six-station models)
 Stav baterie – Indicates remaining battery life
 Deštník – Indicates the rain sensor is suspending irrigation
 Crossed Umbrella – Indicates the rain sensor has been manually bypassed
PŘIPOJENÍ BATERIE/BATERIÍ
NODE používá k provozu ventilů a programování regulátoru jednu nebo dvě standardní devítivoltové baterie (nejsou součástí dodávky). Regulátor může pracovat buď s jednou devítivoltovou baterií, nebo se dvěma devítivoltovými bateriemi. Za normálních podmínek je očekávaná životnost jeden rok pro jednu baterii a dva roky při použití dvou devítivoltových baterií.
![]() POZNÁMKA: NODE má energeticky nezávislou paměť. To umožňuje vyjmout baterii bez ztráty programových informací.
POZNÁMKA: NODE má energeticky nezávislou paměť. To umožňuje vyjmout baterii bez ztráty programových informací.

Instalace baterie/baterií
- Unscrew the rear body of the NODE body to gain access to the battery compartment.
- Insert the battery/batteries into the battery tray and connect to the controller using the battery connector.
- Make sure that no water is inside the battery compartment.
- Přišroubujte zadní část těla NODE zpět k přední polovině.
![]() POZNÁMKA: Ověřte, zda je značka těsnění na zadní polovině UZLU zarovnána s přední polovinou, a zajistěte tak správné těsnění.
POZNÁMKA: Ověřte, zda je značka těsnění na zadní polovině UZLU zarovnána s přední polovinou, a zajistěte tak správné těsnění.

MONTÁŽ SOLENOIDŮ
NODE-100 je dodáván se solenoidem připojeným k regulátoru. NODE-100-LS solenoid neobsahuje. Vícekanálové regulátory NODE-200, NODE-400 a NODE-600 ovládají až dva, čtyři nebo šest solenoidů. Solenoidy Hunter s blokováním stejnosměrným proudem (č. dílu 458200) lze snadno nainstalovat na všechny plastové ventily Hunter.
![]() POZNÁMKA: Používejte stejnosměrné západkové solenoidy pracující v rozsahu 9–11 V DC. Solenoidy 24 V AC nebudou s NODE fungovat.
POZNÁMKA: Používejte stejnosměrné západkové solenoidy pracující v rozsahu 9–11 V DC. Solenoidy 24 V AC nebudou s NODE fungovat.

Zapojení stejnosměrných solenoidů k uzlu
- Attach the black leads from each solenoid to the single common wire (black lead) coming from the NODE. Secure all wire connections with waterproof connectors.
- Attach one red wire from each solenoid to the corresponding station wire (red lead) from the NODE. The station numbers are identified on the face of the NODE. Secure all wire connections with waterproof connectors.
![]() POZNÁMKA: Maximální vzdálenost vodičů mezi solenoidem a UZLEM je 100 m (30′) při použití vodiče o minimálním průřezu 18 mm (1 AWG).
POZNÁMKA: Maximální vzdálenost vodičů mezi solenoidem a UZLEM je 100 m (30′) při použití vodiče o minimálním průřezu 18 mm (1 AWG).
MONTÁŽ UZLU
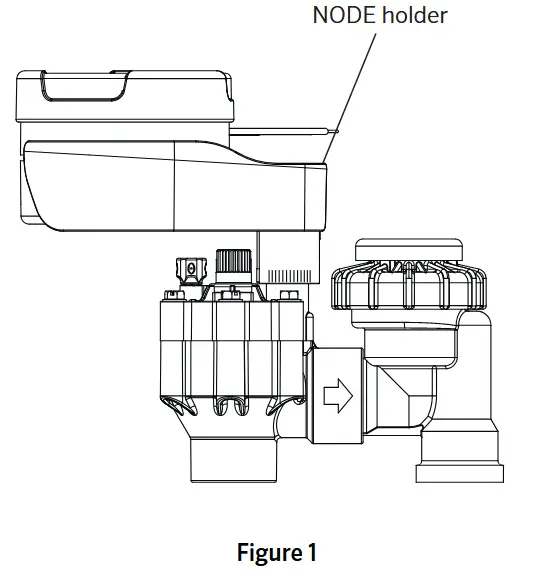
NODE lze snadno namontovat na jakýkoli plastový ventil Hunter. Speciálně navržená montážní spona ventilu usnadňuje instalaci. Součástí dodávky je ochranný gumový kryt, který zabraňuje hromadění nečistot na čelní straně NODE.
Montáž uzlu k ventilu (obrázek 1)
- Screw the Hunter DC latching solenoid (P/N 458200) into the valve bonnet.
- Set the small open end of the NODE holder on top of the solenoid.
- Set the NODE controller into the large open end of the NODE holder.
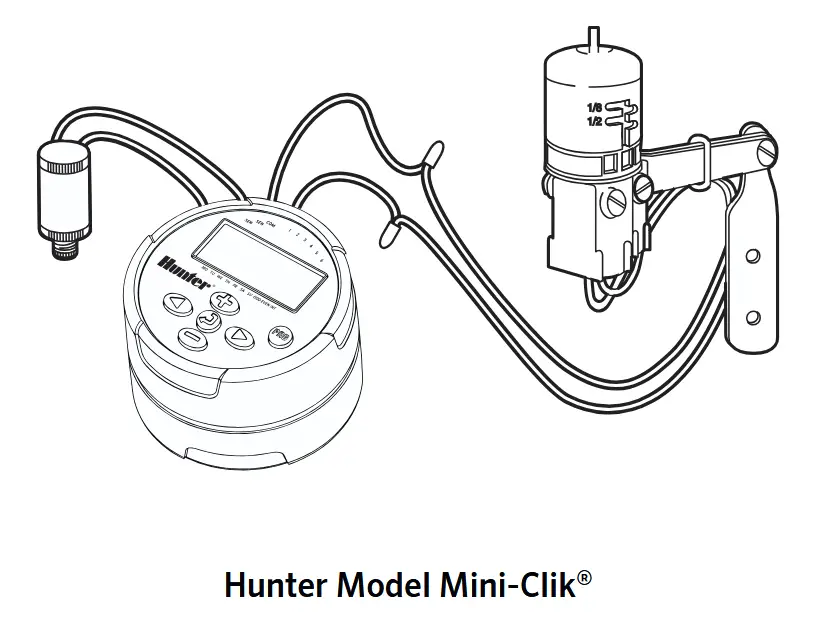
CONNECTING A WEATHER SENSOR
A Hunter Mini-Clik ® or Wired Rain-Clik® rain sensor can be connected to the NODE. The purpose of this sensor is to stop watering when weather conditions dictate.
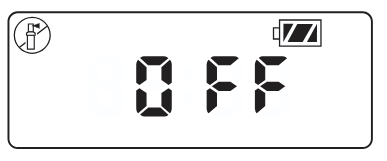
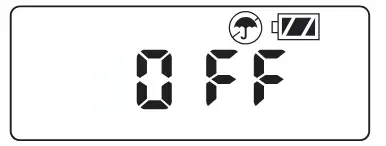
![]() NOTE: When the Wired Rain Sensor is interrupting the watering, the display will show the System Off icon
NOTE: When the Wired Rain Sensor is interrupting the watering, the display will show the System Off icon ![]() , “OFF” and
, “OFF” and ![]() na displeji.
na displeji.
- Cut the yellow wire loop attached to the NODE at approximately the middle of the loop.
- Remove approximately ½” (13 mm) of insulation from each wire. Attach one yellow wire to each of the wires of the weather sensor. You can mount the rain sensor up to 100 ft (30 m) from the NODE controller (18 AWG/1 mm minimum wire size).
- Secure wire connections with waterproof connectors.
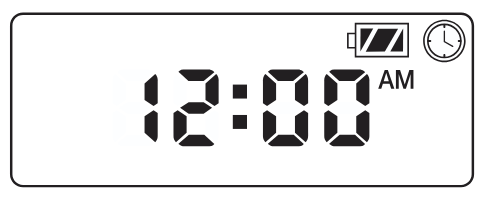
NEČINNÝ REŽIM
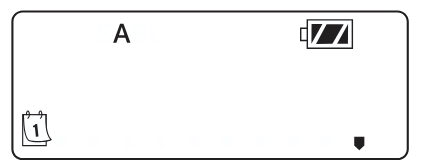
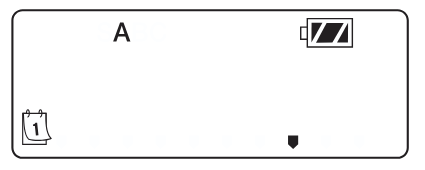
Displej NODE obvykle zobrazuje čas a den, den v týdnu, MV (pokud je aktivována možnost hlavního ventilu) a indikátor životnosti baterie. Po krátké době nečinnosti se displej vypne, aby se zachovala energie baterie. Stisknutím libovolného tlačítka přepnete NODE do klidového režimu.

REŽIM RUN
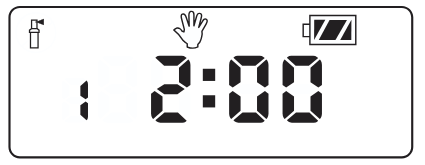
Když řídicí jednotka spouští program, na displeji se zobrazí číslo stanice, písmeno programu, zbývající doba chodu a blikající ikona rotoru.

PROGRAMOVÁNÍ
The NODE uses standard Hunter controller programming with three programs (A, B, or C) and four start times per program. On standard Hunter controllers a dial is used to scroll between the programming functions. However, on the NODE the ![]() button is used to quickly and easily create the irrigation program. When programming, the flashing portion of the display can be changed by pressing the
button is used to quickly and easily create the irrigation program. When programming, the flashing portion of the display can be changed by pressing the ![]() or
or ![]() buttons. To change something that is not flashing, press the
buttons. To change something that is not flashing, press the ![]() or
or ![]() buttons until the desired item is flashing.
buttons until the desired item is flashing.
Nastavení data a času
- Zatlačte na
 tlačítko až do
 se zobrazí ikona .
 - All four digits will be displayed representing the year. Use the
 or
or  buttons to change the year. Press the button to proceed to setting the month.
 - All four digits will be displayed with the two digits on the left representing the month flashing. Use the or buttons to change the month. Press the
 button to proceed to setting the day.
 - Only the two digits on the right side will be displayed and flashing, representing the day. Press the or buttons to change the day. Press the button to proceed with changing the hour. Press the button to proceed to setting the time.
- The AM/PM/24-hour time setting is shown flashing. Press the or button to change the time setting to AM, PM, or 24-hour time. Press the button to proceed to setting the hour.
- All four numbers are shown with the two numbers on the left flashing, representing the hour. Use the or buttons to change the hour. Press the button to proceed to setting the minutes.
- All four numbers are shown with the two numbers on the right flashing, representing the minutes. Use the or buttons to change the minutes. Pressing the button will advance to the year setting at Step 2.
- Stiskněte tlačítko button to proceed to the next programming function or allow controller to return to idle mode.
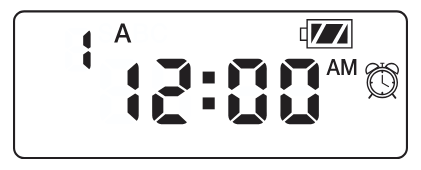
Nastavení časů zahájení zavlažování
- Stiskněte tlačítko tlačítko až do se zobrazí ikona .
- The start time will be displayed flashing, along with the program letter (A, B, or C) and the start time number (1, 2, 3, or 4) in the upper left of the display. Up to 4 different start times can be set for each program.
- Použijte or buttons to change the start time for the program that is displayed. Each press of the button will change the start time in one-minute increments.
- Stiskněte tlačítko button to add an additional start time to the program displayed. The start time number is shown in the upper left corner of the display.
- Stiskněte tlačítko button to add start times to a different program.
- Stiskněte tlačítko button to proceed to the next programming function or allow controller to return to idle mode.
![]() NOTE: After programming the run time for the last station press the
NOTE: After programming the run time for the last station press the ![]() button to display the total run time for the program.
button to display the total run time for the program.
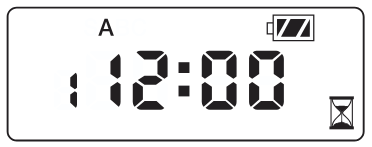
Nastavení doby běhu
- Stiskněte tlačítko tlačítko až do se zobrazí ikona .
- The run time will be displayed flashing. Also shown is the program letter (A, B, or C) and the active station number on the lower left side of the display. Press the or buttons to change the station run time from one minute to six hours.
- Stiskněte tlačítko button to advance to the next station.
- Stiskněte tlačítko button to add a run time to another program.
- Stiskněte tlačítko button to proceed to the next programming function or allow controller to return to idle mode.
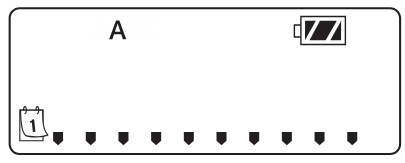
Nastavení dnů zavlažování
- Stiskněte tlačítko tlačítko až do se zobrazí ikona .
- The program letter (A, B, or C) will be displayed.
- Arrows point at the specific days of the week on which watering will occur. Press the
 or buttons to scroll though the days.
 - Stiskněte tlačítko button to activate that day for the program displayed, or the button to cancel watering for that day. The arrow will show on the watering days for the active program.
- Stiskněte tlačítko button to set days to water for a different program, if desired.
- Stiskněte tlačítko button to proceed to the next programming function or allow controller to return to idle mode.
Výběr lichých/sudých dnů pro zalévání
This feature uses numbered days of the month for watering instead of specific days of the week.
- Stiskněte tlačítko tlačítko až do se zobrazí ikona .
- Stiskněte tlačítko button until the cursor is above either ODD or EVEN on the display.
- Stiskněte tlačítko button to select, or the button to cancel either ODD or EVEN days to water.
- Once ODD or EVEN mode is activated, it will be the only cursor shown on the display.
Selecting Interval Days to Water
- Stiskněte tlačítko tlačítko až do se zobrazí ikona .
- Stiskněte tlačítko button until the cursor is above INT na displeji.
- Stiskněte tlačítko button and a 1 will be flashing, indicating the number of days between watering.
- Stiskněte tlačítko or buttons to select the number of days between watering days (1 to 31).
Nastavení sezónního očištění
- Press the button until the is displayed.
- Press the or button to increase or decrease the seasonal adjustment value from the default 100% (down to a minimum of 10% or a maximum of 150%).
- The value programmed for seasonal adjustment will be applied to all irrigation programs and will immediately be reflected in the run times displayed. For examptj. pokud jsou naprogramovány 20minutové doby provozu a poté se sezónní korekce změní ze 100 % na 50 %, zobrazené doby provozu budou 10 minut.

Vypnutí systému
To turn your controller off, press the ![]() tlačítko až do
tlačítko až do ![]() ikona a VYPNUTO is displayed on screen. To return the controller to auto programming mode, press the
ikona a VYPNUTO is displayed on screen. To return the controller to auto programming mode, press the![]() button. The controller will immediately return to auto programming mode and will display the time and battery-life indicator.
button. The controller will immediately return to auto programming mode and will display the time and battery-life indicator.
Ruční zavlažování
Ruční zavlažování umožňuje uživateli otestovat každou stanici nebo program po stanovenou dobu provozu. Stav meteorologického senzoru (pokud je použit) bude v tomto režimu ignorován.
- Make sure the controller is in idle mode. Press and hold the tlačítko až do se zobrazí ikona .
- The station number will be displayed in the lower left side of the display along with the run time.
- Použijte a buttons to select the desired station and the and buttons to set the manual watering time for the station shown.
- To manually activate a program, press the button. The program letter (A, B, or C) will show on the screen. If a different program is needed, press the dokud se nezobrazí požadovaný program.
- To stop the Manual Watering cycle, press the button until the time is reduced to zero.
- Stiskněte tlačítko button to proceed to the next programming function or allow controller to return to idle mode.
POZNÁMKA:
- Stisknutím tlačítka or buttons when a station is running in Manual Watering mode will modify the irrigation time for that station.
- Stisknutím tlačítka button when a station is running in Manual Watering mode will stop irrigation on the current station and advance to the next station.
- Stisknutím tlačítka button when a station is running in Manual Watering mode will stop irrigation on the current station and revert to the previous station.
Provoz senzoru
The NODE is compatible with Hunter Clik-type rain sensors, including Mini-Clik® , Freeze-Clik, and Wired Rain-Click® , as well as many other interrupt-type devices/sensors that do not require power. Simply connect the sensor to the NODE controller by cutting the yellow wire loop and connecting to the sensor wires.
NOTE: NODE is not compatible with Hunter Wireless Rain-Clik ® or other weather devices that require 24 VAC power.
When the sensor is activated, it will suspend irrigation and the ![]() na displeji se zobrazí ikona.
na displeji se zobrazí ikona.
POKROČILÉ PROGRAMOVACÍ FUNKCE
Všechny pokročilé programovací funkce se spouštějí z klidového režimu, který na displeji zobrazuje čas, den v týdnu a indikátor životnosti baterie. Pokud na displeji něco bliká, nachází se regulátor v jednom z programovacích režimů. Po krátké době nečinnosti se regulátor vrátí do klidového režimu.
Obtok senzoru
- From the idle mode, press and hold the tlačítko až do se zobrazí ikona .
- The display will show the umbrella icon flashing and NA.

- Stiskněte tlačítko button to bypass the sensor. The display will show a VYPNUTO to indicate the weather sensor is bypassed. The icon will show on the display during normal operation, indicating the controller is in bypass mode.
- To reactivate the weather sensor, press and hold the tlačítko až do icon is displayed. Press the button to return to normal sensor mode.
Snadné načtení paměti
Tato funkce umožňuje uživateli uložit preferovaný program do trvalé paměti v regulátoru, kterou lze kdykoli obnovit. To je skvělý způsob, jak potlačit provedené změny a vrátit se k původnímu programovacímu plánu.
Chcete-li uložit program:
- Make sure that the controller is programmed with the preferred programming schedule.
- From idle mode, press and hold the a button for five seconds to save the current program.
- The screen will show three dashed lines moving from left to right to indicate the current program is being saved to permanent memory. The display will flash HOTOVO kdy je proces dokončen.

Chcete-li načíst uložený program:
- From idle mode, press and hold the a tlačítko na pět sekund.
- The screen will show three dashed lines moving from right to left to indicate the preferred program is being retrieved from memory.
The controller now has the preferred program as the current program. The display will flash HOTOVO kdy je proces dokončen.
![]() POZNÁMKA: Při používání paměti Easy Retrieve buďte opatrní. Ukládání programových dat do paměti pomocí Easy Retrieve přepíše aktuální informace o programu a přepíše informace uložené v trvalé paměti. Při ukládání programových dat se ujistěte, že aktuální programová data jsou ta, která chcete uložit.
POZNÁMKA: Při používání paměti Easy Retrieve buďte opatrní. Ukládání programových dat do paměti pomocí Easy Retrieve přepíše aktuální informace o programu a přepíše informace uložené v trvalé paměti. Při ukládání programových dat se ujistěte, že aktuální programová data jsou ta, která chcete uložit.
Setting Master Valve Operation
(NODE-200, NODE-400, & NODE-600 Only)
Modely NODE s více stanicemi (NODE-200, NODE-400 a NODE-600) lze programovat s použitím normálně uzavřeného hlavního ventilu. Při programování s hlavním ventilem přiřadíte stanici 1 jako hlavní ventil, čímž efektivně ztratíte možnost použití stanice 1 pro aktivaci zavlažovací stanice.
- From the idle mode, press the tlačítko až do se zobrazí ikona .
- Program A will be displayed along with the active station number on the lower left. Make sure the active station showing is “1.” The run time will be shown.
- Stiskněte tlačítko jednou tlačítko a MV icon will display on the screen and the time will disappear. Station 1 is now acting as the master valve and will not be available in other programming screens.
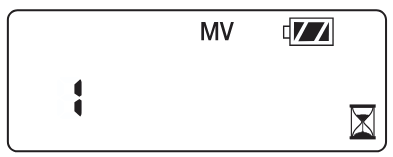
- When the master valve is activated, it will apply to all programs and the MV icon will stay displayed on the screen at all times.
Programovatelné vypnutí (až 99 dní)
Tato funkce umožňuje uživateli zastavit veškeré naprogramované zavlažování na určené období od 1 do 99 dnů. Na konci programovatelného období vypnutí se regulátor vrátí k normálnímu provozu.
- From idle mode, press the tlačítko až do icon is displayed. Wait two seconds until OFF is shown on the display. The controller is now in System Off mode.
- Stiskněte tlačítko button and a blinking “1” will be displayed, indicating the number of days the controller will stay off. Program the off days as desired, up to 99 days maximum.
- The display will show the number of days remaining in the VYPNUTO období.
- To interrupt the VYPNUTO period, press the button to return to the idle mode screen, showing the time of day and day of the week.
INDIKÁTOR VÝŽIVY BATERIE
Zbývající životnost baterie lze odhadnout z indikátoru životnosti baterie zobrazeného na displeji. NODE může fungovat buď s jednou devítivoltovou baterií, nebo se dvěma devítivoltovými bateriemi. Použití dvou devítivoltových baterií poskytne přibližně dvojnásobnou životnost baterie oproti jedné devítivoltové baterii. Níže uvedený graf indikátoru životnosti baterie ukazuje odhad zbývající životnosti baterie.
![]() Full: 100–60% remaining battery life
Full: 100–60% remaining battery life
![]() Med: 60–25% remaining battery life
Med: 60–25% remaining battery life
![]() Low: 25–0% remaining battery life
Low: 25–0% remaining battery life
![]() Okamžitě vyměňte baterii!
Okamžitě vyměňte baterii!
RESETOVÁNÍ OVLADAČE
Resetováním řídicí jednotky se vymažou aktuální data programu a řídicí jednotka se restartuje. Resetováním se však neodstraní program uložený do trvalé paměti pomocí funkce Easy Retrieve Memory (viz strana 12) pro uložení preferovaného programu.
- From idle mode, press and hold the , a klíče.
- After two seconds the screen will go blank. Continue to hold the , a klíče.
- 12:00 will flash on the display. Release the keys.
- The controller may show a countdown from 10 to 1 on the display, and then 12:00 am will be shown flashing when the reset is complete. The controller can now be reprogrammed.
PRŮVODCE ODSTRAŇOVÁNÍM PROBLÉMŮ

SPECIFIKACE
Rozměry: 3 ½”(89 mm) diameter, 2 ½”(64 mm) high
Senzorové vstupy: Jeden
Zdroj energie: One nine-volt alkaline battery (use two for extended battery life). Activates DC latching solenoids operating 9-11VDC (Hunter PN 458200).
Provozní teplota: 0ºF až 140ºF (-17ºC až 60ºC)
Schválení:
IP68
CE
FCC
C-Tick
Dokumenty / zdroje
 |
Bateriový ovladač Hunter NODE [pdfUživatelská příručka NODE ovladač na baterie, NODE, ovladač na baterie, ovladač na baterie, ovladač |