1. Úvod
This manual provides essential information for the safe and effective operation, maintenance, and troubleshooting of your YESWELDER LYG-Q910D Auto Darkening Welding Helmet. Please read this manual thoroughly before use and retain it for future reference.

Image 1.1: The YESWELDER LYG-Q910D Auto Darkening Welding Helmet, showcasing its design and included protective lenses.
2. Bezpečnostní informace
WARNING: Welding and cutting processes can cause serious injury or death. Always follow safety precautions and wear appropriate personal protective equipment (PPE).
- Vždy noste ochranné brýle pod svářečskou kuklou.
- Ensure the helmet is properly adjusted and functioning before each use.
- Do not use the helmet if the auto-darkening filter is damaged or not darkening correctly.
- Protect the helmet from extreme temperatures, moisture, and direct sunlight when not in use.
- Replace scratched or damaged protective lenses immediately.
- Ensure adequate ventilation in the work area to avoid inhaling fumes.
- Udržujte děti a nepovolané osoby mimo dosah svařovacího prostoru.
3. Vlastnosti produktu
The YESWELDER LYG-Q910D welding helmet incorporates advanced features for enhanced safety and performance.
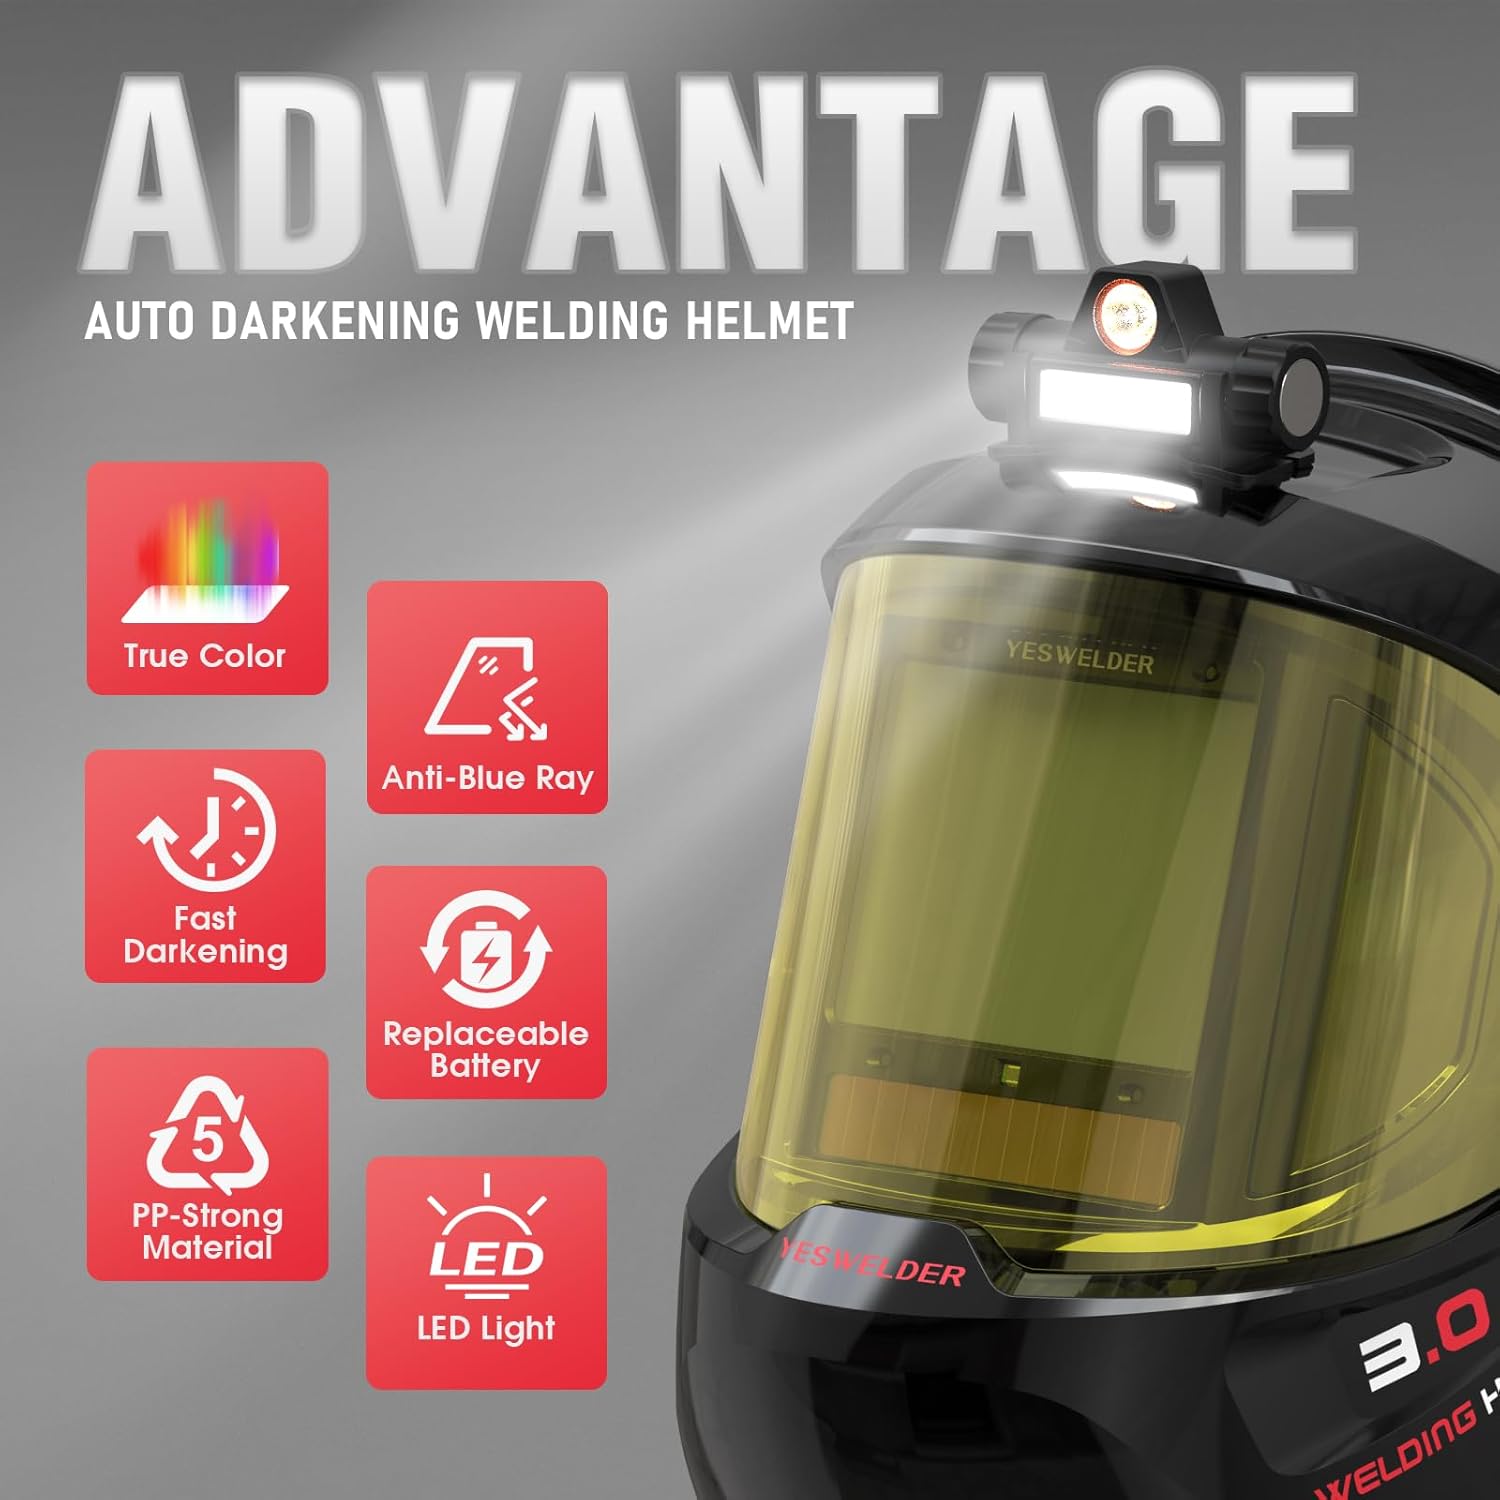
Obrázek 3.1: Konecview of the helmet's key advantages including True Color, Anti-Blue Ray, Fast Darkening, Replaceable Battery, PP-Strong Material, and LED Light.
3.1. Auto-Darkening Filter
Equipped with 4 arc sensors, the auto-darkening filter provides a rapid switching time of 1/30,000 seconds, ensuring immediate eye protection upon arc ignition. The digital control panel allows for precise adjustment of sensitivity and delay.
3.2. Panoramatický View & True Color Technology
The helmet features a 3.94" x 3.27" main viewing area complemented by side views (DIN5, non-auto-darkening) for a 180° panoramic field of vision. True Color technology provides a clear and natural view of the workpiece, enhancing visibility and reducing eye strain. The optical clarity rating is 1/1/1/1.

Image 3.2: Comparison illustrating the clarity of True Color lens technology versus traditional lenses.
3.3. Blue Light Blocking & UV/IR Protection
The helmet incorporates blue light blocking technology to filter harmful high-energy blue light rays, reducing eye fatigue during extended welding sessions. Continuous UV/IR protection is provided by the filter, regardless of whether the auto-darkening function is active or not.
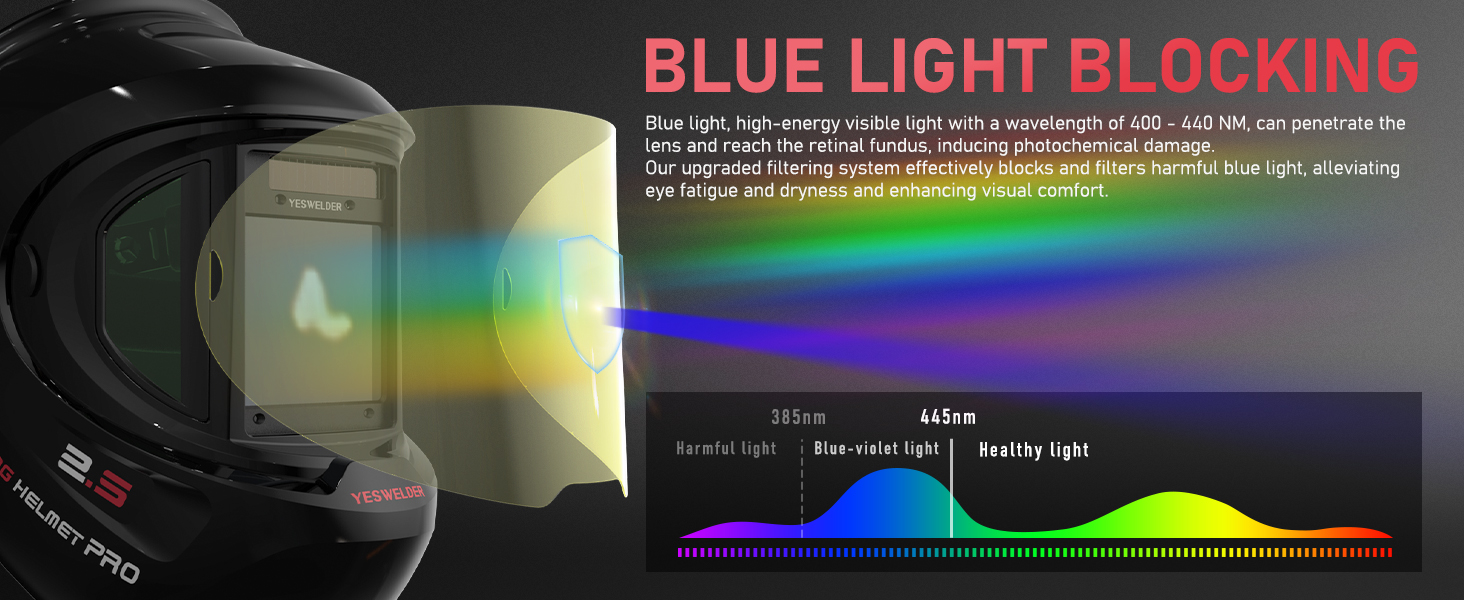
Image 3.3: Diagram explaining how the helmet's blue light blocking technology filters harmful light wavelengths.
3.4. Rechargeable LED Light
An integrated, USB-rechargeable LED light provides illumination for the work area, offering both a larger lighting area and concentrated lighting modes. This feature is particularly useful in low-light environments.

Image 3.4: The rechargeable LED light feature, showing its charging port and two distinct lighting modes.
3.5. Dual Power Sources
The helmet is powered by a combination of solar panel technology and a replaceable CR2450 lithium battery, ensuring long service life and energy efficiency. It includes automatic sleep and shutdown functions to conserve power.
3.6. Trvanlivost
Constructed from PP-strong material, the helmet is designed for fall resistance, impact resistance, corrosion resistance, and flame resistance, providing robust protection in demanding work environments.
4. Nastavení a seřízení
4.1. Nastavení hlavového dílu
Proper adjustment of the headgear is crucial for comfort and stability. Use the various adjustment points to achieve a secure and balanced fit.
- Úprava velikosti: Use the knob at the back of the headgear to adjust the headband's circumference to fit your head.
- Úprava vzdálenosti: Adjust the distance between the helmet and your face for optimal observation and comfort.
- Nastavení úhlu: The helmet's angle knob allows adjustment to any desired viewúhel.
- Nastavení těsnosti: The headband's fixing knob eases adjustment and prevents the helmet from falling off during use.

Obrázek 4.1: Detailní view of the headgear adjustment points for size, distance, angle, and tightness.
4.2. Instalace/kontrola baterie
The helmet comes with a CR2450 lithium battery installed. Ensure it is properly seated. The digital control panel includes a battery indicator to show the current charge level.
4.3. Protective Lens Installation
The helmet includes replacement protective lenses. To install or replace, carefully remove the old lens and insert the new one, ensuring it is securely fitted to prevent dust and debris from entering.
5. Návod k obsluze
Familiarize yourself with the digital control panel for optimal performance.

Image 5.1: Diagram of the digital control panel, indicating arc sensors, UV/IR filter, and control buttons.
5.1. Zapnutí/vypnutí
Press the power button on the digital control panel to turn the helmet on or off. The helmet also features automatic sleep and shutdown functions.
5.2. Výběr režimu
The helmet supports multiple operating modes: Weld, Cut, and Grind. Use the 'MODE/TEST' button to cycle through these modes.
- Režim broušení (DIN 3): For grinding operations. The filter remains in a light state.
- Režim řezání (DIN 5-9): For cutting applications.
- Režim svařování (DIN 9-15): For various welding processes (TIG, MIG, MMA/STICK).

Image 5.2: Visual representation of the shade settings for Grind, Cut, and Weld modes.
5.3. Digital Control Panel Adjustments
The digital control panel allows for fine-tuning of the helmet's performance.
- Ovládání citlivosti: Adjusts the filter's sensitivity to arc light. Use the 'SENS' buttons (+/-) to set the desired level.
- Ovládání zpoždění: Adjusts the time it takes for the lens to return from dark to light state after welding. Use the 'DELAY' buttons (+/-) to set between 0.1 and 1.0 seconds.
- Shade Control & Auto Button: In Weld/Cut mode, use the 'SHADE' buttons (+/-) to manually select the shade level. Long press the 'SHADE AUTO' button for 2 seconds to enter Auto mode, where the helmet automatically adjusts shade according to the arc.
- Funkce paměti: Short press the 'MEMORY' button to select stored setup parameters. Long press for 2 seconds to save current settings to one of 9 memory slots.
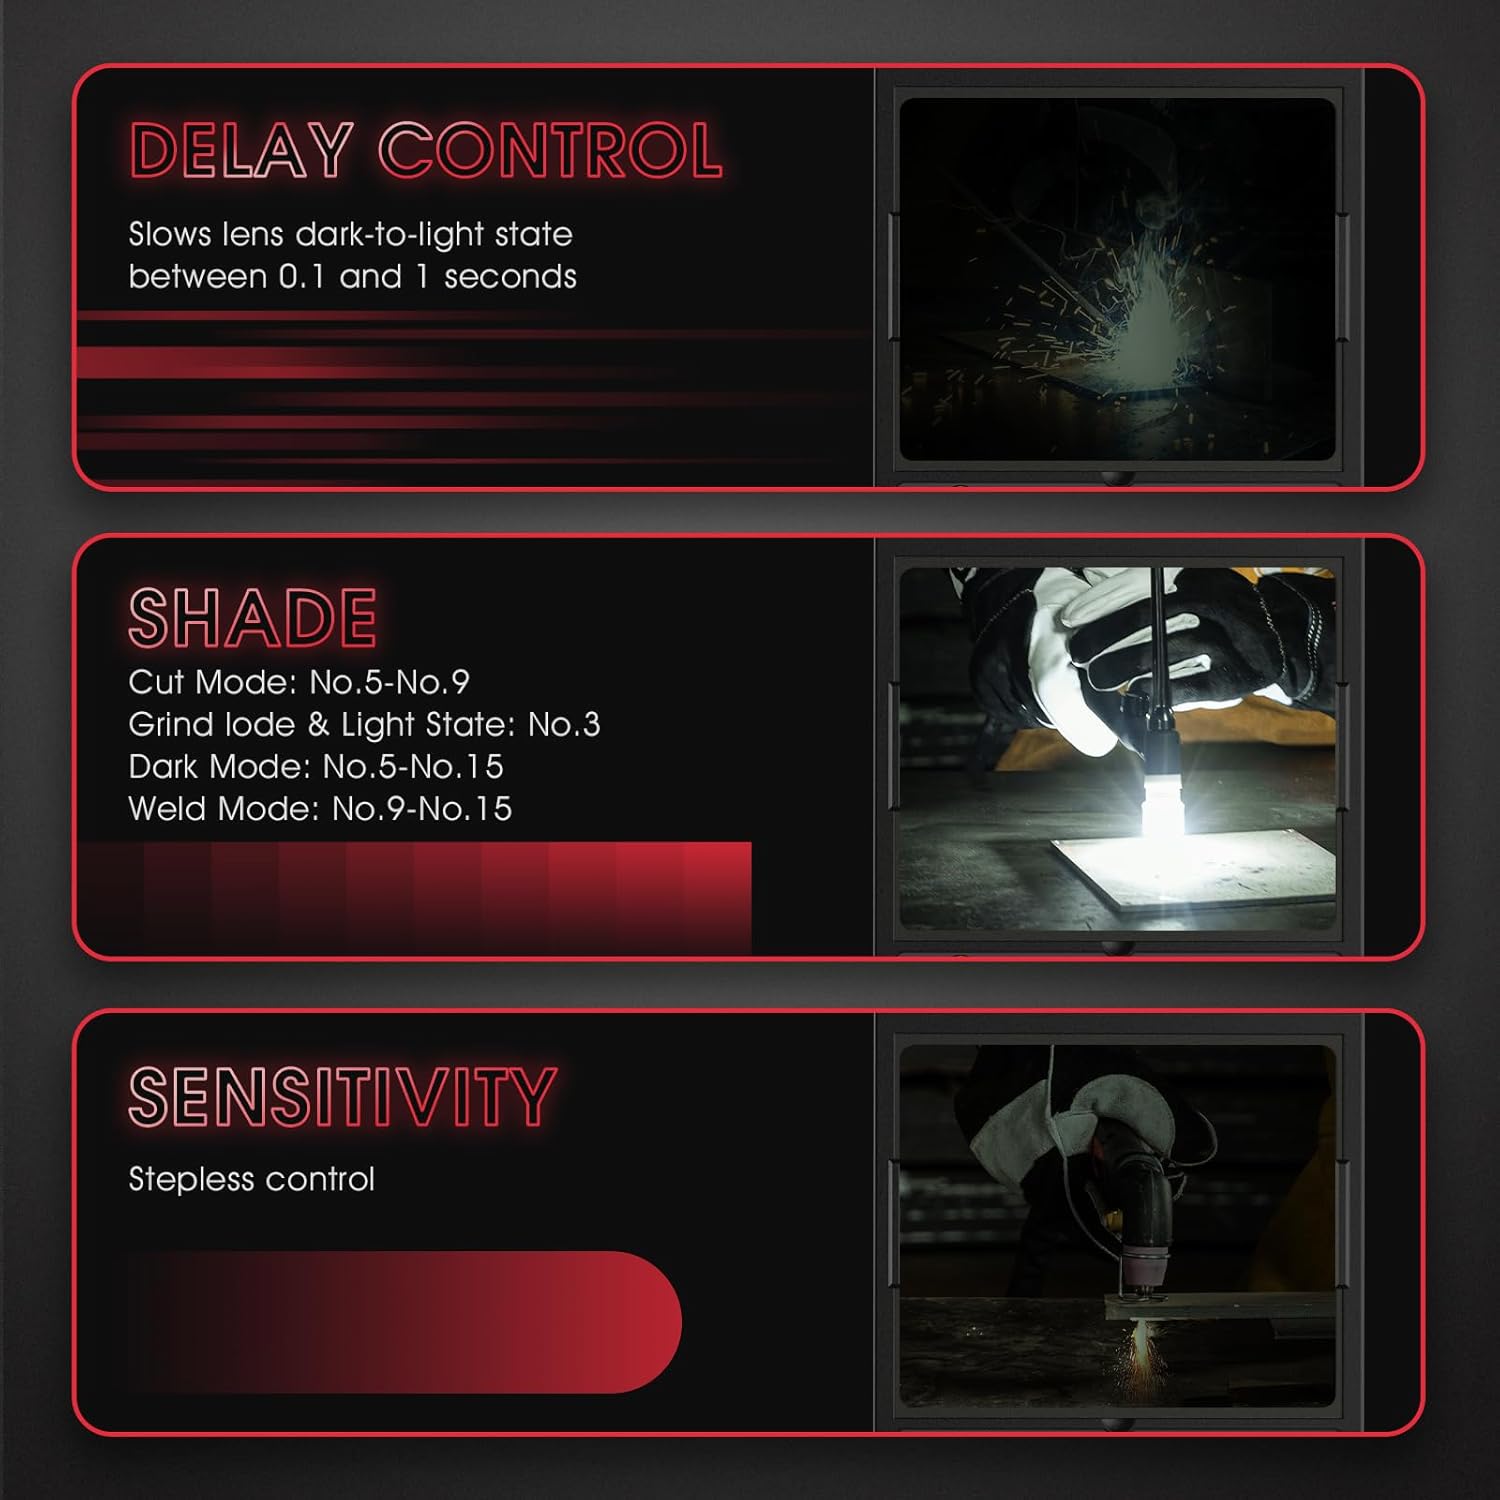
Image 5.3: Explanations for Delay Control, Shade Control, and Sensitivity settings.
5.4. Provoz LED světla
Press the button on the LED light module to cycle through its lighting modes (larger lighting area, concentrated lighting) or to turn it off.
6. Údržba
6.1. Čištění helmy
- Skořepinu helmy čistěte jemným mýdlem a vodou. Vyhněte se agresivním rozpouštědlům.
- Wipe the auto-darkening filter and protective lenses with a soft, clean cloth. Do not use abrasive materials or cleaners that could scratch the surface.
6.2. Výměna ochranných čoček
Regularly inspect the inner and outer protective lenses for scratches, cracks, or excessive spatter. Replace them as needed to maintain clear vision and protect the auto-darkening filter.
6.3. Výměna baterie
When the battery indicator shows low power, replace the CR2450 lithium battery. Refer to the diagram on the digital control panel for battery compartment location.
6.4. Skladování
Store the helmet in a dry, clean environment, away from direct sunlight and extreme temperatures. Use the provided storage bag or a protective case if available.
7. Řešení problémů
| Problém | Možná příčina | Řešení |
|---|---|---|
| Filter does not darken | Low battery; Arc sensors obstructed; Incorrect mode selected; Filter damaged. | Check/replace battery; Clean arc sensors; Select Weld/Cut mode; Contact support if damaged. |
| Špatná viditelnost | Scratched/dirty protective lenses; Incorrect shade setting. | Clean or replace lenses; Adjust shade setting. |
| Helmet slips or is uncomfortable | Pokrývka hlavy není správně nastavená. | Adjust headgear for size, distance, angle, and tightness. |
| LED světlo nefunguje | Low battery; Not charged. | Recharge the LED light using the USB cable. |
8. Specifikace

Image 8.1: Visual summary of the helmet's key specifications and included accessories.
- Model: LYG-Q910D
- Hlavní Viewing Velikost: 3.94" × 3.27" (100 mm × 83 mm)
- Strana Viewing Velikost: 4.29" x 1.97" x 3.98" (DIN5, non-auto-darkening)
- Optická čistota: 1/1/1/1
- Rozsah odstínů: DIN 3 (Grind), DIN 5-9 (Cut), DIN 9-15 (Weld)
- Spínací čas: 1/30,000 sekundy
- Obloukové senzory: 4
- Napájení: Solar panel and replaceable CR2450 Lithium Battery (included)
- standardy: ANSI ISEA Z87.1-2015, CSA Z94.3, EN 379 CE
- Hmotnost položky: Přibližně 2.74 libry
- Zahrnuté komponenty: Welding helmet, 3x replacement lenses, 1x headlamp, 1x headlamp charging cable, 1x replaceable battery.
9. Záruka a podpora
YESWELDER products are designed for quality and reliability. This product comes with a 1-year warranty from the date of purchase, covering manufacturing defects.
- Záruční krytí: Kryje vady materiálu a zpracování při běžném používání.
- Vyloučení: Does not cover damage due to misuse, neglect, unauthorized modification, or normal wear and tear.
- Zákaznická podpora: For warranty claims, technical assistance, or any questions regarding your product, please contact YESWELDER customer support. Refer to the official YESWELDER webstránky s aktuálními kontaktními informacemi.


