Zavedení
Thank you for choosing the Geek AiroCook Torix 25 Litre Smart Air Fryer Oven. This appliance combines the functions of an air fryer and an OTG (Oven Toaster Griller), allowing you to air fry, grill, bake, roast, and toast with ease. This manual provides essential information for safe operation, proper use, and maintenance of your new appliance. Please read it thoroughly before first use and keep it for future reference.
Důležité bezpečnostní pokyny
Při používání elektrických spotřebičů je třeba vždy dodržovat základní bezpečnostní opatření, aby se snížilo riziko požáru, úrazu elektrickým proudem a zranění osob.
- Před použitím spotřebiče si přečtěte všechny pokyny.
- Nedotýkejte se horkých povrchů. Používejte rukojeti nebo knoflíky. Při manipulaci s horkými materiály vždy používejte kuchyňské rukavice nebo chňapky.
- To protect against electric shock, do not immerse the cord, plugs, or the appliance body in water or other liquid.
- Když je jakýkoli spotřebič používán dětmi nebo v jejich blízkosti, je nutný pečlivý dohled.
- Vytáhněte zástrčku ze zásuvky, když ji nepoužíváte a před čištěním. Před nasazením nebo sejmutím dílů nechte vychladnout.
- Neprovozujte žádný spotřebič s poškozenou šňůrou nebo zástrčkou nebo poté, co spotřebič nefunguje správně nebo byl jakýmkoliv způsobem poškozen. Požádejte o pomoc zákaznickou podporu.
- Použití příslušenství, které není doporučeno výrobcem spotřebiče, může způsobit zranění.
- Nepoužívejte venku.
- Nenechávejte kabel viset přes okraj stolu nebo pultu ani se dotýkat horkých povrchů.
- Neumisťujte na horký plynový nebo elektrický hořák nebo do jeho blízkosti nebo do vyhřáté trouby.
- Při přemisťování spotřebiče obsahujícího horký olej nebo jiné horké kapaliny je třeba dbát mimořádné opatrnosti.
- Vždy nejprve zapojte zástrčku do spotřebiče a poté zapojte kabel do zásuvky. Pro odpojení vypněte jakýkoli ovládací prvek a poté vytáhněte zástrčku ze zásuvky.
- Nepoužívejte spotřebič k jinému než určenému použití.
- Do toustovače se nesmí vkládat příliš velké potraviny nebo kovové náčiní, protože by mohly způsobit požár nebo riziko úrazu elektrickým proudem.
- Pokud je trouba během provozu zakrytá nebo se dotýká hořlavých materiálů, včetně záclon, závěsů, stěn a podobně, může dojít k požáru.
- Do trouby nevkládejte žádné jiné materiály než příslušenství doporučené výrobcem.
- Do trouby nevkládejte karton, plast, papír nebo podobné materiály.
- Pokud troubu nepoužíváte, neskladujte v ní žádné materiály kromě příslušenství doporučeného výrobcem.
- Nečistěte kovovými drátěnky. Části se mohou odlomit a dotýkat se elektrických částí, čímž vzniká riziko úrazu elektrickým proudem.
- Nepokoušejte se vytlačit potraviny, když je spotřebič zapojen do elektrické zásuvky.
- Always ensure the appliance is placed on a stable, heat-resistant surface with adequate ventilation around it.
Obsah balení
Carefully unpack your Geek AiroCook Torix and check that all items are present and in good condition.
- 1x Geek AiroCook Torix 25 Litre Smart Air Fryer Oven
- Zásobník na drobky
- Otočný koš
- Rošt do trouby
- Tepelně odolná rukavice
- Kniha receptů
- Rotisserie Rod
- Fetch Tool (for rotisserie and hot trays)
- Plech na pečení
- Koš pro vzduchovou fritézu

Obrázek 1: Dodávané příslušenství. This image displays the nine smart accessories that come with the Geek AiroCook Torix oven: a crumb tray, rotating basket, oven rack, heat-resistant glove, recipe book, rotisserie rod, fetch tool, baking tray, and airfryer basket.
Konec produktuview
Familiarize yourself with the components and control panel of your Geek AiroCook Torix oven.
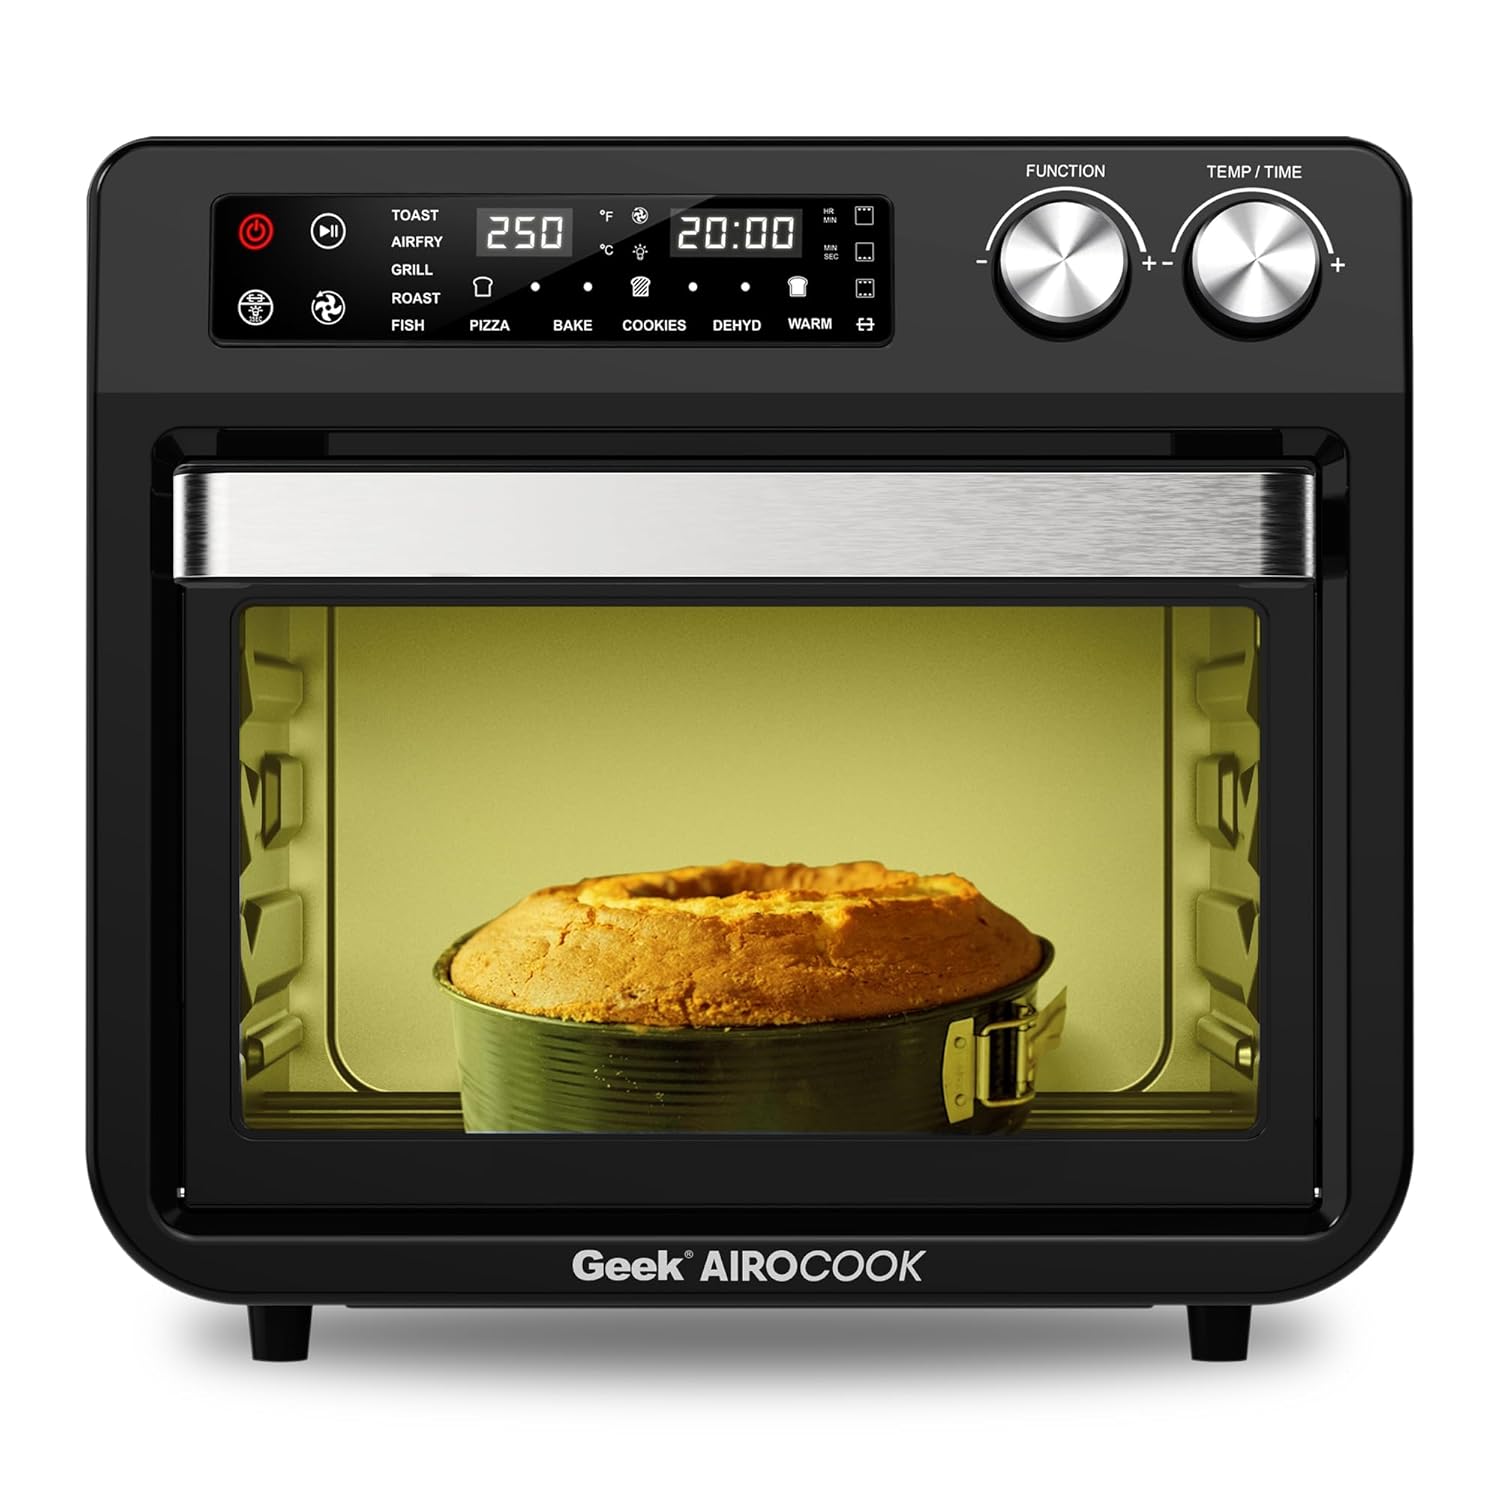
Obrázek 2: Přední strana View of the Geek AiroCook Torix. This image shows the overall design of the air fryer oven, featuring the digital display, control knobs, and the transparent glass door with an internal light.
Ovládací panel

Obrázek 3: Digitální ovládací panel. This image highlights the "Smart Touch" control panel with its various buttons and digital display.
- Vypínač: Zapíná/vypíná spotřebič.
- Tlačítko Start/Pauza: Spustí nebo pozastaví cyklus vaření.
- Světelné tlačítko: Controls the internal oven light.
- Tlačítko na rožni: Aktivuje/deaktivuje funkci grilování na rožni.
- Tlačítko ventilátoru: Controls the convection fan.
- Tlačítko nabídky: Cykluje mezi přednastavenými funkcemi vaření.
- Time/Temperature Knobs: Upravuje dobu a teplotu vaření.
- Digitální LCD displej: Zobrazuje aktuální nastavení, čas a teplotu.
Nastavení
- Rozbalení: Remove all packaging materials, stickers, and labels from the appliance and accessories.
- Počáteční čištění: Otřete vnější povrch trouby pomocí damp cloth. Wash all removable accessories (baking tray, airfryer basket, rotating basket, rotisserie kit, oven rack, crumb tray) with warm soapy water, rinse thoroughly, and dry completely.
- Umístění: Place the oven on a stable, level, heat-resistant surface. Ensure there is at least 10-15 cm (4-6 inches) of clear space on all sides and above the oven for proper ventilation. Do not place it near flammable materials.
- První použití (zapálení): Before cooking food, it is recommended to run the oven empty for about 15-20 minutes at 200°C (390°F) to burn off any manufacturing residues. A slight odor or smoke may be present during this process; this is normal. Ensure the area is well-ventilated.
Návod k obsluze
Základní operace
- Zapnutí: Plug the appliance into a grounded electrical outlet. Press the Power Button to turn on the oven. The digital display will illuminate.
- Vyberte funkci: Use the Menu Button to cycle through the available cooking functions (e.g., Toast, Air Fry, Grill, Roast, Fish, Pizza, Bake, Cookies, Dehydrate, Warm).
- Upravte čas a teplotu: Once a function is selected, use the Time/Temperature knobs to adjust the desired cooking time and temperature. The display will show the current settings.
- Začněte vařit: Press the Start/Pause Button to begin the cooking process. The oven light may turn on, and the fan will activate depending on the selected function.
- Pozastavit/Zastavit: Press the Start/Pause Button again to pause cooking. Press the Power Button to stop the cooking cycle and turn off the oven.
Používání přednastavených nabídek
The Geek AiroCook Torix features 10 precise preset menus for common dishes.

Figure 4: 10 Preset Menu Options. This image illustrates the various preset cooking functions available, including Toast, Air Fry, Roast, Pizza, Cookies, Fish, Grill, Cake, Dehydrate, and Warm, along with their default temperature and time settings.
- Toast: 250 ° C / 5 min
- Fry na vzduchu: 204 ° C / 25 min
- Pečeně: 204°C / 1 hr
- Pizza: 232 ° C / 15 min
- Soubory cookie: 170 ° C / 12 min
- Ryba: 210 ° C / 16 min
- Gril: 230 ° C / 18 min
- Dort: 177 ° C / 30 min
- Dehydrát: 66 ° C / 5 min
- Teplý: 82°C / 1 hr
To use a preset, simply select it using the Menu Button. The oven will automatically set the recommended time and temperature. You can then adjust these settings manually if desired before pressing Start/Pause.
Funkce rotisserie
The rotisserie function is ideal for roasting whole chickens or other large cuts of meat.
- Prepare your food and secure it onto the rotisserie rod using the forks. Ensure the food is centered and balanced.
- Vložte tyčinku na rožeň do určených otvorů uvnitř trouby.
- Select a cooking function (e.g., Roast, Grill) and set the desired time and temperature.
- Press the Rotisserie Button to activate the rotation.
- Stiskněte Start/Pauza pro zahájení vaření.
- Once cooking is complete, use the Fetch Tool to safely remove the hot rotisserie rod and food from the oven.
Údržba a čištění
Pravidelné čištění zajišťuje optimální výkon a prodlužuje životnost vašeho spotřebiče.
- Vždy odpojte ze zásuvky: Před čištěním vždy odpojte troubu od elektrické zásuvky a nechte ji zcela vychladnout.
- Vnější: Otřete exteriér reklamouamp hadříkem a jemným čisticím prostředkem. Nepoužívejte abrazivní čisticí prostředky ani kovové drátěnky.
- Interiér: Otřete vnitřní stěny reklamouamp cloth. For stubborn food residue, use a non-abrasive sponge with mild soap. Ensure the interior is dry before next use.
- Příslušenství: Wash the baking tray, airfryer basket, rotating basket, rotisserie kit, oven rack, and crumb tray with warm soapy water. Rinse thoroughly and dry completely. Poznámka: These accessories are not dishwasher safe.
- Zásobník na drobky: Regularly remove and empty the crumb tray located at the bottom of the oven to prevent grease buildup and potential fire hazards.
- Neponořujte: Nikdy neponořujte hlavní jednotku, kabel ani zástrčku do vody ani jiné kapaliny.
Odstraňování problémů
| Problém | Možná příčina | Řešení |
|---|---|---|
| Zařízení se nezapne. | Není zapojeno do zásuvky; problém se zásuvkou; není stisknuté tlačítko napájení. | Ensure the power cord is securely plugged into a working outlet. Press the Power Button. |
| Jídlo se nevaří rovnoměrně. | Přeplněnost; nesprávná teplota/čas; nestřídání jídla. | Do not overcrowd the basket/tray. Adjust temperature/time. For best results, flip or shake food halfway through cooking. |
| Z trouby se valí bílý kouř. | Grease/oil residue; fatty food cooking. | Clean the oven and accessories thoroughly. For fatty foods, ensure the crumb tray is clean and consider using less oil. |
| Funkce grilování na rožni nefunguje. | Rotisserie rod not properly installed; Rotisserie button not pressed. | Ensure the rotisserie rod is correctly seated in its slots. Press the Rotisserie Button to activate. |
Specifikace
| Název modelu | AiroCook Torix |
| Kapacita | 25 litru |
| Výkon | 1800 wattů |
| svtage | 220 voltů |
| Rozměry produktu (D x Š x V) | 39.5H x 37.5Š x 43.5V centimetrů |
| Hmotnost položky | 10 kg |
| Materiál | Nerez |
| Speciální funkce | Horkovzdušná fritéza + OTG |
Záruka a podpora
Your Geek AiroCook Torix 25 Litre Smart Air Fryer Oven comes with a 1-letá záruka od data nákupu. Tato záruka se vztahuje na výrobní vady vzniklé běžným používáním. Uschovejte si prosím účtenku jako doklad o koupi.
For warranty claims, technical support, or any other inquiries, please contact Geek Customer Care:
- Číslo péče o zákazníky: 1800 121 922922
You can also refer to the included recipe book and access the Geek Recipe App for additional cooking inspiration and tips.


