1. Úvod
This manual provides comprehensive instructions for the installation, operation, maintenance, and troubleshooting of the Vivotek FE9391-EHV-V2 12MP Outdoor Fisheye IR Illumination Camera. Please read this manual thoroughly before using the product to ensure proper setup and functionality. Retain this manual for future reference.
2. Konec produktuview
2.1 Klíčové vlastnosti
- 12 Megapixel Effective Still Resolution for high-quality imaging.
- Fisheye Lens with 1.2mm focal length for wide-area surveillance.
- Integrated IR Illumination for clear night vision up to 20 meters.
- WDR Pro technology for optimal image visibility in high contrast lighting.
- H.265/H.264/MJPEG compression for efficient video streaming.
- IP66-rated weather-resistant enclosure for outdoor use.
- Motion-only alert type for event detection.
- Wi-Fi Connectivity Protocol for flexible network integration.
2.2 Obsah balení
Ověřte, zda jsou v balení přítomny všechny položky:
- Vivotek FE9391-EHV-V2 Camera Unit
- Montážní sada (šrouby, hmoždinky)
- Vodotěsný konektor
- Průvodce rychlou instalací
- Software CD (or download link information)
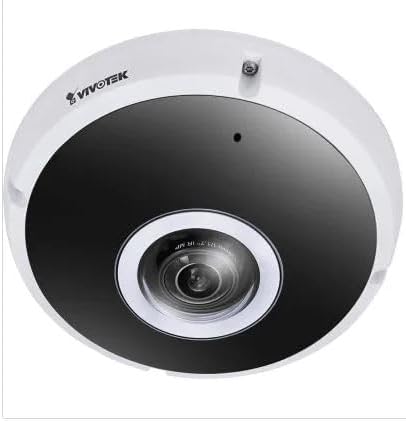
Obrázek 2.1: Přední strana view of the Vivotek FE9391-EHV-V2 12MP Outdoor Fisheye IR Illumination Camera, showing the lens and IR illuminators.
3. Bezpečnostní informace
- Před instalací a provozem si pečlivě přečtěte všechny pokyny.
- Ensure the power source matches the camera's requirements (Corded Electric).
- Nepokoušejte se kameru rozebírat ani upravovat. Ztratíte tak záruku.
- Avoid pointing the camera directly at strong light sources for extended periods.
- Instalaci by měl provádět kvalifikovaný personál v souladu s místními elektrotechnickými předpisy.
- Protect cables from being walked on or pinched.
4. Nastavení a instalace
4.1 Místo montáže
Select a suitable outdoor location for mounting. Consider the desired surveillance area, proximity to power, and network connectivity (Wi-Fi or wired Ethernet). The camera is IP66 rated for outdoor use.

Figure 4.1: Dimensional drawing of the Vivotek FE9391-EHV-V2 camera, showing a diameter of 150mm and height of 68.2mm.
4.2 Fyzická instalace
- Připravte montážní povrch: Use the provided mounting template (if included) to mark drill holes.
- Vrtací otvory: Vyvrtejte pilotní otvory a v případě potřeby vložte do nich nástěnné hmoždinky.
- Zabezpečte kameru: Attach the camera base securely to the mounting surface using the provided screws.
- Připojit kabely:
- Moc: Připojte napájecí kabel k vhodnému zdroji napájení.
- Síť: Connect an Ethernet cable for wired network access, or ensure Wi-Fi signal strength is adequate for wireless connection. Use the waterproof connector for outdoor Ethernet connections.
- Upravit úhel kamery: Loosen the adjustment screws (if applicable) to position the fisheye lens for optimal coverage. Tighten screws once adjusted.

Figure 4.2: An Ethernet cable with an RJ45 connector, used for wired network connectivity.
4.3 Počáteční konfigurace sítě
After physical installation and power-up, the camera needs to be configured on your network.
- Objevte fotoaparát: Use the Vivotek IP Utility software (available on the manufacturer's website) to discover the camera on your network.
- Assign IP Address: Assign a static IP address or ensure it obtains an IP address via DHCP.
- Přístup Web Rozhraní: Otevřete a web prohlížeč a zadejte IP adresu kamery pro přístup k jejímu web-založené konfigurační rozhraní.
- Přihlášení: Enter the default username and password (refer to the Quick Installation Guide for defaults). Change the default password immediately for security.
- Wi-Fi Setup (if applicable): Navigate to the network settings and configure the Wi-Fi connection if you are using wireless connectivity.
5. Návod k obsluze
5.1 Živě View
Once configured, you can access the live video feed through the web interface or compatible Vivotek surveillance software.
- Web prohlížeč: Přihlaste se do kamery web interface and navigate to the "Live Viewsekce ".
- Surveillance Software: Add the camera to your Vivotek NVR or VMS (Video Management Software) for centralized monitoring.
- Mobilní aplikace: Download the Vivotek mobile app and add your camera for remote viewIng.

Obrázek 5.1: Přample of surveillance footage from multiple cameras displayed on a tablet device, demonstrating remote monitoring capabilities.

Figure 5.2: A monitor displaying a split-screen view of four camera feeds, labeled CAM1 through CAM4, illustrating a typical surveillance setup.
5.2 Nahrávání a ukládání
The camera supports various recording options:
- Místní úložiště: Insert a microSD card (not included) into the camera's slot for edge recording. Configure recording schedules and event triggers (e.g., motion detection).
- Síťový videorekordér (NVR): Connect the camera to a compatible NVR for continuous or event-based recording.
- Cloudové úložiště: Some Vivotek models or third-party services may offer cloud storage integration. Refer to the camera's web interface for specific options.
5.3 Detekce pohybu a upozornění
Configure motion detection zones and sensitivity settings in the camera's web interface. When motion is detected, the camera can trigger actions such as:
- Recording video to local storage or NVR.
- Sending email notifications with snapshots.
- Uploading footage to an FTP server.
6. Údržba
- Čištění objektivu: Jemně otřete objektiv fotoaparátu měkkým, čistým hadříkem. Na odolné nečistoty použijte čisticí roztok na objektivy určený pro optické povrchy. Nepoužívejte abrazivní čisticí prostředky.
- Úklid bytů: Vyčistěte kryt fotoaparátu pomocíamp cloth. Avoid using strong detergents or solvents.
- Aktualizace firmwaru: Regularly check the Vivotek website for firmware updates. Updating firmware can improve performance, add features, and enhance security.
- Kontrola kabelů: Periodically inspect all cables for signs of wear or damage, especially for outdoor installations.
- Kontrola prostředí: Zajistěte, aby provozní prostředí kamery zůstalo v rámci specifikovaného rozsahu teploty a vlhkosti.
7. Řešení problémů
7.1 Žádný video kanál
- Zkontrolujte napájení: Ensure the camera is receiving power. Verify power adapter and cable connections.
- Internetové připojení: Confirm the Ethernet cable is securely connected or that the Wi-Fi signal is strong and the camera is connected to the correct network.
- IP adresa: Verify the camera's IP address and ensure it is not conflicting with another device on the network.
- Firewall: Check if any firewall settings on your network or computer are blocking access to the camera.
7.2 Špatná kvalita obrazu
- Čistá čočka: Ujistěte se, že objektiv fotoaparátu je čistý a bez prachu nebo šmouh.
- Světelné podmínky: Adjust camera settings for optimal exposure in varying light conditions. Ensure IR illuminators are functioning at night.
- Nastavení rozlišení: Verify that the video resolution and quality settings are configured appropriately in the camera's web rozhraní.
- Šířka pásma sítě: Insufficient network bandwidth can lead to choppy or low-quality video. Check network load.
7.3 Detekce pohybu nefunguje
- Povolit detekci pohybu: Ensure motion detection is enabled in the camera's settings.
- Sensitivity and Zones: Adjust motion detection sensitivity and define detection zones correctly.
- Plán nahrávání: Verify that the recording schedule is active for motion-triggered events.
8. Specifikace
| Funkce | Detail |
|---|---|
| Číslo modelu | FE9391-EHV-V2 |
| Efektivní rozlišení | 12 MP |
| Čočka | 1.2mm Fisheye Lens |
| Dosah infračerveného osvětlení | 20 m |
| Technologie WDR | WDR Pro |
| Komprese videa | H.265 / H.264 / MJPEG |
| Protokol připojení | Wi-Fi |
| Hodnocení mezinárodní ochrany | IP66 |
| Zdroj napájení | Elektrický kabel |
| Rozměry produktu (D x Š x V) | 5.9 x 5.9 x 2.68 palce (150 x 150 x 68.2 mm) |
| Výrobce | Společnost Vivotek Inc. |
| Doporučená použití | Venkovní zabezpečení |
9. Záruka a podpora
For warranty information, technical support, and additional resources, please visit the official Vivotek webnebo kontaktujte jejich oddělení zákaznických služeb.
- Výrobce: Společnost Vivotek Inc.
- Webmísto: www.vivotek.com (Napřampodkaz, skutečný odkaz se může lišit)
- Kontakt: Viz website for regional support contact information.
Please have your model number (FE9391-EHV-V2) and purchase date available when contacting support.


