Zavedení
This manual provides detailed instructions for the setup, operation, and maintenance of your La Crosse Technology WS6824 Weather Station. Please read this manual thoroughly before using the device to ensure proper function and longevity.
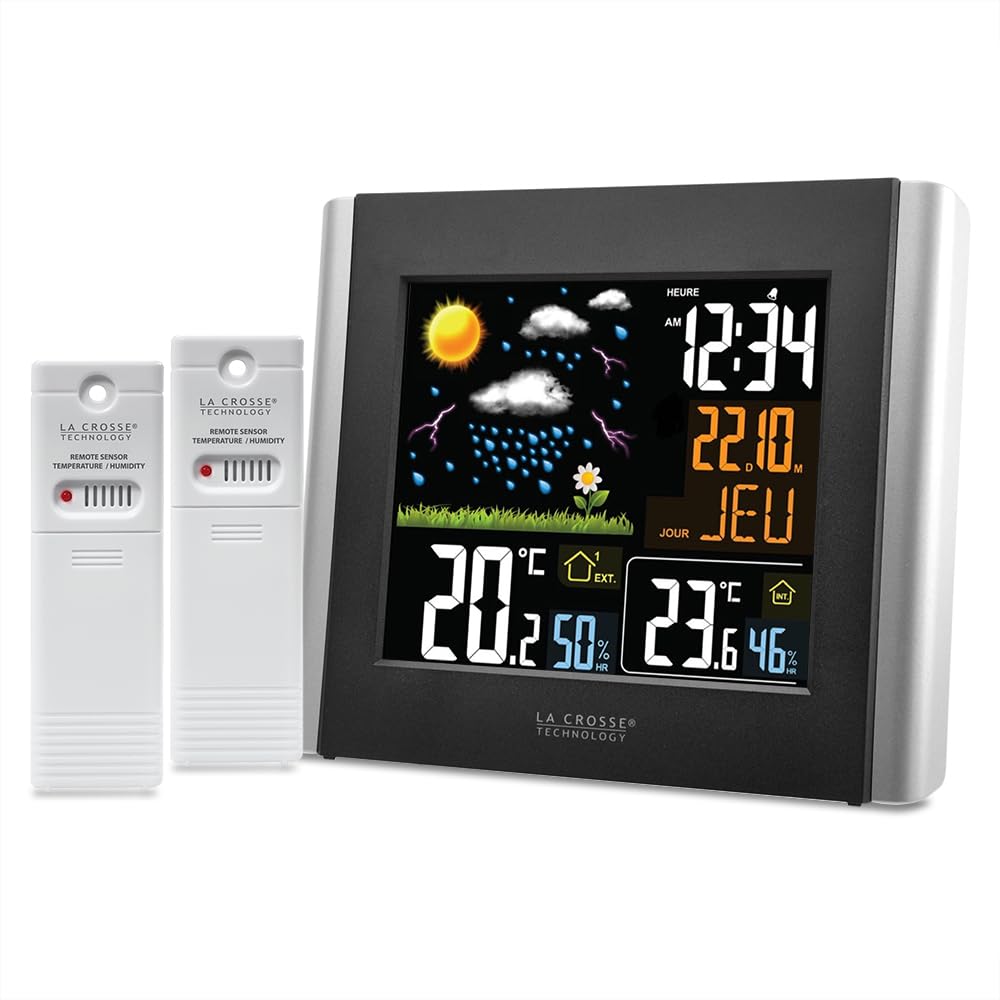
Obrázek 1: La Crosse Technology WS6824 Weather Station main unit (left) and two remote temperature/humidity sensors (right). The main unit features a color LCD display showing time, date, indoor/outdoor temperature and humidity, and a weather forecast icon.
1. Nastavení
1.1 Vybalení
Carefully remove all components from the packaging. Ensure you have the main weather station unit, two remote sensors, and this instruction manual.
1.2 Instalace baterie
The weather station and sensors require batteries (not included).
- Hlavní jednotka: Open the battery compartment on the back of the main unit. Insert the required batteries (e.g., 3 x AAA, refer to the compartment label) observing the correct polarity (+/-). Close the compartment.
- Dálkové senzory: Open the battery compartment on each remote sensor. Insert the required batteries (e.g., 2 x AA per sensor, refer to the compartment label) observing the correct polarity (+/-). Close the compartment.
1.3 Umístění snímače
Place the remote sensors in desired outdoor locations. For accurate readings, ensure sensors are:
- Protected from direct sunlight and precipitation.
- Within the effective transmission range (typically up to 100 meters in open air) of the main unit.
- Away from large metal objects or electrical interference.
1.4 Počáteční synchronizace
After installing batteries in both the main unit and sensors, the main unit will automatically search for and connect to the sensors. This process may take a few minutes. Ensure sensors are within range during initial setup.
2. Provoz
2.1 Zobrazení nadview
The main unit features a color LCD display. Based on the provided image and OCR, the display typically shows:
- Čas a datum: "12:34" (HEURE), "22.10." (Date), "JEU" (Day of week, e.g., Thursday).
- Předpověď počasí: Icons representing sunny, cloudy, rainy, stormy conditions.
- Venkovní teplota a vlhkost: "20.2°C" and "50%" (EXT.).
- Vnitřní teplota a vlhkost: "23.6°C" and "46%" (INT.).
2.2 Nastavení času a data
Refer to the buttons on the back or side of the main unit. Typically, a "SET" or "MODE" button is used to enter setting mode, and "+"/"-" or "UP"/"DOWN" buttons are used to adjust values. Follow the on-screen prompts to set the time, date, and year.
2.3 Výběr teplotní jednotky (°C/°F)
A dedicated button (often labeled "°C/°F") or a setting within the menu allows you to switch between Celsius and Fahrenheit temperature displays.
2.4 Předpověď počasí
The weather station predicts weather conditions for the next 12-24 hours based on changes in atmospheric pressure. The forecast icons are an indication and may not always reflect actual weather conditions with 100% accuracy.
3. Údržba
3.1 Čištění
Otřete hlavní jednotku a senzory měkkým hadříkemamp hadříkem. Nepoužívejte abrazivní čisticí prostředky ani rozpouštědla, protože by mohly poškodit displej neboasing.
3.2 Výměna baterie
Replace batteries in both the main unit and sensors when the low battery indicator appears on the display. Always replace all batteries at the same time to ensure optimal performance.
3.3 Péče o senzor
Periodically check outdoor sensors for debris or obstructions that might affect readings. Ensure they remain protected from extreme weather conditions.
4. Řešení problémů
| Problém | Řešení |
|---|---|
| Na hlavní jednotce se nezobrazuje žádný displej. | Check battery installation and polarity. Replace with fresh batteries. Ensure power adapter (if applicable) is securely connected. |
| Venkovní teplota/vlhkost se nezobrazuje nebo je nesprávná. |
|
| Nepřesná předpověď počasí. | The forecast is based on atmospheric pressure changes and is an estimation for the next 12-24 hours. It may not always match local conditions perfectly. Allow time for the station to calibrate to its environment. |
| Čas/datum je nesprávný. | Manually set the time and date as described in Section 2.2. If the unit has an atomic clock feature, ensure it is receiving a signal (check for an antenna icon). |
5. Specifikace
- Model: WS6824
- Typ displeje: LCD color
- Zdroj napájení: Battery powered (main unit and sensors)
- Technologie připojení: 433 MHz, RF
- Přesnost teploty: +/- 1 °C
- Speciální vlastnosti: 2 thermo/hygro sensors included
- Materiál: Plast
- Barva: Šedá
- Rozměry (balení): 20 x 20 x 7 cm; 650 gramů
6. Záruka a podpora
6.1 Informace o záruce
La Crosse Technology products are designed for reliability. For specific warranty details, please refer to the warranty card included with your product or visit the official La Crosse Technology webUschovejte si účtenku jako doklad o koupi pro případ reklamace.
6.2 Zákaznická podpora
If you encounter any issues not covered in this manual or require further assistance, please contact La Crosse Technology customer support. Contact information can typically be found on the product packaging or the official brand webmísto.