Zavedení
Thank you for choosing the Weiser Elements Keyless Entry Deadbolt. This manual provides detailed instructions for the installation, operation, and maintenance of your new electronic door lock. Please read this manual thoroughly before installation and keep it for future reference to ensure optimal performance and security.
Vlastnosti produktu
- Pohodlné bezklíčové vstupy: Easily lock and unlock your door using the keypad without needing physical keys.
- Snadná správa kódu: Customize up to 12 user codes, 2 one-time user codes, and 1 programming code for flexible access control.
- Funkce automatického zámku: Enhance security with customizable automatic locking intervals (30 sec, 1 min, 3 min, 5 min, or 10 min).
- Upozornění na narušení: An alarm sounds and the keypad disables for 1 minute after 3 consecutive incorrect code entries to deter tampering.
- Easy Low Light Code Entry: Bright LED lights illuminate the keypad for easy code entry in the dark.
Co je v krabici
Před zahájením instalace se prosím ujistěte, že jsou přítomny všechny komponenty:

Image: All components included in the product packaging, laid out for inspection.
- Sestava vnějšího závoru
- Sestava vnitřního závoru
- Nastavitelná západka
- Úderová deska
- Montážní deska
- Installation Hardware (screws, bolts)
- 1 Weiser Key
- Instalační příručka (samostatný dokument)
Specifikace

Image: Detailed dimensions of the exterior keypad and interior unit, along with the adjustable latch backset.
| Funkce | Popis |
|---|---|
| Značka | Weiser |
| Typ zámku | Klávesnice Deadbolt |
| Materiál | Plast, kov |
| Typ dokončení | Kartáčovaný |
| Barva | Saténový nikl |
| Speciální funkce | BHMA/ANSI Grade 3, Vacation Mode, Light Up Keypad, Auto-Lock, Motorized Locking |
| Rozměry položky (D x Š x V) | 25 x 71 x 117 milimetrů |
| Doporučená použití | Front, Back, Side, Office, Garage, Shed Doors |
Nastavení a instalace
For detailed step-by-step installation instructions, please refer to the dedicated Průvodce instalací included in your product packaging. This section provides a general overview a důležité úvahy.
Kontroly před instalací:
- Ujistěte se, že tloušťka dveří je kompatibilní se zámkem.
- Verify the backset measurement (distance from door edge to center of bore hole) is 2 3/8" or 2 3/4". The adjustable latch can accommodate both.
- Připravte si potřebné nástroje: křížový šroubovák, metr, tužku.
Obecné kroky instalace:
- Nainstalujte západku do okraje dveří.
- Nainstalujte sestavu vnější klávesnice.
- Nainstalujte vnitřní montážní desku.
- Připojte kabel z vnější sestavy k vnitřní sestavě.
- Připevněte vnitřní sestavu k montážní desce.
- Install batteries (4 AA alkaline batteries, not included).
- Perform the door handing process (automatic or manual, as per the Installation Guide).
Návod k obsluze
Bezklíčový vstup

Image: A person entering a code on the keypad to unlock the door, demonstrating the convenience of keyless entry.
To unlock the door, enter your valid 4-8 digit user code on the keypad. The lock will retract the deadbolt. To lock the door, press the lock button on the keypad or use the thumb turn on the interior side.
Správa kódu
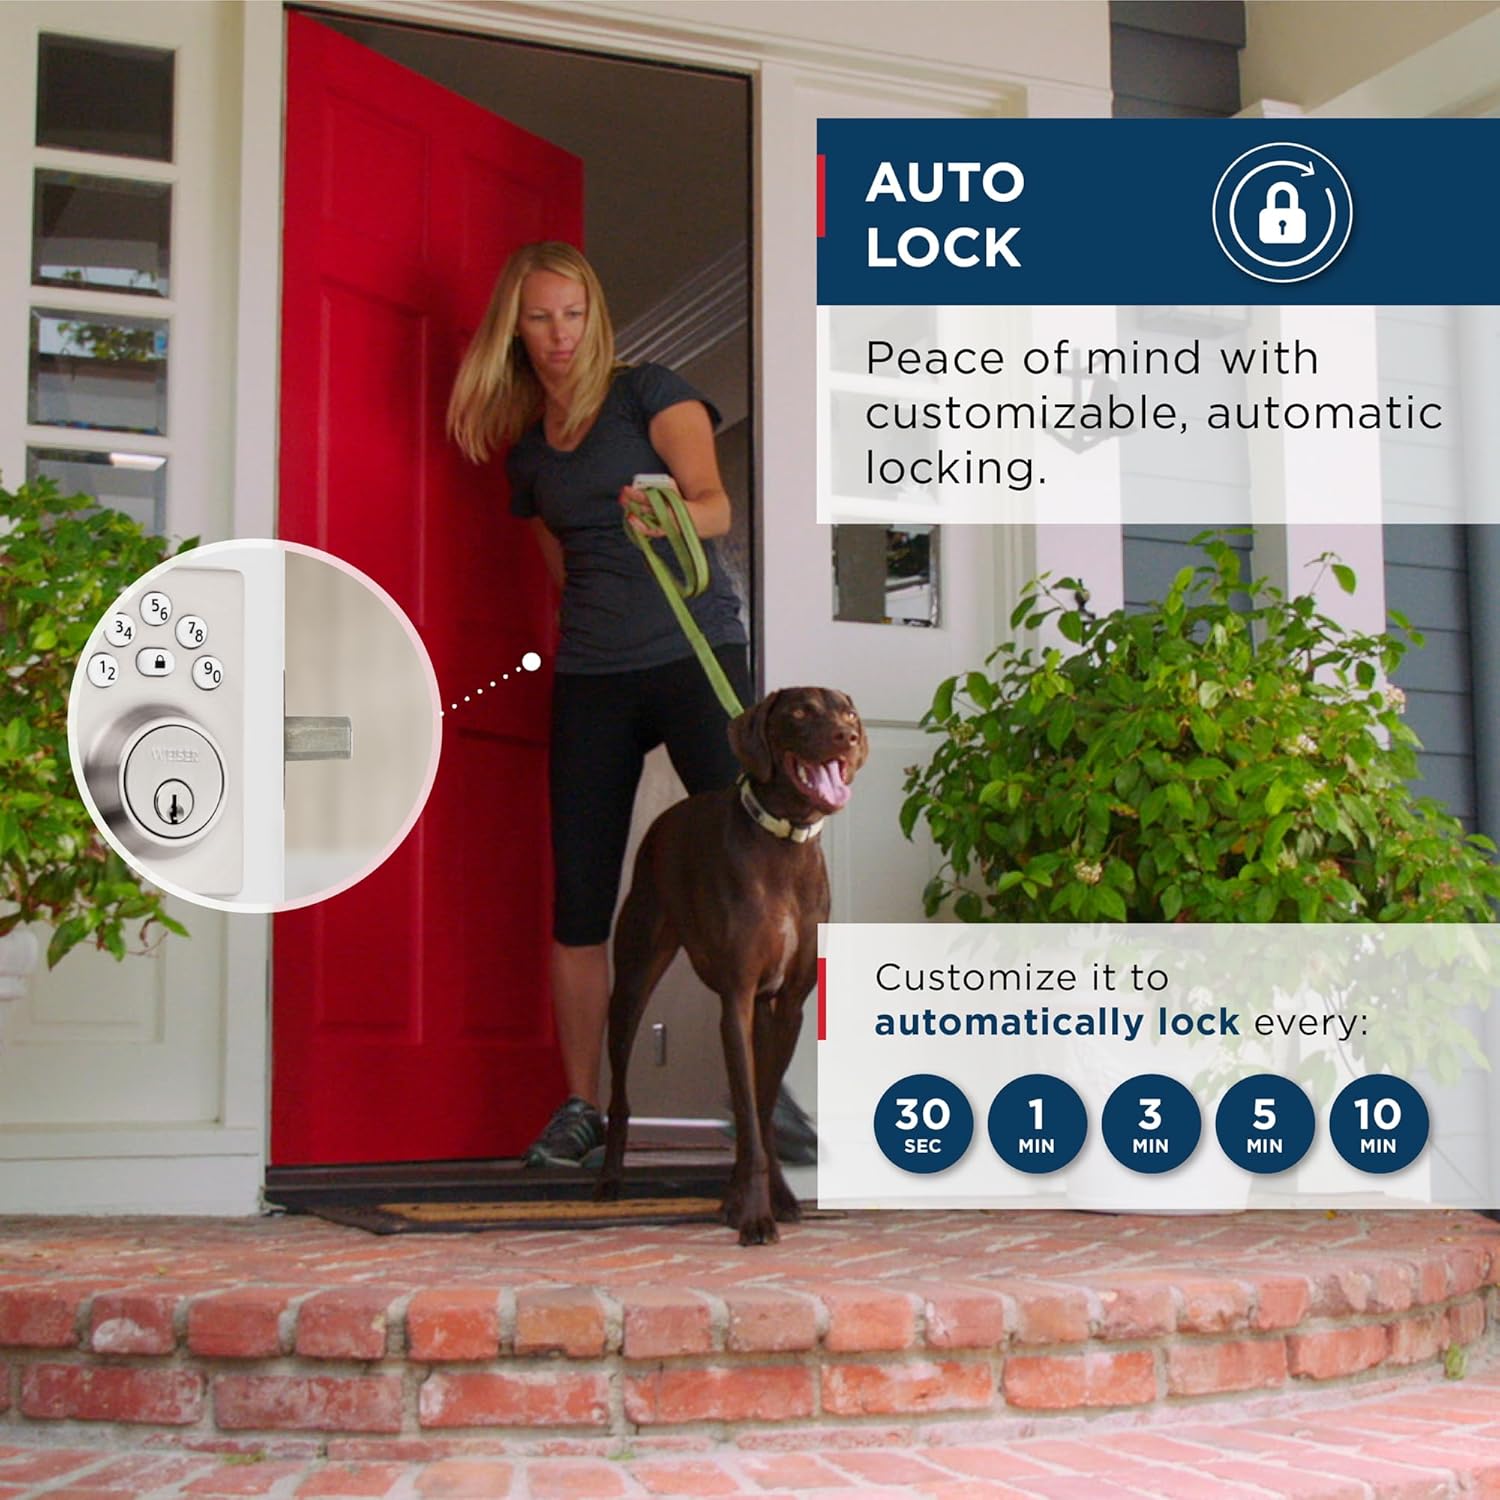
Image: Visual representation of the lock's capacity for 12 regular user codes and 2 one-time user codes.
Your lock supports up to 12 unique user codes and 2 one-time user codes. A programming code is used to add, delete, or modify these user codes. Refer to your Installation Guide for specific steps on programming codes.
Funkce automatického zámku

Image: A graphic showing the customizable auto-lock intervals: 30 seconds, 1 minute, 3 minutes, 5 minutes, and 10 minutes.
The auto-lock feature automatically locks the deadbolt after a set period of time. You can customize this delay to 30 seconds, 1 minute, 3 minutes, 5 minutes, or 10 minutes. This feature provides added peace of mind, ensuring your door is always secured.
Zadání kódu pro slabé osvětlení

Image: The keypad of the lock glowing in a dark setting, highlighting the LED illumination feature for night use.
The keypad features bright LED backlighting. Simply tap the keypad to illuminate the numbers, making it easy to enter your code even in complete darkness.
Údržba
To ensure the longevity and proper functioning of your Weiser Elements Keyless Entry Deadbolt, follow these maintenance guidelines:
- Výměna baterie: The lock requires 4 AA alkaline batteries. Replace all four batteries simultaneously when the low battery indicator appears (usually a series of beeps or a flashing light). Do not mix old and new batteries or different battery types.
- Čištění: Clean the keypad and exterior components with a soft, damp hadříkem. Nepoužívejte abrazivní čisticí prostředky, rozpouštědla ani chemické spreje, protože by mohly poškodit povrchovou úpravu a elektronické součástky.
- Mazání: Periodically lubricate the latch and deadbolt mechanism with a silicone-based lubricant to ensure smooth operation. Do not use oil-based lubricants.
Odstraňování problémů
This section addresses common issues you might encounter with your Weiser Elements Keyless Entry Deadbolt.
Upozornění na narušení
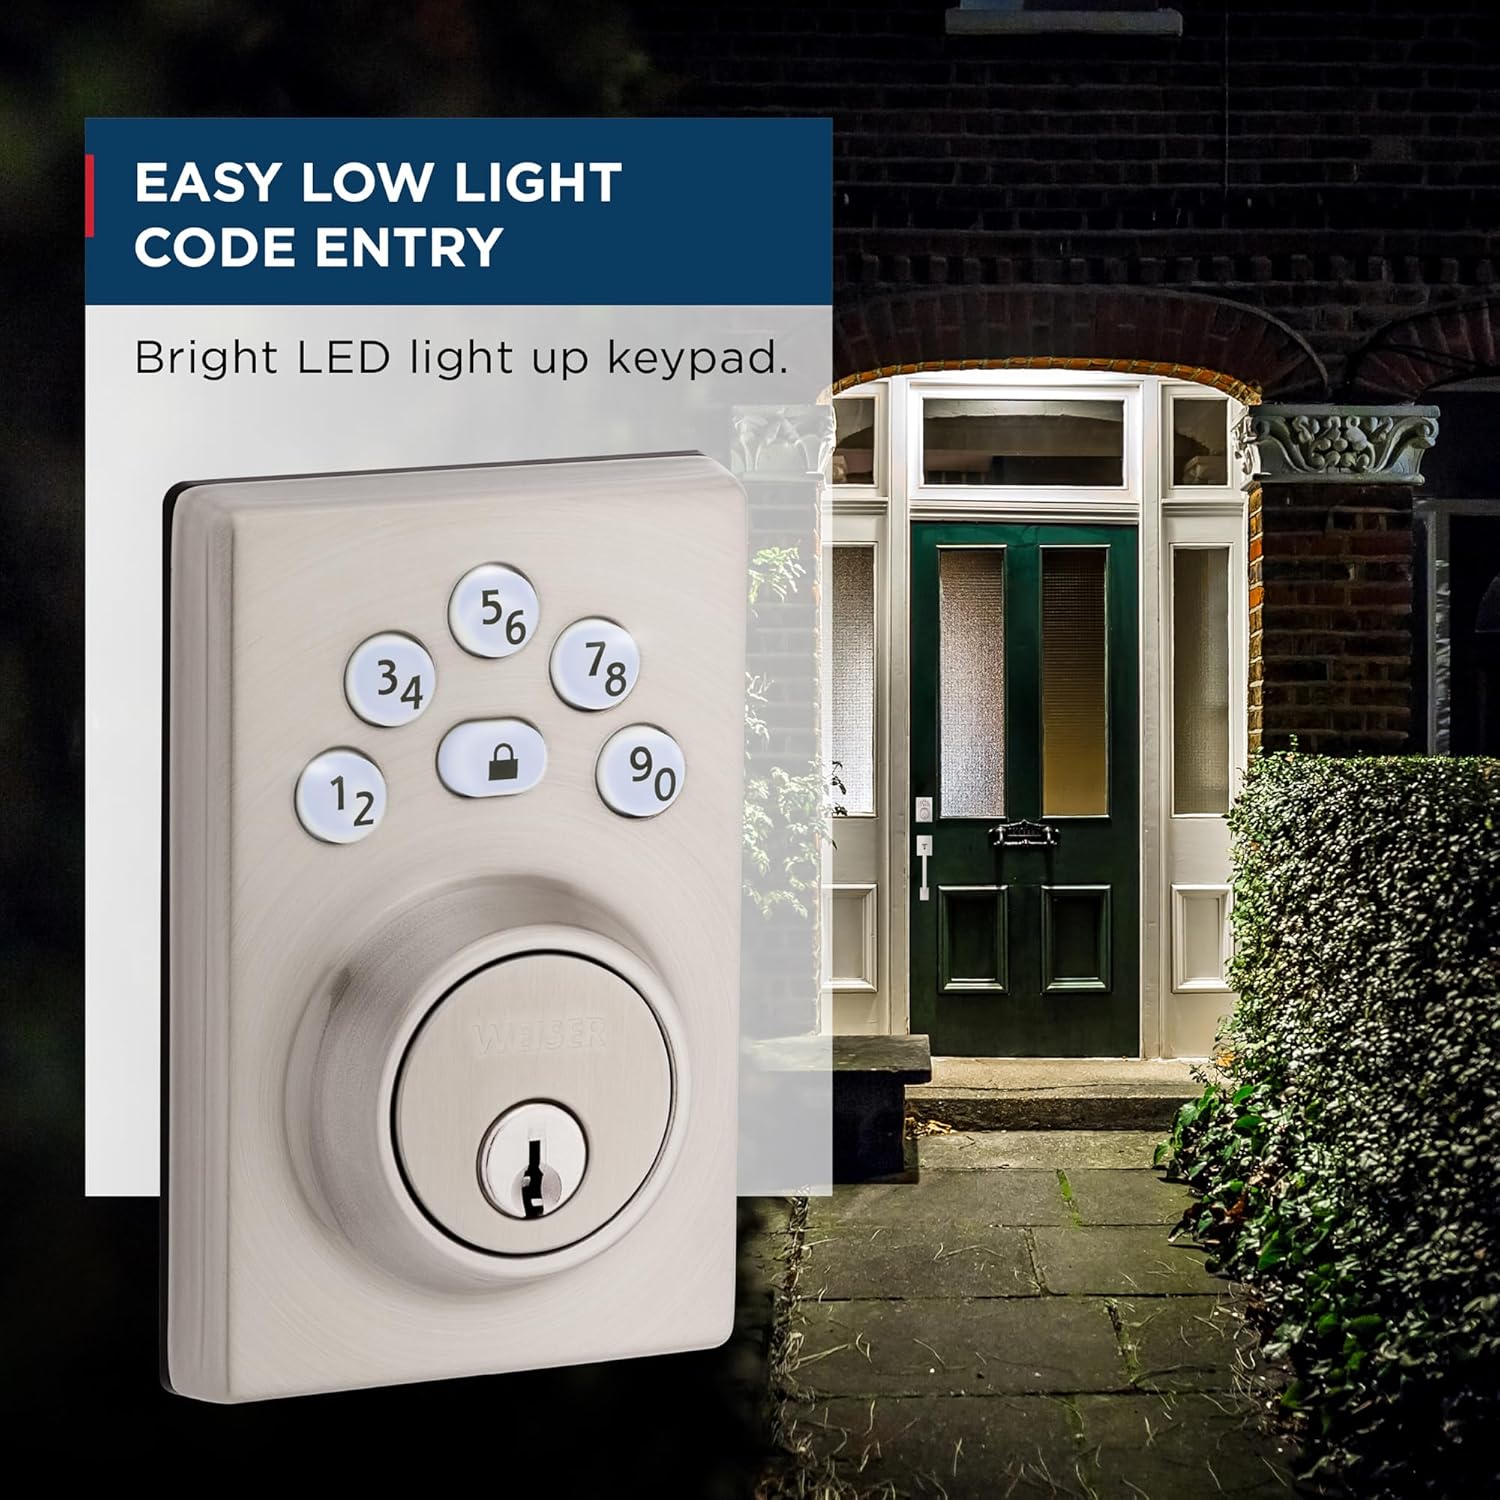
Image: A visual explanation of the intrusion alert system, showing the keypad flashing red and sounding beeps after three incorrect code attempts.
If 3 consecutive incorrect user codes are entered, the lock will sound an alarm and disable the keypad for 1 minute. This is a security feature to prevent unauthorized access. Wait for the 1-minute lockout period to expire before attempting to enter a valid code again.
Běžné problémy a řešení:
- Zámek nereaguje na klávesnici:
- Check batteries and replace if low.
- Ensure the cable connection between the exterior and interior assemblies is secure.
- Verify the programming code and user codes are correct.
- Deadbolt does not extend/retract fully:
- Zkontrolujte, zda v zárubni nebo zárubni nejsou nějaké překážky.
- Ensure the latch and deadbolt are properly aligned with the strike plate.
- Verify the door handing process was completed correctly during installation.
- Indikátor slabé baterie:
- Replace all four AA alkaline batteries immediately.
If you continue to experience issues, please refer to the comprehensive troubleshooting section in your Installation Guide or contact Weiser customer support.
Záruka a podpora
Weiser products are designed for durability and reliability. For information regarding your product's warranty, please refer to the warranty card included in your product packaging or visit the official Weiser webUschovejte si doklad o koupi pro případ reklamace.
For technical support, replacement parts, or further assistance, please contact Weiser Customer Service. Contact information can typically be found on the Weiser webwebu nebo v dokumentaci k produktu.


