Zavedení
Thank you for choosing the Xgody 3-Channel Dash Cam. This manual provides detailed instructions for the installation, operation, and maintenance of your new dash camera. Please read this manual thoroughly before using the product to ensure proper function and to maximize your user experience. Keep this manual for future reference.
Konec produktuview a co je v krabici
The Xgody 3-Channel Dash Cam is designed to record video from the front, inside, and rear of your vehicle simultaneously, providing comprehensive coverage. It features high-definition recording, infrared night vision, G-sensor for emergency locking, loop recording, and parking monitoring.
Obsah balení:
- Xgody Dash Cam Unit
- Zadní View Camera (6M cable)
- Nabíječka do auta
- USB datový kabel
- Uživatelská příručka
- 64GB SD karta
- Lepicí nálepka
- Karta Pin
- Screws (for rear camera installation)
- 3M Glue Stick Card Line
- Páčidlo (pro vedení kabelů)

Figure 1: Xgody Dash Cam and Included Accessories
Klíčové vlastnosti
Three-Channel Recording
The dash cam simultaneously records video from three perspectives: front (1080p), inside (720p), and rear (720p). For clearer internal and external footage, the front and cabin dual-lens cameras can operate independently at 1080p+1080p.

Figure 2: Three-Channel Recording Overview
Infrared (IR) Night Vision
The inside-facing camera is equipped with 4 IR LED lights and an F/2.0 aperture. This technology automatically increases exposure in low-light or dark conditions, ensuring clear video footage of the vehicle's interior. The operating temperature range is -31°F to 167°F (-35°C to 75°C).

Figure 3: Infrared Night Vision in Operation
Nahrávání ve smyčce
Continuous loop recording automatically overwrites the oldest unlocked video files when the memory card is full. This ensures that recording never stops due to a full card, providing uninterrupted surveillance.

Obrázek 4: Funkce nahrávání ve smyčce
G-senzor (nouzové zamknutí)
The built-in G-sensor detects sudden shocks or collisions. When such an event occurs, the dash camera automatically locks the current video footage, čímž se zabrání jeho přepsání záznamem ve smyčce. Tím je zajištěno zachování důležitých důkazů.
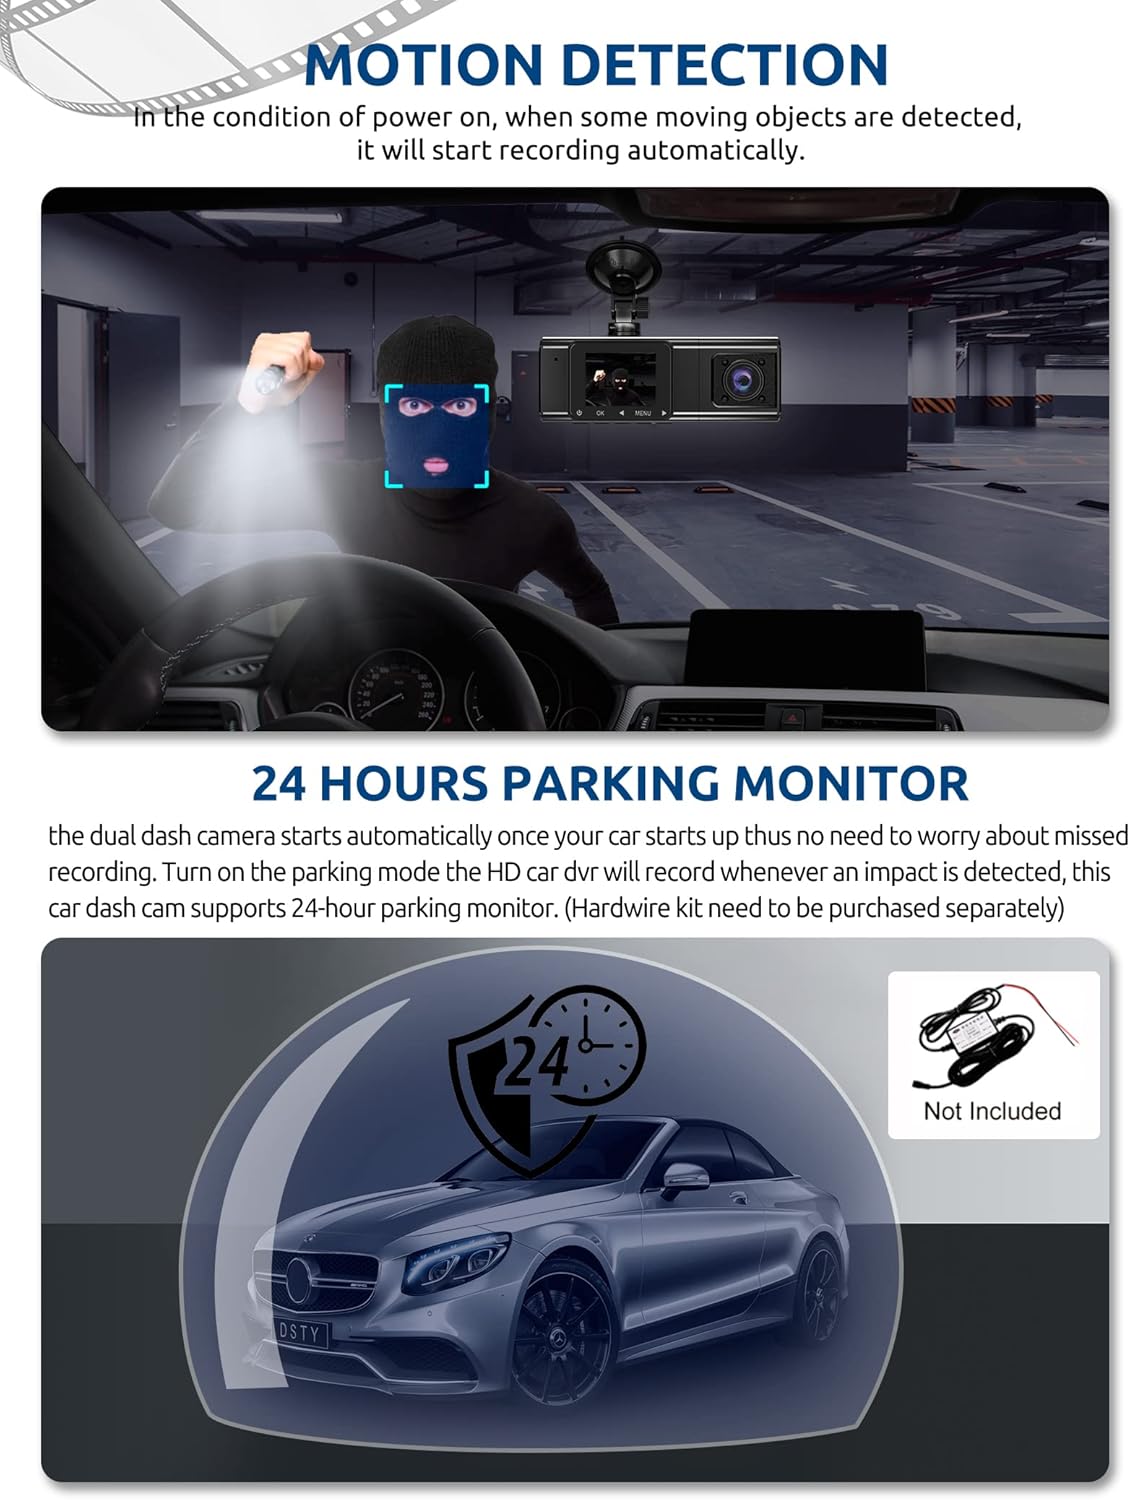
Figure 5: G-Sensor Activating During an Impact
Motion Detection & 24-Hour Parking Mode
In motion detection mode, the video recorder begins recording automatically when it detects movement in front of the camera. For continuous 24-hour surveillance, even when the car is off, the dash cam can be connected to the car battery via a hardwire kit (not included). This enables parking mode, which records when an impact is detected.

Figure 6: Motion Detection and Parking Monitoring
Pokyny pro nastavení
1. Insert the SD Card
- Najděte slot pro SD kartu na boku palubní kamery.
- Vložte dodanou 64GB SD kartu zlatými kontakty směrem k zadní straně fotoaparátu, dokud nezacvakne.
- Ujistěte se, že je karta zcela zasunuta.
2. Mount the Dash Cam
- Vyčistěte oblast čelního skla, kam chcete namontovat palubní kameru.
- Připevněte přísavný držák k palubní kameře.
- Press the suction cup firmly against the windshield and lock it into place. Position the camera to ensure a clear view vozovky před vámi, aniž byste při řízení překáželi ve výhledu.
3. Nainstalujte zadní kameru
- Připojte kabel zadní kamery k hlavní jednotce palubní kamery.
- Route the cable neatly along the vehicle's headliner and trim to the rear of the car. Use the provided crowbar to tuck the cable under panels.
- Mount the rear camera on the rear windshield using the adhesive sticker or screws, ensuring it has a clear view ze silnice za sebou.
4. Připojte napájení
- Zapojte autonabíječku do zásuvky zapalovače cigaret ve vozidle.
- Connect the other end of the car charger cable to the dash cam's power input port.
- Palubní kamera se obvykle automaticky zapne při nastartování vozidla a vypne se při jeho vypnutí.
Návod k obsluze
Zapnutí/vypnutí
- Automatický: The dash cam powers on and starts recording automatically when connected to power and the vehicle ignition is on. It powers off automatically when the ignition is turned off.
- Manuální: Press and hold the power button for a few seconds to manually turn the device on or off.
Režimy záznamu
- Normální nahrávání: The default mode, continuously recording video in segments.
- Nouzové nahrávání (G-senzor): Automatically activated upon impact, locking the current video file.
- Záznam detekce pohybu: Records when motion is detected while the vehicle is parked (requires activation in settings).
- Sledování parkování: Records when an impact is detected while the vehicle is parked (requires hardwire kit and activation in settings).
Navigace v nabídce
- Use the 'MENU' button to access settings.
- Use the 'UP' and 'DOWN' arrow buttons to navigate through menu options.
- Stisknutím tlačítka „OK“ potvrďte výběr.
- Common settings include video resolution, loop recording duration, G-sensor sensitivity, parking mode, date/time, and language.
Viewing Footage
- Na zařízení: Vstupte do režimu přehrávání pomocí nabídky view recorded videos directly on the dash cam screen.
- V počítači: Remove the SD card from the dash cam and insert it into a computer's card reader. The video files can then be accessed and played using standard media player software.
Údržba
Formátování SD karty
It is recommended to format the SD card regularly (e.g., once a month) to ensure optimal performance and prevent data corruption. This can typically be done through the dash cam's menu settings. Formatting will erase all data on the card, so back up any important files první.
Čištění objektivu
Periodically clean the lenses of the front, inside, and rear cameras with a soft, lint-free cloth. Avoid using abrasive cleaners that could scratch the lens surface. Clean lenses ensure clear video quality.
Aktualizace firmwaru
Check the official Xgody website periodically for any available firmware updates. Updates can improve performance, add new features, or fix bugs. Follow the instructions provided with the firmware update carefully.
Odstraňování problémů
| Problém | Možná příčina | Řešení |
|---|---|---|
| Palubní kamera se nezapne. | Žádné napájení; vadná nabíječka do auta; uvolněné připojení. | Check car charger connection; ensure vehicle's cigarette lighter socket is functional; try a different power source if available. |
| Nahrávání se zastaví nebo files jsou poškozeny. | SD karta plná; chyba SD karty; nekompatibilní SD karta. | Format the SD card regularly; use a high-speed (Class 10 or U3) SD card; replace the SD card if issues persist. |
| Screen is unresponsive or distorted. | Extreme temperatures; software glitch. | Allow the device to return to normal operating temperature; perform a factory reset (refer to manual for specific steps); ensure the device is not exposed to direct sunlight for extended periods in hot climates. |
| Kvalita videa je špatná. | Znečištěný objektiv; na objektivu stále ochranná fólie; nesprávné nastavení rozlišení. | Clean camera lenses; remove any protective film; check video resolution settings in the menu. |
| G-senzor je příliš citlivý/nedostatečně citlivý. | Nastavení citlivosti G-senzoru je příliš vysoké/nízké. | Citlivost G-senzoru upravte v nabídce nastavení palubní kamery. |
Specifikace
| Funkce | Specifikace |
|---|---|
| Rozměry produktu | 4.25 x 1.77 x 1.57 palce |
| Hmotnost položky | 1.26 libry |
| Technologie připojení | USB, bezdrátový |
| Rozlišení záznamu videa | 1080p (Front), 720p (Inside), 720p (Rear) |
| Velikost obrazovky | 1.5 palce |
| Typ paměti Flash | SD |
| Provozní teplota | -31 °F až 167 °F (-35 °C až 75 °C) |
| Zahrnuté komponenty | Paměťová karta (64 GB) |
| Barva | Černý |
Záruka a podpora
Xgody provides 18 months of service for this product. If you have any questions or require assistance regarding your Xgody Dash Cam, please contact our customer support. We aim to respond with helpful advice within 24 hours.
For support, please refer to the contact information provided in the packaging or on the official Xgody webmísto.


