1. Úvod
Thank you for choosing the ORSKEY S950 Dash Cam. This manual provides detailed instructions for the proper installation, operation, and maintenance of your new dash camera system. Please read this manual thoroughly before use to ensure optimal performance and longevity of the device.

Image: The ORSKEY S950 Dash Cam, showing the main front unit with a 3-inch IPS screen and the separate rear camera.
2. Konec produktuview
2.1 Obsah balení
The ORSKEY S950 Dash Cam package includes the following items:
- ORSKEY S950 Front Dash Camera
- Zadní kamera
- Nabíječka do auta
- Montážní držák (montáž na palubní desku)
- Kabel zadní kamery
- Uživatelská příručka
- Memory Card (Included components: Memory Card)
2.2 Klíčové vlastnosti
The ORSKEY S950 Dash Cam is equipped with advanced features for comprehensive vehicle surveillance:
- 4K Ultra HD přední nahrávání: Zachycuje jasné a detailní záběrytage.
- 1080P zadní nahrávání: Poskytuje široký view zadní části vozidla.
- Sony Starvis Sensor: Enhances low-light performance for superior night vision.
- 3palcová IPS obrazovka: Offers a clear and wide viewing angle for playback and settings.
- 170-Degree Wide Field of View: Both front and rear cameras cover multiple lanes.
- Nahrávání ve smyčce: Automaticky přepíše nejstarší soubor footage když je paměťová karta plná.
- G-Sensor (Emergency Accident Lock): Detects sudden impacts and locks the current video to prevent overwriting.
- Sledování parkování: Provides surveillance when the vehicle is parked (requires continuous power supply).
- Support for up to 128GB MicroSD Card: Allows for extended recording times.

Image: Visual representation of the ORSKEY S950's powerful functions, including 4K+1080P recording, Sony Sensor, 3" IPS screen, dual 170° FOV, G-Sensor, Loop Recording, Parking Monitoring, Emergency Recording, and Max 128GB support.
3. Nastavení a instalace
3.1 Vložení karty MicroSD
- Ujistěte se, že je palubní kamera vypnutá.
- Locate the MicroSD card slot on the side of the main unit.
- Insert the MicroSD card (Class 10 or higher, up to 128GB) into the slot until it clicks into place.
- Důležité: Format the MicroSD card within the dash cam's settings menu before first use and periodically thereafter to ensure stable recording.
3.2 Montáž přední kamery
- Vyčistěte oblast čelního skla, kam chcete kameru namontovat.
- Attach the suction cup mount or adhesive mount to the windshield, ensuring it does not obstruct your view.
- Slide the main dash cam unit onto the mounting bracket until it locks securely.
- Adjust the camera lens angle to ensure it captures the road ahead clearly.
3.3 Instalace zadní kamery
- Určete optimální místo pro montáž zadní kamery, obvykle na zadní čelní sklo nebo poblíž registrační značky.
- Důkladně očistěte montážní povrch.
- Zadní kameru upevněte pomocí dodaného lepidla nebo šroubů.
- Route the rear camera cable from the rear of the vehicle to the front dash cam unit. Ensure the cable is tucked away neatly to avoid interference with driving.
- Připojte kabel zadní kamery k určenému portu na hlavní jednotce palubní kamery.

Image: Illustration of the dual lens dash camera's wide 170° viewing angles for both front and rear, providing comprehensive coverage.
3.4 Připojení napájení
- Připojte nabíječku do auta ke vstupnímu portu napájení palubní kamery.
- Zapojte druhý konec autonabíječky do zásuvky zapalovače cigaret ve vozidle.
- Palubní kamera se automaticky zapne a začne nahrávat po zapnutí zapalování vozidla.
4. Návod k obsluze
4.1 Základní obsluha
- Zapnutí/vypnutí: The camera powers on/off automatically with the vehicle's ignition. You can also manually power on/off by pressing and holding the power button.
- Záznam: Once powered on and with a formatted MicroSD card, the camera will automatically start loop recording. A flashing indicator light usually signifies active recording.
- Zapnutí/vypnutí obrazovky: The screen can be set to turn off automatically after a set period to avoid distraction while driving. Recording continues in the background.
4.2 Nahrávání ve smyčce
Loop recording ensures continuous recording by overwriting the oldest unlocked video files when the MicroSD card reaches its capacity. This feature prevents the card from filling up and stopping recording.
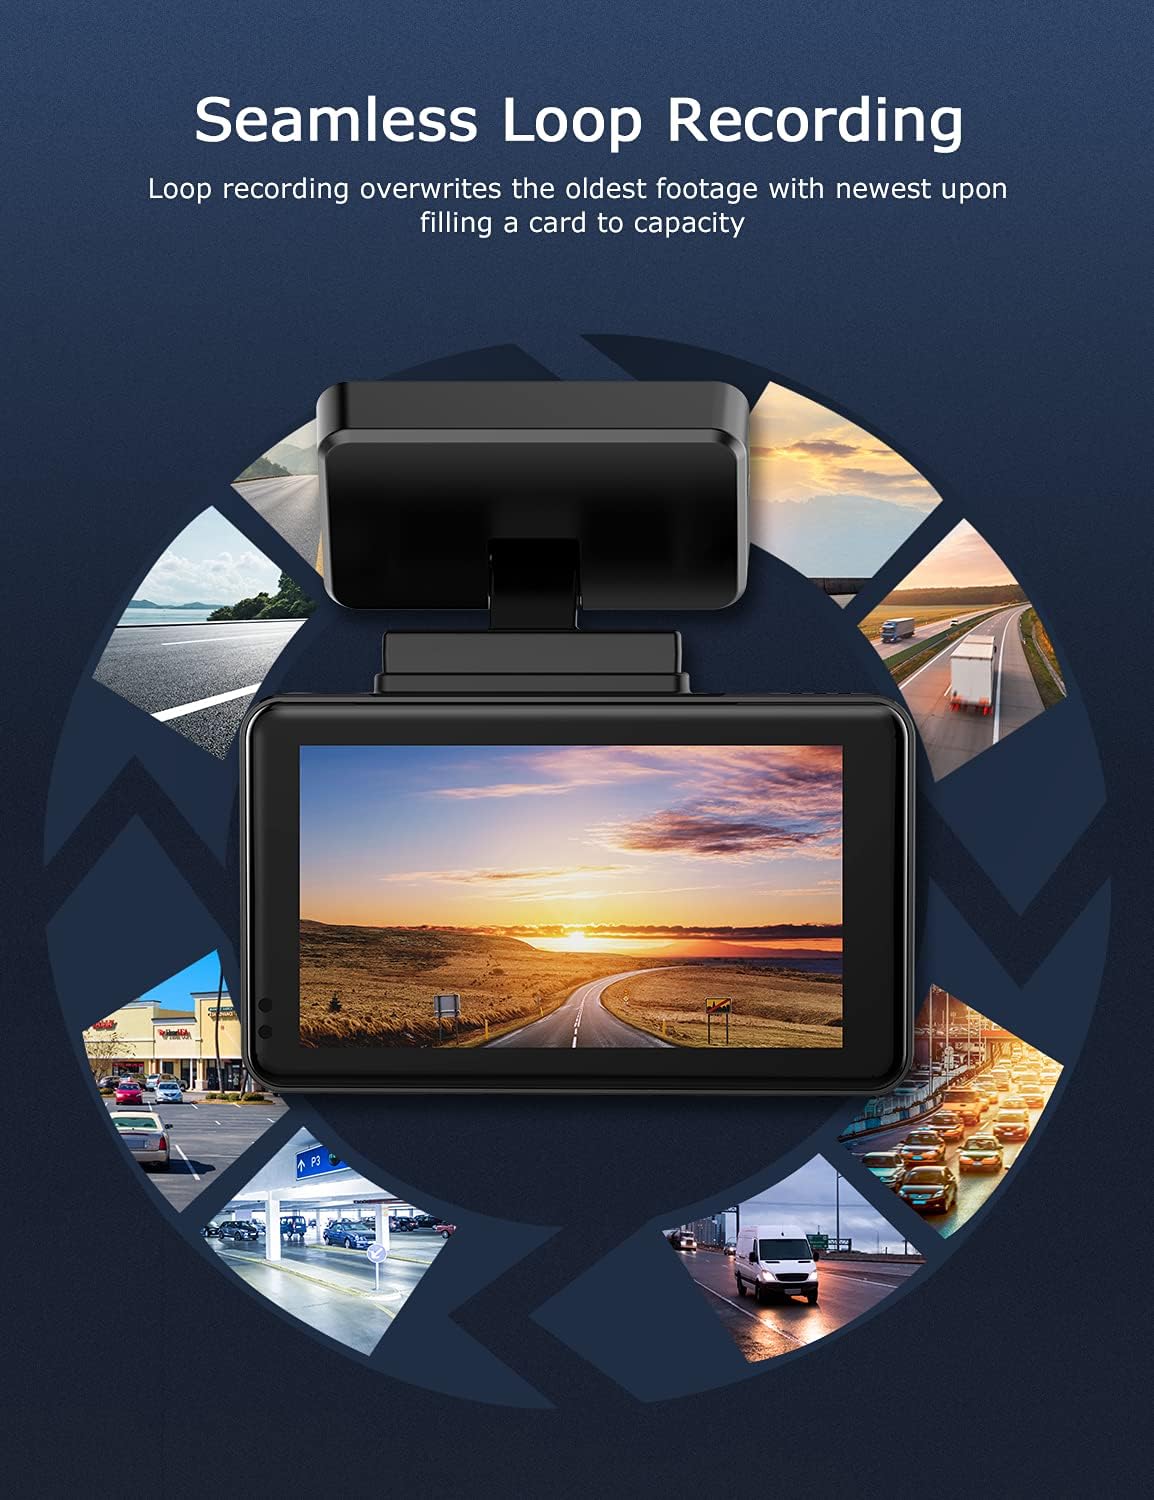
Image: Visual explanation of seamless loop recording, where the dash cam continuously records and overwrites the oldest footage once the memory card is full.
4.3 G-senzor a nouzový zámek
The built-in G-sensor detects sudden acceleration, braking, or collisions. When triggered, it automatically locks the current video segment, protecting it from being overwritten by loop recording. These locked filejsou uloženy v samostatné složce na kartě MicroSD.

Image: Depiction of the Emergency Accident Lock feature, where the G-sensor detects an impact and automatically locks the video footage as important evidence.
4.4 Monitorování parkování
When enabled, parking monitoring allows the dash cam to automatically record if it detects a collision or vibration while the vehicle is parked. This feature typically requires a hardwire kit (sold separately) for continuous power supply.
4.5 Noční vidění
Equipped with a Sony Starvis Sensor, the ORSKEY S950 provides enhanced night vision capabilities, capturing clear video footage i za špatných světelných podmínek.
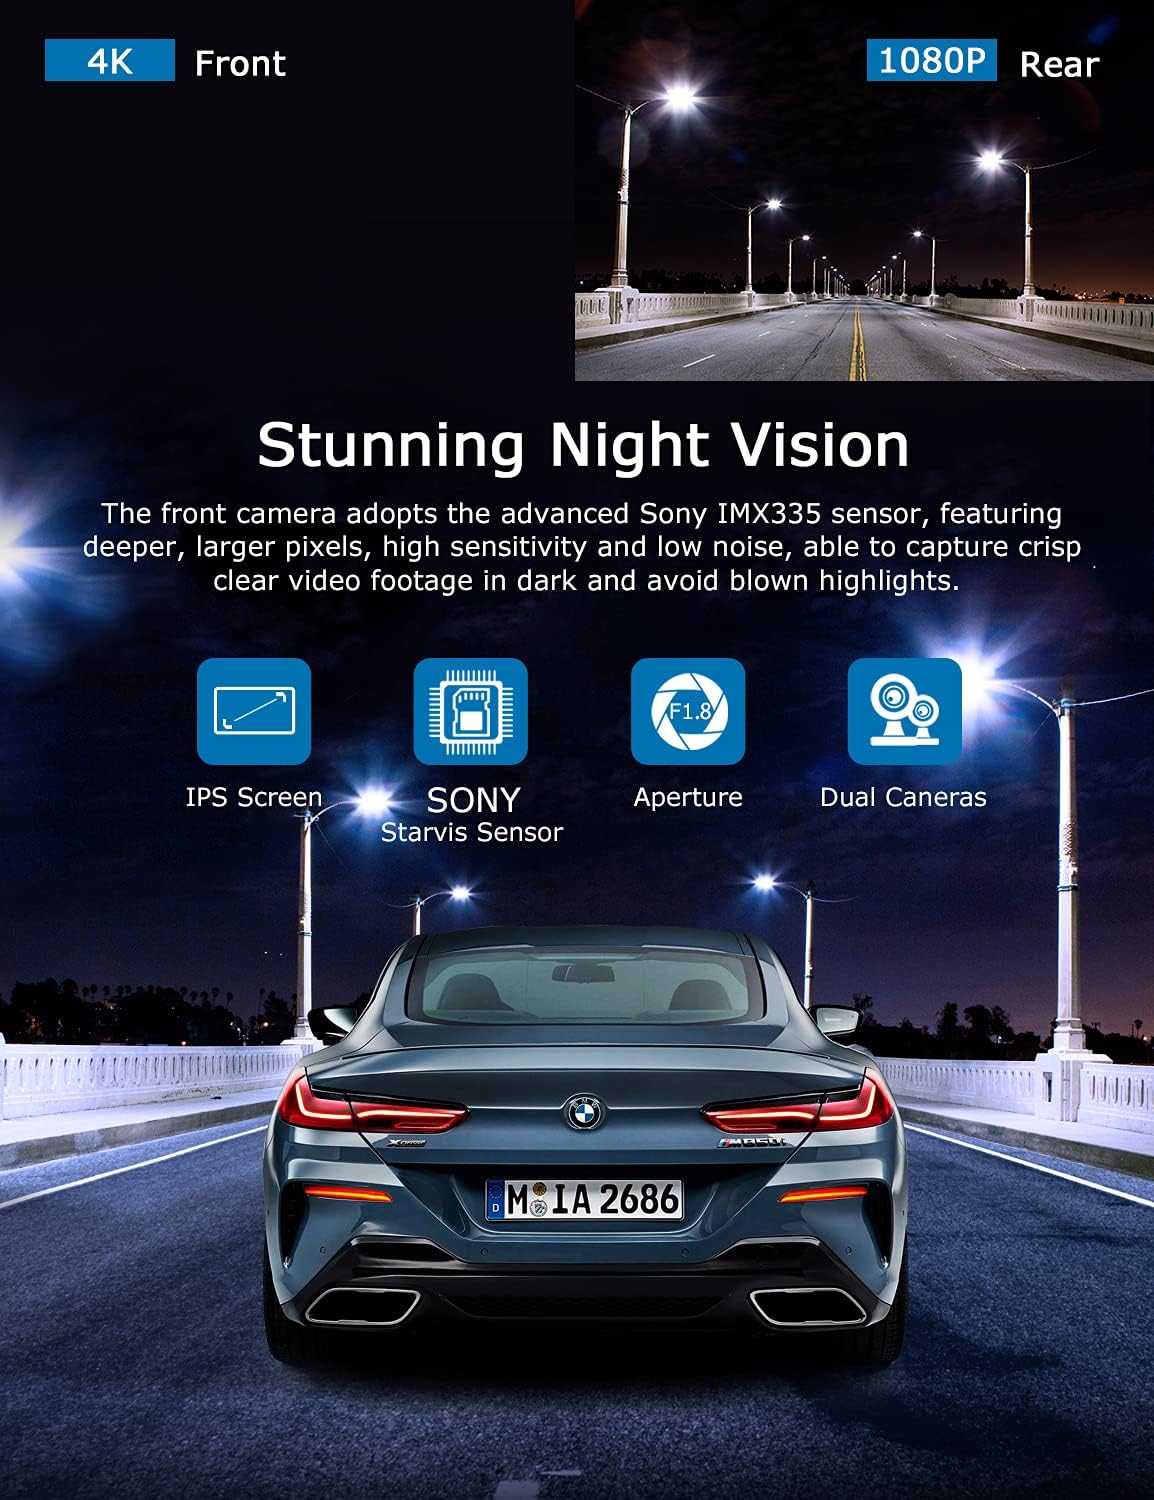
Image: Illustration highlighting the stunning night vision capability of the ORSKEY S950, showing clear footage v tmavém prostředí.
4.6 Přehrávání
Na review zaznamenané footage:
- Stop recording by pressing the OK button (if currently recording).
- Enter playback mode via the menu options.
- Navigate through video files using the up/down buttons.
- Vyberte a file a stisknutím tlačítka OK přehrajte.
- You can also remove the MicroSD card and view files on a computer using a compatible media player.
5. Údržba
- Formátování karty MicroSD: Regularly format the MicroSD card (at least once a month) to prevent data corruption and ensure optimal performance. Back up important files před formátováním.
- Čištění: K čištění objektivu a obrazovky fotoaparátu používejte měkký, suchý hadřík. Nepoužívejte abrazivní čisticí prostředky ani rozpouštědla.
- Teplota: Avoid exposing the dash cam to extreme temperatures for prolonged periods, as this can affect battery life and component integrity.
6. Řešení problémů
| Problém | Možná příčina | Řešení |
|---|---|---|
| Fotoaparát se nezapne. | No power supply; faulty charger; dead battery. | Check car charger connection and vehicle's cigarette lighter. Ensure the camera's internal battery is charged. |
| "Card Error" or recording stops. | MicroSD card not formatted, incompatible, or corrupted. | Format the MicroSD card in the camera. Use a high-quality Class 10 (U3 recommended) MicroSD card from a reputable brand. Try a different card. |
| Video playback is laggy or corrupted. | Slow MicroSD card; file system issues; incompatible player. | Ensure you are using a high-speed MicroSD card (V30/U3). Format the card. Try playing videos with a different media player on your computer. |
| Rear camera image is reversed. | Default setting for mirror view. | Check camera settings for a 'Mirror Image' or 'Flip' option for the rear camera. If not available, this may be intended for reverse assistance rather than recording. |
| G-senzor je příliš citlivý/nedostatečně citlivý. | Nastavení citlivosti G-senzoru. | Adjust the G-Sensor sensitivity level in the camera's settings menu. |
7. Specifikace
| Funkce | Specifikace |
|---|---|
| Číslo modelu | S950 |
| Rozlišení záznamu videa | 4K (přední), 1080P (zadní) |
| Velikost obrazovky | 3palcový IPS displej |
| Pole View | 170 stupňů (přední a zadní) |
| Speciální funkce | Loop Recording, Night Vision, G-Sensor, Parking Monitoring |
| Podpora úložiště | Up to 128GB MicroSD Card (Class 10/U3 recommended) |
| Kontrolní metoda | Dotek |
| Zdroj napájení | Car Charger (1 Lithium Polymer battery included) |
| Rozměry produktu | 21 x 15.5 x 4.5 cm; 505 g |
8. Záruka a podpora
ORSKEY products are designed for reliability and performance. For warranty information, technical support, or any inquiries regarding your ORSKEY S950 Dash Cam, please refer to the contact details provided on the official ORSKEY webnebo obalu produktu. Uschovejte si účtenku jako doklad o koupi pro případ reklamace.
For further assistance, you may visit the ORSKEY Store on Amazon: ORSKEY Store


