1. Úvod
The Watts BT-D03 RF is a wireless digital room thermostat designed for precise temperature control in various heating and cooling installations. It features a backlit LCD screen and operates via 868 MHz radio frequency communication. This manual provides comprehensive instructions for the proper installation, operation, and maintenance of your thermostat.

Obrázek 1: Přední strana view of the Watts BT-D03 RF Thermostat, showing the display and control buttons.
2. Bezpečnostní informace
- Před instalací a provozem si pečlivě přečtěte všechny pokyny.
- Installation should only be performed by a qualified electrician or heating engineer.
- Před zahájením jakékoli kabeláže nebo údržby se ujistěte, že je odpojeno napájení.
- Nevystavujte zařízení extrémním teplotám, vlhkosti nebo přímému slunečnímu záření.
- Udržujte zařízení mimo dosah dětí.
3. Obsah balení
Ověřte, zda jsou v balení přítomny všechny komponenty:
- Watts BT-D03 RF Wireless Digital Room Thermostat
- Stolní stojan
- Montážní šrouby a hmoždinky
- Uživatelská příručka
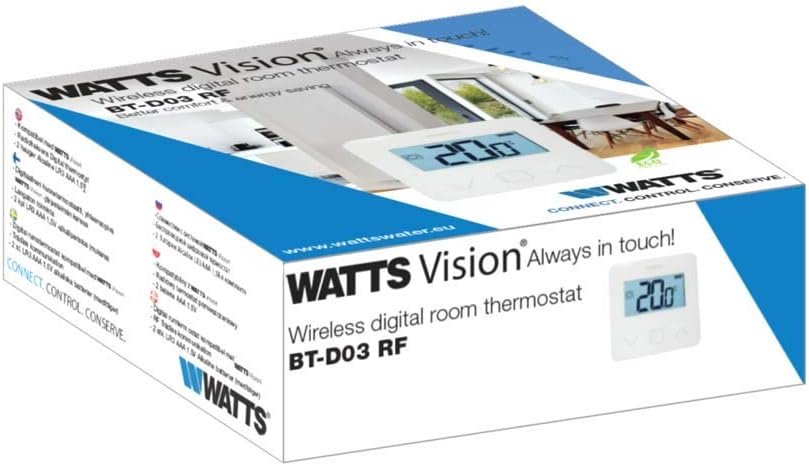
Figure 2: Product packaging of the Watts BT-D03 RF Thermostat.
4. Konec produktuview
4.1 Komponenty
- LCD displej: Backlit screen showing temperature, battery level, and operating status.
- Ovládací tlačítka: Up, Down, and OK/Menu buttons for navigation and setting adjustments.
- Vnitřní senzory: For detecting ambient room temperature.
- External Sensor Port: For optional NTC 10 kOhm external sensor (not included).
- LED indikátor: Shows active heating/cooling signal.
- Internal Reset Button: For quick RF pairing or system reset.
- Bzučák: Provides audible feedback for certain operations.

Obrázek 3: Detailní přední strana view of the thermostat display.

Obrázek 4: Zpět view of the thermostat, showing battery compartment and mounting points.
4.2 Rozměry
The physical dimensions of the thermostat are provided below for installation planning.
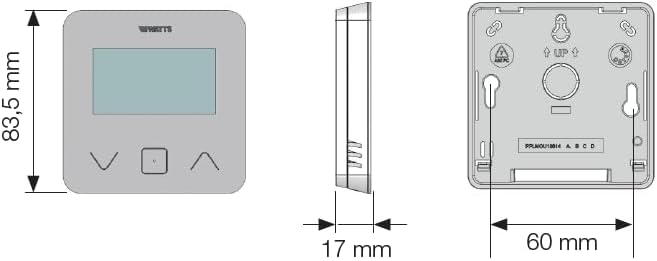
Figure 5: Dimensional drawing of the Watts BT-D03 RF Thermostat.
5. Nastavení
5.1 Instalace baterie
- Remove the back cover of the thermostat.
- Vložte dvě baterie AAA, dbejte na správnou polaritu.
- Nasaďte zadní kryt.
5.2 Možnosti montáže
The thermostat can be installed in two ways:
- Montáž na stěnu: Use the provided screws and wall plugs to secure the thermostat to a wall at an appropriate height (typically 1.5 meters from the floor).
- Umístění na stůl: Attach the included stand to the back of the thermostat for placement on a flat surface.

Figure 6: Thermostat with tabletop stand attached.
5.3 RF Pairing
To establish wireless communication with the receiver unit (sold separately), follow the pairing instructions provided with your receiver. The thermostat features an internal reset button for quick RF pairing, typically requiring a short press during the receiver's pairing mode.
6. Návod k obsluze
6.1 Zapnutí/vypnutí
The thermostat powers on automatically upon battery insertion. There is no dedicated on/off button for the thermostat unit itself; it remains active as long as batteries are present.
6.2 Nastavení teploty
Use the Up and Down buttons to adjust the desired setpoint temperature. The LCD will display the current setpoint during adjustment.
6.3 Režimy zobrazení
You can choose to display either the detected ambient temperature or the currently set temperature on the LCD. Refer to the full installation parameters mode for configuration details.
6.4 Keypad Lock (PIN Code)
To prevent unauthorized changes, the keypad can be locked using a PIN code. This feature is particularly useful for installations in public areas. Consult the advanced settings menu for PIN code setup and activation.
6.5 Detekce otevřeného okna
The thermostat includes an open window detection feature. When a sudden drop in temperature is detected, the thermostat can temporarily suspend heating/cooling to conserve energy. This function can be configured in the settings.
6.6 Proportional Band Setting (PWM)
The thermostat supports proportional band setting (PWM) or configurable institutions (0.2÷3) for precise control of heating/cooling systems. This advanced setting allows for fine-tuning the system's response to temperature changes.
7. Údržba
7.1 Výměna baterie
When the battery charge level indicator on the LCD shows low power, replace the two AAA batteries promptly to ensure continuous operation. Follow the battery installation steps in Section 5.1.
7.2 Čištění
Clean the thermostat's exterior with a soft, dry cloth. Do not use abrasive cleaners, solvents, or spray directly onto the device.
8. Řešení problémů
- Bez displeje: Zkontrolujte instalaci baterií a jejich stav nabití. V případě potřeby baterie vyměňte.
- No Communication with Receiver: Ensure the thermostat and receiver are within range. Re-perform the RF pairing procedure (Section 5.3).
- Nesprávný údaj teploty: Zajistěte, aby termostat nebyl vystaven přímému slunečnímu záření, průvanu nebo zdrojům tepla.
- Klávesnice nereaguje: Check if the keypad lock (PIN Code) is active. Unlock the keypad as per instructions.
8.1 Funkce reset
If the thermostat is not functioning as expected, an internal reset button can be used. Consult the full installation parameters mode for specific reset procedures, as this may clear custom settings.
9. Technické specifikace
| Značka | Watts |
| Číslo modelu | BT-D03-RF-GT |
| Rozměry produktu (D x Š x V) | 6.2 x 1.7 x 8.35 cm |
| Hmotnost položky | 0.18 g |
| svtage | 230 Volts (for connected system, thermostat is battery powered) |
| Zdroj napájení | Napájení z baterie |
| Typ ovladače | Ruční ovládání |
| Typ zobrazení | LCD |
| Podsvícení | Ano |
| Provozní teplota | 0 až 40 °C |
10. Informace o shodě
The Watts BT-D03 RF Wireless Digital Room Thermostat complies with the following directives:
- 2014/35/EU
- 2014/30/EU
- 2014/53/EU
- 2011/65/EU
- 2012/19/EU
- 2015/1188/EU


