1. Konec produktuview
The GIYO Mini Bicycle Pump is a compact and portable inflation device designed for various cycling and recreational needs. It features a smart valve system compatible with both Presta and Schrader valves, an integrated pressure gauge for accurate inflation, and a durable construction. This manual provides essential information for the safe and effective use of your GIYO Mini Bicycle Pump.
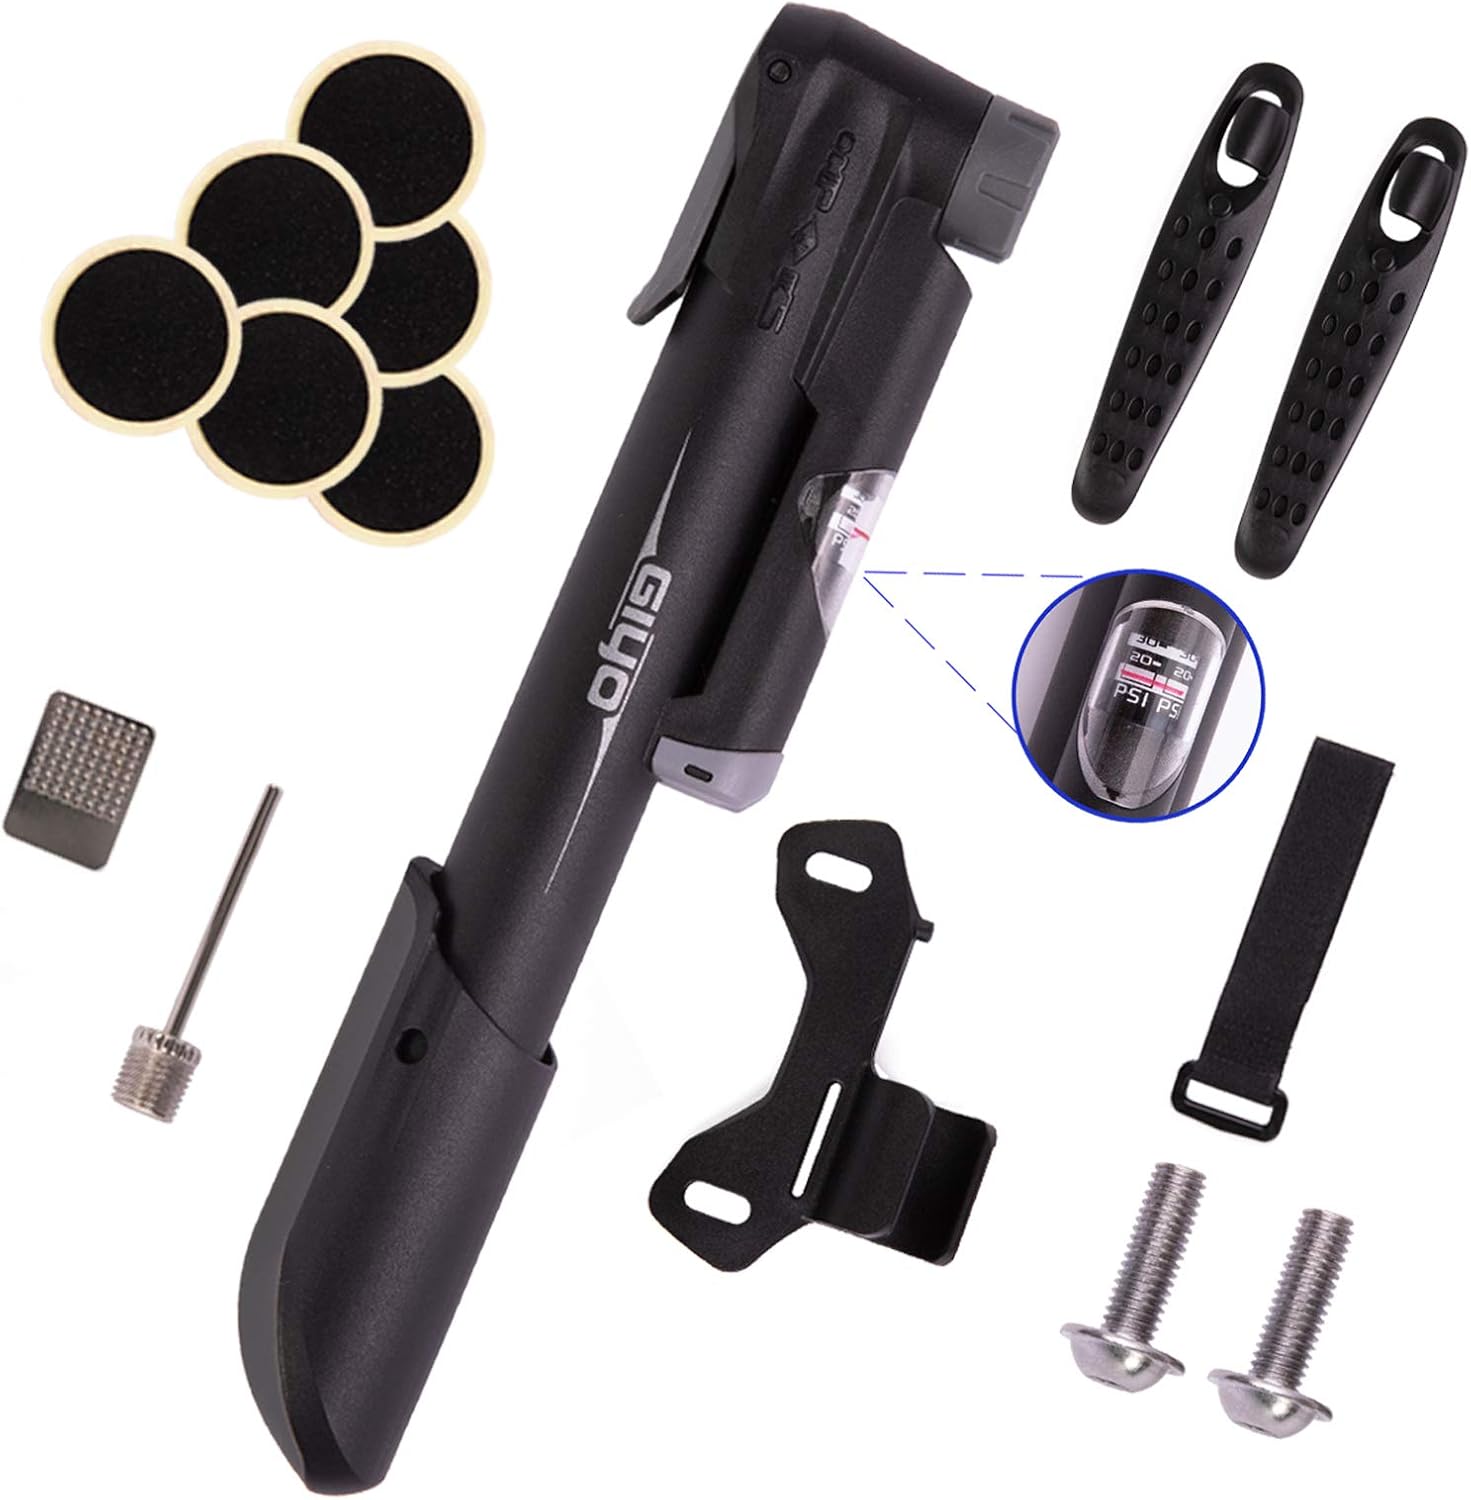
Figure 1: GIYO Mini Bicycle Pump and its complete accessory kit.
This image displays the GIYO Mini Bicycle Pump along with all its components: the pump itself, a mounting bracket, Velcro strap, fixing screws, a ball inflate needle, grinding tablet, mini pry bars, and tire patches. The pump is black with the GIYO logo prominently displayed.
2. Obsah balení
- 1 x GIYO Mini Bike Pump
- 1 x montážní držák
- 1 x Velcro Strap
- 2 x upevňovací šrouby
- 1 x Ball Inflate Needle
- 1 x Grinding Tablet
- 2 x Mini Pry Bars
- 6 x Tire Patches
3. Nastavení a instalace
3.1 Mounting the Pump to Your Bicycle
The GIYO Mini Bicycle Pump can be conveniently mounted to your bike frame using the provided mounting bracket and screws. This ensures the pump is always accessible during your rides.
- Identify the pre-drilled holes on your bike frame, typically near the water bottle cage mounts.
- Align the mounting bracket with these holes.
- Secure the bracket using the two fixing screws. Ensure the screws are tightened firmly but do not overtighten.
- Place the pump into the mounted bracket. Use the Velcro strap to further secure the pump, preventing movement during cycling.

Figure 2: Illustration of the pump securely mounted to a bicycle frame using the provided bracket and strap.
This image demonstrates the GIYO Mini Bicycle Pump attached to a bike frame. The pump is held by a black mounting bracket and a Velcro strap, positioned along the frame's tubing. Two screws are visible, securing the bracket to the frame.
3.2 Valve Compatibility (Presta & Schrader)
The GIYO Mini Bicycle Pump features a smart valve system that automatically adapts to both Presta and Schrader valves without requiring manual adjustments or adapters for the pump head itself. Simply push the pump head onto the valve stem.

Obrázek 3: Detail view of the pump head showing its smart valve system.
This image highlights the "SUPER FIT CLEVER VALVE" mechanism of the GIYO pump. It shows the pump head with a lever in both "NO LEAKS" (locked) and "UNLOCK" positions, indicating its ability to automatically fit Schrader and Presta valves.
Pro ventily Presta: Ensure the valve core is unscrewed before attaching the pump. After inflation, tighten the valve core.
Pro ventily Schrader: The pump can be directly attached to the valve stem.
4. Návod k obsluze
4.1 Huštění pneumatik jízdních kol
- If using a Presta valve, unscrew the valve core to open it.
- Firmly push the pump head onto the tire valve stem. Ensure a tight seal to prevent air leakage.
- Flip the lever on the pump head to the locked position to secure it to the valve.
- Begin pumping by moving the handle up and down. The integrated pressure gauge will display the current tire pressure.
- Inflate to the recommended PSI (Pounds per Square Inch) for your tire, typically found on the tire's sidewall. The pump supports up to 120 PSI.
- Once the desired pressure is reached, flip the lever to the unlocked position and carefully remove the pump from the valve.
- If using a Presta valve, screw the valve core back down to seal it.

Figure 4: Demonstrating the inflation process with the pump and visible pressure gauge.
This image shows a person using the GIYO Mini Bicycle Pump to inflate a bicycle tire. The pump is attached to the tire valve, and the user is actively pumping. A close-up inset highlights the integrated pressure gauge, displaying pressure readings in PSI and bar.
4.2 Using the Pressure Gauge
The GIYO Mini Bicycle Pump includes a built-in pressure gauge to accurately monitor tire pressure during inflation. The gauge displays pressure in both PSI and bar, allowing you to achieve optimal inflation levels for your specific bicycle type (road, mountain, BMX) or sports ball.
4.3 Inflating Sports Balls
To inflate sports balls, attach the included ball inflate needle to the pump head. Insert the needle into the ball's valve and pump until the desired pressure is reached.

Figure 5: The pump equipped with the ball needle, suitable for various sports balls.
This image illustrates the versatility of the GIYO Mini Bicycle Pump, showing it with the ball inflate needle attached. Below the pump, icons and images of a bicycle, football, basketball, and baseball indicate its multi-functional use for different inflation needs.
4.4 Using the Tire Repair Kit
The included tire repair kit is designed for quick and easy puncture repairs on the go.
- Use the mini pry bars to carefully remove the tire from the rim.
- Locate the puncture in the inner tube.
- Use the grinding tablet to roughen the area around the puncture. This helps the patch adhere better.
- Peel off the backing from one of the tire patches and firmly press it over the puncture. Hold for at least one minute to ensure a strong bond.
- Reinstall the inner tube and tire onto the rim.
- Inflate the tire using the GIYO Mini Bicycle Pump to the recommended pressure.

Figure 6: Visual guide for using the glue-less puncture repair kit.
This image displays the "Glue-less puncture bicycle tire repair kit" components, including mini pry bars, a grinding tablet, and tire patches. It also shows a three-step visual guide for repairing a tire: "Take out the tire," "Clean the tube," and "Stick the patch to the leak place, then press it for 1 min."
5. Údržba
- Keep the pump clean and free from dirt and debris. Wipe it down with a damp hadříkem po použití.
- Store the pump in a dry place to prevent corrosion.
- Periodically check the pump head and hose for any signs of wear or damage. Replace if necessary.
- Ensure the dust caps are in place when not in use to protect the valve mechanism.
6. Řešení problémů
| Problém | Možná příčina | Řešení |
|---|---|---|
| Únik vzduchu během nafukování. | Pump head not securely attached to valve; Presta valve core not fully unscrewed. | Ensure pump head is pushed firmly onto the valve and the lever is locked. For Presta valves, fully unscrew the valve core. |
| Difficulty attaching pump to valve. | Valve stem or pump head is dirty; incorrect valve type for pump head orientation (though pump is auto-sensing, ensure proper seating). | Clean valve stem and pump head. Ensure the pump head is pushed straight and firmly onto the valve. |
| Tire not inflating. | Puncture in tire/tube; valve core blocked or damaged; pump malfunction. | Check for punctures and use the repair kit if needed. Inspect valve core for blockages. If pump is damaged, contact customer support. |
7. Specifikace
- ventily: Presta & Schrader (Smart Compatible)
- Maximální tlak: 120 PSI
- Materiál: Outer ABS plastic, inner steel tube
- Barva: Černý
- Délka: 23 cm / 9.05 palců
- Hmotnost: 140 g / 0.31 lb
- Číslo modelu: GIYO_123456
8. Oficiální produktová videa
Watch these official videos for visual guidance on using your GIYO Mini Bicycle Pump.
Hycline Mini Bike Pump Overview
Video 1: Stručný přehledview of the Hycline mini bike pump, demonstrating its features and portability.
This video provides a quick demonstration of a mini bike pump, showcasing its compact size, mounting options, and valve compatibility. It highlights the ease of attaching it to a bike frame and its ability to inflate tires.
How to Use Mini Bike Pump with Gauge by PRO BIKE TOOL
Video 2: Detailed instructions on assembling and using a mini bike pump with an integrated gauge for accurate tire inflation.
This instructional video guides users through the assembly and operation of a mini bike pump with a gauge. It covers how to prepare the pump for use, attach it to Presta valves, monitor pressure with the gauge, and properly disassemble it after inflation.
How to use ROCKBROS Mini Bike Pump 110PSI CO2 Inflator
Video 3: Demonstrating the use of a mini bike pump with CO2 cartridges for rapid tire inflation.
This video illustrates the process of using a mini bike pump in conjunction with CO2 cartridges for quick tire inflation. It shows how to prepare the CO2 cartridge, attach it to the pump, and inflate a deflated tire, emphasizing the use of an insulated sleeve for safety.
9. Záruka a podpora
For warranty information or customer support, please refer to the contact details provided with your product packaging or visit the official GIYO webUschovejte si účtenku jako doklad o koupi pro případné reklamace.
Další zdroje a informace o produktech naleznete na GIYO Store on Amazon.
