Zavedení
This manual provides detailed instructions for the operation and maintenance of your Aomago V619 Digital Voice Recorder. Please read this manual thoroughly before using the device to ensure proper functionality and to maximize its capabilities. The Aomago V619 is designed for high-quality audio recording, suitable for lectures, meetings, interviewa osobní poznámky.

Figure 1: Aomago V619 Digital Voice Recorder. This image displays the sleek black design of the recorder, highlighting its display screen and control buttons.
Konec produktuview
The Aomago V619 features a compact design with intuitive controls. Familiarize yourself with the device's physical components:
- Displej: HD color display for navigation and viewnahrávek.
- Ovládací tlačítka: Dedicated buttons for menu, navigation (up, down, left, right), play/pause, and back.
- REC/SAVE Switch: A physical slide switch on the side for quick recording initiation and saving.
- Port USB-C: Pro nabíjení a přenos dat.
- 3.5mm audio jack: For headphones or external microphone/line-in.
- Vestavěné mikrofony: Dual microphones for stereo recording.

Figure 2: Device dimensions and REC/SAVE switch. This image illustrates the compact size of the recorder (approximately 3.9 inches in length) and highlights the REC/SAVE slide switch on its side, indicating its simple operation.
Nastavení
1. Nabíjení zařízení
Before first use, fully charge the recorder. Connect the supplied USB-C cable to the device's USB-C port and the other end to a USB power adapter (not included) or a computer's USB port. The battery indicator on the screen will show charging status. A full charge provides approximately 12 hours of general use, with up to 45 hours of continuous recording time depending on settings.

Figure 3: Charging the Aomago V619. The image shows the recorder connected via its USB-C port to a portable power bank, demonstrating its convenient charging capability.
2. Počáteční zapnutí a základní nastavení
To power on, slide the REC/SAVE switch to the 'SAVE' position or press and hold the power button (if available, otherwise assume it powers on by sliding the switch). Upon first use, you may need to set the language, date, and time. Navigate through the menu using the control buttons to access 'Settings' and adjust these parameters.
3. Setting Password Protection
For enhanced security, you can set a password to protect your recordings. Access the 'Settings' menu, locate the 'Password' option, and follow the on-screen prompts to set your desired passcode. This prevents unauthorized access to your files on the device or when connected to a computer.

Figure 4: Password protection feature. The recorder's screen displays an "Input a new password" prompt, illustrating the device's security capability.
Návod k obsluze
1. Základní nahrávání
To start recording, simply slide the REC/SAVE switch to the 'REC' position. The device will begin recording immediately. To stop recording and save the file, slide the switch back to the 'SAVE' position. The recording will be saved automatically to the internal 32GB memory.
2. Recording Formats and Quality
The V619 supports both MP3 and WAV recording formats. You can select your preferred format and recording quality (bitrate) through the device's menu. Higher bitrates (e.g., 1536Kbps WAV) offer superior audio fidelity but consume more storage space. Lower bitrates (e.g., 32Kbps MP3) save space but may reduce audio quality. The device can store over 1000 hours of recording files.

Figure 5: Recording quality options. This image displays the various WAV and MP3 bitrate options available, such as 1536Kbps WAV and 192Kbps MP3, indicating the flexibility in recording quality.
3. Voice Activated Recording (AVR)
The Voice Activated Recording (AVR) function allows the recorder to automatically start recording when sound is detected and pause when silence occurs. This feature helps conserve memory and battery life by only recording when necessary. You can adjust the AVR sensitivity level in the settings menu.
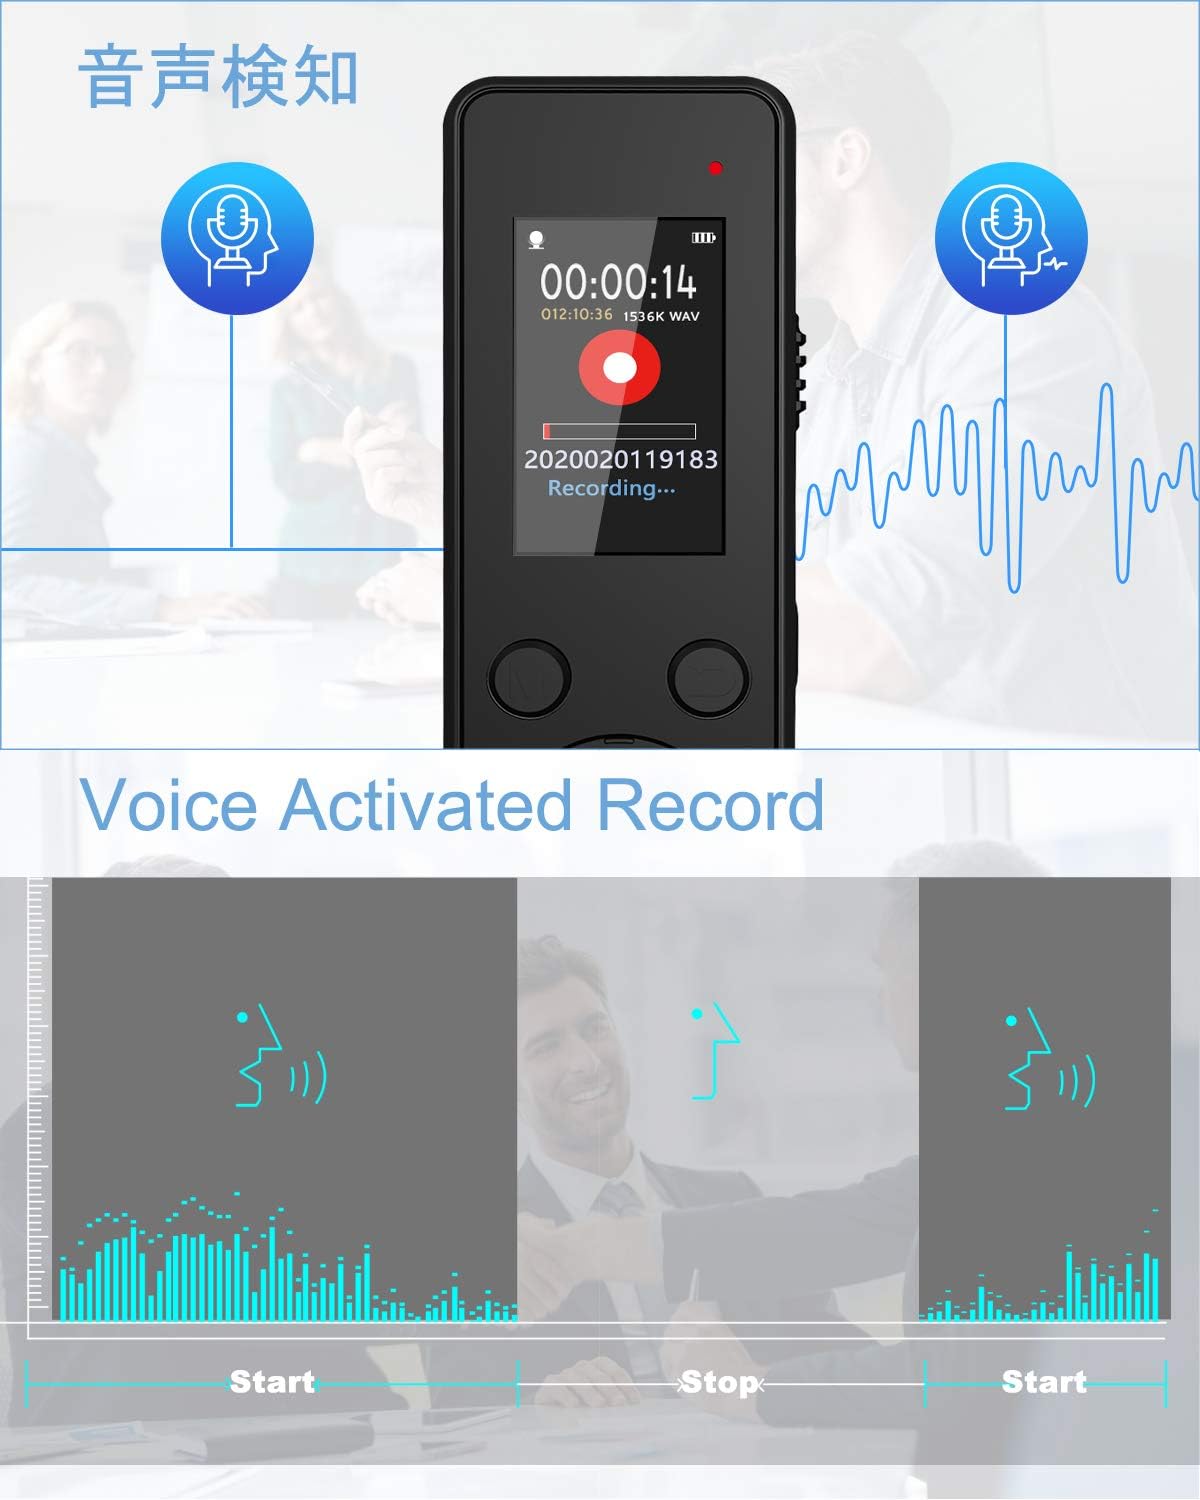
Figure 6: Voice Activated Recording (AVR). This graphic illustrates how the recorder automatically starts recording when sound is present and pauses during silence, optimizing recording efficiency.
4. Timed Recording
Set the recorder to start and stop recording at specific times using the Timed Recording feature. This is useful for scheduling recordings of lectures or meetings. Access this option in the recording settings to configure start time, end time, and recording cycle (e.g., single, everyday, working day).

Figure 7: Timed Recording function. The image shows the recorder's screen displaying a scheduled recording time, indicating its ability to automatically record at pre-set intervals.
5. Playback and A-B Repeat
To play back recordings, navigate to the 'Recordings Library' from the main menu. Select the desired file and press the play/pause button. The A-B repeat function allows you to loop a specific section of an audio file, which is ideal for studying or transcribing important phrases.
6. Connecting External Microphone/Line-in
The V619 supports external microphones and line-in audio sources via its 3.5mm audio jack. This provides flexibility for different recording scenarios, such as connecting a lavalier microphone for interviews or directly recording from an audio output device.
7. Přenos Files do počítače
Connect the recorder to your computer using the supplied USB-C cable. The device will appear as a removable storage drive. You can then easily drag and drop your recorded audio files to your computer for backup, editing, or sharing.
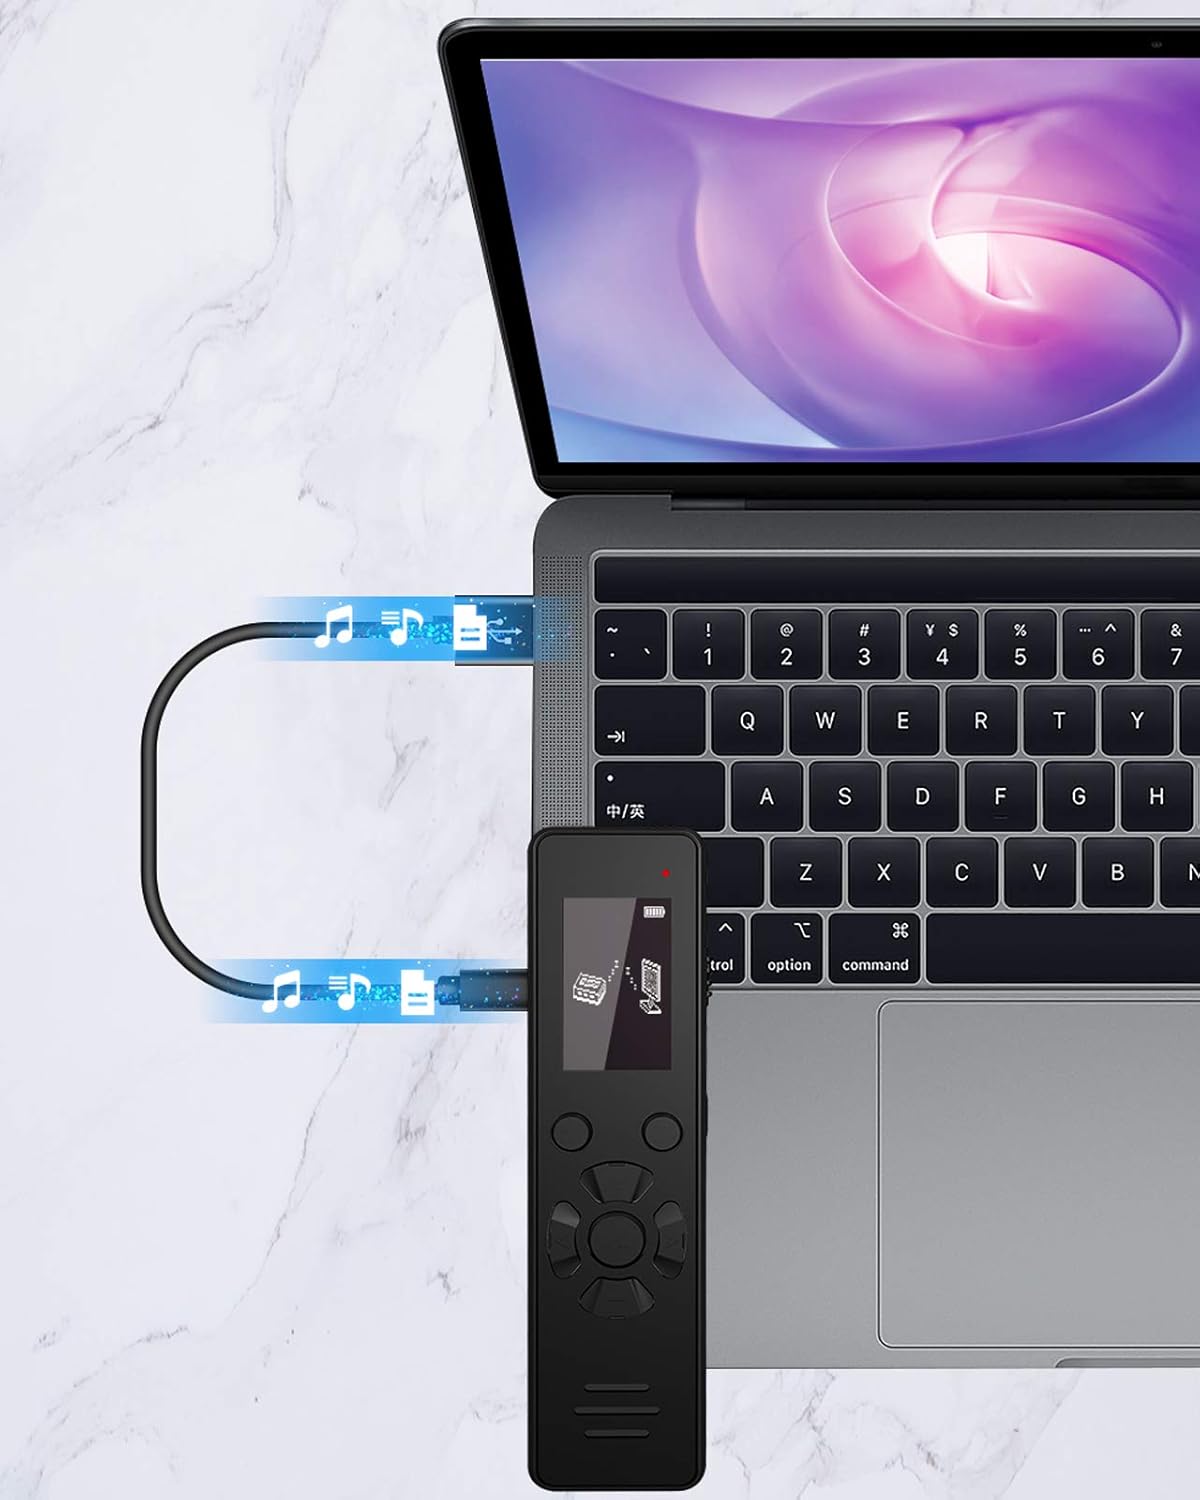
Obrázek 8: File transfer to computer. The image shows the recorder connected to a laptop via a USB-C cable, indicating the ease of transferring recorded audio files.
8. Using as MP3 Player
The V619 can also function as an MP3 player. Transfer your music files to a folder named 'Music' on the device's internal storage. You can then select the 'Music' option from the main menu to play your audio files. Headphones can be connected to the 3.5mm jack for private listening.
Údržba
- Čištění: K čištění zařízení používejte měkký, suchý hadřík. Nepoužívejte tekuté čisticí prostředky ani aerosoly.
- Péče o baterie: Chcete-li prodloužit životnost baterie, vyhněte se častému úplnému vybíjení zařízení. Pravidelně jej nabíjejte, i když jej delší dobu nepoužíváte.
- Skladování: Uchovávejte diktafon na chladném a suchém místě mimo dosah přímého slunečního záření, extrémních teplot a vlhkosti.
- Záloha dat: Pravidelně zálohujte důležité nahrávky do počítače, abyste předešli ztrátě dat.
Odstraňování problémů
Zařízení se nezapíná:
- Ujistěte se, že je baterie nabitá. Připojte zařízení ke zdroji napájení a nechte jej nabíjet alespoň 30 minut, než se jej pokusíte znovu zapnout.
- Verify the REC/SAVE switch is in the 'SAVE' position before attempting to power on.
Date/Time Resetting:
- This may occur if the battery is completely drained. Recharge the device fully and reset the date and time in the settings menu.
Špatná kvalita nahrávky:
- Check the recording format and bitrate settings. Higher quality settings (e.g., WAV 1536Kbps) provide better audio.
- Ensure the built-in microphones are not obstructed.
- Adjust the microphone gain level in the settings to suit the recording environment.
- For voice activated recording (AVR), adjust the sensitivity level.
Files Not Transferring to PC:
- Ensure the USB-C cable is securely connected to both the recorder and the computer.
- Zkuste jiný port USB na počítači.
- If password protection is enabled, ensure the device is unlocked before connecting to the PC.
Specifikace
| Funkce | Detail |
|---|---|
| Číslo modelu | V619 |
| Kapacita paměti | 32 GB |
| Nahrávací formáty | Audio MP3, WAV |
| Max Recording Quality | 1536Kbps (WAV) |
| Typ baterie | 1 Lithium Polymer (součástí balení) |
| Battery Life (General Use) | Až 12 hodin |
| Výdrž baterie (nahrávání) | Up to 45 Hours (depending on settings) |
| Velikost obrazovky | 1.1 palce |
| Rozměry produktu | 3.94 x 0.47 x 0.39 palce |
| Hmotnost položky | 5.6 unce |
| Hardwarové rozhraní | 3.5mm audio, USB typu C |
| Tvarový faktor mikrofonu | Vestavěný |
| Jack pro sluchátka | 3.5 milimetru |
| Výrobce | Aomago |
Záruka a podpora
For warranty information or technical support, please refer to the documentation included with your purchase or visit the official Aomago website. You can also contact Aomago customer service directly for assistance with product inquiries or issues.
Official Aomago Store: Aomago Store on Amazon


