1. Důležité bezpečnostní informace
Please read and understand all safety information before assembling and using this product. Failure to follow these instructions may result in injury or product damage.
- Maximum static load capacity of the bench: 200 kg (440 lbs).
- Maximum static load capacity of each compartment or drawer: 10 kg (22 lbs).
- Protect the wooden bench from water and excessive moisture.
- Ensure the bench is stable and properly assembled to prevent tipping.
- Během montáže udržujte malé části mimo dosah dětí.
2. Obsah balení
Před zahájením montáže se ujistěte, že jsou všechny níže uvedené díly přítomny a nepoškozené. Pokud některé díly chybí nebo jsou poškozené, kontaktujte zákaznickou podporu.
- 1 x Shoe Bench (main components)
- 1 x Accessory Package (screws, dowels, pins, etc.)
- 1 x Návod k obsluze (tento dokument)

Image: Detailed diagram of the shoe bench with dimensions for each section and the drawer.
3. Nastavení a montáž
Assembly is required for this shoe bench. Follow the numbered steps provided in the accessory package's instruction sheet. It is recommended to assemble the unit on a soft, clean surface to prevent scratches.
- Rozbalte komponenty: Carefully remove all parts from the packaging. Verify against the parts list in the included instruction sheet.
- Identify Numbered Parts: The components are typically numbered for easy identification. Match them with the diagrams in the assembly guide.
- Sestavte rám: Begin by connecting the main frame pieces using the provided hardware (dowels, screws). Ensure all connections are secure but do not overtighten until the unit is fully assembled.
- Instalace polic: Insert the shelf support pins into the pre-drilled holes. Place the shelves onto these pins. Ensure they are seated firmly.
- Sestavení a instalace zásuvky: Follow the specific instructions for assembling the drawer. Once assembled, slide it into its designated slot.
- Připevnit polštář: The upholstered cushion attaches to the top surface of the bench. It typically uses Velcro fasteners for secure placement and easy removal.
- Konečné utažení: Jakmile jsou všechny součásti na místě, jemně utáhněte všechny šrouby, abyste zajistili stabilitu. Nepřetahujte je.
- Umístění: Position the assembled shoe bench in its desired location, ensuring it is on a level surface.

Image: The assembled shoe bench in a home environment, demonstrating its use.
4. Návod k obsluze
The VASAGLE shoe bench is designed for convenient shoe storage and comfortable seating.
4.1. Úschova bot
- Otevřené přihrádky: Utilize the various open compartments to store shoes of different sizes. The design includes both smaller and larger sections to accommodate various footwear, including boots.
- Výstavce: The integrated drawer is suitable for storing smaller items such as keys, shoe care accessories, or other personal belongings.
4.2. Seating Function
- The upholstered top provides a comfortable surface for sitting while putting on or taking off shoes.
- The bench is designed to comfortably seat up to two individuals.

Obrázek: Podrobný view of the shoe bench's storage compartments, drawer, and cushioned seat.
5. Údržba a péče
Proper care will extend the life and appearance of your VASAGLE shoe bench.
- Dřevěné povrchy: Wipe the wooden surfaces with a dry cloth to remove dust and dirt. Avoid using abrasive cleaners or excessive moisture.
- Potah polštáře: The cushion cover is removable and machine washable for easy cleaning. Refer to the care label on the cushion for specific washing instructions.
- Rozlití: In case of spills, wipe immediately with a clean, dry cloth to prevent staining or damage to the wood.
- Pravidelná kontrola: Pravidelně kontrolujte všechny šrouby a spoje, zda jsou pevně utažené. V případě potřeby je dotáhněte.
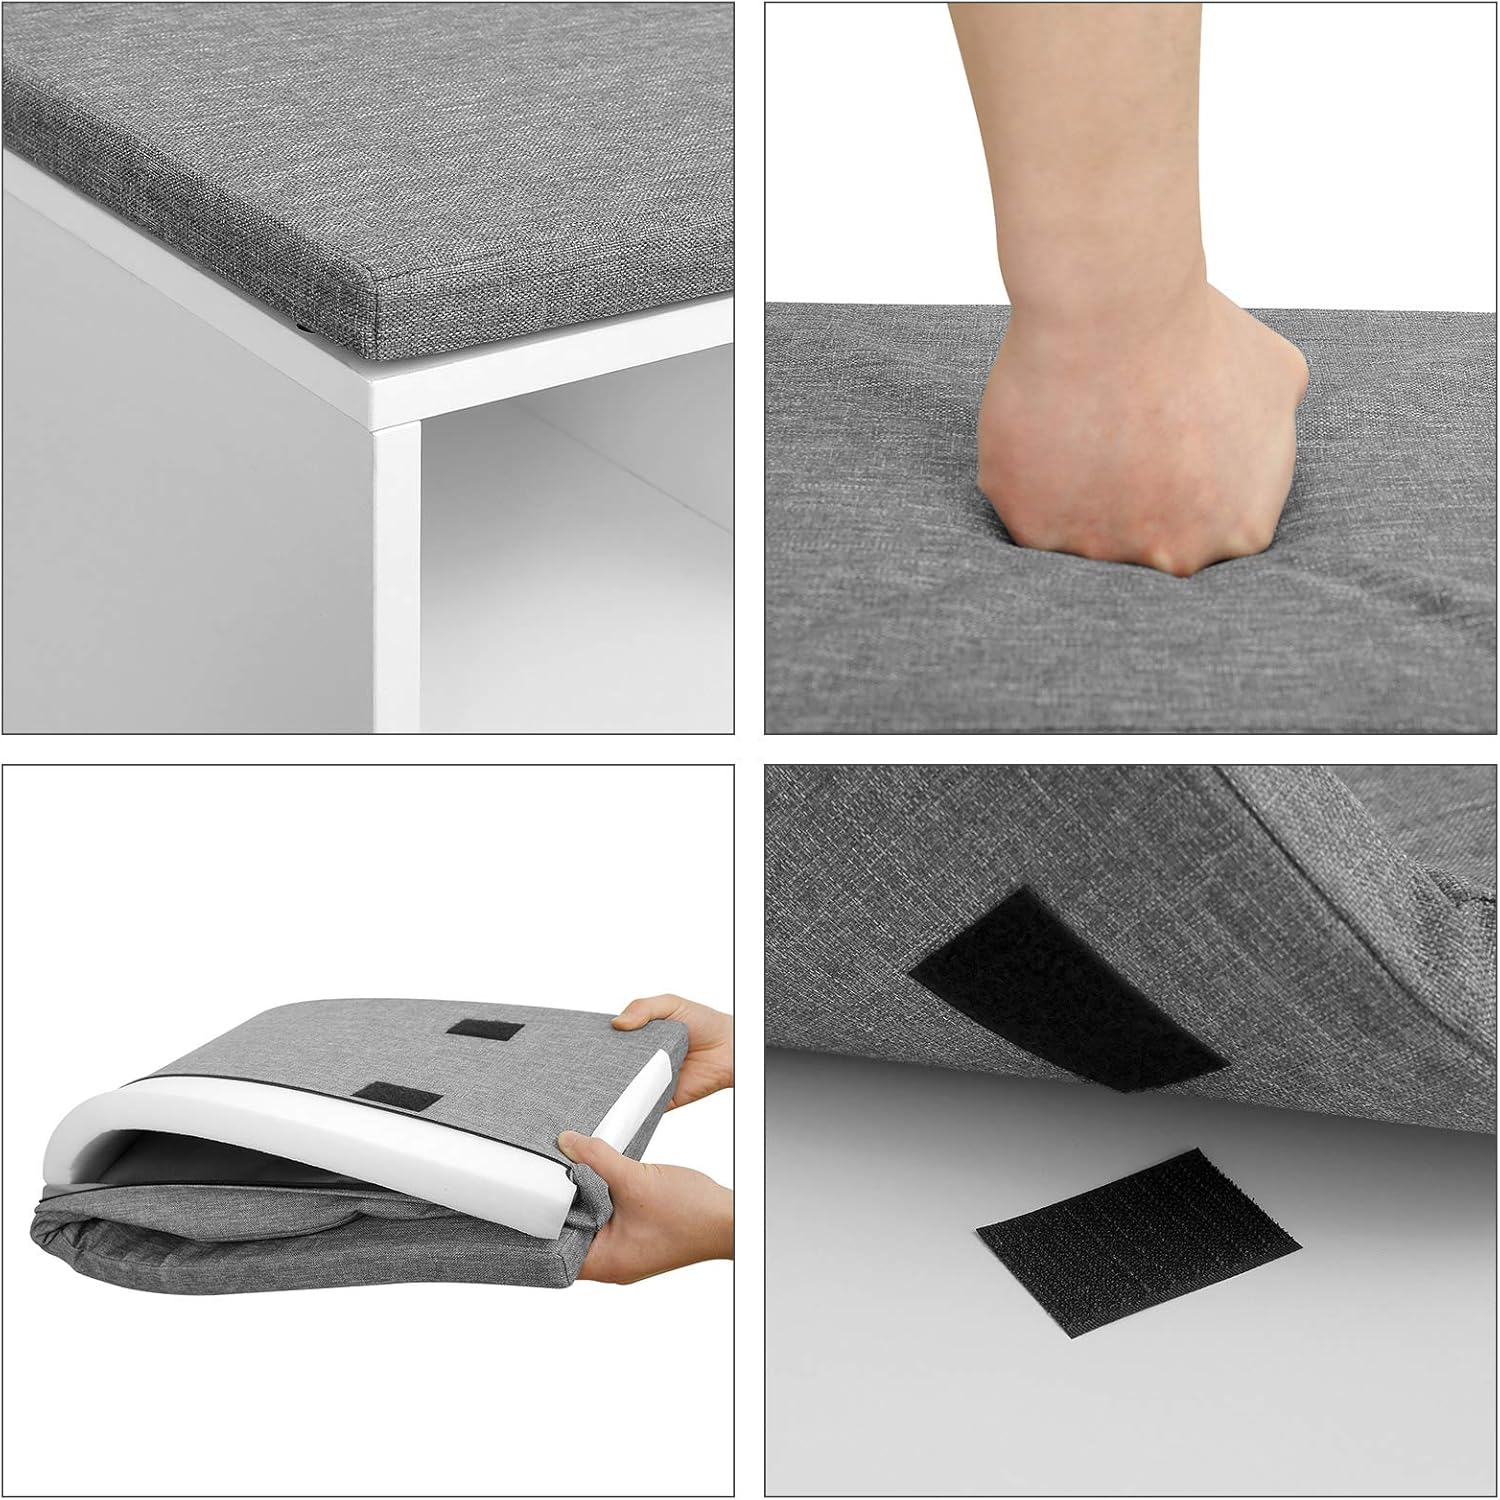
Image: Details of the cushion, highlighting its removable and washable nature with Velcro fasteners.
6. Řešení problémů
If you encounter any issues with your shoe bench, refer to the following common solutions:
| Problém | Možná příčina | Řešení |
|---|---|---|
| Lavice se zdá být vratká nebo nestabilní. | Screws are not fully tightened, or the bench is on an uneven surface. | Ensure all assembly screws are securely tightened. Move the bench to a level surface. If the issue persists, check if any parts were assembled incorrectly. |
| Shelf pins fall out. | Pins may not be fully inserted, or shelves are overloaded. | Push the shelf pins firmly into their holes. Ensure the shelves are not overloaded beyond the 10 kg capacity per compartment. |
| Zásuvka neklouže hladce. | Kolejnice zásuvek jsou špatně zarovnané nebo zablokované. | Remove the drawer and check the runners for any obstructions or damage. Ensure the drawer was assembled correctly and the runners are aligned. |
7. Specifikace
| Funkce | Detail |
|---|---|
| Číslo modelu | LHS24WT |
| Rozměry produktu (D x Š x V) | 104 x 30 x 48 cm (40.9 x 11.8 x 18.9 palce) |
| Hmotnost položky | 18.5 kg (40.8 lb) |
| Materiál | E1-grade particleboard, foam padding, imitation linen seat cover |
| Barva | White + Grey (cushion) |
| Max. statická nosnost (lavice) | 200 kg (440 lb) |
| Max. Static Load Capacity (Compartment/Drawer) | 10 kg (22 lb) |
| Montáž Vyžadována | Ano |
| Pokyny pro péči | Wipe with a dry cloth (for bench), machine washable (for cushion cover) |
8. Záruka a podpora
Specific warranty information for this product is not provided in the available data. For warranty details or customer support, please refer to the documentation included with your purchase or contact VASAGLE customer service directly through their official webna webu nebo u prodejce, kde byl produkt zakoupen.
Pro další pomoc prosím navštivte Obchod VASAGLE na Amazonu.