Zavedení
Děkuji za nákupasing the Smart Starsat SR-90000 XTREAM HD DVB-S2 Satellite Receiver. This device is designed to provide a high-quality viewing experience with its H.265 HEVC (High Efficiency Video Coding) support and Full HD 1080P output. This manual will guide you through the setup, operation, and maintenance of your new satellite receiver, ensuring optimal performance and longevity.
Bezpečnostní informace
- Před použitím zařízení si pečlivě přečtěte všechny pokyny.
- Nevystavujte přijímač dešti ani vlhkosti, abyste předešli požáru nebo úrazu elektrickým proudem.
- Zajistěte řádné větrání kolem jednotky, abyste zabránili přehřátí.
- Neotevírejte casing; veškerý servis svěřte kvalifikovanému personálu.
- Používejte pouze napájecí adaptér dodaný s jednotkou.
- Chraňte zařízení před přímým slunečním zářením, zdroji tepla a silnými magnetickými poli.
Obsah balení
Zaškrtněte prosím políčko u následujících položek:
- Smart Starsat SR-90000 XTREAM Receiver
- 2 Remote Controls (one standard, one with WiFi technology)
- WiFi anténa
- AV kabel
- Napájecí adaptér
- Uživatelská příručka (tento dokument)
- Záruční list
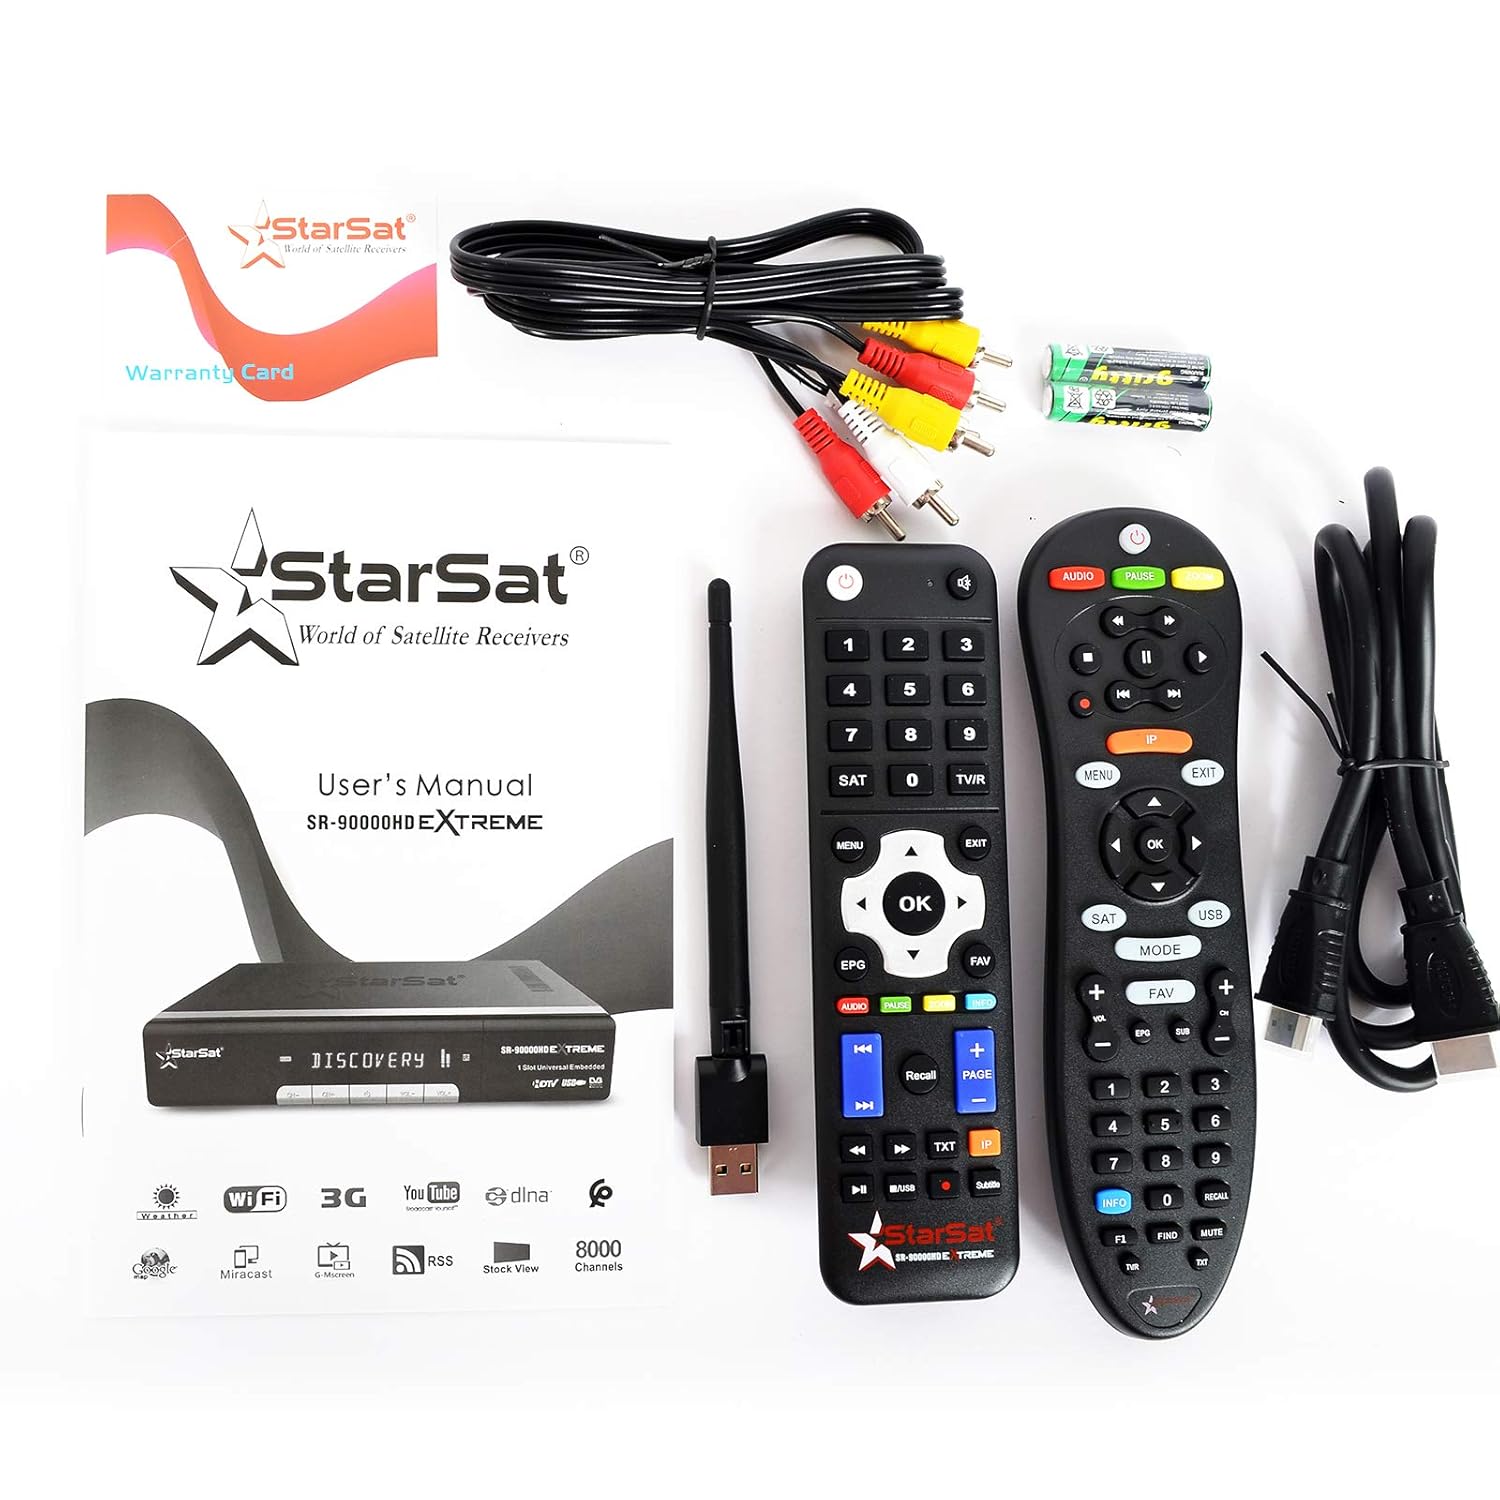
Image: All items included in the Smart Starsat SR-90000 XTREAM Receiver package.
Konec produktuview
Přední panel
The front panel of the SR-90000 XTREAM receiver features a display for channel numbers and status indicators, along with basic control buttons for power, channel up/down, and volume. A USB port is also accessible on the front for convenient media playback or software updates.
Připojení zadního panelu
The rear panel provides all necessary ports for connecting your receiver to a television, satellite dish, and network.

Image: Rear panel connections of the SR-90000 XTREAM Receiver.
Key Ports:
- TUNER 1 IN / TUNER 2 IN: Connect your satellite dish cables here.
- USB 2.0: Two USB ports for external storage devices (e.g., USB drives for media playback or recording).
- DV OUT: HDMI výstup pro připojení k televizoru.
- AUDIO L/P, VIDEO: RCA (AV) outputs for older televisions.
- KOAXIÁLNÍ: Digitální audio výstup.
- RS232: Servisní port.
- LAN: Ethernetový port pro kabelové připojení k síti.
- NAPÁJENÍ: Připojte napájecí adaptér.
- Přepínač ON/OFF: Hlavní vypínač.
Nastavení
1. Připojení k televizoru
- Ensure both your TV and the receiver are powered off.
- For best quality, connect an HDMI cable from the DV OUT portu na receiveru ke vstupu HDMI na vašem televizoru.
- Alternatively, use the supplied AV cable to connect the AUDIO L / P a VIDEO porty na receiveru k odpovídajícím vstupům na vašem televizoru.
2. Connecting to Your Satellite Dish
- Connect the coaxial cable(s) from your satellite dish LNB(s) to the TUNER 1 IN a/nebo TUNER 2 IN ports on the receiver.
3. Connecting to the Network (Optional)
- Kabelové připojení: Připojte ethernetový kabel z routeru k LAN portu na přijímači.
- Bezdrátové připojení: Screw the provided WiFi antenna into the designated port on the receiver. You will configure the wireless connection in the system settings after initial power-on.
4. Zapnutí a počáteční nastavení
- Connect the power adapter to the receiver and then to a power outlet.
- Převrátit ON/OFF switch on the rear panel to the 'ON' position.
- Turn on your TV and select the correct HDMI or AV input source.
- Follow the on-screen instructions for initial setup, which typically includes language selection, time zone, and satellite configuration/channel scan.
Návod k obsluze
Funkce dálkového ovládání
The receiver comes with two remote controls. The primary remote offers comprehensive control over all receiver functions. Familiarize yourself with the button layout for easy navigation.
Image: The two remote controls provided with the receiver.
- MOC: Turns the receiver on/off or to standby.
- JÍDELNÍ LÍSTEK: Přístup k hlavní nabídce s nastaveními a funkcemi.
- OK/ENTER: Potvrzuje výběr nebo zobrazuje seznam kanálů.
- TLAČÍTKA ŠIPEK: Navigate through menus and channels.
- VÝSTUP: Returns to the previous screen or live TV.
- VOL +/-: Upravuje hlasitost.
- CH +/-: Mění kanály.
- EPG: Zobrazí elektronického programového průvodce.
- USB: Accesses media filez připojeného zařízení USB.
- OBLÍBENÉ: Přístup k seznamům oblíbených kanálů.
- AUDIO: Changes audio tracks or language.
- TXT: Funkce teletextu.
Navigace v nabídce
Stiskněte tlačítko MENU button on your remote to access the main menu. Use the arrow buttons to navigate through options such as Installation, Channel Manager, System Settings, Media Center, and Network Settings. Press OK vyberte možnost a EXIT vrátit se.
Správa kanálů
In the Channel Manager menu, you can perform tasks such as:
- Skenování kanálu: Hledat new satellite channels.
- Upravit kanály: Přesouvání, mazání nebo uzamčení kanálů.
- Favorite Groups: Create custom lists of your preferred channels.
Přehrávání médií
Insert a USB storage device into one of the USB ports. Navigate to the Media Center menu to browse and play supported media files (video, audio, images). The receiver supports DLNA for streaming content from compatible devices on your local network.
Funkce internetu
Connect your receiver to the internet via LAN or WiFi (configure in Network Settings) to access features like YouTube and other online services.
Údržba
- Čištění: K čištění vnější strany přijímače používejte měkký, suchý hadřík. Nepoužívejte tekuté čisticí prostředky ani aerosoly.
- Větrání: Ensure that the ventilation openings on the receiver are not blocked to prevent overheating.
- Aktualizace softwaru: Pravidelně kontrolujte informace od výrobce website or the receiver's system settings for available software updates to ensure optimal performance and access to new features.
Odstraňování problémů
| Problém | Možná příčina | Řešení |
|---|---|---|
| Žádný obraz ani zvuk | Incorrect TV input selected; loose cables; receiver not powered on. | Check TV input source; ensure all cables (HDMI/AV, power) are securely connected; power on the receiver. |
| Dálkové ovládání nefunguje | Dead batteries; obstruction between remote and receiver; remote not pointed correctly. | Replace batteries; remove obstructions; point remote directly at the receiver's IR sensor. |
| Žádný satelitní signál | Dish misalignment; loose LNB cable; bad weather. | Check LNB cable connection; ensure dish is properly aligned (may require professional assistance); wait for weather to clear. |
| Nelze se připojit k WiFi | Incorrect password; WiFi antenna not connected; router issues. | Verify WiFi password; ensure WiFi antenna is securely attached; restart your router. |
Specifikace
| Funkce | Popis |
|---|---|
| Model | SR-90000 |
| Dekódování videa | H.265 HEVC, Full HD 1080P |
| Typ tuneru | DVB-S2 (Double Tuner) |
| USB porty | 2 2.0 (USB XNUMX) |
| Konektivita | WiFi (via included antenna), LAN (Ethernet), IR |
| Zvukový výstup | AC/DC, Coaxial, Audio L/R |
| Video výstup | HDMI (DV OUT), Video RCA |
| Podporované funkce | YouTube, DLNA, EPG, Multi Language, DISEQC1.0 / 1.1, PAL/NTSC |
| Kompatibilní zařízení | Televize |
| Hmotnost položky | 1.46 kg |
| Rozměry (balení) | 31.3 x 29.9 x 7.7 cm |
Záruka a podpora
Your Smart Starsat SR-90000 XTREAM Receiver comes with a 1-year service warranty. For technical support, further information, or to check for software updates, please visit the official Starsat webmísto:

Image: Product box highlighting features and the official Starsat webstránky pro podporu.