Zavedení
This manual provides detailed instructions for the installation, operation, and maintenance of your GIGABYTE GA-A320M-H AMD AM4 motherboard. This motherboard is designed to support AMD Ryzen 3000, 2000, and 1000 series processors, as well as Athlon processors with Radeon Vega Graphics and 7th Gen A-series/Athlon X4 processors. It features a Hybrid Digital VRM Solution, NVMe PCIe 3.0 x4 M.2 slot, and Realtek GbE LAN. Please read this manual thoroughly before proceeding with installation to ensure proper setup and functionality.

Obrázek 1: GIGABYTE GA-A320M-H Motherboard and its retail packaging. This image provides an overview of the product as it appears when unboxed.
Klíčové vlastnosti
- Podpora procesoru: Compatible with AMD 3rd Gen Ryzen, 2nd Gen Ryzen, 1st Gen Ryzen, 2nd Gen Ryzen with Radeon Vega Graphics, 1st Gen Ryzen with Radeon Vega Graphics, Athlon with Radeon Vega Graphics, 7th Gen A-series, and Athlon X4 Processors.
- Paměť: Features Dual Channel Non-ECC Unbuffered DDR4 memory support with 2 DIMM slots, supporting up to 32GB RAM.
- Dodávka energie: Equipped with a Hybrid Digital VRM Solution utilizing Low RDS(on) MOSFETs for stable power delivery.
- Skladování: Includes an Ultra-Fast NVMe PCIe 3.0 x4 & SATA Mode M.2 slot for high-speed storage devices.
- Chlazení: Smart Fan 5 technology with 5 temperature sensors and 2 hybrid fan headers for optimized cooling control.
- Konektivita: Realtek GbE LAN with cFosSpeed internet accelerator software for improved network performance.
Nastavení a instalace
Before beginning installation, ensure your system is powered off and disconnected from the mains. Handle the motherboard by its edges to avoid static discharge.
1. Základní deska přesview

Obrázek 2: Shora dolů view of the GIGABYTE GA-A320M-H motherboard, highlighting the CPU socket, DIMM slots, PCIe slots, and M.2 slot. This perspective is useful for identifying component locations during installation.
Familiarize yourself with the layout of the motherboard, including the CPU socket (AM4), DDR4 DIMM slots, PCIe expansion slots, M.2 slot, SATA ports, and various headers for front panel connections.
2. Instalace procesoru
- Najděte patici procesoru AM4 na základní desce.
- Zvedněte páku zatížení na boku zásuvky.
- Carefully align the triangular mark on your AMD processor with the corresponding mark on the socket.
- Gently place the CPU into the socket without forcing it. It should sit flush.
- Spusťte páku zatížení, abyste zajistili procesor na místě.
3. Instalace chladiče procesoru
Follow the instructions provided with your specific CPU cooler. Ensure thermal paste is applied correctly between the CPU and the cooler's base. Connect the CPU fan cable to the "CPU_FAN" header on the motherboard.
4. Instalace paměti RAM
- Otevřete klipy na obou koncích slotů DDR4 DIMM.
- Zarovnejte zářez na paměťovém modulu DDR4 s výstupkem ve slotu DIMM.
- Pevně zatlačte na oba konce paměťového modulu, dokud klipsy nezacvaknou na místo.
- For dual-channel operation, refer to the motherboard manual for recommended slot population (typically slots 1 and 2, or 2 and 4).
5. Instalace M.2 SSD disku
- Najděte slot M.2 na základní desce.
- Remove the M.2 screw and standoff from the motherboard.
- Vložte disk M.2 SSD do slotu pod úhlem 30 stupňů.
- Gently push the SSD down and secure it with the screw and standoff.
6. Instalace grafické karty (PCIe)
- Otevřete pojistku na slotu PCIe x16.
- Align your graphics card with the slot and press down firmly until it is fully seated and the retention clip snaps shut.
- Připevněte grafickou kartu k skříni počítače šroubem.
- Připojte všechny potřebné napájecí kabely PCIe od zdroje napájení ke grafické kartě.
7. Připojení napájení
- Připojte 24pinový konektor hlavního napájení ATX ze zdroje k odpovídajícímu konektoru na základní desce.
- Connect the 8-pin (or 4-pin) ATX 12V CPU power connector to the header near the CPU socket.
8. Přední panel a vstupně/výstupní připojení

Obrázek 3: Rear I/O panel of the GIGABYTE GA-A320M-H motherboard, showing various ports including USB, LAN, audio, HDMI, and DVI. This panel is where external devices connect.
Connect the front panel cables from your PC case (Power Switch, Reset Switch, HDD LED, Power LED) to the corresponding headers on the motherboard. Also connect USB 2.0/3.0 headers and audio headers. Refer to the detailed pinout diagram in the full GIGABYTE manual for precise connections.
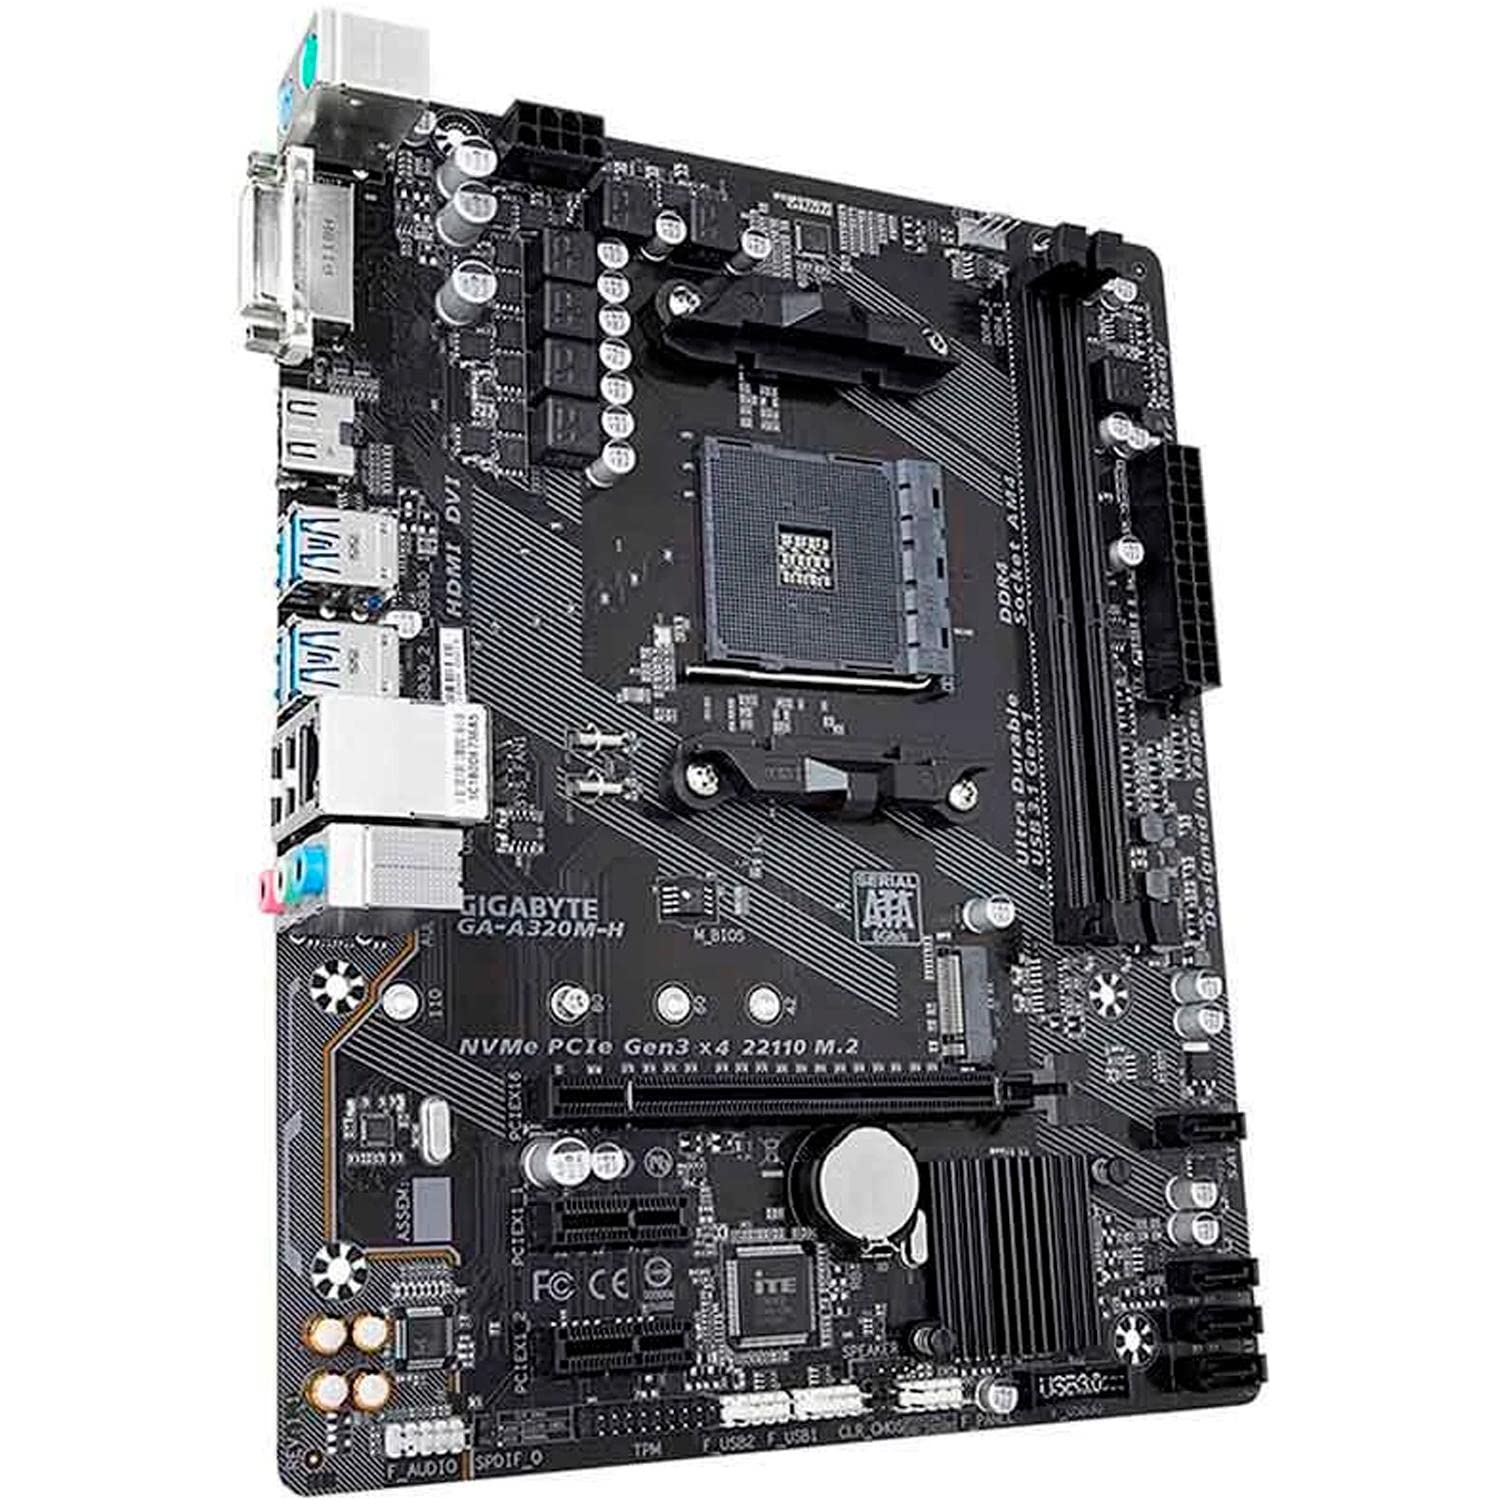
Obrázek 4: Úhlové view of the GIGABYTE GA-A320M-H motherboard, showcasing the various ports and connectors, including the M.2 slot and rear I/O. This view helps in visualizing component placement.
Návod k obsluze
1. Počáteční spuštění a nastavení BIOSu/UEFI
- Po instalaci a připojení všech komponent zapněte systém.
- Stiskněte tlačítko DEL opakovaně stiskněte klávesu během spouštění pro vstup do nástroje pro nastavení systému BIOS/UEFI.
- Configure boot order, enable XMP for memory (if applicable), and set other system preferences. Save changes and exit.
2. Instalace operačního systému a ovladačů
- Vložte instalační médium operačního systému (USB disk nebo DVD).
- Postupujte podle pokynů na obrazovce a nainstalujte operační systém.
- Once the OS is installed, install the latest drivers for your motherboard chipset, LAN, audio, and any other integrated components from the GIGABYTE webnebo z dodaného CD/USB s ovladači.
Údržba
- Odstranění prachu: Regularly clean your PC case and motherboard components using compressed air to prevent dust buildup, which can affect cooling and performance. Ensure the system is powered off and unplugged before cleaning.
- Aktualizace BIOSu/UEFI: Pravidelně kontrolujte GIGABYTE website for BIOS/UEFI updates. Updates can improve system stability, compatibility, and performance. Follow the instructions provided by GIGABYTE carefully when performing a BIOS update.
Odstraňování problémů
Pokud narazíte na problémy, zvažte následující běžné kroky pro řešení potíží:
- Bez displeje:
- Ujistěte se, že kabely monitoru jsou bezpečně připojeny ke grafické kartě nebo základní desce (pokud používáte integrovanou grafickou kartu).
- Ověřte, zda je grafická karta správně usazena ve slotu PCIe a zda jsou připojeny všechny potřebné napájecí kabely.
- Zkuste znovu osadit moduly RAM.
- System Won't Boot:
- Zkontrolujte všechna připojení napájení (24pinový ATX, 8pinový CPU, napájení PCIe).
- Ensure CPU and RAM are correctly installed.
- Clear CMOS (refer to motherboard manual for jumper location or battery removal method).
- Periferní zařízení nebylo detekováno:
- Ověřte, zda je zařízení správně připojeno.
- Nainstalujte nebo aktualizujte příslušné ovladače.
- Zkontrolujte nastavení systému BIOS/UEFI a ujistěte se, že je port nebo zařízení povoleno.
- Nestabilita/pády systému:
- Ujistěte se, že všechny ovladače jsou aktuální.
- Zkontrolujte teploty CPU a GPU.
- Spusťte diagnostické nástroje paměti a zkontrolujte chyby paměti RAM.
- Consider updating the BIOS/UEFI.
Specifikace
| Funkce | Detail |
|---|---|
| Značka | GIGABYTE |
| Model | GA-A320M-H |
| Zásuvka CPU | Zásuvka AM4 |
| Kompatibilní procesory | AMD 1st, 2nd, 3rd Generation Ryzen, AMD A-Series, AMD Athlon |
| Čipová sada | AMD A320 |
| Technologie paměti RAM | DDR4 |
| Paměťové sloty | 2 x DDR4 DIMM sloty |
| Maximální kapacita RAM | 32 GB |
| Rozhraní grafické karty | PCI Express |
| Rozhraní úložiště | NVMe PCIe 3.0 x4 M.2, SATA 6Gb/s |
| LAN | Realtek GbE LAN |
| USB porty | Total 4 (Rear I/O, plus internal headers) |
| Rozměry produktu | 24.4 x 19.5 x 0.5 cm |
| Hmotnost položky | 100 g |
Podpora a záruka
Technická podpora
For further technical assistance, driver downloads, or BIOS updates, please visit the official GIGABYTE support webmísto: Podpora GIGABYTE
Záruka na produkt
This GIGABYTE motherboard is covered by a manufacturer's warranty. Please refer to the warranty card included with your product or visit the GIGABYTE webPodrobné záruční podmínky platné pro váš region naleznete na webových stránkách. Uschovejte si doklad o koupi pro případ reklamace.


