Zavedení
Thank you for choosing the iTOMA CKS801 Alarm Clock. This device combines a digital alarm clock with convenient features such as wireless charging, a USB charging port, dual alarms, an adjustable night light, and an indoor temperature and humidity display. This manual will guide you through the setup, operation, and maintenance of your new alarm clock to ensure optimal performance and user experience.
Vlastnosti produktu
- Funkce bezdrátového nabíjení: Compatible with most universal wireless charging enabled mobile phones.
- USB nabíjecí port: Provides an additional port for charging other mobile devices.
- Dual Alarm with Snooze: Set two independent alarms with a 9-minute snooze function (up to 6 times).
- Nastavitelné noční světlo: Features two night light modes for ambient lighting.
- 4-Level Display Dimmer: Adjust the brightness of the LED display.
- Indoor Temperature and Humidity Display: Shows ambient temperature (Celsius/Fahrenheit) and relative humidity.
- 12/24hodinový formát času: Select your preferred time display format.
Rozložení zařízení
Familiarize yourself with the buttons and display elements of your iTOMA CKS801 alarm clock.
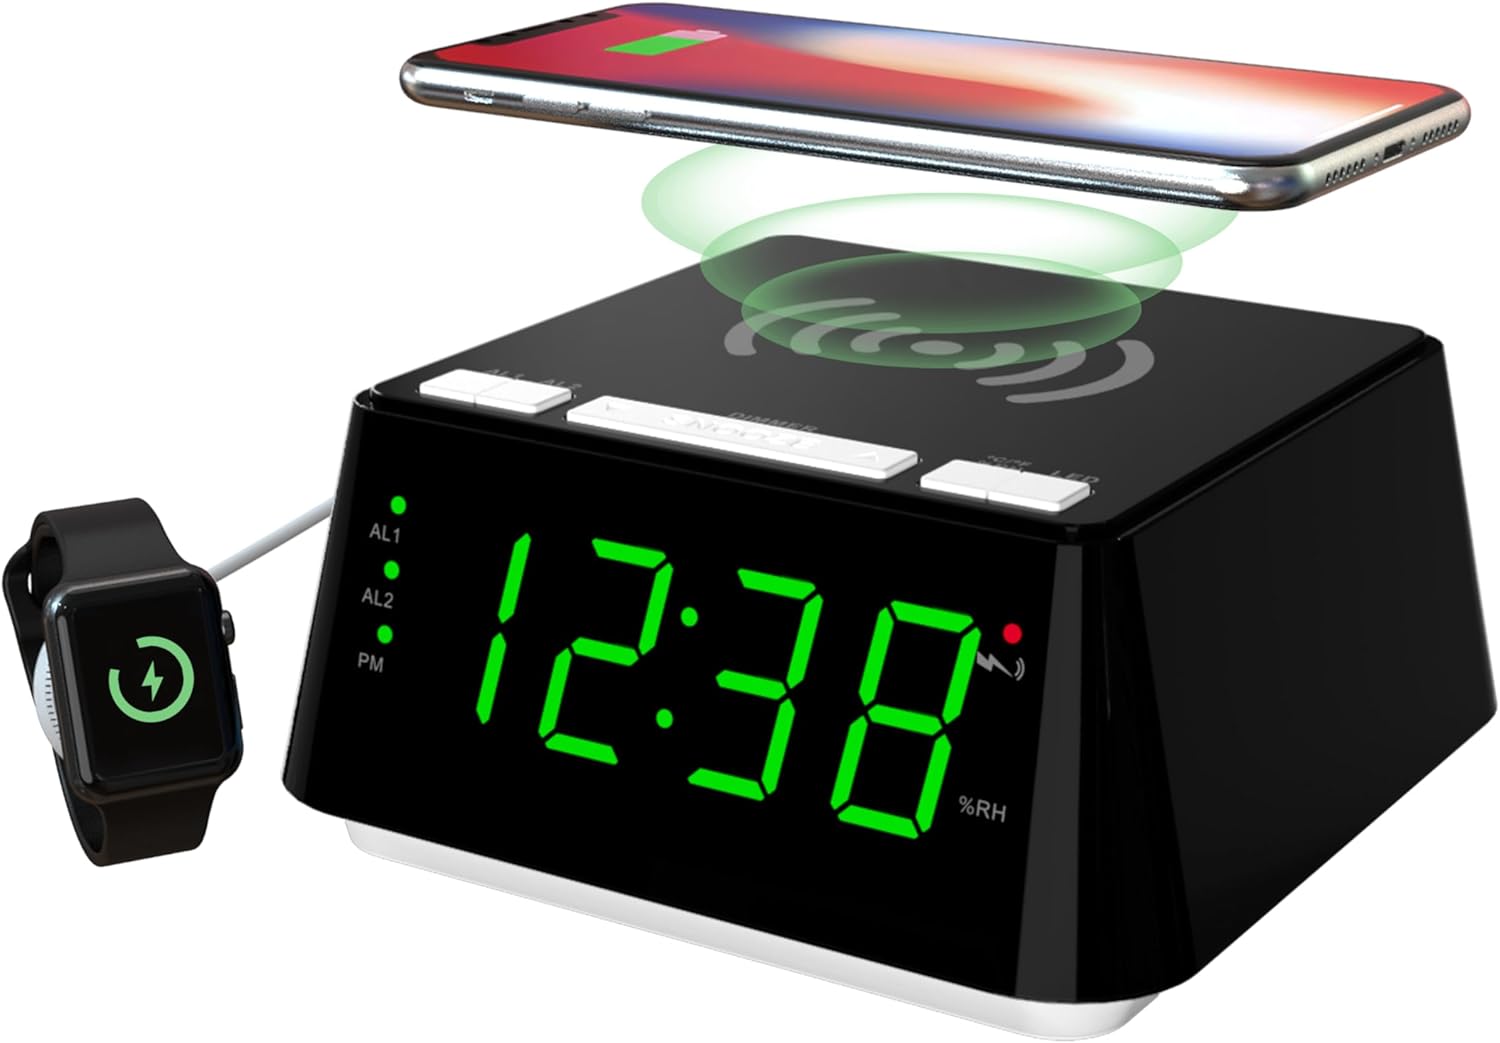
Obrázek 1: Přední a horní view of the iTOMA CKS801 alarm clock, showing the digital time display, alarm indicators (AL1, AL2), PM indicator, humidity percentage (%RH), and the wireless charging pad on top. A smartphone is shown wirelessly charging, and a smartwatch is connected to the USB port.
- Horní panel: Wireless charging pad, SNOOZE/DIMMER button, AL1/AL2 buttons, °C/°F/%RH button, LED (Night Light) button.
- Přední displej: Large LED display showing time, AL1/AL2 indicators, PM indicator, temperature, and humidity.
- Zadní panel: Power input, USB charging port.
Nastavení
- Připojení napájení: Connect the provided power adapter to the DC input port on the back of the alarm clock and then plug it into a standard wall outlet. The display will light up.
- Počáteční nastavení času: Upon first power-up, the clock may display a default time. Refer to the "Time Setting" section under Operating Instructions to set the correct time.
Návod k obsluze
1. Nastavení času
- Stiskněte a podržte NASTAVENÍ ČASU button (if available, otherwise use a combination of buttons, e.g., SNOOZE/DIMMER for setting mode and AL1/AL2 for adjustment).
- Použijte AL1 or AL2 buttons (or dedicated UP/DOWN buttons if present) to adjust the hour.
- Stiskněte tlačítko NASTAVENÍ ČASU button again to move to minute adjustment. Use AL1 or AL2 upravit minuty.
- Stiskněte tlačítko NASTAVENÍ ČASU ještě jednou pro potvrzení a ukončení režimu nastavení času.
- Chcete-li přepnout mezi 12hodinovým a 24hodinovým formátem času, stiskněte tlačítko °C/°F/%RH button while the time is displayed. The PM indicator will appear for 12-hour format afternoon times.
2. Alarm Setting (AL1 & AL2)

Obrázek 2: Close-up of the iTOMA CKS801 display and top buttons, illustrating the dual alarm indicators (AL1, AL2) and the three alarm modes: ALL-7-DAY, WEEKDAY, and WEEKEND.
- Setting Alarm 1 (AL1):
- Stiskněte a podržte AL1 tlačítko. Zobrazení hodin bude blikat.
- Použijte SNOOZE/DIMMER button (or dedicated UP/DOWN) to adjust the alarm hour.
- Stiskněte AL1 znovu pro přechod na nastavení minut. Použijte SNOOZE/DIMMER upravit minuty.
- Stiskněte AL1 again to select the alarm mode (ALL-7-DAY, WEEKDAY, WEEKEND). Use SNOOZE/DIMMER pro cyklické přepínání režimů.
- Stiskněte AL1 once more to confirm and activate Alarm 1. The AL1 indicator will light up.
- Setting Alarm 2 (AL2): Follow the same steps as for AL1, using the AL2 tlačítko.
- Aktivace/deaktivace alarmů: Krátce stiskněte AL1 or AL2 button to toggle the respective alarm on or off. The AL1/AL2 indicator will show its status.
- Funkce odložení: Když zazní alarm, stiskněte velké SNOOZE/DIMMER button on top to activate snooze. The alarm will pause for 9 minutes and sound again. This can be repeated up to 6 times.
- Zastavení alarmu: To stop an alarm completely, press any other button (e.g., AL1, AL2, LED) except the SNOOZE/DIMMER button. The alarm will reset for the next day.
3. Bezdrátové nabíjení

Obrázek 3: A smartphone placed on the top surface of the iTOMA CKS801 alarm clock, indicating active wireless charging with a charging icon on the phone screen.
- Place your Qi-compatible smartphone directly on the wireless charging pad located on the top surface of the alarm clock.
- Ensure the phone is centered on the charging pad for optimal charging.
- A charging indicator (usually on your phone screen) will confirm that charging has begun.
- Remove any metal objects or thick cases from your phone that may interfere with wireless charging.
4. USB nabíjecí port
- Locate the USB charging port on the rear of the alarm clock.
- Připojte nabíjecí kabel USB vašeho zařízení k tomuto portu.
- This port provides a convenient way to charge non-wireless charging devices or additional accessories like smartwatches.
5. Provoz nočního světla

Obrázek 4: The iTOMA CKS801 alarm clock displaying the time, with its integrated night light illuminated, casting a soft glow around the base.
- Stiskněte tlačítko LED button on the top panel to turn the night light on.
- Stiskněte tlačítko LED button again to cycle through the available night light modes (e.g., different brightness levels or colors, if applicable, as the description mentions "two modes").
- Stiskněte tlačítko LED button repeatedly until the night light turns off.
6. Zobrazení teploty a vlhkosti

Obrázek 5: Two iTOMA CKS801 alarm clocks side-by-side, one displaying "23C" (Celsius) and the other "73F" (Fahrenheit), demonstrating the temperature display feature.

Obrázek 6: The iTOMA CKS801 alarm clock displaying "55%RH", indicating the indoor humidity percentage.
- The alarm clock automatically displays the indoor temperature and humidity.
- To switch between Celsius (°C) and Fahrenheit (°F) for temperature, briefly press the °C/°F/%RH tlačítko.
- The humidity is displayed as a percentage (%RH).
7. Ovládání stmívání displeje

Obrázek 7: Čtyři views of the iTOMA CKS801 alarm clock, demonstrating the four levels of display brightness: High (L-3), Medium (L-2), Low (L-1), and Off.
- Krátce stiskněte SNOOZE/DIMMER button to cycle through the 4 levels of display brightness: High (L-3), Medium (L-2), Low (L-1), and Off.
- Select the brightness level that is most comfortable for your environment.
Údržba
- Čištění: Zařízení otřete měkkým, suchým hadříkem. Nepoužívejte abrazivní čisticí prostředky ani rozpouštědla.
- Umístění: Umístěte budík na stabilní, rovný povrch mimo dosah přímého slunečního záření, zdrojů tepla a vlhkosti.
- Moc: Vždy používejte originální napájecí adaptér dodaný se zařízením.
Odstraňování problémů
| Problém | Možná příčina / řešení |
|---|---|
| Zobrazení hodin je vypnuté nebo bliká. |
|
| Bezdrátové nabíjení nefunguje. |
|
| Alarm se nespustí. |
|
| Incorrect temperature/humidity reading. |
|
Specifikace
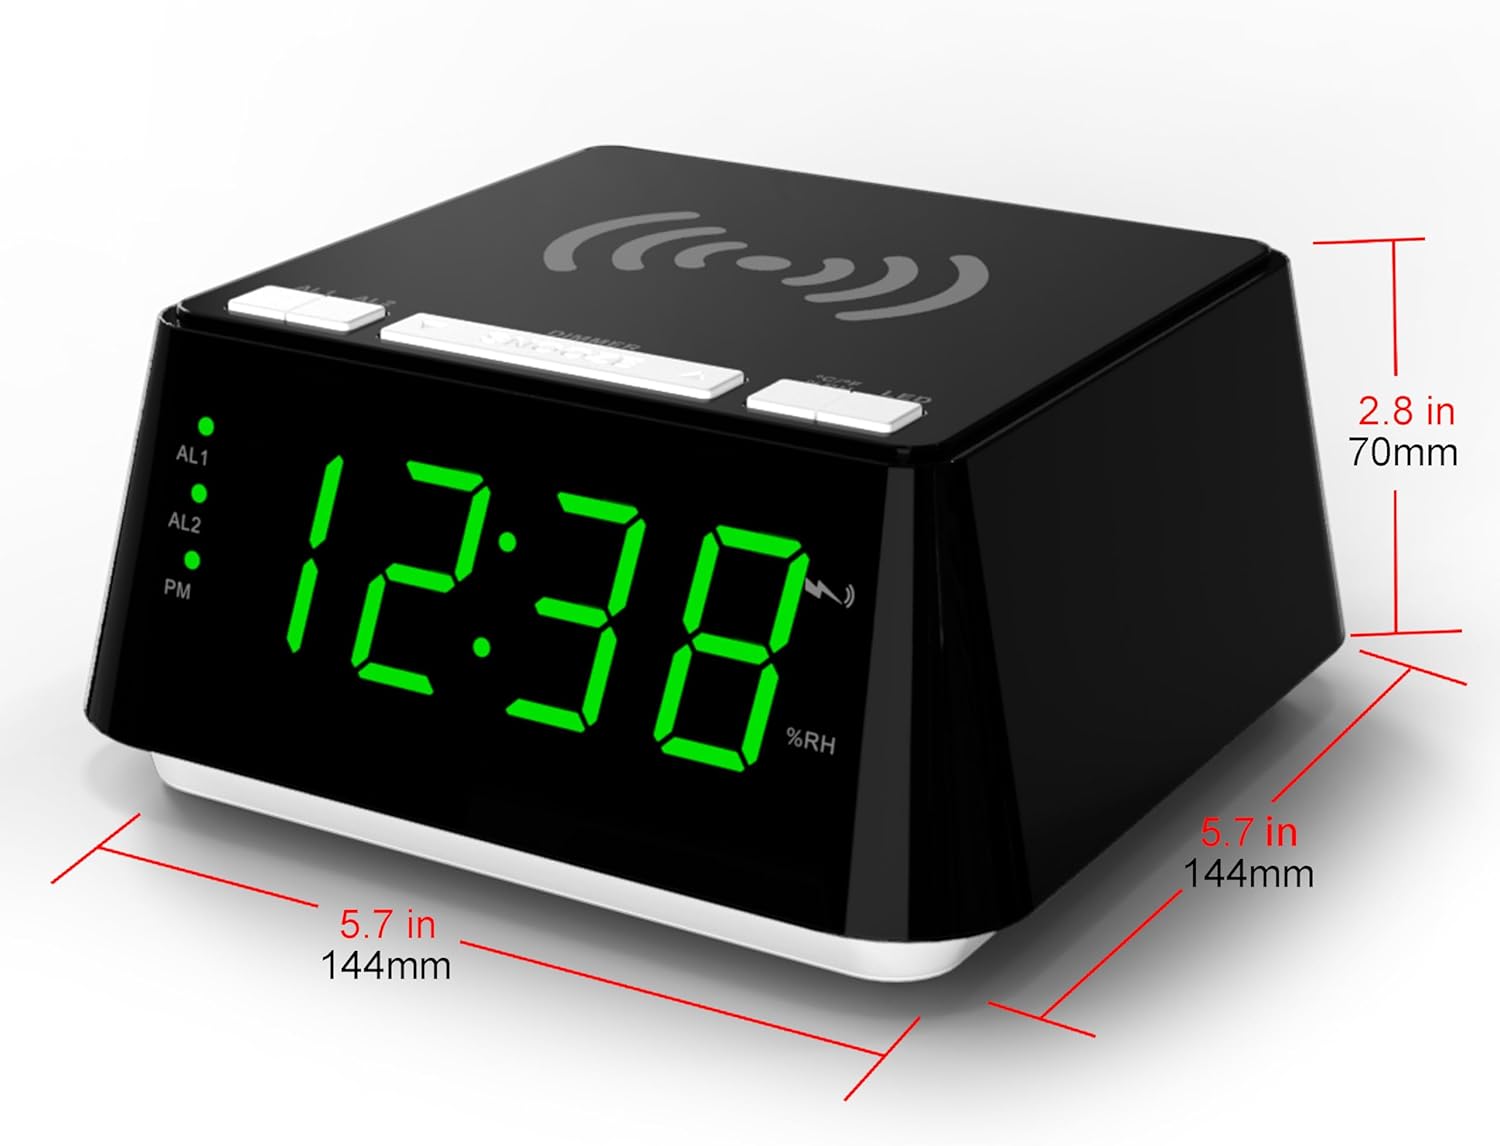
Obrázek 8: Diagram showing the dimensions of the iTOMA CKS801 alarm clock: 5.7 inches (144mm) in width, 5.7 inches (144mm) in depth, and 2.8 inches (70mm) in height.
| Funkce | Detail |
|---|---|
| Model | 801 CKS |
| Rozměry (D x Š x V) | 14.4 x 13 x 7.11 cm (5.7 x 5.1 x 2.8 palce) |
| Hmotnost | 381.02 g (0.84 lb) |
| Typ zobrazení | Digitální LED |
| Barva | Green (LED display color, product casing is black) |
| Zdroj napájení | AC Power Adapter (Batteries not required for operation) |
| Speciální funkce | Alarm, Wireless Charging, USB Charging, Night Light, Temperature Display, Humidity Display |
Záruka a podpora
For warranty information or technical support, please refer to the documentation included with your purchase or visit the official iTOMA website. If you encounter any issues not covered in this manual, please contact iTOMA customer service for assistance.


