Zavedení
The WindowFX Plus Projector is designed to display seasonal and holiday-themed videos for decoration and entertainment. This projector kit includes a 4 x 6 screen, a tripod, a remote control, and 14 pre-loaded videos. It supports both horizontal and vertical video formats to accommodate various window sizes and shapes. The animated videos are projected onto the screen, making them visible from outside your home, creating a dynamic display.
Key features include: year-round decorating fun with easily addable new content, compatibility with any window size or shape, and 14 pre-recorded videos for immediate use. This product is intended for indoor use only.
Průvodce nastavením
1. Obsah balení
Before beginning setup, ensure all components are present in the package:
- WindowFX Plus Projector
- 4 x 6 Projection Screen
- Nastavitelný stativ
- Multifunkční dálkový ovladač
- Napájecí adaptér

Image: All components of the WindowFX Plus Projector kit, including the projector, screen, tripod, remote, and power adapter, laid out on a surface.
2. Instalace obrazovky
Hang the provided 4 x 6 projection screen in the desired window. Ensure it is taut and smooth for optimal projection quality. The screen is designed to be viewed from outside the home.
3. Projector Placement and Connection
Position the projector inside your home, facing the projection screen. The included tripod can be attached to the bottom of the projector for stable placement.

Obrázek: Detail view of the bottom of the WindowFX Plus Projector, showing the threaded mount for attaching the tripod.

Image: A close-up of the flexible legs of the adjustable tripod, designed to provide stable support for the projector.
Connect the power adapter to the "DC IN" port on the side of the projector and plug it into a standard electrical outlet.

Obrázek: Boční view of the WindowFX Plus Projector, highlighting the DC IN power input and the 3.5mm audio output jack.
If connecting external devices, use the HDMI or USB ports located on the back of the projector.

Obrázek: Zadní view of the WindowFX Plus Projector, showing the HDMI input port, USB port, IR receiver, and the keystone correction dial.
4. Nastavení dálkového ovládání
Insert the required batteries (not included) into the remote control. Ensure correct polarity. The remote control is essential for navigating menus and selecting videos.

Image: The multi-function remote control for the WindowFX Plus Projector, featuring power, menu, navigation, volume, and playback buttons.
Návod k obsluze
1. Zapnutí/vypnutí
Stiskněte tlačítko Moc button on the projector's top panel or the remote control to turn the unit on or off.
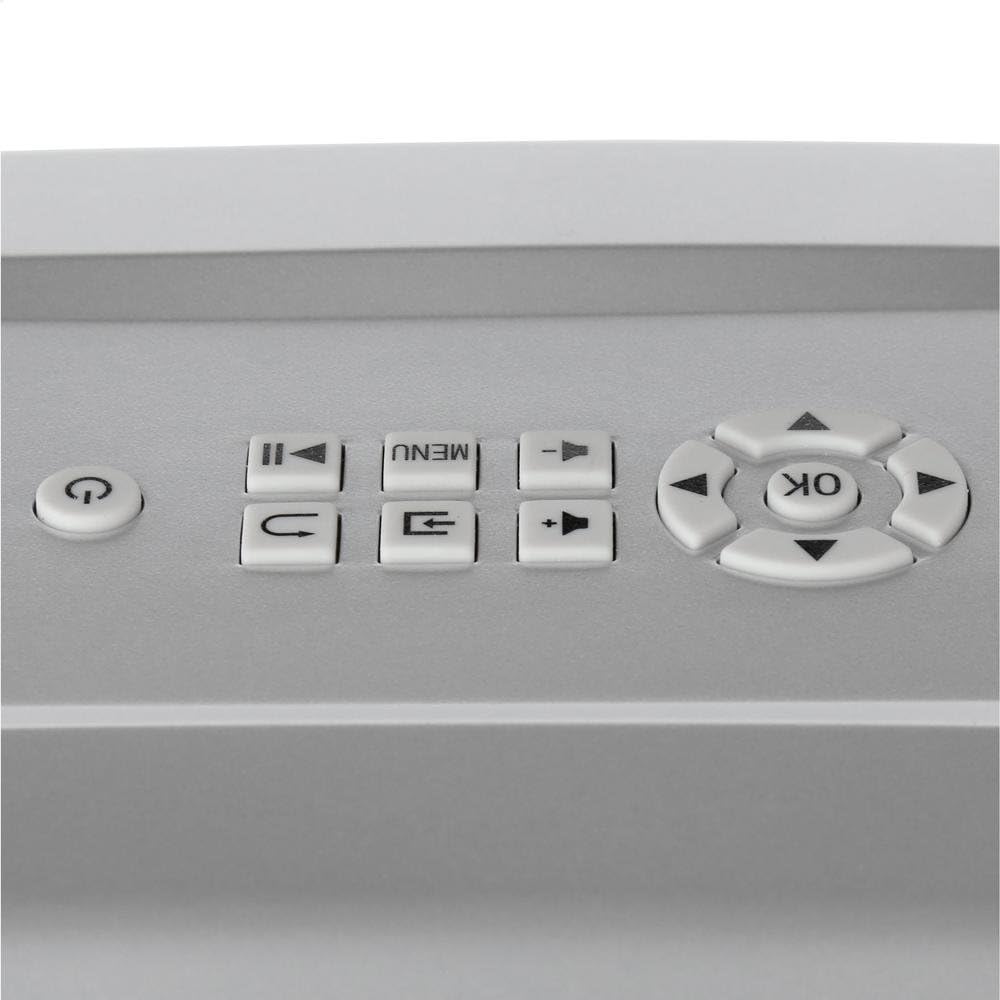
Image: Close-up of the top control panel of the WindowFX Plus Projector, showing buttons for power, menu, navigation, and playback.
2. Úprava zaostření a lichoběžníkového zkreslení
Rotate the focus ring on the projector lens until the image appears clear and sharp on the screen. Use the keystone correction dial (located on the back panel) to adjust the image shape if it appears trapezoidal, ensuring a rectangular projection.
3. Navigating Menus and Playing Videos
Použijte navigační tlačítka (Nahoru dolu vlevo vpravo) a OK button on the remote or projector panel to browse through the menu options. Select "Play" or the desired video from the pre-loaded content. The projector comes with 14 pre-loaded videos for various occasions.

Image: A collage displaying various scenes from the 14 pre-loaded videos, including Halloween, Christmas, New Year, and other festive themes.
To play videos from a USB drive, insert the drive into the USB port and select the USB input source from the menu. Navigate to your video files and select one to play.
4. Zvukový výstup
The projector has a built-in speaker. For external audio, connect headphones or external speakers to the 3.5mm audio output jack on the side of the projector.
The projector also features Bluetooth connectivity, allowing wireless audio streaming to compatible Bluetooth speakers or headphones. Refer to the on-screen menu for Bluetooth pairing instructions.
Údržba
- Čištění objektivu: Jemně otřete čočku projektoru měkkým hadříkem, který nepouští vlákna. Nepoužívejte abrazivní čisticí prostředky ani rozpouštědla.
- Generální úklid: Use a soft, dry cloth to clean the exterior of the projector. Avoid spraying liquids directly onto the unit.
- Skladování: When not in use, store the projector in a cool, dry place, away from direct sunlight and extreme temperatures. It is recommended to store it in its original packaging or a protective case to prevent dust accumulation and damage.
- Větrání: Abyste zabránili přehřátí, zajistěte, aby větrací otvory projektoru nebyly během provozu zablokovány.
Odstraňování problémů
| Problém | Možná příčina | Řešení |
|---|---|---|
| Žádná síla | Napájecí kabel není připojen; zásuvka nefunguje. | Ensure power adapter is securely connected to the projector and a working electrical outlet. |
| Žádný obraz na obrazovce | Projector not powered on; Incorrect input source selected; Lens cap on. | Turn on the projector. Select the correct input source (e.g., USB, HDMI). Remove the lens cap. |
| Obrázek je rozmazaný | Není nastavené zaostření; Projektor je příliš daleko/blízko k promítacímu plátnu. | Adjust the focus ring on the lens. Reposition the projector for optimal distance. |
| Obrázek je lichoběžníkový | Lichoběžníkové zkreslení nebylo upraveno. | Adjust the keystone correction dial on the back of the projector. |
| Žádný zvuk | Volume too low; External audio device not connected properly. | Increase volume using the remote or projector controls. Check connections to external speakers/headphones. Ensure Bluetooth device is paired correctly. |
| Dálkové ovládání nefunguje | Vybité nebo nesprávně vložené baterie; Překážka mezi dálkovým ovladačem a projektorem. | Replace batteries, ensuring correct polarity. Remove any obstructions between the remote and the projector's IR receiver. |
Specifikace
- Název značky: WindowFX
- Číslo modelu: Plus
- Hmotnost položky: 2.7 libry
- Rozměry produktu: 12.1 x 7.7 x 4.1 palce
- Technologie připojení: HDMI, USB, Bluetooth
- Typ displeje: LCD, DLP, or LED (as per general specification, specific type not detailed)
- Doporučená použití: Home Cinema, Seasonal Decoration
- Speciální vlastnosti: Wireless (Bluetooth), Pre-loaded Videos
Záruka a podpora
For information regarding warranty coverage, technical support, or service, please refer to the documentation included with your purchase or visit the official WindowFX webUschovejte si doklad o koupi pro případ reklamace.
For additional assistance, you may contact the manufacturer's customer service department. Contact details are typically available on the product packaging or the official brand webmísto.