1. Bezpečnostní pokyny
Please read all instructions carefully before using the NutriChef Vertical Countertop Oven. Retain this manual for future reference.
- Troubu vždy umístěte na stabilní, žáruvzdorný povrch.
- Do not touch hot surfaces. Use handles or knobs. Always use oven mitts or heat-resistant gloves when handling hot materials.
- Abyste zabránili úrazu elektrickým proudem, neponořujte kabel, zástrčky ani zařízení do vody nebo jiné kapaliny.
- Když je jakýkoli spotřebič používán dětmi nebo v jejich blízkosti, je nutný pečlivý dohled.
- Vytáhněte zástrčku ze zásuvky, když ji nepoužíváte a před čištěním. Před nasazením nebo sejmutím dílů nechte vychladnout.
- Neprovozujte žádný spotřebič s poškozenou šňůrou nebo zástrčkou nebo poté, co spotřebič nefunguje správně nebo byl jakýmkoliv způsobem poškozen.
- Do not use attachments not recommended by the appliance manufacturer, as they may cause injuries.
- Neumisťujte na horký plynový nebo elektrický hořák nebo do jeho blízkosti nebo do vyhřáté trouby.
- Při přemisťování spotřebiče obsahujícího horký olej nebo jiné horké kapaliny je třeba dbát mimořádné opatrnosti.
- Nepoužívejte spotřebič k jinému než určenému použití v domácnosti.
- Během provozu zajistěte dostatečné větrání kolem trouby.
2. Konec produktuview
The NutriChef Vertical Countertop Oven PKRT97 is a versatile appliance designed for rotisserie, baking, broiling, and kebab functions. Its compact vertical design saves counter space while providing efficient cooking.

Figure 2.1: NutriChef Vertical Countertop Oven with various cooking functions.

Figure 2.2: The oven's compact design fits well on countertops.
Video 2.1: Oficiální produkt skončilview demonstrating the NutriChef Vertical Countertop Oven.
3. Součásti a příslušenství
The NutriChef Vertical Countertop Oven comes with several accessories to enhance your cooking experience:
- Rotisserie Forks & Skewers (2)
- Rotating Kebab Rack (1)
- Bake Grill Racks (2)
- Bake Pan (1)
- Drip Tray Pan (1)
- Napájecí kabel

Figure 3.1: All included accessories for the oven.
4. Nastavení
Pro počáteční nastavení postupujte takto:
- Unpack the oven and all accessories from the packaging.
- Place the oven on a flat, stable, and heat-resistant surface, ensuring adequate ventilation around the unit.
- Remove any protective films or packaging materials from the oven and accessories.
- Wash all removable accessories (rotisserie forks, skewers, racks, pans) with warm, soapy water, rinse thoroughly, and dry completely.
- Otřete vnitřek a vnější povrch trouby reklamouamp tkanina.
- Before first use, operate the oven empty for approximately 15 minutes at the highest temperature setting to burn off any manufacturing residues. Ensure the area is well-ventilated during this process.
5. Návod k obsluze
The NutriChef Vertical Countertop Oven offers multiple cooking modes. Always ensure the oven is plugged into a grounded electrical outlet.
5.1 Funkce grilování na rožni
Use this function for roasting whole chickens, turkeys, or other large cuts of meat.
- Prepare your meat by seasoning it as desired. Secure the meat onto the rotisserie spit using the forks. Ensure the meat is balanced to allow for even rotation.
- Insert the rotisserie spit into the designated slots inside the oven. The heating elements should be in the vertical position for rotisserie cooking.
- Place the drip tray pan at the bottom of the oven to collect juices and fats.
- Close the tempered glass door gently.
- Nastavte MODE knob to 'Rotisserie'.
- Upravte TEPL knob to the desired temperature (e.g., 350-400°F for chicken).
- Nastavte ČASOVAČ knob to the desired cooking time. The oven will automatically turn off when the timer expires. For continuous operation, select 'Stay On'.
- Monitor the cooking progress through the glass door. Use a meat thermometer to ensure the internal temperature of the meat reaches safe levels.

Figure 5.1: The rotisserie function ensures even cooking with rapid air circulation.
Video 5.1: Demonstration of cooking a chicken using the rotisserie function.
5.2 Bake/Broil Function
For baking and broiling, the heating elements should be in the horizontal position.
- Adjust the heating elements to the horizontal position.
- Place the bake grill racks and/or bake pan into the desired slots.
- Place your food on the rack or in the pan.
- Zavřete dvířka z tvrzeného skla.
- Nastavte MODE knob to 'Bake' or 'Broil'.
- Upravte TEPL knoflík na požadovanou teplotu.
- Nastavte ČASOVAČ knob for the required cooking duration.
5.3 Kebab Function
Use the rotating kebab rack for perfectly cooked kebabs.
- Thread your meat and vegetables onto the kebab skewers.
- Attach the skewers to the rotating kebab rack.
- Insert the kebab rack into the oven, ensuring it is properly seated for rotation. The heating elements should be in the vertical position.
- Place the drip tray pan at the bottom.
- Zavřete dvířka z tvrzeného skla.
- Nastavte MODE knob to 'Rotisserie'.
- Upravte TEPL knoflík na požadovanou teplotu.
- Nastavte ČASOVAČ knob for the required cooking duration.
Video 5.2: Demonstration of using the rotisserie for cooking kebabs.
6. Čištění a údržba
Pravidelné čištění zajistí optimální výkon a dlouhou životnost vaší trouby.
- Před čištěním vždy odpojte troubu od elektrické zásuvky a nechte ji zcela vychladnout.
- Remove all removable accessories (rotisserie spit, forks, racks, pans, drip tray). Most accessories are dishwasher safe. For stubborn residue, soak in warm, soapy water before scrubbing.
- Vnitřní povrchy trouby otřeteamp cloth and mild detergent. Avoid abrasive cleaners or scouring pads that could damage the non-stick coating or metal finish.
- Clean the tempered glass door with a soft cloth and glass cleaner.
- Otřete vnější povrch trouby pomocí damp tkanina. Neponořujte hlavní jednotku do vody.
- Před opětovným sestavením a uložením trouby se ujistěte, že jsou všechny díly zcela suché.
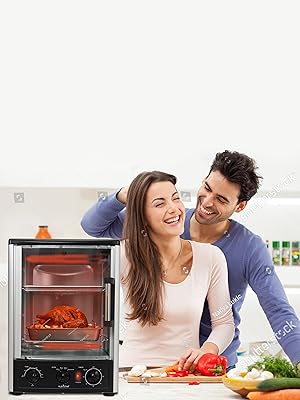
Figure 6.1: Cleaning the interior of the oven for hygiene and maintenance.
7. Řešení problémů
If you encounter any issues with your NutriChef Vertical Countertop Oven, refer to the following common problems and solutions:
- Trouba se nezapíná: Ensure the power cord is securely plugged into a working outlet. Check if the timer knob is set to a cooking duration or 'Stay On'.
- Food not rotating (Rotisserie/Kebab): Verify that the rotisserie spit or kebab rack is correctly inserted into the motor drive and support bracket. Ensure the 'MODE' knob is set to 'Rotisserie'.
- Nerovnoměrné vaření: Ensure food is properly centered and balanced on the rotisserie spit or kebab rack. Avoid overloading the oven. Check that the heating elements are clean and functioning.
- Nadměrné kouření: This may be due to accumulated grease or food particles. Clean the oven interior and drip tray thoroughly. Ensure the drip tray is in place during cooking.
- Dveře se nezavírají správně: Check for any obstructions preventing the door from closing fully. Ensure the door is properly aligned in its tracks.
Pokud problém přetrvává i po vyzkoušení těchto řešení, kontaktujte zákaznickou podporu.
8. Specifikace
| Funkce | Detail |
|---|---|
| Značka | NutriChef |
| Název modelu | PKRT97 |
| Barva | Černý |
| Rozměry produktu (D x Š x V) | 13.5"H x 16.5"Š x 21.5"V |
| Hmotnost položky | 13.2 libry |
| Zdroj napájení | AC adaptér |
| Výkon topného tělesa | 1500 wattů |
| Teplotní rozsah | 200 - 464 stupňů Fahrenheita |
| Typ ovládání | Knoflík |
| Typ materiálu dveří | Tvrzené sklo |
| Počet polic | 2 |
| Kapacita | 24 kvartů |

Figure 8.1: Detailed dimensions of the oven.
9. Informace o záruce
This NutriChef appliance is covered by a manufacturer's warranty against defects in materials and workmanship. The warranty period typically lasts for one year from the date of purchase. Please retain your proof of purchase for warranty claims. For specific terms and conditions, refer to the warranty card included with your product or contact customer support.
10. Zákaznická podpora
For technical assistance, troubleshooting, or warranty inquiries, please contact NutriChef customer support:
- Visit the official NutriChef webweb s nejčastějšími dotazy a zdroji podpory.
- Refer to the contact information provided on your product packaging or warranty card.