1. Důležité bezpečnostní pokyny
Vždy si přečtěte a pochopte všechna bezpečnostní varování, pokyny, ilustrace a specifikace dodané s tímto elektrickým nářadím. Nedodržení všech níže uvedených pokynů může vést k úrazu elektrickým proudem, požáru a/nebo vážnému zranění.
Obecná bezpečnostní upozornění pro elektrické nářadí
- Bezpečnost pracovního prostoru: Udržujte pracovní prostor čistý a dobře osvětlený. Nepořádek nebo tmavé prostory vedou k nehodám. Nepoužívejte elektrické nářadí ve výbušném prostředí, například v přítomnosti hořlavých kapalin, plynů nebo prachu.
- Elektrická bezpečnost: Zástrčky elektrického nářadí musí odpovídat zásuvce. Nikdy zástrčku nijak neupravujte. Nepoužívejte žádné adaptéry s uzemněným elektrickým nářadím. Zabraňte kontaktu těla s uzemněnými povrchy.
- Osobní bezpečnost: Always wear eye protection, hearing protection, and a dust mask. Dress properly. Do not wear loose clothing or jewelry. Keep hair and clothing away from moving parts.
- Použití a péče o elektrické nářadí: Netlačte na elektrické nářadí silou. Používejte správné elektrické nářadí pro danou aplikaci. Před prováděním jakýchkoli úprav, výměnou příslušenství nebo uložením elektrického nářadí odpojte zástrčku od zdroje napájení a/nebo vyjměte z elektrického nářadí baterii, pokud je odnímatelná.
- Servis: Nechte své elektrické nářadí opravit kvalifikovanou osobou, která bude používat pouze identické náhradní díly. Tím zajistíte zachování bezpečnosti elektrického nářadí.
Table Saw Specific Safety Warnings
- Keep hands and fingers away from the saw blade.
- Vždy používejte kryt kotouče a štípačku.
- Zajistěte, aby byl obrobek pevně podepřen a veden.
- Never reach over or behind the rotating saw blade.
- Při provádění úzkých řezů použijte tlačnou tyč nebo tlačný blok.
- Do not perform freehand cuts. Always use the fence or miter gauge.
- Before starting the saw, ensure the blade is clear of the workpiece and all adjustments are secure.
- Regularly check the saw blade for damage or dullness. Replace as necessary.
2. Konec produktuview
The Scheppach HS105 Table Saw is a powerful and versatile tool designed for precise cutting of wood and similar materials. It features a robust 2000W motor, a 255mm saw blade, and a stable chassis for reliable operation.

Obrázek 2.1: Celkově view of the Scheppach HS105 Table Saw with its integrated stand.
Klíčové vlastnosti:
- Výkonný motor: 2000W for efficient cutting.
- Large Saw Blade: 255mm diameter for various cutting tasks.
- Nastavitelná výška sečení: Up to 80mm at 90° and 55mm at 45°.
- Pivoting Blade: Blade can be tilted up to 45° for bevel cuts.
- Rozšíření tabulky: Expandable table surface for larger workpieces.
- Precision Guides: Includes a miter gauge and parallel stop for accurate cuts.
- Integrated Chassis: Provides stability and an ergonomic working height of 910mm.
- Mobilita: Equipped with wheels for easy transport.
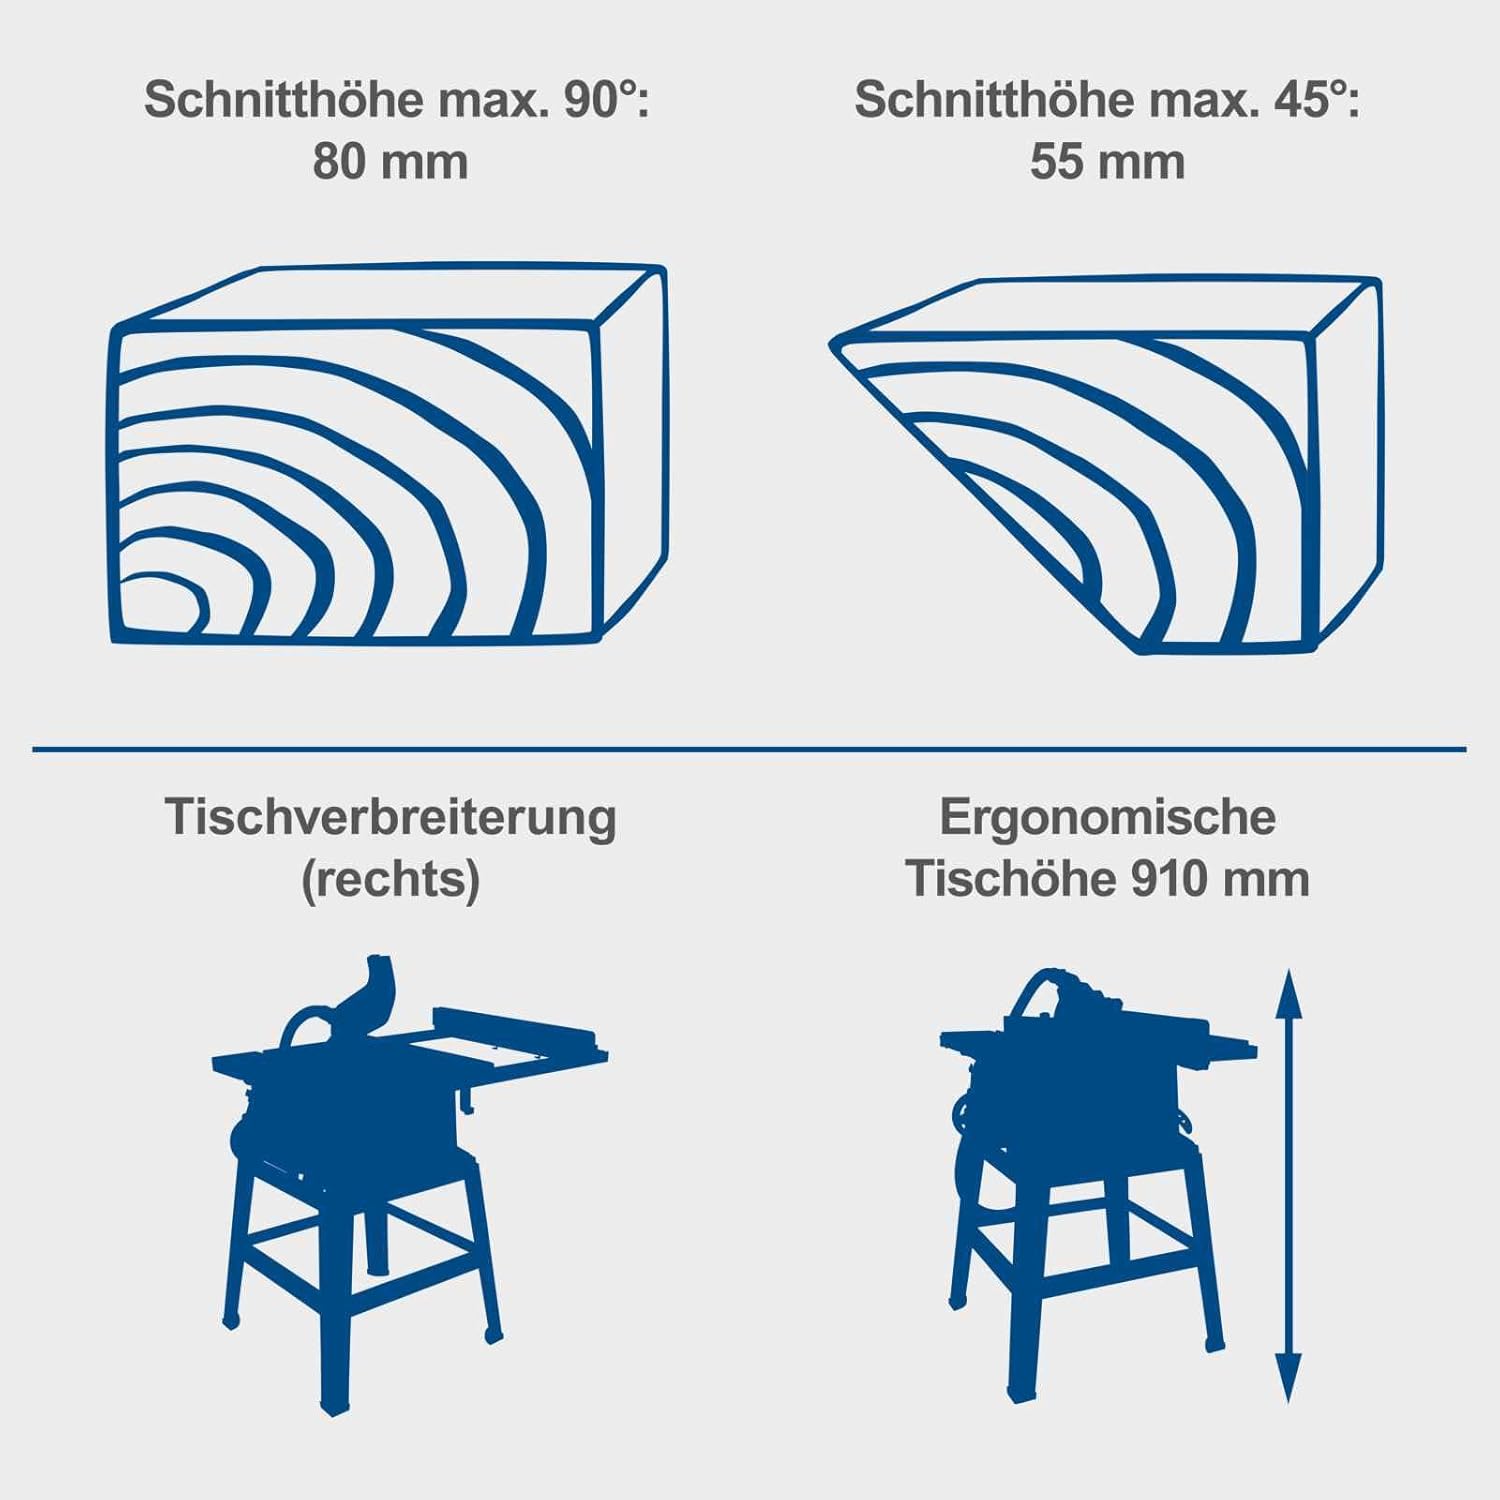
Obrázek 2.2: Diagram illustrating maximum cutting heights (80mm at 90°, 55mm at 45°), right table extension, and ergonomic table height (910mm).

Obrázek 2.3: Diagram showing saw blade specifications (255mm x 30mm x 2.8mm) and the blade's pivot range (0-45°).
3. Nastavení a montáž
Before operating the Scheppach HS105 Table Saw, ensure it is properly assembled and all components are securely fastened.
3.1 Vybalení a kontrola
- Opatrně vyjměte všechny součásti z obalu.
- Inspect for any shipping damage. Do not operate the tool if damage is found.
- Verify all parts listed in the packing list are present.
3.2 Sestavení stojanu
Assemble the stand according to the diagrams provided in the separate assembly guide. Ensure all bolts and nuts are tightened securely to provide a stable base for the saw. The stand provides an ergonomic working height of 910mm.

Obrázek 3.1: The table saw positioned at an ergonomic working height, facilitating comfortable operation.
3.3 Instalace pilového kotouče
- Ujistěte se, že je pila odpojena od zdroje napájení.
- Odstraňte hrdlo plechu.
- Use the provided wrenches to loosen the arbor nut and remove the outer flange.
- Place the new 255mm saw blade onto the arbor, ensuring the teeth are pointing towards the front of the saw.
- Reinstall the outer flange and arbor nut, tightening securely.
- Vyměňte desku hrdla.
3.4 Attaching the Blade Guard and Splitter
The blade guard and splitter are crucial safety components. Ensure they are correctly installed and aligned with the saw blade. The splitter helps prevent kickback, and the guard protects against accidental contact with the blade.
3.5 Table Extensions
The table saw features a right-side table extension that can be pulled out to accommodate larger workpieces, extending the table width up to 1045mm.
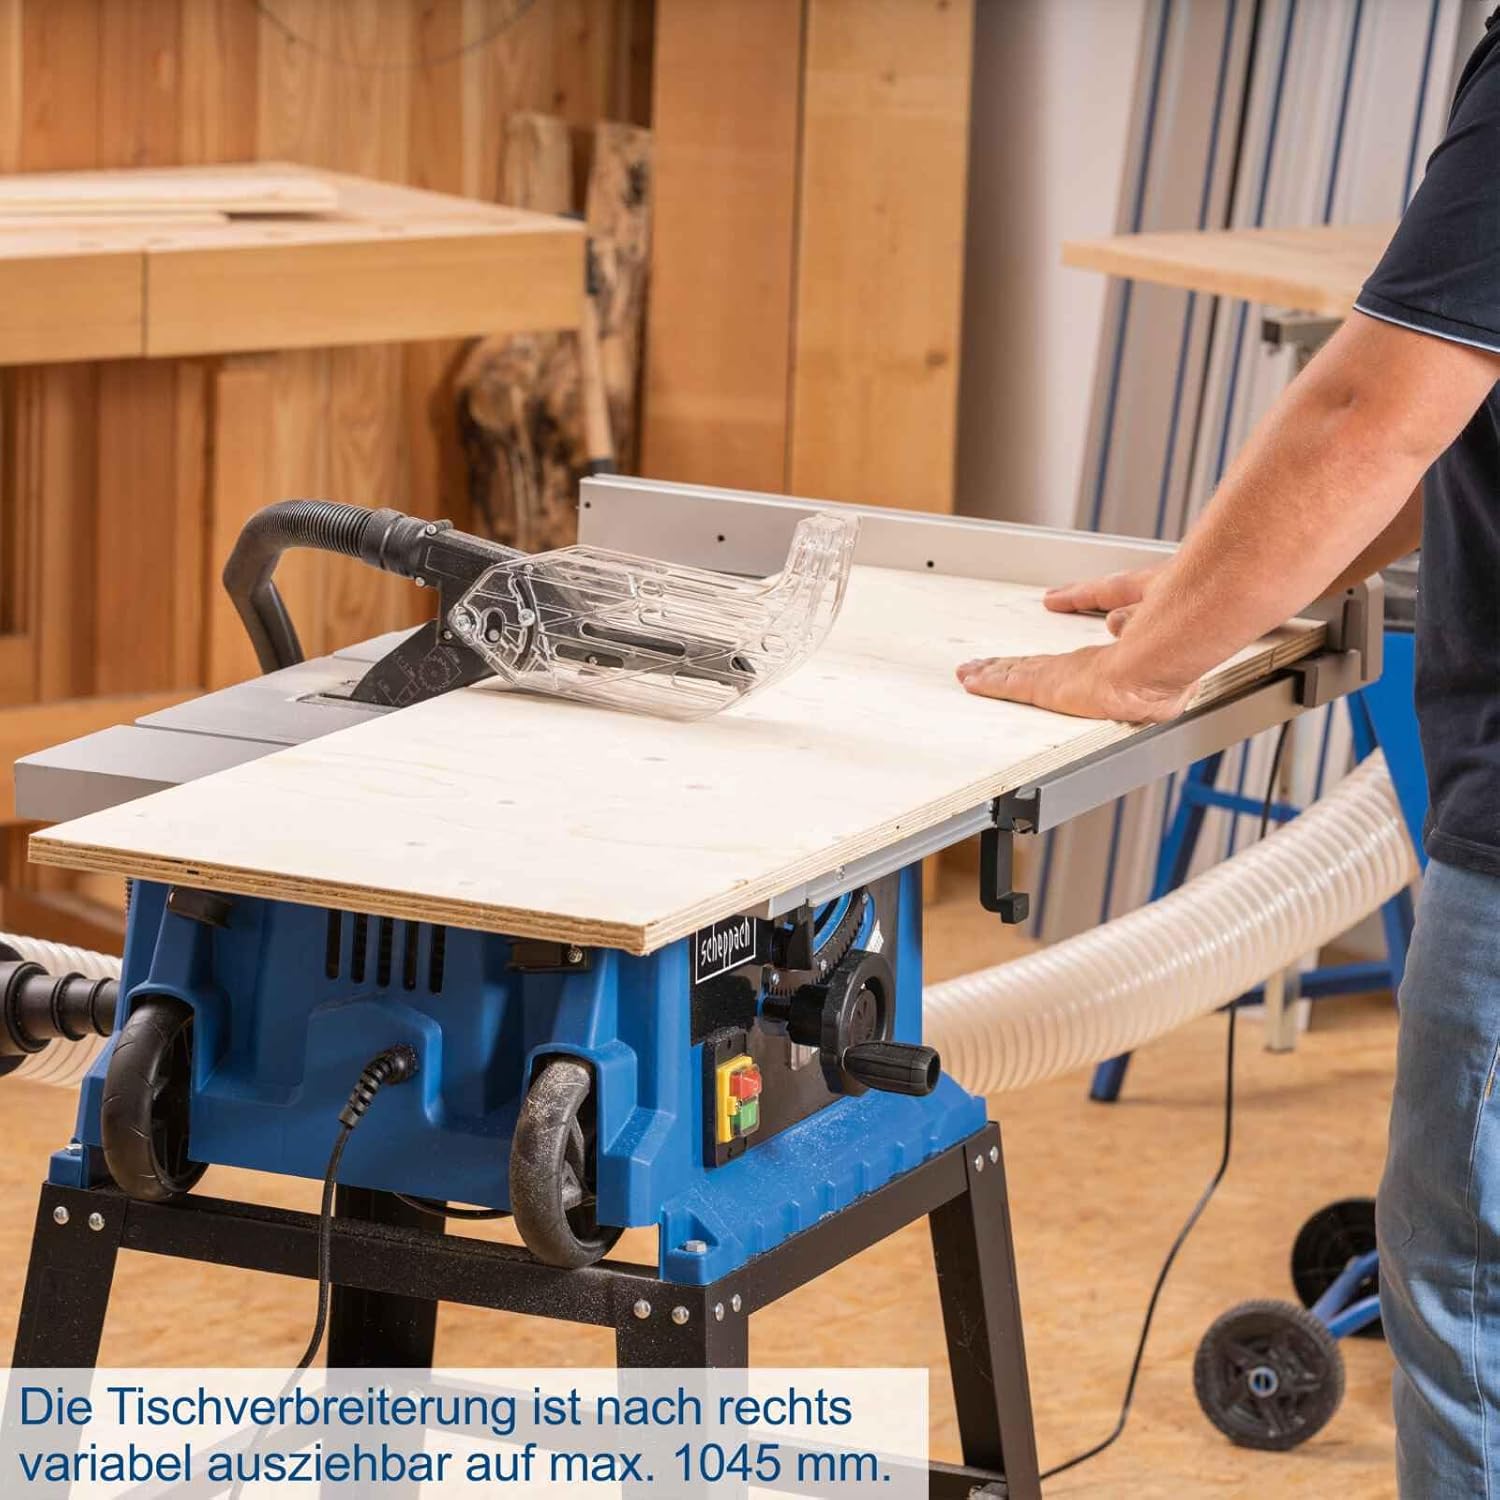
Obrázek 3.2: The right table extension pulled out, providing additional support for wider materials.
3.6 Připojení odsávání prachu
For a cleaner and safer working environment, connect a dust extraction system to the saw's dust port. This machine allows for direct dust extraction from the housing or the saw blade guard.

Obrázek 3.3: The table saw with a dust extraction system connected, demonstrating dust management capability.
4. Návod k obsluze
Always ensure all safety precautions are followed before operating the table saw.
4.1 Zapnutí/vypnutí
- To turn on the saw, press the green "ON" button.
- Chcete-li pilu vypnout, stiskněte červené tlačítko „OFF“.
- In case of emergency, press the large red emergency stop button if available.
4.2 Nastavení výšky sečení
The cutting height can be adjusted using the handwheel located on the front of the saw. Rotate the handwheel to raise or lower the saw blade. For optimal safety and cut quality, the blade should extend approximately 3-6mm above the workpiece. The maximum cutting height is 80mm.

Obrázek 4.1: Demonstrating the maximum cutting height of 80mm for the HS105.
4.3 Nastavení úhlu zkosení
To make bevel cuts, the saw blade can be tilted from 0° to 45°. Loosen the bevel locking knob, adjust the blade to the desired angle using the angle scale, and then securely tighten the locking knob.
4.4 Using the Parallel Stop (Rip Fence)
The parallel stop is used for making accurate rip cuts (cutting along the grain). Position the fence to the desired width of cut and lock it securely. The dual-clamped parallel stop ensures precise and repeatable cuts.

Obrázek 4.2: Detail of the dual-clamped parallel stop, designed for precise and repeatable rip cuts.
4.5 Using the Miter Gauge
The miter gauge is used for making accurate cross-cuts and miter cuts (angled cuts across the grain). Insert the miter gauge into the T-slot on the table, adjust to the desired angle, and secure it.
4.6 Provedení řezu
- Ujistěte se, že obrobek neobsahuje hřebíky, šrouby nebo jiné cizí předměty.
- Position the workpiece against the parallel stop or miter gauge.
- Zapněte pilu a nechte kotouč dosáhnout plné rychlosti.
- Slowly and steadily feed the workpiece into the blade. Use a push stick for narrow pieces.
- Once the cut is complete, turn off the saw and wait for the blade to stop before removing the workpiece or off-cuts.
5. Údržba
Regular maintenance ensures the longevity and safe operation of your Scheppach HS105 Table Saw. Always disconnect the saw from the power supply before performing any maintenance.
5.1 Čištění
- After each use, clean sawdust and debris from the table, blade guard, and motor housing.
- Use a brush or compressed air. Do not use solvents that could damage plastic parts.
- Ensure the dust extraction ports are clear of blockages.
5.2 Saw Blade Care
- Regularly inspect the saw blade for sharpness, cracks, or missing teeth.
- A dull blade can cause kickback and poor cut quality. Replace dull or damaged blades immediately.
- Očistěte čepel od pryskyřice a usazenin smoly pomocí vhodného čističe čepelí.
5.3 Mazání
Periodically lubricate moving parts such as the blade height adjustment mechanism and bevel adjustment mechanism with a dry lubricant or silicone spray to ensure smooth operation.
6. Řešení problémů
Before attempting any repairs, always disconnect the saw from the power supply.
| Problém | Možná příčina | Řešení |
|---|---|---|
| Pila se nespustí | No power supply; faulty switch; thermal overload activated. | Check power connection and circuit breaker; inspect switch; allow motor to cool down. |
| Čepel se během řezání zasekává nebo zasekává | Dull blade; improper feed rate; workpiece pinching blade; misaligned fence. | Replace or sharpen blade; reduce feed rate; ensure workpiece is supported; check fence alignment. |
| Nadměrné vibrace | Loose blade; damaged blade; unstable stand; worn bearings. | Tighten blade arbor nut; replace damaged blade; ensure stand is stable; contact service for bearing issues. |
| Nepřesné řezy | Misaligned fence or miter gauge; dull blade; incorrect blade height. | Calibrate fence and miter gauge; replace blade; adjust blade height correctly. |
7. Technické specifikace
| Specifikace | Hodnota |
|---|---|
| Číslo modelu | 430450 |
| svtage | 230 voltů |
| Power (Motor) | 2000 W |
| Průměr pilového kotouče | 255 mm |
| Průměr otvoru čepele | 30 mm |
| Čepel Kerf | 2.8 mm |
| Max. výška sečení (90°) | 80 mm |
| Max. výška sečení (45°) | 55 mm |
| Rozsah náklonu čepele | 0 - 45° |
| Table Dimensions (L x W) | 92 x 91 cm |
| Table Extension (Right) | Až 1045 mm |
| Ergonomic Table Height | 910 mm |
| Rozměry produktu (D x Š x V) | 92 x 91 x 71 cm |
| Hmotnost položky | 30.6 kg |
| Materiál čepele | Rychlořezná ocel |
| Zdroj napájení | Elektrický kabel |
| Speciální funkce | Nastavení hloubky |
| Zahrnuté komponenty | 1 HS105 Professional Table Saw, with stand |
8. Záruka a podpora
Scheppach products are manufactured to high-quality standards. In the unlikely event of a defect, please refer to your purchase documentation for warranty details. For technical support, spare parts, or service inquiries, please contact your authorized Scheppach dealer or visit the official Scheppach webmísto.
Keep your proof of purchase (receipt or invoice) for any warranty claims.
9. Mobility and Transport
The Scheppach HS105 Table Saw is designed with integrated wheels for convenient transport and mobile use.
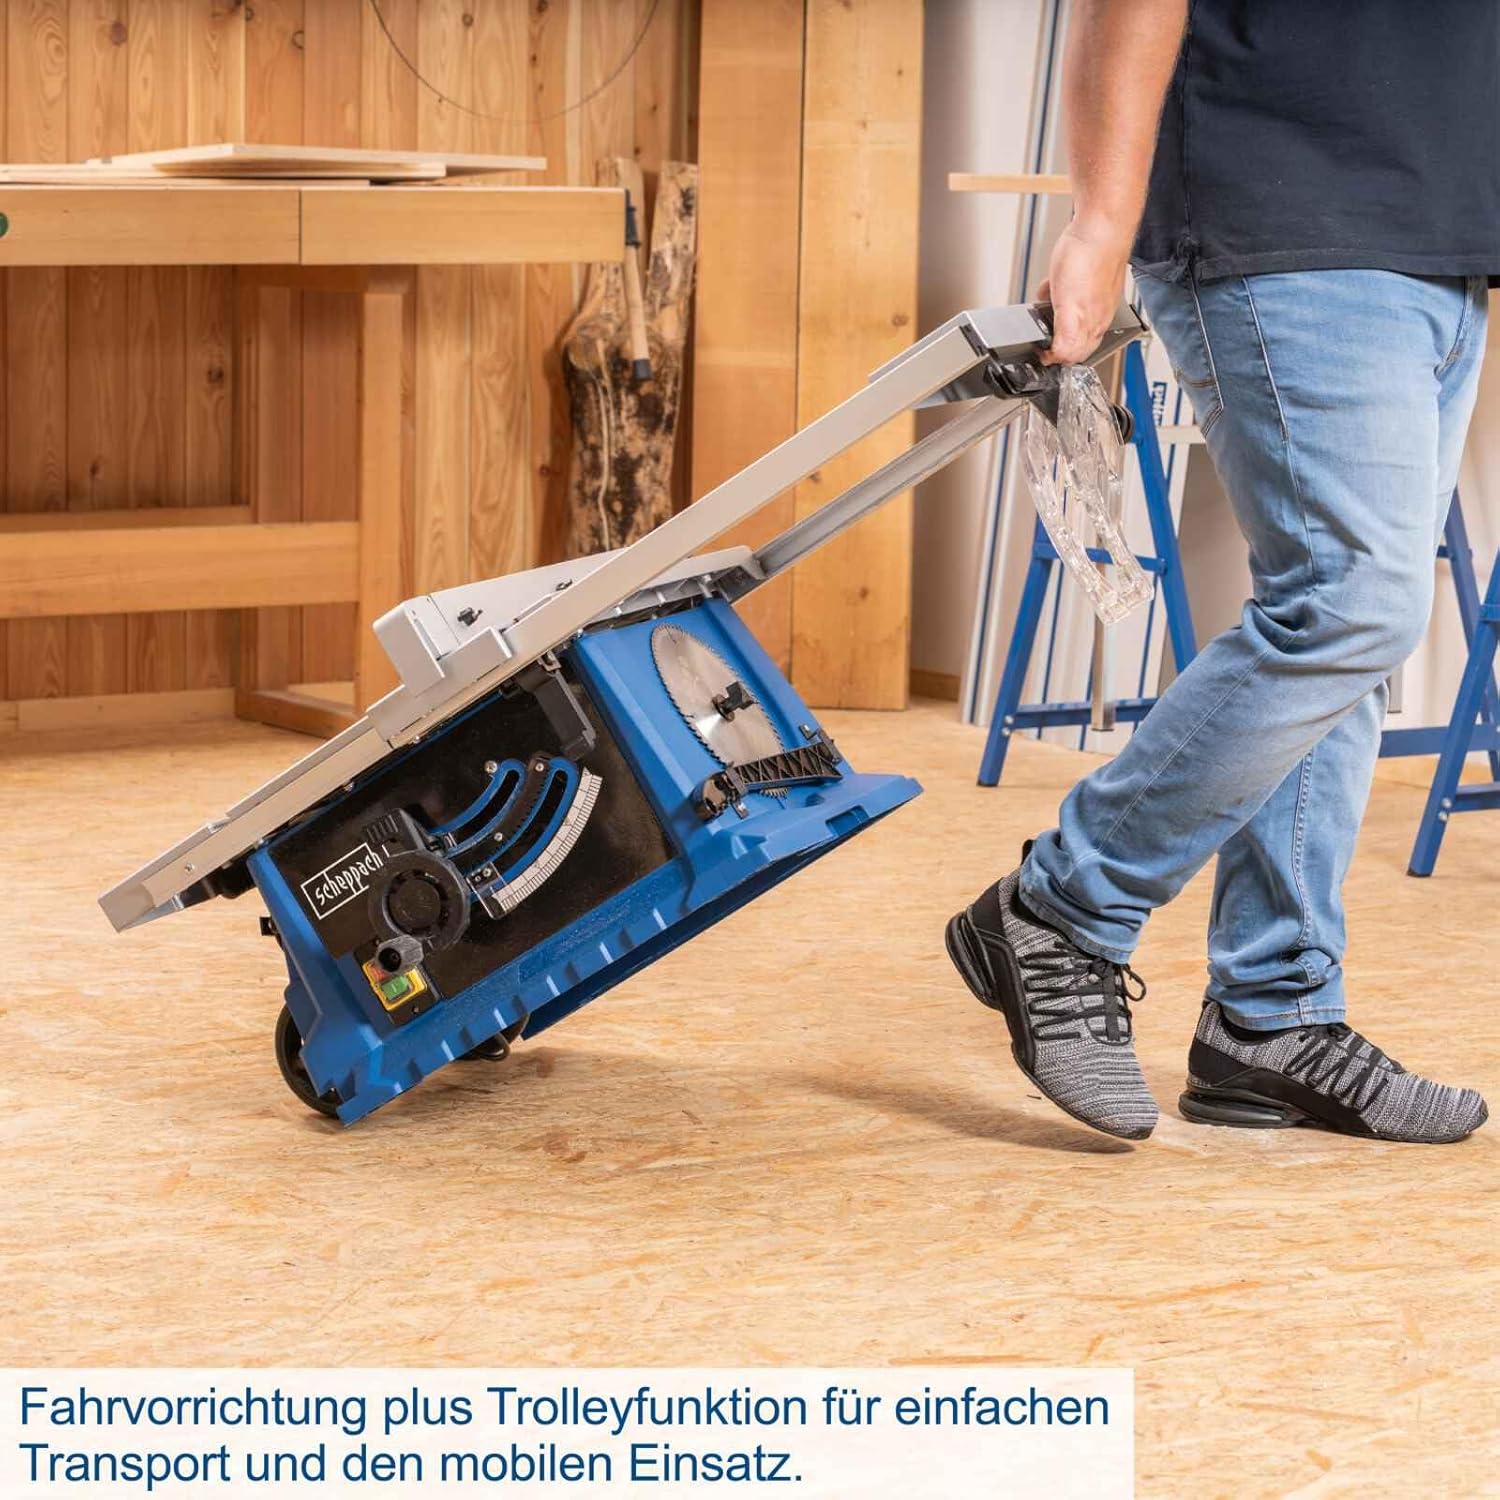
Obrázek 9.1: The table saw being transported using its integrated wheels, highlighting its portability.
- Before transporting, ensure the saw is unplugged and the blade is fully retracted and secured.
- Use the handles provided to tilt the saw onto its wheels and move it to the desired location.
- Exercise caution when moving the saw over uneven surfaces.


