Zavedení
The Peavey PV 10 AT is a versatile 10-channel compact mixer designed for both live and recording applications. It features high-quality mic preamps, Bluetooth wireless input, digital effects, Antares Auto-Tune, and USB connectivity for streaming and playback. This manual provides detailed instructions for setting up, operating, maintaining, and troubleshooting your PV 10 AT mixer.

Obrázek 1: Úhlové view of the Peavey PV 10 AT Compact Mixer, showcasing its various controls and inputs.
Nastavení
1. Vybalení a první kontrola
Opatrně vyjměte mixér z obalu. Zkontrolujte jednotku, zda nevykazuje známky poškození, ke kterému mohlo dojít během přepravy. Uschovejte obal pro budoucí přepravu nebo skladování.
2. Připojení napájení
Connect the provided 15V/1.0A DC power adapter to the 'DC IN' port on the rear panel of the mixer. Plug the adapter into a suitable power outlet. Press the 'POWER' button to turn on the mixer.
3. Připojení vstupů
The PV 10 AT offers various input options:
- Microphones/Line Sources (Channels 1-4): Use XLR or 1/4" TRS/TS cables to connect microphones or line-level instruments to the combo jacks. Channels 1-4 also feature 'DIRECT OUT' 1/4" jacks for sending individual channel signals to a recording interface or secondary console.
- Stereo vstup (kanály 5/6): Connect stereo line-level devices using a 3.5mm stereo jack or two 1/4" TS jacks (L/R).
- USB A Playback (Channels 7/8): Vložte USB flash disk obsahující MP3 files into the 'USB A' port. Use the 'MEDIA SELECT' controls to navigate and play tracks.
- Bluetooth (Channels 7/8): Activate Bluetooth by pressing the 'ON/OFF' button next to the Bluetooth indicator. Pair your smart device to stream audio wirelessly.
- Stereo vstup (kanály 9/10): Connect additional stereo line-level devices using two 1/4" TS jacks (L/R).
4. Připojení výstupů
The mixer provides several output options:
- Hlavní výstupy: Připojte hlavní reproduktory nebo napájecí amplifier using XLR or 1/4" TRS/TS cables.
- Aux Send: Use the 'AUX SEND' XLR output to send a monitor mix or external effects.
- Control Room Outputs (A/B): Connect studio monitors or a headphone amplifier to the RCA (L/R) outputs for monitoring. The A/B SELECT button allows switching between two sets of monitors.
- USB B (Computer): Connect the 'USB B' port to your computer for streaming the main mix to a Digital Audio Workstation (DAW) or for receiving audio from the computer for monitoring.
- Sluchátkový výstup: Connect headphones to the 1/4" stereo jack for private monitoring.
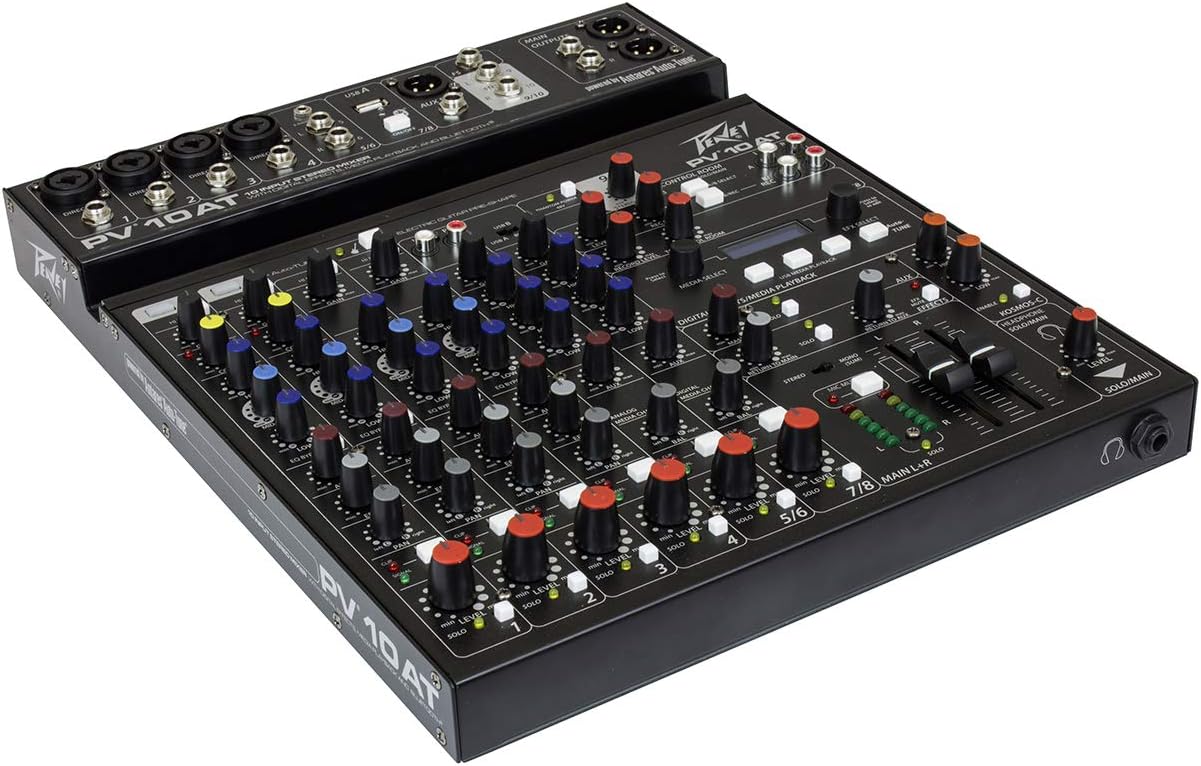
Figure 2: Rear panel connections of the Peavey PV 10 AT, including XLR/1/4" combo inputs, direct outs, stereo inputs, USB A, Aux Send, Stereo In, Main Outputs, and USB B.
Obsluha mixéru
1. Channel Controls (Channels 1-4)
- Hi Pass: Aktivuje vysokofrekvenční filtr pro odstranění nežádoucího nízkofrekvenčního dunění.
- Získat: Upravuje vstupní citlivost připojeného mikrofonu nebo nástroje.
- Comp (Compressor): (Channels 1 & 2 only) Controls the amount of compression applied to the input signal, helping to smooth out dynamics and prevent clipping. A red LED indicates when the compressor is active.
- High, Mid-Morph, Low (3-Band EQ): Adjusts the high, mid, and low frequencies of the channel. The Mid-Morph control allows for dynamic adjustment of the mid-frequency range, acting as a low-mid cut or a high-mid boost depending on the setting.
- EQ Bypass: Bypasses the equalizer section for a direct comparison of the EQ'd and un-EQ'd signal.
- Aux: Controls the level of the channel's signal sent to the Aux Send output.
- EFX: Controls the level of the channel's signal sent to the internal digital effects processor.
- Pánev: Upravuje stereo pozici signálu kanálu (zleva doprava).
- Ztlumit: Mutes the channel's audio output.
- Clip/Signal LEDs: The green 'SIGNAL' LED indicates signal presence, while the red 'CLIP' LED warns of signal overload. Adjust gain to prevent clipping.
- Sólo: Isolates the channel's signal for monitoring through headphones or control room outputs without affecting the main mix.
- Úroveň: Adjusts the overall output level of the channel to the main mix.
2. Electric Guitar Pre-Shape (Channel 4)
Channel 4 includes a dedicated 'ELECTRIC GUITAR PRE-SHAPE' switch. Activating this switch optimizes the input impedance for direct connection of an electric guitar, providing a suitable tone without needing an external DI box or ampživější.
3. Fantomové napájení (48 V)
The 'PHANTOM POWER 48V' button activates 48V phantom power for condenser microphones connected to channels 1-4. Ensure condenser microphones are connected before activating phantom power.
4. Media Playback (Channels 7/8)
The media section allows playback from a USB A drive or via Bluetooth. Use the 'MEDIA SELECT' rotary encoder to browse folders and tracks on a USB drive. The Play/Pause and Skip buttons control playback. The 'USB A / Bluetooth' button switches between these two sources.
5. Digitální efekty
The PV 10 AT features a built-in digital effects processor. Use the 'EFX SELECT' rotary encoder to choose from various effects (e.g., reverb, delay). Some effects allow parameter editing (e.g., delay time) by pressing the 'EFX SELECT' knob.
6. Antares Auto-Tune (Channels 1 & 2)
The 'Auto-Tune' button (channels 1 & 2) activates the Antares Auto-Tune feature. Use the 'EFX SELECT' knob to choose the desired key for Auto-Tune, ensuring vocal performances remain in pitch with the music. This feature can be toggled on/off via an optional footswitch connected to the 'FS' jack.
7. Kosmos-C Enhancement
The 'KOSMOS-C' button activates Peavey's proprietary audio enhancement technology. This circuitry processes the low and high frequencies to create a fuller, more defined sound, enhancing the apparent bass and clarity without increasing overall volume.
8. Control Room and Recording
The 'CONTROL ROOM' section allows for flexible monitoring and recording:
- A/B Select: Switches between two sets of control room monitors.
- Level A/B: Adjusts the output level for the selected control room monitors.
- B/REC: When engaged, the 'B' control room output becomes a dedicated record output, allowing you to send the main mix to an external recording device.
- Rec Level: Controls the level of the signal sent to the record output.
- Record Level to Control Room: Adjusts the level of the recorded signal returning from your computer (via USB B) to your control room monitors.
9. Hlavní výstupy
The main mix is controlled by the 'MAIN L+R' faders. The LED meter bridge provides visual feedback of the main output levels. The 'MONO (SUM)' button sums the stereo main output to mono.
10. Výstup pro sluchátka
The 'HEADPHONE SOLO/MAIN' knob adjusts the volume for the headphone output. The 'SOLO/MAIN' button allows you to switch between monitoring the soloed channels or the main mix.
Video 1: Podrobný popisview of the Peavey PV10AT Mixer, covering its features, inputs, outputs, and controls. This video is provided by Guitar Interactive (Seller).
Údržba
To ensure the longevity and optimal performance of your Peavey PV 10 AT mixer, follow these maintenance guidelines:
- Čištění: Povrch mixážního pultu pravidelně otírejte měkkým, suchým hadříkem. Nepoužívejte abrazivní čisticí prostředky, rozpouštědla ani vosky, protože by mohly poškodit povrchovou úpravu a ovládací prvky.
- Ochrana proti prachu: When not in use, cover the mixer with a dust cover to prevent dust and debris from accumulating on the controls and internal components.
- Skladování: Store the mixer in a cool, dry place away from direct sunlight, extreme temperatures, and high humidity. If transporting, use appropriate protective casing.
- Péče o kabely: Always use high-quality cables and ensure they are properly connected and disconnected. Avoid pulling on cables or subjecting them to excessive strain, which can damage the connectors and internal wiring.
- Větrání: Ensure adequate ventilation around the mixer to prevent overheating. Do not block any ventilation openings.
Odstraňování problémů
If you encounter issues with your Peavey PV 10 AT mixer, refer to the following common problems and solutions:
- Žádný zvukový výstup:
- Zkontrolujte všechna připojení k napájení a ujistěte se, že je mixér zapnutý.
- Ověřte, zda jsou vstupní zdroje správně připojeny a aktivní.
- Ensure channel 'Mute' buttons are disengaged and 'Level' knobs/faders are raised.
- Check main output faders and control room levels.
- Confirm that connected speakers or ampZáchranné přístroje jsou zapnuté a fungují správně.
- Zkreslení nebo oříznutí:
- Reduce the 'Gain' control on the input channel.
- If the 'CLIP' LED is flashing, the input signal is too hot. Lower the source volume or the channel gain.
- Engage the compressor on channels 1 & 2 to manage dynamic peaks.
- Zpětná vazba:
- Snižte zesílení mikrofonu nebo přesuňte mikrofony dále od reproduktorů.
- Use the 'Hi Pass' filter on microphone channels.
- Adjust the EQ to cut problematic frequencies (often mid-range).
- Problémy s připojením Bluetooth:
- Ensure the Bluetooth 'ON/OFF' button is engaged and the indicator is flashing (pairing mode) or solid (connected).
- Check your smart device's Bluetooth settings and ensure it's discoverable.
- Move the device closer to the mixer to improve signal strength.
- USB Recording/Playback Problems:
- For USB A playback, ensure the USB drive is formatted correctly and contains compatible MP3 files.
- For USB B recording, verify that your computer recognizes the mixer as an audio device and that your DAW settings are correct.
- Check the 'Record Level' and 'Record Level to Control Room' knobs for proper signal routing.
Specifikace
| Funkce | Detail |
|---|---|
| Hmotnost položky | 9.46 libry |
| Rozměry produktu | 16.14 x 16.54 x 3.54 palce |
| Číslo modelu položky | PV10AT |
| Název barvy | Černý |
| Typ materiálu | Nerez |
| Zdroj napájení | Elektrický kabel |
| Počet kanálů | 10 (4 mic/line, 2 stereo line, 2 USB/Bluetooth, 2 stereo in) |
| Technologie připojení | Bluetooth, USB |
| Fantomová síla | 48V |
| Efekty | Digital effects with LCD display, Antares Auto-Tune |
| Ekvalizér na kanál | 3-band with Mid-Morph |
Informace o záruce
Peavey Electronics Corporation warrants this product against defects in material and workmanship for a period of one (1) year from the date of original purchase. This warranty is valid only if the product is purchased from an authorized Peavey dealer and the original sales receipt is retained as proof of purchase. The warranty does not cover damage resulting from accident, misuse, abuse, neglect, unauthorized modification, or improper installation or operation. For full warranty terms and conditions, please refer to the official Peavey webwebu nebo kontaktujte zákaznickou podporu.
Zákaznická podpora
For technical assistance, service, or further information regarding your Peavey PV 10 AT mixer, please contact Peavey Customer Support. You can find contact details, FAQs, and additional resources on the official Peavey website. Please have your product model number (PV10AT) and proof of purchase ready when contacting support.