1. Úvod
This manual provides detailed instructions for the proper use and maintenance of your JVC GR-AX720 Compact VHS Camcorder. Please read this manual thoroughly before operating the camcorder to ensure optimal performance and longevity. Keep this manual for future reference.
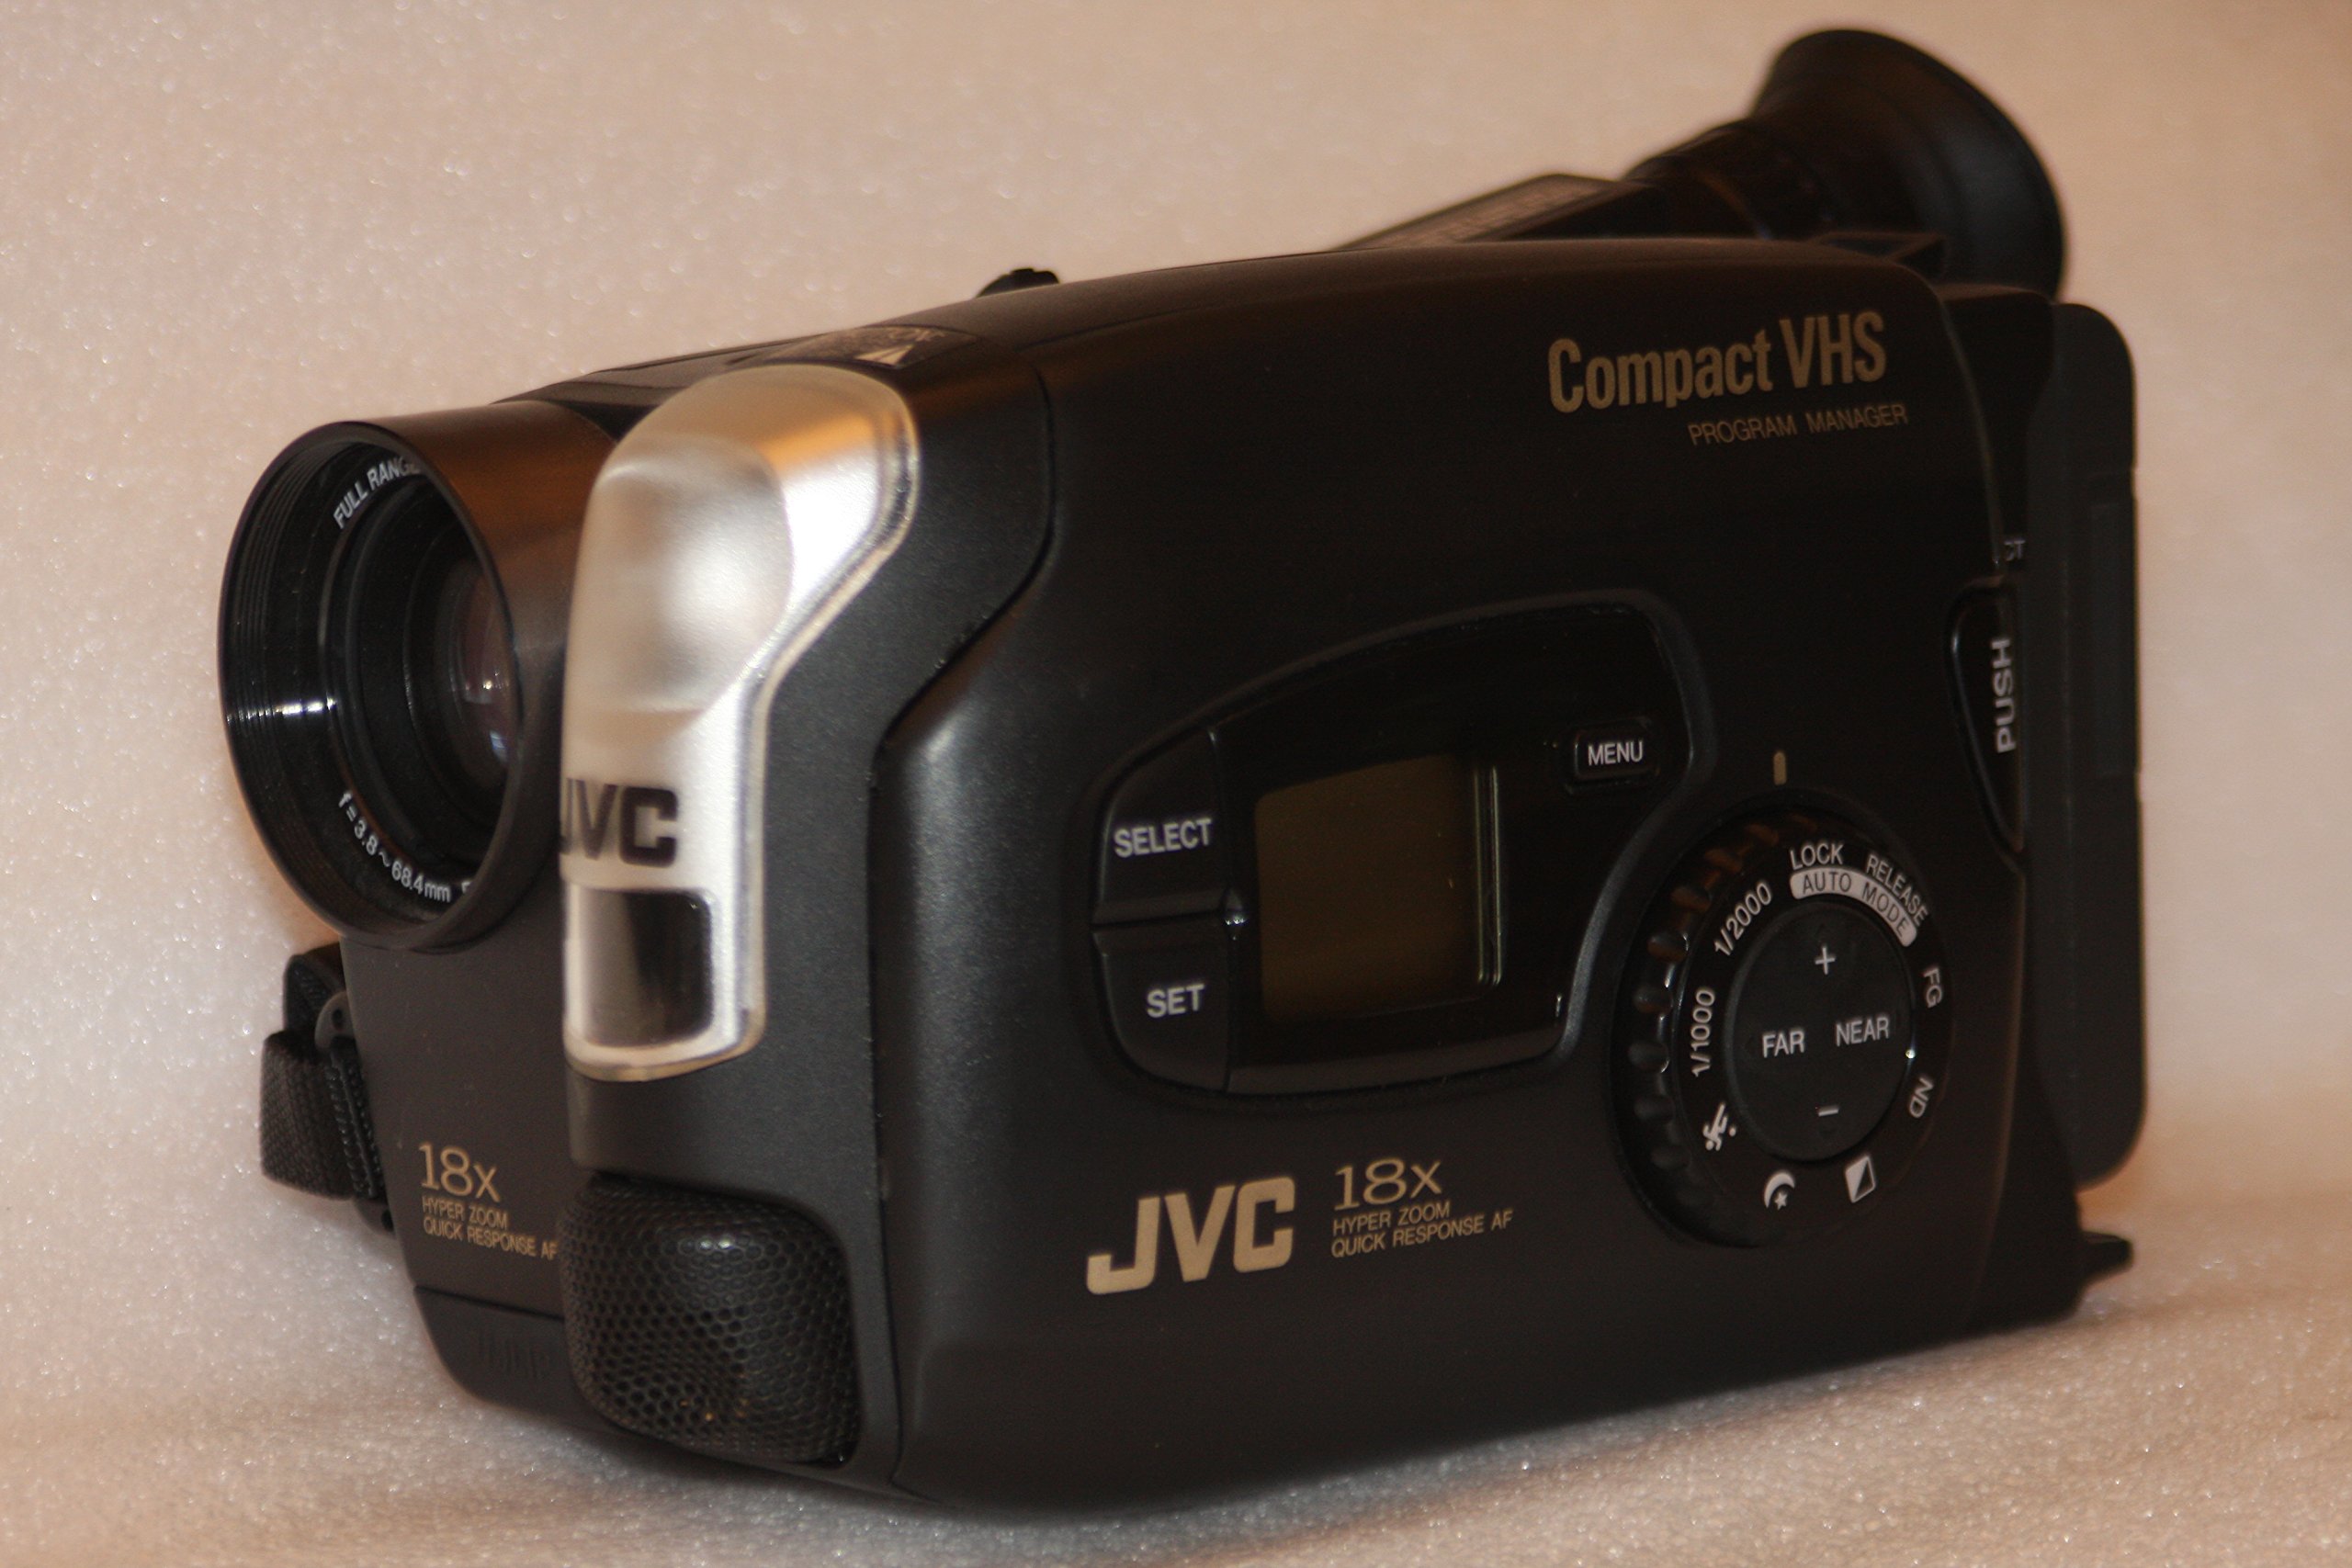
Obrázek 1: Přední a boční strana view of the JVC GR-AX720 Compact VHS Camcorder, showcasinjeho kompaktní design a hlavní ovládací prvky.
2. Konec produktuview
The JVC GR-AX720 is a Compact VHS (VHS-C) camcorder designed for recording and playing back video on VHS-C tapes. Key features include an 18x Hyper Zoom lens, Auto Light function, Fast Auto Focus (AF), Program AE with various special effects, and a color viewfinder for monitoring recordings and playback.
Klíčové vlastnosti:
- VHS-C Format: Records to and plays from Compact VHS tapes. These tapes can be played in a standard VHS VCR using an appropriate adapter (not included).
- 18x Hyper Zoom: Provides extended optical zoom capabilities for capturing distant subjects.
- Barva Viewnálezce: Offers a color display for framing shots and reviewing footage.
- Automatické osvětlení: Automatically adjusts for optimal lighting conditions.
- Fast AF: Ensures quick and accurate focusing.
- Program AE with Special Effects: Allows for creative control over recordings.
3. Nastavení
3.1. Instalace a nabíjení baterie
- Ujistěte se, že je videokamera vypnutá.
- Vyhledejte přihrádku na baterii na zadní straně videokamery.
- Slide the battery release latch and insert the battery pack, ensuring it clicks into place securely.
- To charge the battery, connect the AC adapter to the camcorder's DC input and then to a power outlet. The charging indicator will illuminate.
3.2. Loading a VHS-C Cassette
- Open the cassette compartment by sliding the EJECT lever. The compartment cover will open.
- Insert a VHS-C cassette with the tape window facing forward and the open side facing down.
- Gently push the cassette down until it locks into position.
- Close the cassette compartment cover until it clicks shut.

Obrázek 2: Boční strana view of the camcorder, illustrating the general area for battery and cassette insertion.
3.3. Připojení k televizi
Na view your recordings on a television, use the provided Composite A/V cable.
- Connect one end of the Composite A/V cable to the A/V output jacks on the camcorder.
- Connect the other end of the cable to the corresponding A/V input jacks (typically yellow for video, white/red for audio) on your television.
- Select the correct A/V input channel on your television.
4. Návod k obsluze
4.1. Zapnutí/vypnutí
To power on the camcorder, slide the MOC switch from VYPNUTO na FOTOAPARÁT for recording or HRÁT for playback. To power off, slide the switch back to VYPNUTO.

Obrázek 3: Detail view of the power switch, light control, and record button on the camcorder.
4.2. Nahrávání
- Nastavte MOC přepnout na FOTOAPARÁT.
- Otevřete kryt objektivu.
- Look through the color viewhledáček pro orámování vašeho záběru.
- Použijte ZOOM lever to adjust the focal length (telephoto/wide-angle).
- Stiskněte tlačítko ZÁZNAM tlačítko pro spuštění nahrávání. Indikátor nahrávání se rozsvítí.
- Stiskněte tlačítko ZÁZNAM dalším tlačítkem nahrávání zastavíte.
Nastavení zaostření:
The camcorder features Fast AF for automatic focusing. For manual focus, switch to manual mode (if available) and use the focus ring or buttons.
Speciální efekty:
Refer to the on-screen menu (accessed via the MENU button) for available Program AE modes and special effects.
4.3. Přehrávání
- Nastavte MOC přepnout na HRÁT.
- If connected to a TV, ensure the TV is on the correct A/V input.
- Use the playback controls (Play, Stop, Rewind, Fast Forward) to navigate your recordings.
4.4. Using the Color Viewnálezce
Barva viewfinder provides a real-time view of your subject during recording and displays recorded footage during playback. Adjust the diopter on the viewfinder for clear vision if needed.

Obrázek 4: Boční strana view of the camcorder, highlighting the adjustable color viewnálezce.
5. Údržba
5.1. Čištění
- Čočka: Používejte měkký hadřík bez žmolků, speciálně určený pro optické čočky. Nepoužívejte abrazivní čisticí prostředky.
- Tělo: Otřete tělo videokamery měkkým, suchým hadříkem. V případě odolných nečistot lehceampOpláchněte hadřík vodou. Nepoužívejte rozpouštědla.
- Magnetické hlavy: Regular cleaning of tape heads is recommended to maintain optimal video quality. Use a dry-type VHS-C head cleaner cassette (not included) according to its instructions.
5.2. Skladování
- Videokameru skladujte na chladném a suchém místě mimo dosah přímého slunečního záření a extrémních teplot.
- Remove the battery pack if the camcorder will not be used for an extended period.
- Keep the lens cap on to protect the lens from dust and scratches.
6. Řešení problémů
If you encounter issues with your JVC GR-AX720 camcorder, refer to the following common problems and solutions:
| Problém | Možná příčina | Řešení |
|---|---|---|
| Videokamera se nezapne. | Baterie je vybitá nebo není správně nainstalována. | Nabijte baterii nebo se ujistěte, že je bezpečně nainstalována. |
| No image in viewfinder during recording. | Lens cap is on. Power switch is not in FOTOAPARÁT režimu. | Remove the lens cap. Set the power switch to FOTOAPARÁT. |
| Poor video quality during playback. | Dirty tape heads. Damaged tape. | Clean the tape heads using a head cleaner cassette. Try a different tape. |
| Během přehrávání není slyšet žádný zvuk. | TV volume is low or muted. A/V cables are not connected correctly. | Adjust TV volume. Check A/V cable connections. |
If the problem persists after attempting these solutions, please contact JVC customer support.
7. Specifikace
The following are technical specifications for the JVC GR-AX720 Compact VHS Camcorder:
| Funkce | Specifikace |
|---|---|
| Název modelu | JVC GR AX720 |
| Formát záznamu videa | VHS-C |
| Rozlišení záznamu videa | 480p |
| Optický zoom | 18x |
| Technologie připojení | Composite A/V |
| Podporovaný formát zvuku | Analogový zvuk |
| Barva | Černý |
| Zahrnuté komponenty | Battery, Carrying Case, User Manual, VHS-C to RCA Cable |

Obrázek 5: Spodní část view of the camcorder, displaying the model number (GR-AX720U) and other regulatory information.
8. Záruka a podpora
For warranty information and customer support, please refer to the documentation included with your purchase or visit the official JVC webUschovejte si doklad o koupi pro případ reklamace.
JVC Customer Support: For technical assistance or service inquiries, please contact JVC directly through their official support channels.