Konec produktuview
The Vileda Professional Roll O Matic Commercial Sponge Mop is designed for efficient and effective floor cleaning. Its self-wringing mechanism allows for easy moisture control, making it suitable for various floor types.

An image of the Vileda Professional Roll O Matic Commercial Sponge Mop, featuring a blue handle and a light blue sponge head, standing vertically against a white background.
Komponenty
- Mop Handle (Alloy Steel)
- Sponge Head (Blue, replaceable)
- Self-Wringing Mechanism (Rollers and Clip)
- Sponge Channel (Metal bar holding the sponge)

Detailní záběr view showing the two metal hooks on the mop handle where the sponge head channel connects.

A detailed image of the rear side of the mop head connectors, illustrating how they engage with the handle.

Vedlejší profesionálfile close-up of the mop head connectors, showing their design and attachment points.

An image showing the side view of the connectors on a replacement sponge head, ready for attachment.

A diagram illustrating the 'Current' and 'Upgraded' designs of the mop head channel, highlighting improvements for better connection.
Setup: Attaching the Sponge Head
Before first use, attach the sponge head to the mop handle. Ensure you have the correct size sponge refill (10-inch or 14-inch) for your mop handle.
- Hold the mop handle upright.
- Align the sponge head's channel directly in the center of the rollers on the mop handle.
- Apply slight pressure to the top of the sponge head.
- Slide the clip on the mop handle into the hole on one side of the sponge channel.
- Once one side is secured, align and secure the other side by sliding the clip into the corresponding hole.
- Ensure both clips are firmly in place, securing the sponge head to the handle.
An instructional video demonstrating how to properly attach and detach the sponge head refill to the Vileda Roll-O-Matic mop handle. The video shows aligning the sponge channel with the rollers and securing the clips.
Návod k obsluze
- Wetting the Sponge: Submerge the sponge head in water or a cleaning solution until fully saturated.
- Wringing the Sponge: Pull the handle lever upwards to engage the rollers and squeeze excess water from the sponge. Repeat until desired moisture level is achieved.
- Vytírání: Glide the mop across the floor surface to clean. For stubborn spots, apply gentle pressure.
- Máchání: Periodically rinse the sponge head in clean water to remove dirt and debris.

A person using the Vileda sponge mop to clean a liquid spill on a kitchen floor, demonstrating the mop in action.

A person operating the wringing mechanism of the Vileda sponge mop in a kitchen, showing how to remove excess water from the sponge.

A person cleaning a wooden floor in a living room using the Vileda sponge mop, highlighting its use on different surfaces.
Maintenance: Replacing the Sponge Head
To ensure optimal cleaning performance, replace the sponge head when it shows signs of wear or damage.
- Remove Old Sponge: With the mop handle upright, use your fingers to push in the clips on both sides of the sponge channel. This will release the pressure.
- Place your thumb on the channel and gently pop off the old sponge head. Dispose of it properly.
- Install New Sponge: Follow the 'Setup: Attaching the Sponge Head' instructions to install a new sponge refill.
An instructional video demonstrating how to properly attach and detach the sponge head refill to the Vileda Roll-O-Matic mop handle. The video shows aligning the sponge channel with the rollers and securing the clips, which also illustrates the removal process in reverse.
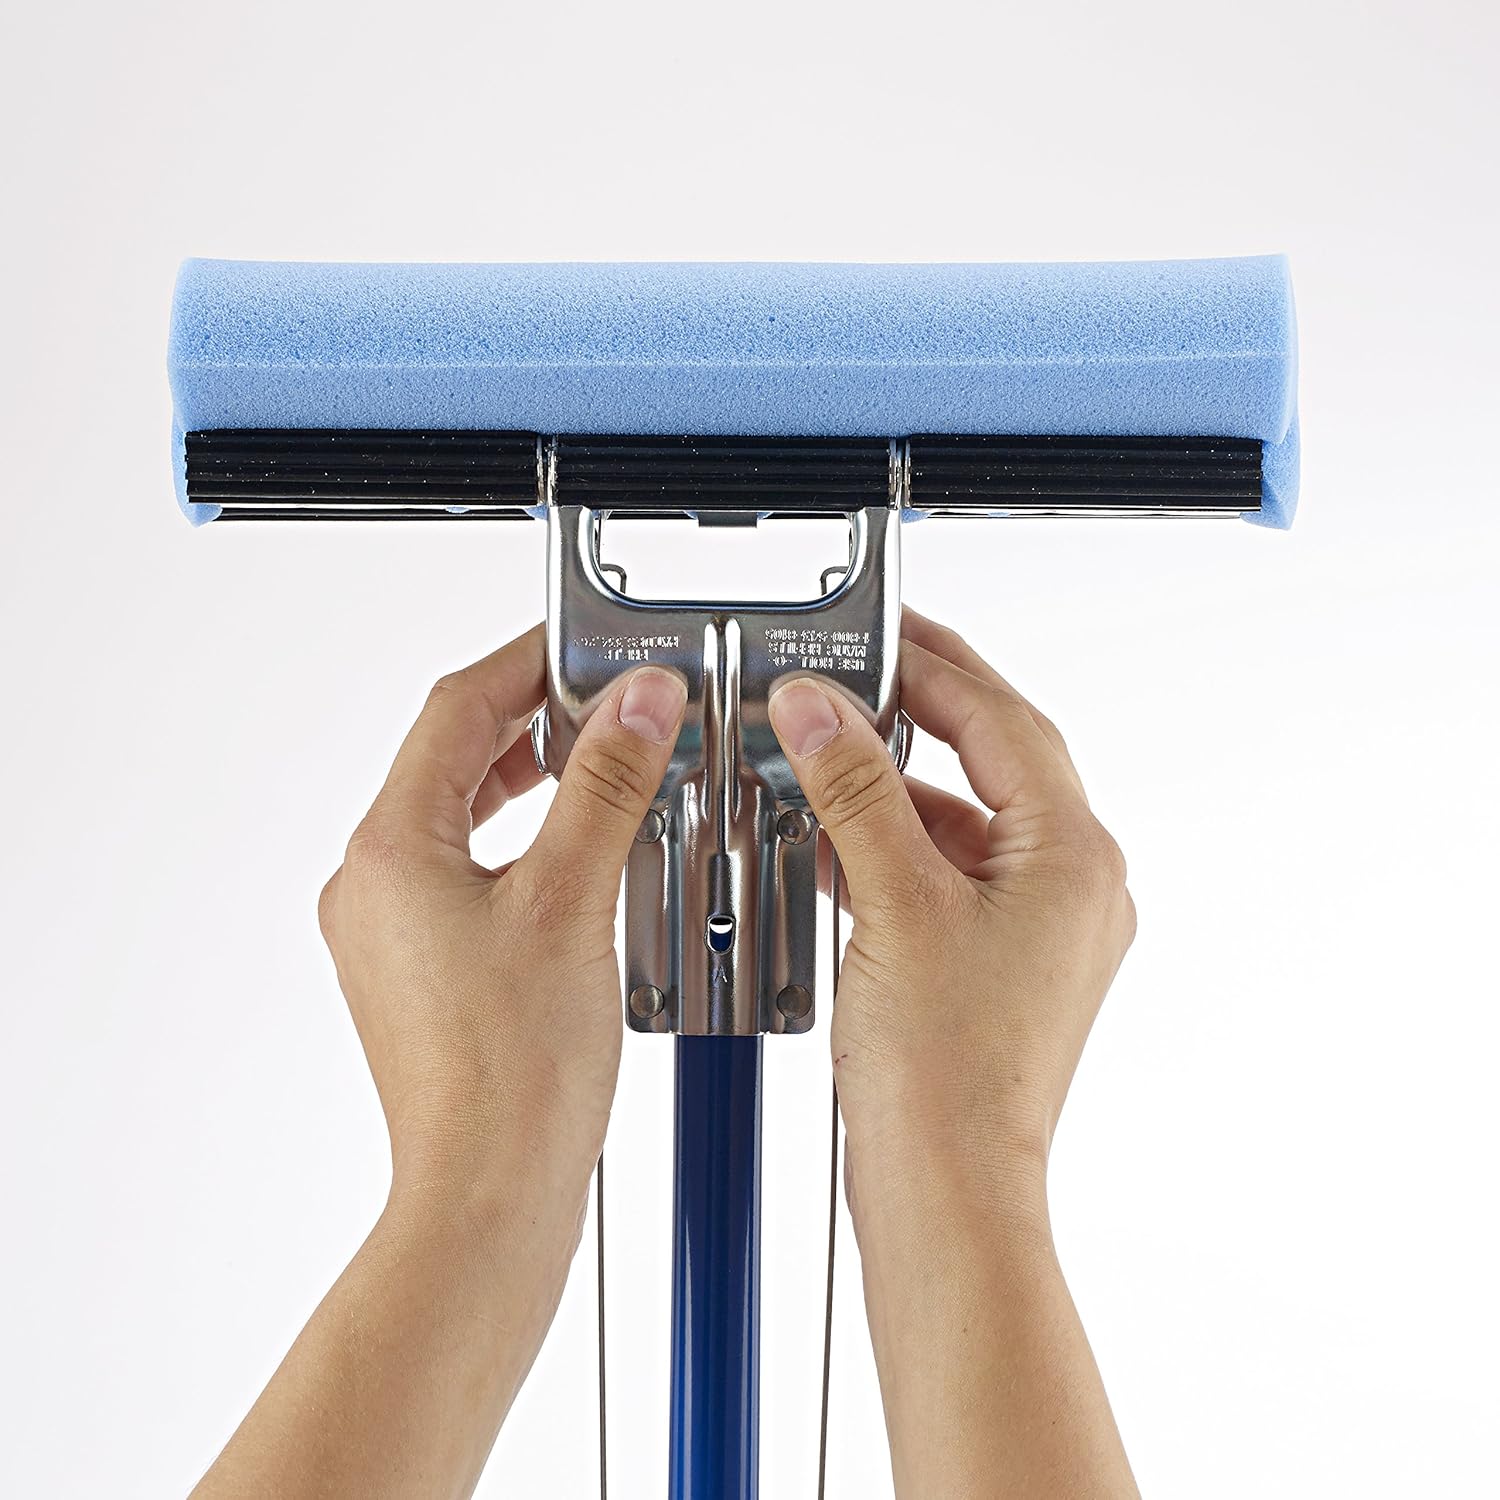
A close-up of hands holding the mop head, illustrating the metal frame and the points where the sponge attaches.

Hands showing the action of releasing one side of the sponge head from its attachment point on the mop handle.

Hands illustrating the process of releasing the second side of the sponge head from the mop handle, completing the detachment.

Hands in the process of completely removing the sponge head from the mop handle after both sides have been released.
Odstraňování problémů
| Problém | Možná příčina | Řešení |
|---|---|---|
| Sponge head detaches during use | Improper attachment; clips not fully engaged; incorrect sponge size. | Ensure sponge channel clips are fully secured into the handle's holes. Verify you are using the correct 10-inch or 14-inch refill for your mop handle. |
| Ineffective wringing | Sponge is worn out; wringing mechanism obstructed. | Replace the sponge head. Check the wringing mechanism for any debris or obstructions. |
| Mop zanechává šmouhy | Dirty sponge; too much cleaning solution; worn sponge. | Rinse sponge thoroughly. Use less cleaning solution. Replace sponge if worn. |
Specifikace
| Funkce | Detail |
|---|---|
| Značka | Vileda |
| Čísla modelů | 4110, 4114 |
| Hmotnost položky | 1.81 libry |
| Rozměry produktu | 10 x 5 x 48 palce |
| Materiál rukojeti | Legovaná ocel |
| Materiál hlavy | Houba |
| Doporučení pro povrch | Patro |
| UPC | 074642111004 |
Záruka a podpora
For warranty information, please refer to the product packaging or contact Vileda customer service. For further assistance or support, please visit the official Vileda webwebu nebo kontaktujte jejich zákaznickou linku podpory.


