1. Úvod
This manual provides detailed instructions for the installation, operation, maintenance, and troubleshooting of the ASUS P7F-M Micro ATX Motherboard. Please read this manual thoroughly before installing or using the motherboard to ensure proper setup and functionality.
The ASUS P7F-M is designed for Intel Xeon 3400 series, Core i7, Core i5, and Core i3 processors with an LGA 1156 socket, supporting DDR3 memory and offering various expansion and connectivity options.
2. Nastavení a instalace
Before beginning installation, ensure your system is powered off and disconnected from the power source. Wear an anti-static wrist strap to prevent electrostatic discharge (ESD) damage to components.
2.1 Rozložení základní desky

Obrázek: Shora dolů view of the ASUS P7F-M motherboard, showing the CPU socket, RAM slots, PCIe slots, and various connectors.

Obrázek: Úhlový view of the ASUS P7F-M motherboard, highlighting the rear I/O panel, CPU socket, and expansion slots.
2.2 Instalace CPU
- Najděte na základní desce patici procesoru LGA 1156.
- Gently push down the load lever and pull it sideways to open the socket retention frame.
- Opatrně zarovnejte procesor s paticí a ujistěte se, že zlatý trojúhelník na procesoru odpovídá trojúhelníku na patici. Nevkládejte procesor do patice silou.
- Zavřete zajišťovací rám a zatlačte páku zpět na místo, dokud nezaklapne.

Obrázek: Detail view of the LGA 1156 CPU socket on the ASUS P7F-M motherboard, ready for processor installation.
2.3 Instalace paměti
The motherboard supports 4x DDR3-1333/1066 DIMMs, with a maximum capacity of 16GB. It supports both ECC and non-ECC un-buffered memory.
- Otevřete klipy na obou koncích slotu DIMM.
- Zarovnejte paměťový modul se slotem a ujistěte se, že zářez na modulu odpovídá výstupku ve slotu.
- Pevně zatlačte na oba konce paměťového modulu, dokud klipsy nezacvaknou na místo.
Obrázek: Detail view of the four DDR3 DIMM slots on the ASUS P7F-M motherboard, showing their arrangement.
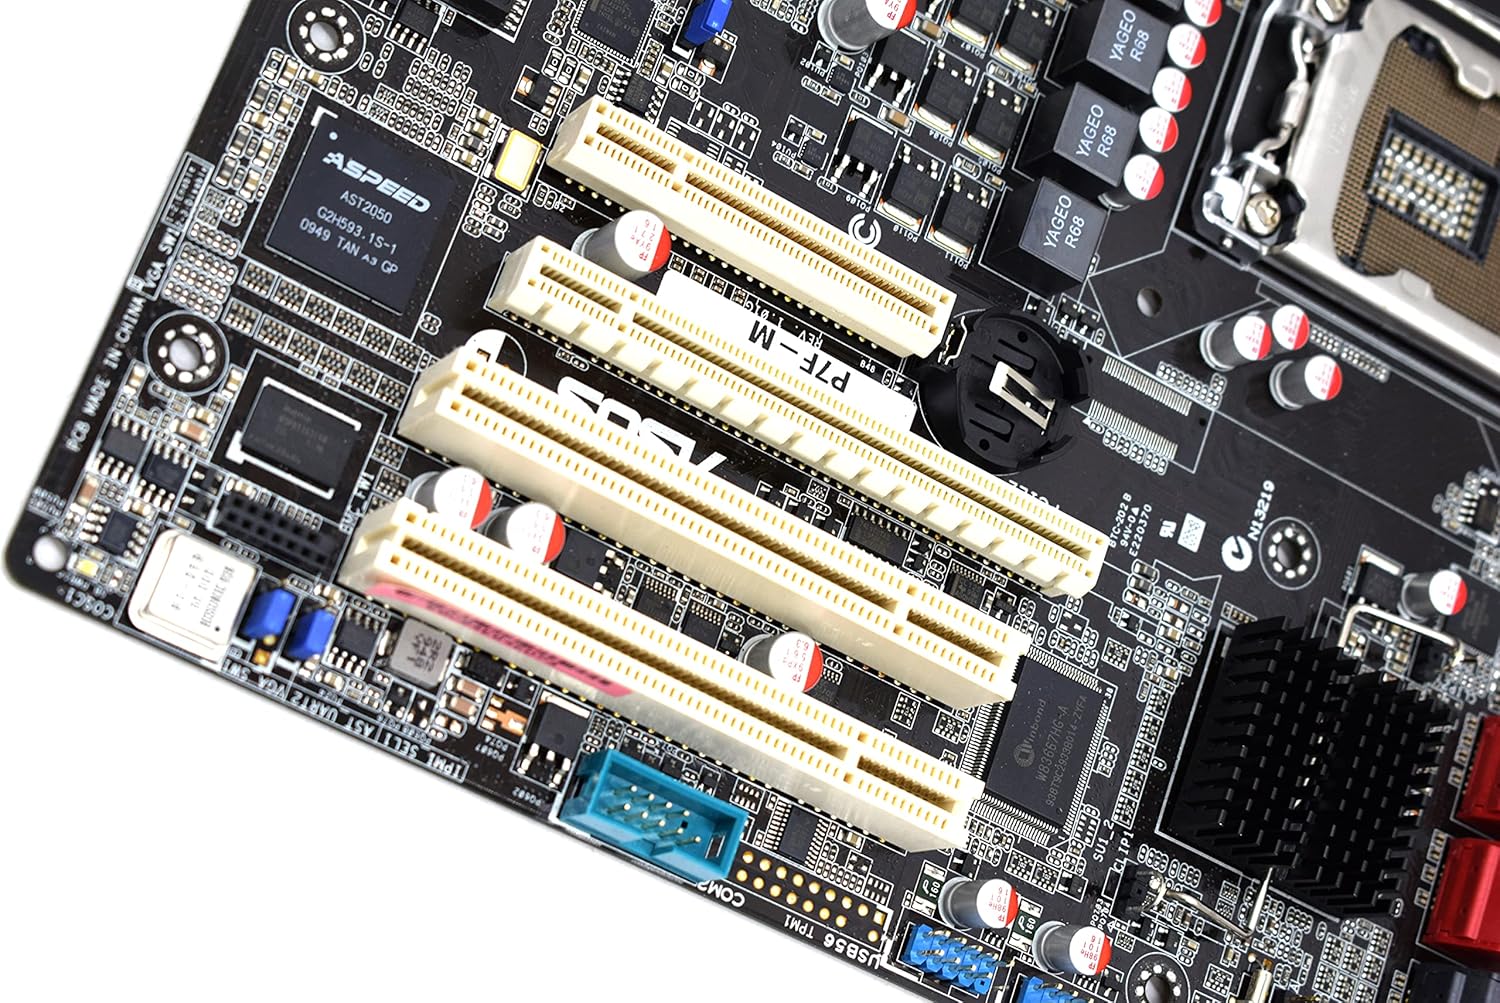
2.4 Instalace rozšiřující karty
The motherboard features:
- 1x PCI-Express x16 Slot
- 1x PCI-Express x8 Slot (operates at x4)
- 2x 32bit/33MHz PCI Slots
- Select an appropriate expansion slot for your card.
- Remove the corresponding metal slot cover from your PC case.
- Zarovnejte kartu se slotem a pevně ji zatlačte, dokud nebude bezpečně usazena.
- Připevněte kartu šroubem k pouzdru počítače.

Obrázek: Detail view of the PCI Express and PCI expansion slots on the ASUS P7F-M motherboard.
2.5 Připojení úložného zařízení
Connect your SATA storage devices (HDDs, SSDs, optical drives) to the SATA ports on the motherboard.

Obrázek: Detail view of the SATA ports on the ASUS P7F-M motherboard, typically located near the chipset.
2.6 Připojení napájení
Connect the 24-pin ATX main power connector and the 8-pin CPU power connector from your power supply unit (PSU) to the corresponding ports on the motherboard.
2.7 Připojení zadního panelu
Connect peripherals to the rear I/O ports:
- USB porty: 2.0 Pro klávesnice, myši a další USB zařízení.
- Porty PS/2: For legacy PS/2 keyboards and mice.
- RJ45 LAN Ports: Pro síťové připojení.
- Sériový port: For serial devices.
- VGA port: For video output to a monitor.
3. Návod k obsluze
3.1 Počáteční zapnutí
After all components are installed and connected, connect the power cable to your PSU and press the power button on your PC case. The system should initiate the Power-On Self-Test (POST).
3.2 Nastavení BIOSu/UEFI
During POST, press the designated key (usually DEL or F2) to enter the BIOS setup utility. Here you can configure system settings, boot order, and monitor hardware status.
3.3 Instalace ovladače
After installing your operating system, install the necessary drivers for the motherboard chipset, LAN, and any other integrated components. These drivers are typically provided on a support CD or available for download from the ASUS webmísto.
4. Údržba
4.1 Čištění
Pravidelně čistěte vnitřek počítače, abyste zabránili hromadění prachu, který může vést k přehřátí a selhání součástí. K odstranění prachu z ventilátorů, chladičů a dalších součástí použijte stlačený vzduch. Před čištěním se ujistěte, že je systém vypnutý a odpojený od sítě.
4.2 Aktualizace systému BIOS
Pravidelně kontrolujte podporu ASUS website for updated BIOS versions. BIOS updates can improve system stability, add support for new hardware, or fix bugs. Follow the instructions provided by ASUS carefully when performing a BIOS update to avoid system damage.
5. Řešení problémů
If you encounter issues with your ASUS P7F-M motherboard, consider the following troubleshooting steps:
- Bez napájení: Ensure all power cables (24-pin ATX, 8-pin CPU) are securely connected. Verify the PSU is functioning correctly.
- Bez displeje: Check that the monitor is connected to the correct video output (VGA on the motherboard or a dedicated graphics card). Reseat the graphics card and memory modules.
- Nestabilita systému: This can be caused by incompatible memory, insufficient power, or overheating. Verify memory compatibility and check CPU/case fan operation.
- Zvukové kódy POST: Listen for beep codes during startup. Refer to the ASUS website or a general BIOS beep code guide to diagnose the issue.
- Component Detection Issues: Ensure all components (CPU, RAM, expansion cards, storage drives) are properly seated and connected.
Pro další pomoc se obraťte na podporu ASUS webwebu nebo kontaktujte jejich technickou podporu.
6. Specifikace
Below are the detailed technical specifications for the ASUS P7F-M Motherboard:
| Funkce | Specifikace |
|---|---|
| Zásuvka CPU | LGA 1156 |
| Kompatibilní procesory | Intel Quad Core Xeon 3400 series, Core i7-800, Core i5-700, Core i3 series |
| Čipová sada | Intel 3420 PCH Chipset |
| Paměťové sloty | 4x DDR3 DIMMs |
| Typ paměti | DDR3-1333/1066, Dual Channel, Un-buffered, ECC/non-ECC |
| Maximální kapacita paměti | 16 GB |
| Sloty PCI-Express x16 | 1 |
| Sloty PCI-Express x8 | 1 (runs in x4 mode) |
| PCI sloty | 2x 32bit/33MHz |
| Ovladač LAN | Intel 82574L Dual Port Gigabit LAN controller, 1x Management LAN |
| Porty USB 2.0 | 7 (2 zadní, 5 přes sběrnici) |
| PS/2 Ports | 2 |
| LAN porty RJ45 | 3 |
| Sériové porty | 2 (1 zadní, 1 přes sběrnici) |
| VGA Port | 1 |
| Hlavní napájecí konektor | 1x 24-pin |
| Napájecí konektor CPU | 1x 8-pin |
| Form Factor | Micro ATX |
| Rozměry | 13.3 x 11.1 x 3.1 palce (balení) |
| Hmotnost položky | 1.5 libry |
7. Záruka a podpora
For information regarding the product warranty, please refer to the warranty card included with your motherboard or visit the official ASUS website. ASUS provides technical support and resources, including driver downloads, FAQs, and contact information, on their support portal.
Podpora ASUS Webmísto: https://www.asus.com/support/