
1. Důležité bezpečnostní informace
Please read all instructions carefully before operating the appliance. Retain this manual for future reference. Always follow basic safety precautions to reduce the risk of fire, electric shock, and injury.
- Ujistěte se, že je spotřebič připojen k řádně uzemněné zásuvce.
- Neponořujte napájecí kabel, zástrčku nebo zařízení do vody nebo jiných kapalin.
- Před čištěním nebo když spotřebič nepoužíváte, odpojte jej ze zásuvky.
- Neprovozujte spotřebič s poškozeným kabelem nebo zástrčkou.
- Udržujte spotřebič mimo zdroje tepla a přímého slunečního záření.
- Tento spotřebič je určen pouze pro použití v domácnosti.
2. Konec produktuview
The EUHOMY IM046-S is a countertop ice ball maker designed to produce crystal-clear, slow-melting 2-inch ice spheres. It features a self-cleaning function and offers both manual and automatic water refill options.

Obrázek 2.1: Přední strana view of the EUHOMY IM046-S Ice Ball Maker, showcasing its compact design and the ice spheres inside.
3. Nastavení
3.1 Vybalení
- Opatrně vyjměte výrobník ledu z obalu.
- Check that all included components are present: Ice Maker Machine, Inlet Pipe, Instruction Manual, Ice Clamp.
- Remove any protective film or tape from the appliance.
3.2 Umístění
Place the ice maker on a stable, level surface away from direct sunlight and heat sources. Ensure there is adequate ventilation around the unit. The product dimensions are 17.6"D x 12.6"W x 17.9"H.

Image 3.1: Product dimensions (Length: 12.6 in, Width: 17.6 in, Height: 17.9 in) and key specifications.
3.3 Plnění vodou
Výrobník ledu nabízí dva způsoby doplňování vody:
- Ruční vyplňování: Open the water inlet cover and pour clean drinking water directly into the reservoir.
- Automatické doplňování: Connect the provided inlet pipe to a water line for continuous water supply.

Image 3.2: Illustration of the two water filling methods: manual pour and automatic water line connection.
3.4 Počáteční čištění
Before first use, perform a self-cleaning cycle. Refer to the 'Maintenance' section for detailed instructions on using the self-cleaning function.
4. Návod k obsluze
4.1 Ovládací panel
The ice maker features an intuitive touch control panel. Familiarize yourself with the buttons and indicators:
- Vypínač: Zapíná nebo vypíná spotřebič.
- Tlačítko Clean: Spustí cyklus samočištění.
- Water Shorttage Upozornění: Indicates when the water reservoir needs refilling.
- Door Alert: Indicates if the door is not properly closed.
- Ice Making Progress Bar: Zobrazuje aktuální stage of the ice production cycle.
- Kontrolka dýchání: Provides visual feedback on the machine's status.

Obrázek 4.1: Detailní view of the easy touch controls and indicators on the ice maker's display panel.
4.2 Výroba ledu
- Ujistěte se, že je nádržka na vodu naplněná.
- Stiskněte tlačítko Tlačítko napájení (right side) to turn on the machine.
- The ice maker will automatically begin the ice production cycle. Four 2-inch ice balls are typically ready in approximately 40 minutes.
- The machine will continue to produce ice until the ice storage capacity is reached or the water level is low.
Video 4.1: This video demonstrates the ice making process, showing the machine producing four ice balls in approximately 40 minutes.
4.3 Skladování ledu
The ice maker has a storage capacity of approximately 30-40 ice balls. The machine is designed to keep ice cold longer through adaptive cooling and high-density PU foam insulation, but it is not a freezer. For long-term storage, transfer ice balls to a freezer.
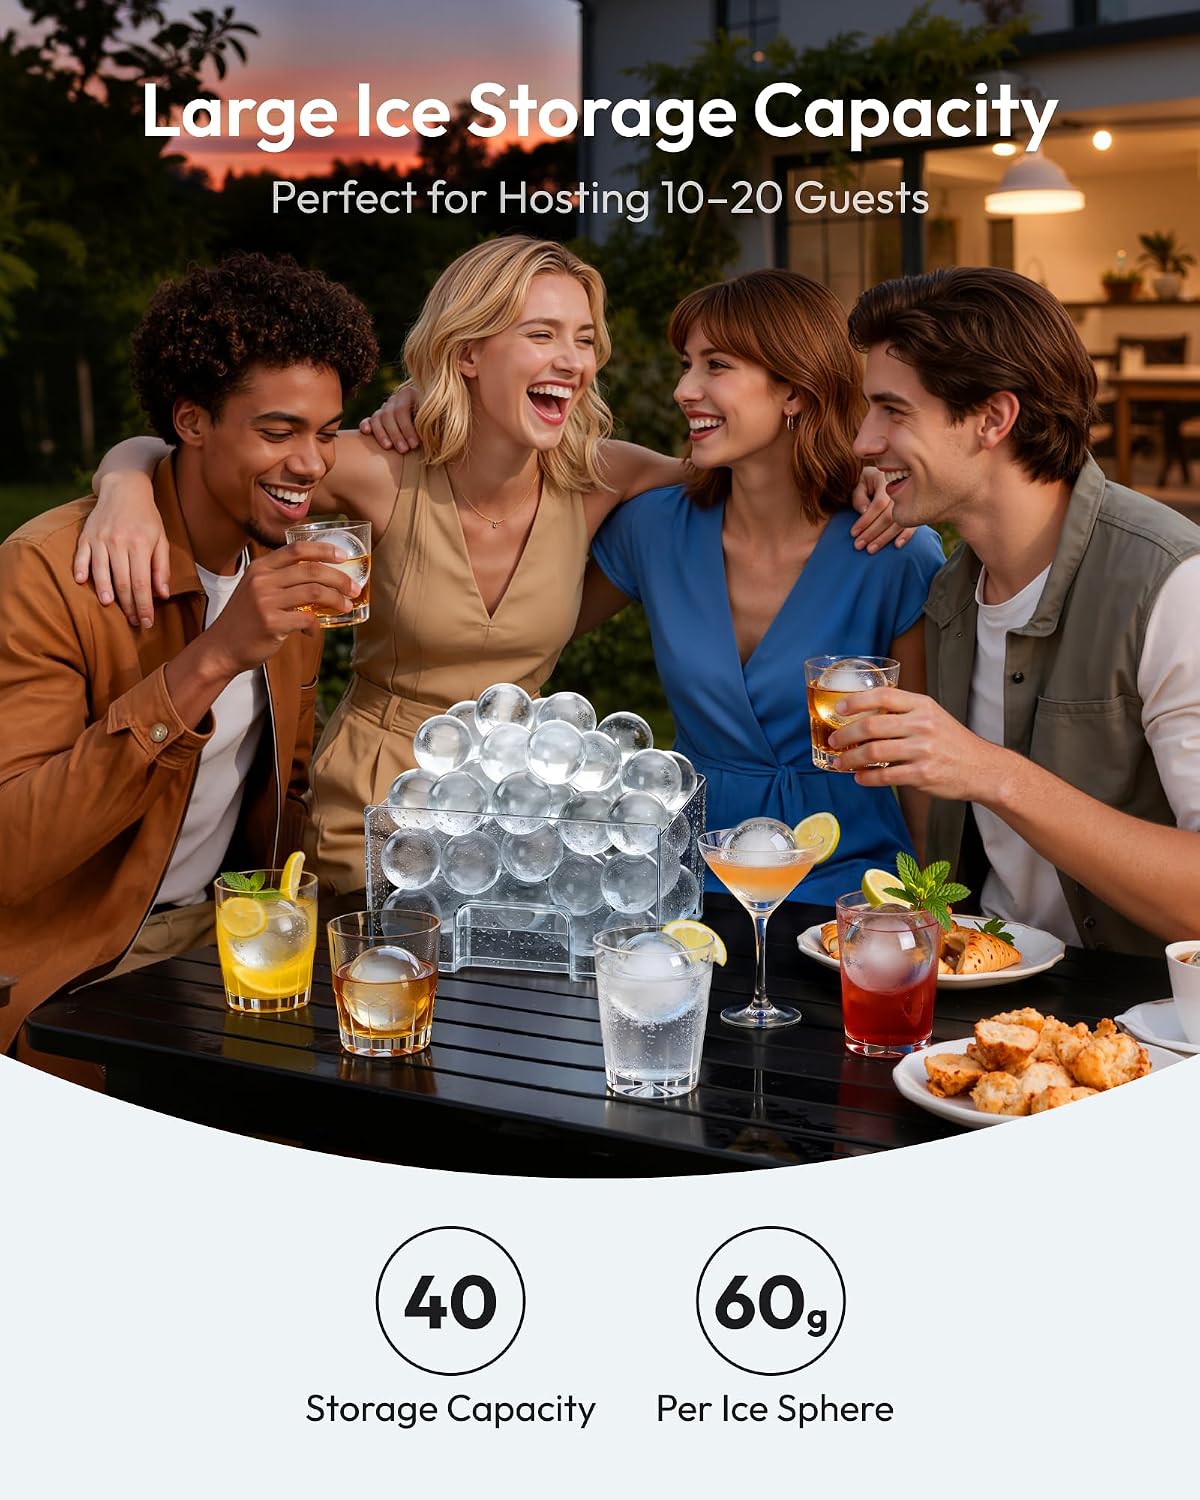
Image 4.2: The ice maker's large storage capacity, ideal for continuous ice supply.
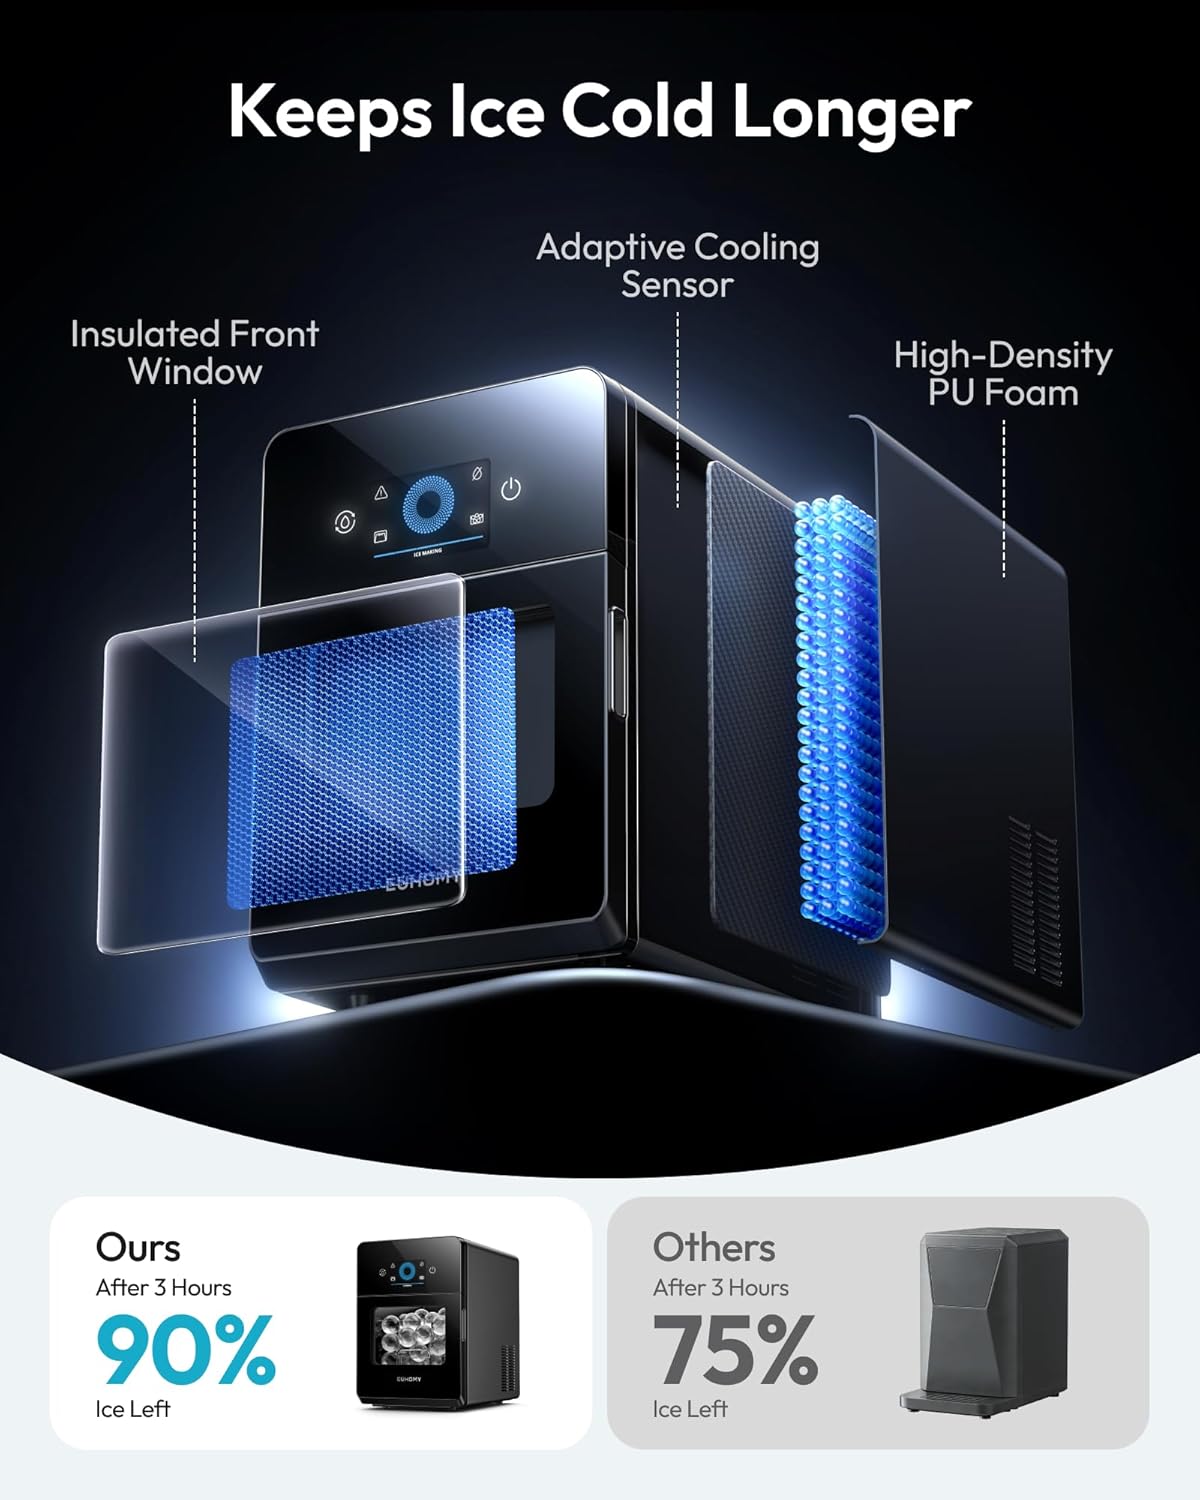
Image 4.3: Internal components demonstrating how the ice maker keeps ice cold longer, including insulation and cooling sensor.
4.4 Water Quality for Clear Ice
The clarity of the ice balls can be influenced by the quality of the water used. For best results and crystal-clear ice, distilled water is recommended. Filtered water also produces good results, while tap water may result in cloudier ice with more bubbles.

Image 4.4: Visual guide to ice clarity based on the Total Dissolved Solids (TDS) level in water, recommending distilled water for optimal results.

Image 4.5: Illustration demonstrating how the 2-inch clear ice spheres melt slower than standard ice cubes, preserving drink flavor.
5. Údržba
5.1 Funkce samočištění
The ice maker is equipped with an automatic deep cleaning system:
- Ujistěte se, že nádržka na vodu je naplněna čistou vodou.
- Stiskněte a podržte Tlačítko Clean (left side) for 5 seconds to initiate the thorough cleaning cycle.
- The machine will perform a cleaning process, circulating water to remove impurities.
- Once the cleaning cycle is complete, drain the water as described in section 5.2.

Image 5.1: The self-cleaning feature in action, ensuring hygienic ice production without manual scrubbing.
5.2 Vypouštění vody
To drain water from the appliance:
- Locate the front-edge drain port at the bottom of the unit.
- Place a container under the drain port.
- Odstraňte vypouštěcí zátku, aby mohla vytéct voda.
- Po vypuštění bezpečně nasaďte zpět vypouštěcí zátku.

Image 5.2: The convenient front-edge drain port for easy water removal without lifting the machine.
5.3 Obecné čištění
Regularly wipe the exterior of the appliance with a soft, damp cloth. For the interior, in addition to the self-cleaning function, periodically wipe down surfaces with a mild detergent solution and rinse thoroughly. Ensure the appliance is unplugged before any manual cleaning.
6. Řešení problémů
If you encounter issues with your EUHOMY IM046-S ice ball maker, refer to the following common problems and solutions:
| Problém | Možná příčina | Řešení |
|---|---|---|
| Stroj se nezapíná | Žádné napájení | Zkontrolujte připojení napájecího kabelu a zásuvky ve zdi. |
| Žádná tvorba ledu | Low water level; Door not closed; Ambient temperature too high | Refill water reservoir; Ensure door is securely closed; Operate in a cooler environment. |
| Ice balls are cloudy | Špatná kvalita vody | Use filtered or distilled water for clearer ice. |
| Water Shorttage Alert is on | Zásobník vody je prázdný | Refill the water reservoir manually or check auto-refill connection. |
| Door Alert is on | Dveře nejsou správně zavřené | Close the door firmly until the alert disappears. |
Pokud problém přetrvává i po vyzkoušení těchto řešení, kontaktujte zákaznickou podporu.
7. Specifikace
| Funkce | Detail |
|---|---|
| Značka | EUHOMY |
| Název modelu | IM046-S |
| Rozměry produktu | 17.6"H x 12.6"Š x 17.9"V |
| Kapacita | 22 Pounds (Ice Production per Day) |
| Wattage | 150 wattů |
| svtage | 120 voltů |
| Ice Ball Size | 2 palce (50 mm) |
| Ice Making Speed | 4 balls per 40 minutes |
| Denní výroba ledu | Up to 144 balls per day |
| Kapacita úložiště ledu | 30-40 balls |
| Čistá hmotnost | 40.23 lb / 18.25 kg |
| Chladivo | R290a |
| Zahrnuté komponenty | Ice Maker Machine, Inlet Pipe, Instruction Manual, Ice Clamp |
8. Záruka a podpora
This EUHOMY ice ball maker comes with a 1 roky záruka výrobce. For warranty claims, technical support, or any questions regarding the operation or maintenance of your appliance, please contact EUHOMY customer service. Refer to the contact information provided in the packaging or on the official EUHOMY webmísto.