
1. Úvod
The Portta VD20 VHS to Digital Converter is designed to help you preserve your analog video memories by converting them into digital MP4 files. This device features a 5-inch HD screen for real-time preview and playback, supporting various analog sources such as VHS, VCR, DVR, DVD, Hi8, Mini DV, and camcorders. It records directly to USB flash drives or TF cards, offering a convenient solution for digitizing your video collection.
2. Bezpečnostní informace
- Nevystavujte zařízení vodě nebo vlhkosti.
- Neumisťujte zařízení do blízkosti zdrojů tepla nebo na přímé sluneční světlo.
- Používejte pouze dodaný napájecí adaptér, abyste předešli poškození.
- Nepokoušejte se zařízení otevírat ani opravovat sami. Veškerý servis svěřte kvalifikovanému personálu.
- Udržujte zařízení mimo dosah dětí.
- Během provozu zajistěte dostatečné větrání v okolí zařízení.
3. Obsah balení
Po otevření zkontrolujte obsah balení. Pokud některé položky chybí nebo jsou poškozené, kontaktujte zákaznickou podporu.
- Portta VD20 VHS to Digital Converter
- Napájecí adaptér
- AV kabel
- Uživatelská příručka
4. Konec produktuview
Familiarize yourself with the various parts and connections of your Portta VD20 converter.
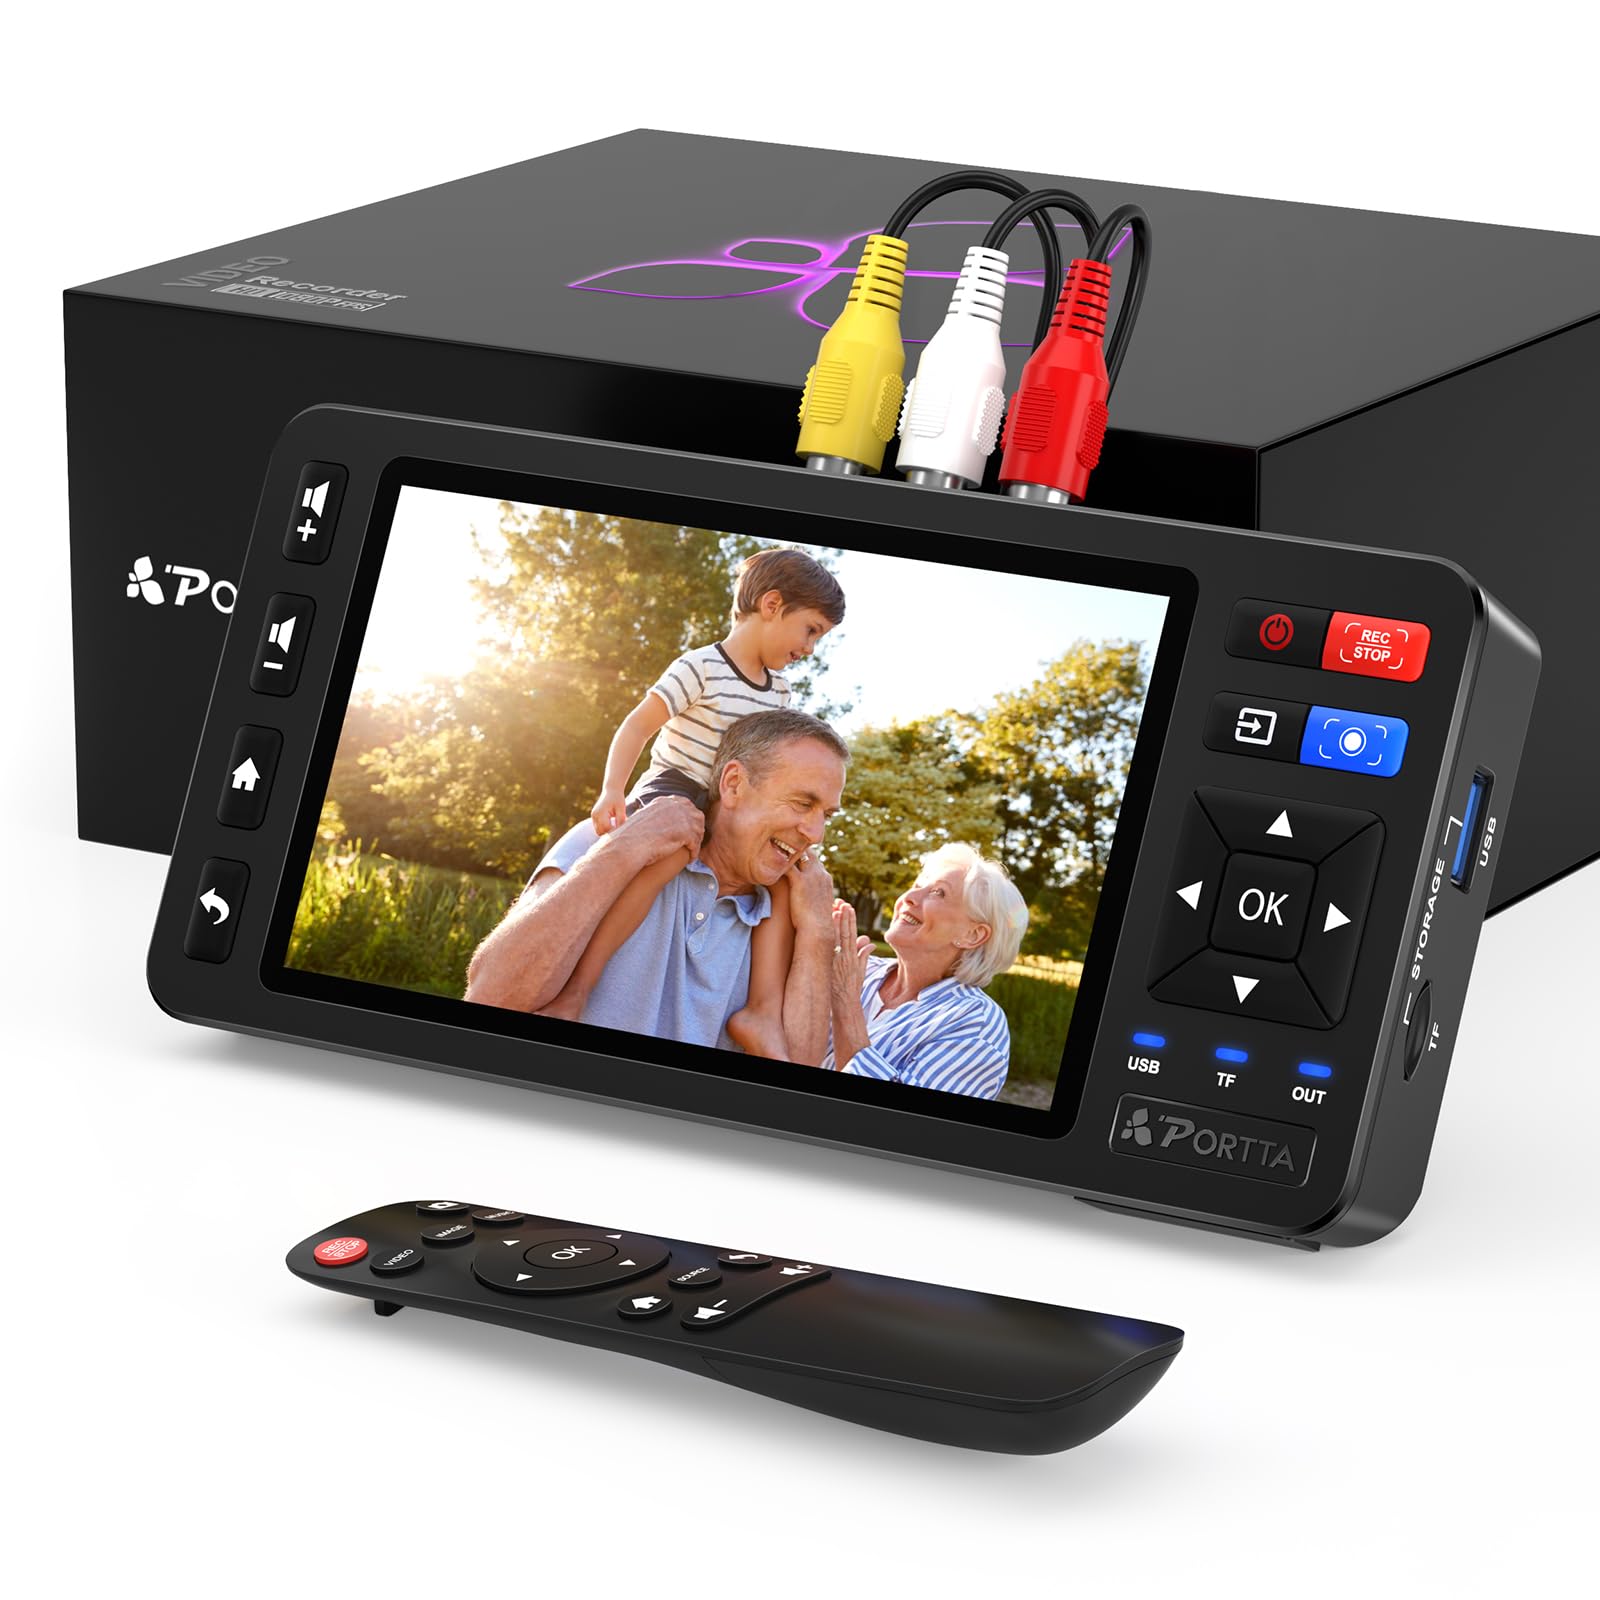
Obrázek 1: Přední strana view of the Portta VD20 VHS to Digital Converter. This image displays the device's 5-inch HD screen, control buttons for recording and navigation, and various input/output ports on its sides.
Přední panel
- 5palcový HD LCD displej: Displays video input, recorded content, and menu options.
- Ovládací tlačítka: For power, menu navigation, record/stop, and playback.
Side/Rear Panel
- AV Input (RCA): Connects to analog video sources using composite video (yellow) and stereo audio (red/white) cables.
- Vstup S-Video: Connects to analog video sources using an S-Video cable for potentially higher quality video.
- USB port: For connecting USB flash drives or portable HDDs/SSDs for storage.
- Slot na kartu TF: For inserting TF (MicroSD) cards for storage.
- Vstupní napájení (DC 5V): Připojuje se k napájecímu adaptéru.
5. Nastavení
5.1 Připojení napájení
- Connect the power adapter to the DC 5V input port on the Portta VD20.
- Zapojte napájecí adaptér do elektrické zásuvky.
5.2 Připojení zdrojových zařízení
The VD20 supports both AV (RCA) and S-Video inputs. Choose the appropriate connection based on your source device (VCR, DVD player, camcorder, etc.).
Using AV (RCA) Cables:
- Connect the yellow RCA cable to the video output (yellow) of your source device and to the AV video input (yellow) on the VD20.
- Connect the red and white RCA cables to the audio outputs (red for right, white for left) of your source device and to the AV audio inputs (red/white) on the VD20.
Using S-Video Cable:
- Connect the S-Video cable to the S-Video output of your source device and to the S-Video input on the VD20.
- For audio, you will still need to use the red and white RCA audio cables as described above, connecting them to the audio outputs of your source device and the AV audio inputs on the VD20.
5.3 Connecting Storage Device
The VD20 supports USB flash drives, portable HDDs/SSDs, and TF (MicroSD) cards.
- Pro úložiště USB: Insert your USB flash drive or portable HDD/SSD into the USB port on the VD20.
- For TF Card Storage: Insert your TF card into the TF card slot on the VD20. Ensure it is inserted correctly until it clicks into place.
Note: Ensure your storage device is formatted to FAT32 or exFAT for optimal compatibility. NTFS may also be supported but FAT32/exFAT is recommended.
6. Návod k obsluze
6.1 Zapnutí/vypnutí
- Zapnutí: Stiskněte a podržte tlačítko napájení, dokud se obrazovka nerozsvítí.
- Vypnout: Stiskněte a podržte tlačítko Napájení, dokud se obrazovka nevypne.
6.2 Using the 5-inch HD LCD Screen
The built-in screen provides a real-time preview of the video input and allows you to navigate menus and playback recorded files.
6.3 Nahrávání videa
- Ensure your source device is connected and playing the content you wish to record.
- On the VD20, select the correct input source (AV or S-Video) if prompted, or if there's a dedicated input selection button.
- Verify the video is displayed correctly on the 5-inch screen.
- Stiskněte tlačítko Záznam button (usually indicated by a red dot or 'REC'). The recording indicator will light up, and a timer will appear on the screen, indicating that recording has started.
- Nahrávání zastavíte stisknutím tlačítka Záznam button again. The recording indicator will turn off, and the file will be saved to your connected storage device.
6.4 Přehrávání
- Navigate to the 'Playback' or 'Files' menu using the control buttons.
- Vyberte požadované video file ze seznamu.
- Press the 'Play' button to start playback.
- Use the navigation buttons to pause, fast forward, or rewind during playback.
6.5 Format Settings
The VD20 supports MP4 video and MP3 audio formats, compatible with PAL, NTSC, and SECAM video standards. These settings can typically be adjusted in the device's menu.
- Formát videa: MP4 (H.264 encoding).
- Formát zvuku: MP3 (for audio-only recordings) or LPCM (for video recordings).
- Video standard: Ensure the device's video standard setting (PAL/NTSC/SECAM) matches your source device's output for correct display and recording.
7. Údržba
7.1 Čištění
- K čištění vnějších částí zařízení používejte měkký, suchý hadřík.
- Na obrazovku použijte čisticí roztok určený pro obrazovky a hadřík z mikrovlákna.
- Nepoužívejte abrazivní čisticí prostředky nebo rozpouštědla.
7.2 Skladování
- Přístroj skladujte na chladném a suchém místě mimo dosah přímého slunečního záření a extrémních teplot.
- Pokud skladujete zařízení delší dobu, odpojte napájecí adaptér.
8. Řešení problémů
| Problém | Možná příčina | Řešení |
|---|---|---|
| Žádná síla | Power adapter not connected; faulty outlet. | Ujistěte se, že je napájecí adaptér bezpečně připojen a zapojený do funkční zásuvky. |
| No video on screen | Incorrect input source selected; cables not connected properly; source device not playing. | Check all AV/S-Video connections. Ensure source device is powered on and playing. Select correct input on VD20. |
| Žádný zvuk | Audio cables not connected; volume too low on source or VD20. | Verify red/white audio RCA cables are connected. Adjust volume on source device and VD20. |
| Recording fails or stops | Storage device full; incompatible format; storage device not detected. | Check available space on USB/TF card. Ensure storage device is formatted to FAT32/exFAT. Reinsert storage device. |
| Špatná kvalita videa | Poor quality source; dirty cables/ports; incorrect video standard. | Ensure source video is clean. Clean cables and ports. Verify VD20 video standard (PAL/NTSC/SECAM) matches source. |
9. Specifikace
- Model: VD20
- Obrazovka: 5palcový HD LCD displej
- Video vstup: AV (CVBS), S-Video
- Zvukový vstup: R/L Stereo Audio (RCA)
- Formát videa: MP4 (H.264)
- Formát zvuku: MP3, LPCM (for video)
- Video standardy: PAL, NTSC, SECAM
- Rozlišení záznamu: Up to 1080p @ 60fps (input resolution)
- Paměťová média: USB Flash Drive, TF Card, Portable HDD/SSD
- Napájení: DC 5V
- Rozměry (D x Š x V): 6.85 x 3.23 x 0.91 palce
- Kompatibilní zařízení: VHS players, VCRs, DVRs, DVD players, Hi8, Mini DV, Camcorders, Retro Gaming Consoles
10. Záruka a podpora
10.1 Informace o záruce
The Portta VD20 VHS to Digital Converter comes with a 2-letá záruka od data nákupu. Tato záruka se vztahuje na výrobní vady a poruchy při běžném používání. Nevztahuje se na škody způsobené nesprávným použitím, nehodami, neoprávněnými úpravami nebo přírodními katastrofami.
10.2 Zákaznická podpora
For technical assistance, troubleshooting, or warranty claims, please contact Portta customer support. Refer to the contact information provided on the Portta webwebu nebo v dokumentaci k nákupu.
Online podpora: Visit the official Portta website for FAQs, driver downloads, and support contact details.