
1. Úvod
Thank you for choosing the ANDELI MIG-135MINI Multiprocess Welder. This machine is designed for versatility, offering MIG (Flux-Cored), Lift TIG, and MMA (Stick) welding capabilities in a compact and portable unit. This manual provides essential information for the safe and efficient operation, setup, maintenance, and troubleshooting of your welder. Please read this manual thoroughly before operating the machine to ensure proper use and to prevent injury or damage.
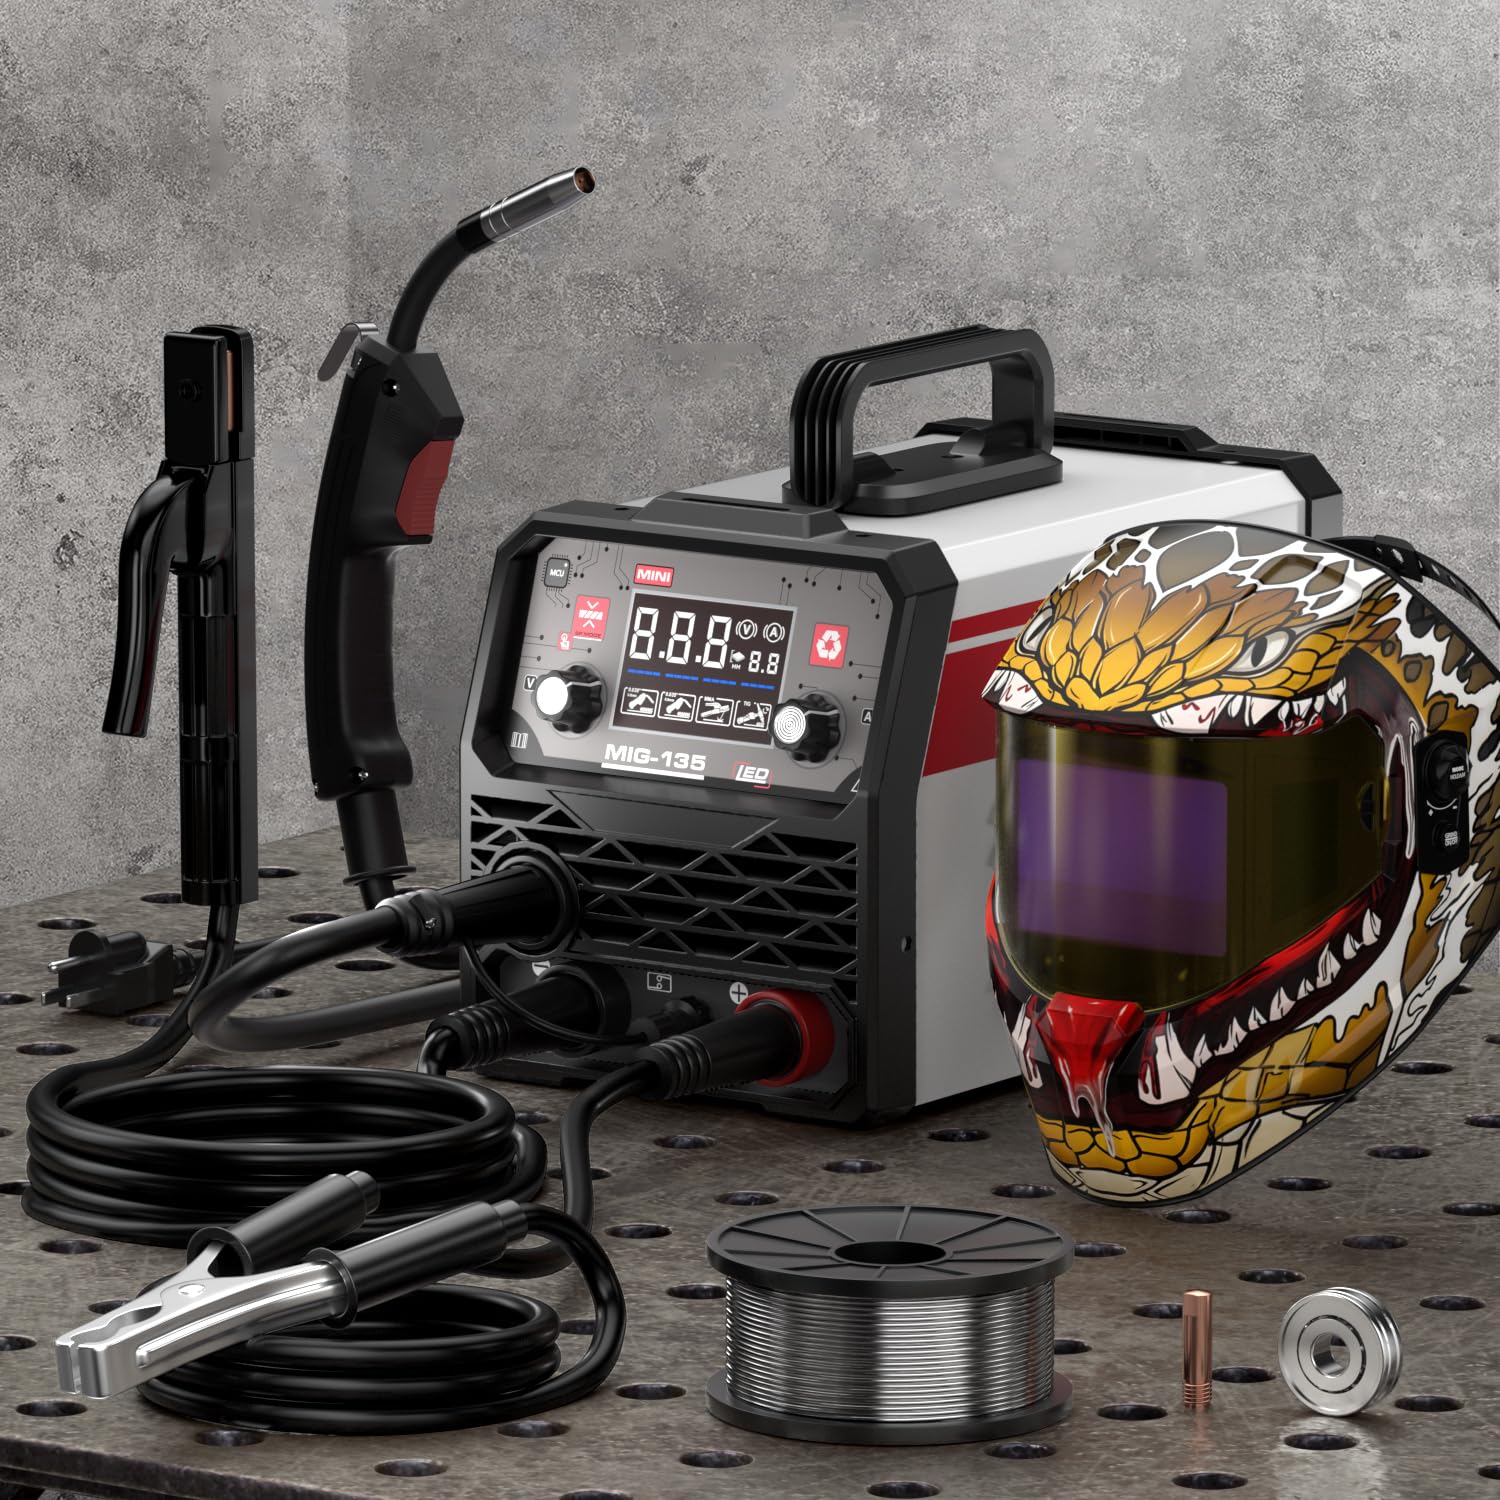
Figure 1.1: The ANDELI MIG-135MINI Multiprocess Welder. This image displays the compact design of the welding machine, highlighting its portability and general appearance.
2. Bezpečnostní pokyny
Welding can be dangerous if proper safety precautions are not observed. Always prioritize safety to prevent electric shock, burns, fire, and other hazards. Read and understand all safety warnings before operating the welder.
2.1 Osobní ochranné prostředky (OOP)
- Svářečská helma: Always wear a welding helmet with appropriate shade filter to protect eyes and face from arc rays and sparks.
- Welding Gloves: Use heavy, flame-resistant welding gloves to protect hands from heat, sparks, and electric shock.
- Ochranný oděv: Wear flame-resistant clothing, long sleeves, and pants to protect skin from sparks and UV radiation. Avoid synthetic fabrics.
- Safety Footwear: Wear sturdy, closed-toe shoes, preferably leather, to protect feet from falling objects and sparks.
2.2 Elektrická bezpečnost
- Ujistěte se, že je svářečka řádně uzemněna.
- Never operate the welder in wet conditions or damp prostředí.
- Inspect all cables and connections for damage before each use. Replace damaged components immediately.
- Nedotýkejte se elektrických částí pod napětím.
2.3 Prevence požáru a výbuchu
- Odstraňte všechny hořlavé materiály z oblasti svařování.
- Mějte po ruce hasicí přístroj.
- Nesvařujte na nádobách, které obsahovaly hořlavé materiály.
2.4 Bezpečnost při práci s výpary a plyny
- Ensure adequate ventilation in the welding area to avoid inhaling welding fumes.
- If ventilation is poor, use an approved respirator.
3. Konec produktuview
Familiarize yourself with the components of your ANDELI MIG-135MINI welder before operation.
3.1 Přední panel

Figure 3.1: Front Control Panel. This image illustrates the layout of the control panel, including mode selection, current/voltage adjustment knobs, and display screen.
- Přepínač volby režimu: Selects between MIG, Lift TIG, and MMA welding modes.
- Aktuální/Voltage Nastavovací knoflík: Adjusts welding current (MMA/TIG) or voltage (MIG).
- Wire Speed Adjustment Knob (MIG Mode): Adjusts the speed of the welding wire feed.
- Digitální displej: Zobrazuje proud, objemtage, or wire speed settings.
- Výstupní terminály: Connections for welding torch, electrode holder, and ground clamp.
3.2 Zadní panel
- Příkon: Connects to 110V AC power supply.
- Vypínač: Zapíná/vypíná svářečku.
- Chladicí ventilátor: Zajišťuje potřebné chlazení vnitřních součástí.
3.3 Internal Wire Feeder

Figure 3.2: Internal Wire Feeder Assembly. This image shows the mechanism for loading and feeding welding wire, including the wire spool holder and drive rollers.
The welder features an integrated wire feeder for MIG welding, designed for smooth and consistent wire delivery.
4. Nastavení
Správné nastavení je klíčové pro bezpečné a efektivní svařování.
4.1 Vybalení a kontrola
- Carefully remove the welder and all accessories from the packaging.
- Inspect the machine for any signs of shipping damage. If damage is found, contact your dealer immediately.
- Ověřte, zda jsou přítomny všechny součásti uvedené v dodacím listu.
4.2 Připojení napájení
- The ANDELI MIG-135MINI operates on a 110V AC power supply.
- Connect the power cord to a dedicated 110V, 20A (minimum) grounded outlet.
- Ensure the power switch on the rear panel is in the "OFF" position before connecting to power.
4.3 Wire Installation (MIG Flux-Cored)

Figure 4.1: Welder Setup Diagram. This diagram illustrates the connections for the welding torch, ground clamp, and power, along with the wire spool installation.
- Otevřete přihrádku podavače drátu.
- Place the 0.030 inch (1kg) flux-cored welding wire spool onto the spool holder. Ensure it rotates freely.
- Thread the wire through the guide tube and into the drive rollers.
- Zavřete napínací rameno hnací kladky a seřiďte napětí. Mělo by být dostatečně utažené, aby drát podával bez prokluzování, ale ne tak utažené, aby se drát deformoval.
- Ensure the correct drive roller groove (0.030 inch) is aligned with the wire.
- Feed the wire through the MIG torch liner until it exits the contact tip. You may need to press the torch trigger with the power on (but no arc) to advance the wire.
4.4 Připojení svařovacího příslušenství
- Pozemní Clamp: Připojte zem třamp cable to the appropriate output terminal on the welder (usually marked with a negative (-) symbol for flux-cored MIG). Secure the clamp k obrobku nebo svařovacímu stolu a zajistěte tak dobrý elektrický kontakt.
- MIG pochodeň: Connect the MIG torch cable to the positive (+) output terminal.
- MMA Electrode Holder: Pro svařování MMA připojte kabel držáku elektrody ke kladnému (+) pólu a zemnícímu kontaktu.amp na záporný (-) terminál.
- Zvedací TIG hořák: For Lift TIG welding, connect the TIG torch cable to the negative (-) terminal and the ground clamp ke kladné (+) svorce.
5. Návod k obsluze
This section details the operation of the ANDELI MIG-135MINI in its various welding modes.
5.1 Obecné kroky provozu
- Zajistěte dodržování všech bezpečnostních opatření a používání OOPP.
- Connect the welder to power and turn the power switch ON.
- Select the desired welding mode (MIG, TIG, or MMA) using the mode selection switch.
- Nastavení parametrů svařování (proud, objemtage, wire speed) according to the material thickness and welding process.
- Perform a test weld on scrap material to verify settings.
- Začněte svařovat.
5.2 Svařování MIG (plničkou)
- Zvolte režim „MIG“.
- Ensure the welder is set for flux-cored wire (no external gas required).
- Upravit voltage and wire speed. A good starting point for 0.030 inch flux-cored wire on thin steel is typically 16-18V and 150-200 IPM wire speed. Refer to a welding chart for specific material thicknesses.
- Maintain a consistent stick-out (distance from contact tip to workpiece) of about 3/8 to 1/2 inch (10-13mm).
- Use a drag technique (pulling the torch) for flux-cored welding.
5.3 Svařování TIG s liftingem
- Zvolte režim „TIG“.
- Připojte hořák TIG k zápornému (-) pólu a zemnícímu vodiči.amp ke kladné (+) svorce.
- Install a tungsten electrode (e.g., 2% Lanthanated) into the TIG torch.
- Upravte svařovací proud.
- To initiate the arc, gently touch the tungsten to the workpiece and then lift it slightly (approx. 1/16 inch or 1.5mm). The arc will start.
- This machine supports Lift TIG, which does not require a high-frequency start unit.
5.4 MMA (obalené) svařování
- Vyberte režim „MMA“.
- Připojte držák elektrody ke kladnému (+) pólu a uzemňovacímu vodiči.amp na záporný (-) terminál.
- Insert the appropriate welding electrode (stick) into the electrode holder.
- Adjust the welding current based on the electrode type and diameter, and the material thickness.
- Strike the arc by lightly scratching the electrode against the workpiece, then quickly lifting it to maintain a short arc length.
6. Údržba
Pravidelná údržba zajistí dlouhou životnost a optimální výkon vaší svářečky.
6.1 Denní údržba
- Zkontrolujte všechny kabely a spoje, zda nejsou poškozené nebo opotřebované.
- Clean the welding torch nozzle and contact tip (MIG) or collet/collet body (TIG) of spatter.
- Zajistěte uzemnění třamp vytváří dobrý kontakt a je bez nečistot.
6.2 Týdenní/měsíční údržba
- Clean the wire feeder assembly, removing any dust or wire shavings.
- Check the drive rollers for wear and ensure they are clean.
- Use compressed air to blow dust out of the welder's internal components through the ventilation openings. Ensure the power is disconnected before doing this.
- Zkontrolujte napájecí kabel, zda není poškozen.
Poznámka: For any internal repairs or complex maintenance, contact qualified service personnel. Do not attempt to repair the machine yourself if you are not trained.
7. Řešení problémů
Tato část obsahuje řešení běžných provozních problémů. V případě problémů, které zde nejsou uvedeny, kontaktujte zákaznickou podporu.
| Problém | Možná příčina | Řešení |
|---|---|---|
| Žádné napájení stroje. | Napájecí kabel odpojený, jistič vypnutý, vypínač vypnutý. | Check power cord, reset circuit breaker, turn power switch ON. |
| Žádný svařovací oblouk. | Poor ground connection, incorrect mode selected, wrong settings, damaged cable. | Ensure good ground contact, verify mode and settings, inspect cables. |
| Problémy s podáváním drátu (MIG). | Incorrect wire tension, clogged liner, wrong drive roller groove, spatter in contact tip. | Adjust tension, clean liner, verify drive roller, clean/replace contact tip. |
| Špatná kvalita svaru. | Incorrect settings, dirty workpiece, improper technique, wrong consumables. | Adjust settings, clean workpiece, refine technique, use correct wire/electrode. |
| Aktivována ochrana proti přehřátí. | Překročený pracovní cyklus, špatné větrání. | Allow machine to cool down, ensure adequate ventilation. |
8. Specifikace
Technical specifications for the ANDELI MIG-135MINI Multiprocess Welder.
| Funkce | Detail |
|---|---|
| Model | MIG-135MINI |
| Vstupní objemtage | 110V AC |
| Svařovací procesy | MIG (s tavným plněným médiem), Lift TIG, MMA (obalené) |
| Wire Compatibility (MIG) | 0.030 inch (1kg) Flux-Cored Wire |
| Hmotnost položky | Přibližně 18.85 libry |
| Rozměry balení | Přibližně 19.7 x 14.6 x 13.4 palce |
| Bezpečnostní funkce | Nadproud, Nadproudtage, Over-heating Automatic Protection |
9. Záruka a podpora
ANDELI products are manufactured to high-quality standards. For warranty information, technical support, or service inquiries, please contact your authorized dealer or the ANDELI customer service department. Keep your purchase receipt as proof of purchase for warranty claims.
Contact information can typically be found on the ANDELI official webna webu nebo prostřednictvím vašeho nákupního místa.