
1. Úvod
The UltraPro 800 Series Z-Wave On/Off Switch provides smart control for your lights and fixtures. This device integrates into your Z-Wave network, allowing for remote operation, scheduling, and voice control when paired with a compatible smart hub. It supports both Z-Wave Plus Long Range and Z-Wave Classic protocols, offering flexible connectivity options for various home environments.
2. Bezpečnostní informace
VAROVÁNÍ: RIZIKO ÚRAZU ELEKTRICKÝM PROUDEM. This product requires installation involving 120V wiring. Improper installation can result in injury or death. Always consult a qualified electrician if you are unsure about any part of the installation process.
- Turn OFF power at the circuit breaker or fuse box before wiring.
- Ujistěte se, že všechna vodičová spojení jsou bezpečná a řádně izolovaná.
- Do not exceed the maximum load ratings for the switch.
- Instalujte pouze uvnitř.
- Use only copper wire for connections.
3. Vlastnosti
- Hlasové ovládání: Compatible with Amazon Alexa and Google Assistant (requires Z-Wave certified hub).
- DIY design: QuickFit design with reduced housing depth and color-coded flying leads for easier installation.
- Multi-Switch Capable: Supports single-pole or multi-switch configurations with up to four compatible add-on switches or one standard three-way switch.
- Univerzální kompatibilita: Z-Wave Plus Long Range (up to 1,300ft) and Z-Wave Classic (up to 150ft) for broad network integration.
- Personalizace: Customizable LED indicator with eight colors and four operation modes.

Image: UltraPro Z-Wave Plus LR Switch highlighting mobile or voice control and scheduling capabilities.
4. Instalace
4.1 Přepojení kabelážeview
The UltraPro Z-Wave switch features color-coded flying leads for simplified wiring. Ensure power is OFF at the circuit breaker before proceeding.
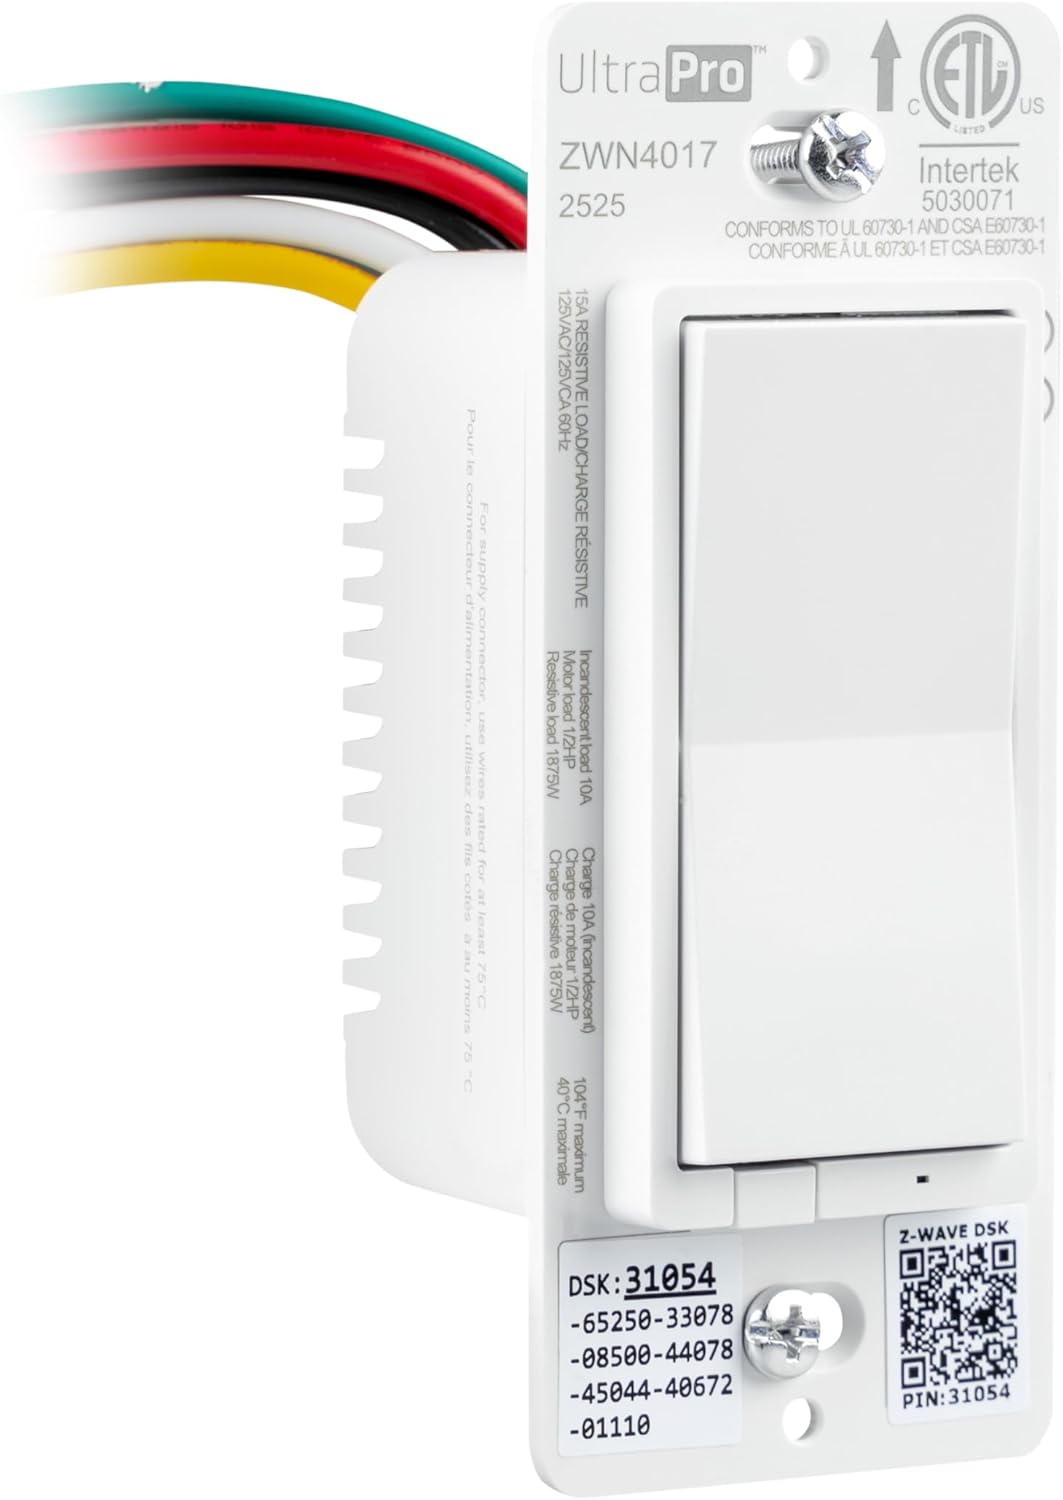
Obrázek: Přední strana view of the UltraPro Z-Wave switch showing wiring connections and product specifications.
4.2 Jednopólové zapojení
- Vypnout napájení: Locate the circuit breaker controlling the switch and turn it OFF.
- Demontáž starého spínače: Unscrew and carefully pull the existing switch from the wall box. Disconnect wires, noting their connections.
- Connect new switch: Connect the UltraPro switch wires to your home's wiring using wire nuts (not included):
- Black wire (Line): Connect to the incoming 120V AC hot wire.
- Red wire (Load): Connect to the wire going to the light fixture or load.
- White wire (Neutral): Connect to the neutral wire bundle (usually white).
- Green wire (Ground): Connect to the bare copper or green ground wire.
- Note: The yellow wire is for 3-way/multi-switch configurations only. Insulate if not used.
- Montáž spínače: Carefully push the wired switch back into the wall box. Secure it with screws.
- Install wallplate: Attach your desired wallplate (sold separately).
- Obnovení napájení: Turn the circuit breaker back ON.
4.3 3-Way / Multi-Switch Wiring
This switch supports direct 3-way wiring without needing an add-on switch, or can be used with up to four UltraPro add-on switches. For direct 3-way, the yellow traveler wire is used. Refer to the detailed wiring diagrams provided with your product packaging or on the manufacturer's website for specific multi-switch configurations.
Důležité: In a 3-way setup, ensure that the switch location where the UltraPro Z-Wave switch is installed has a constant hot line, a load wire, and a neutral wire. The yellow wire from the UltraPro switch connects to the traveler wire that goes to the other standard 3-way switch. The other standard 3-way switch will then control the power to the yellow traveler wire.
5. Setup and Pairing (Z-Wave Inclusion)
To integrate your UltraPro Z-Wave switch into your smart home system, you must pair it with a compatible Z-Wave certified hub.
- Prepare your hub: Follow your Z-Wave hub's instructions to enter inclusion (pairing) mode. This is often referred to as "Add Device" or "Discover Device."
- Initiate pairing on switch: Press the top or bottom of the paddle switch once. The LED indicator will flash to confirm inclusion mode.
- Confirm pairing: Your hub should confirm the device has been added. The switch's LED will stop flashing and return to its normal state.
- Pojmenujte zařízení: Assign a name to your switch within your hub's interface (e.g., "Kitchen Light").
5.1 Vyloučení Z-Wave (odebrání ze sítě)
To remove the switch from your Z-Wave network:
- Prepare your hub: Follow your Z-Wave hub's instructions to enter exclusion (removal) mode. This is often referred to as "Remove Device" or "Exclude Device."
- Initiate exclusion on switch: Press the top or bottom of the paddle switch once. The LED indicator will flash to confirm exclusion mode.
- Confirm exclusion: Your hub should confirm the device has been removed. The switch's LED will stop flashing.
5.2 Nastavení hlasového ovládání
Once paired with a compatible Z-Wave hub (e.g., SmartThings, Ring Alarm) that supports Amazon Alexa or Google Assistant integration, you can enable voice control:
- Link accounts: In your Alexa or Google Home app, link your Z-Wave hub account.
- Objevte zařízení: Ask your voice assistant to "Discover devices" or use the app to initiate discovery.
- Řízení: You can now use voice commands like "Alexa, turn on Kitchen Light" or "Hey Google, turn off Living Room Fan."

Image: A family in a kitchen, demonstrating voice control functionality with Amazon Alexa and Google Home compatibility.
6. Provoz
6.1 Ruční ovládání
- NA: Press the top of the paddle switch to turn the connected load ON.
- OFF: Press the bottom of the paddle switch to turn the connected load OFF.
6.2 Remote Control and Scheduling
Once paired with your Z-Wave hub, you can control the switch remotely via your hub's mobile application. This allows you to turn lights ON/OFF from anywhere and set up schedules for automated operation.

Image: A person using a mobile device to schedule and control home lighting remotely.
6.3 LED Indicator Customization
The switch features a customizable LED indicator. Refer to your Z-Wave hub's advanced settings or the UltraPro support documentation for instructions on how to change the LED color and operation mode (e.g., always ON, always OFF, ON when load is OFF, ON when load is ON).
7. Údržba
The UltraPro Z-Wave switch requires minimal maintenance. To clean, wipe with a soft, dry cloth. Do not use liquid cleaners or sprays directly on the switch.
8. Řešení problémů
- Přepínač nereaguje: Ensure power is ON at the circuit breaker. Check wiring connections. Try re-pairing the switch with your Z-Wave hub.
- Nelze spárovat s hubem: Ensure your hub is in inclusion mode. Move the switch closer to the hub if range is an issue (especially for Z-Wave Classic). Perform a factory reset on the switch (refer to manufacturer's website for specific steps, usually involves a sequence of button presses).
- Světla blikají nebo se správně nezapínají/nevypínají: Verify the load connected to the switch does not exceed the maximum rating (15A resistive, 10A incandescent, 1/2 HP motor). Ensure proper wiring, especially for 3-way configurations.
- Difficulty fitting into wall box: The QuickFit design reduces housing depth. Ensure sufficient space for wiring and wire nuts.
9. Specifikace

Image: UltraPro Z-Wave switch showing physical dimensions and LED indicator information.
| Specifikace | Detail |
|---|---|
| Číslo modelu | 76605 |
| Provozní režim | ZAPNUTO VYPNUTO |
| Aktuální hodnocení | 15 Amps |
| Provozní svtage | 120 voltů střídavého proudu, 60 Hz |
| Typ kontaktu | Normálně otevřeno |
| Typ konektoru | Clamp (flying leads) |
| Typ obvodu | 3-way capable |
| Protokol připojení | Z-Wave (Z-Wave Plus LR, Z-Wave Classic) |
| Wireless Range (Z-Wave LR) | Up to 1,300ft (400m) line of sight |
| Wireless Range (Z-Wave Classic) | Up to 150ft (45m) line of sight |
| Provozní teplota | 32 °F až 104 °F (0 °C až 40 °C) |
| Rozměry (D x Š x V) | 1.75 x 1.75 x 4.25 palce |
| Barva | Bílý |
| Výrobce | Jasco Products Company, LLC |
10. Záruka a podpora
For warranty information or technical support, please visit the UltraPro website or contact Jasco Products Company, LLC directly. Keep your purchase receipt for warranty claims.
Kontaktní údaje:
- Web: byjasco.com/support
- Telefon: Viz pokyny výrobce website for current support numbers.