
Caroma D1 (B0FSZZL7PR)
Caroma Electric Scooter D1 User Manual
Model: D1 (B0FSZZL7PR) | Brand: Caroma
1. Úvod
Welcome to the Caroma Electric Scooter D1 user manual. This manual provides essential information for the safe operation, maintenance, and troubleshooting of your new electric scooter. Please read this manual thoroughly before using the scooter to ensure optimal performance and safety.

Figure 1: Caroma Electric Scooter D1 - General View (Animated)
2. Důležitá bezpečnostní varování
Nedodržení těchto bezpečnostních pokynů může vést k vážnému zranění nebo smrti.
- Při jízdě vždy používejte helmu a vhodné bezpečnostní vybavení (chrániče kolen, lokty).
- Nejezděte za mokra, v silném dešti ani v kalužích.
- Avoid riding on uneven surfaces, loose gravel, or slippery terrain.
- Před každou jízdou se ujistěte, že jsou všechny šrouby a upevňovací prvky utažené.
- Nepřekračujte maximální nosnost 300 kg.
- Při jízdě mějte obě ruce na řídítkách.
- Seznamte se s místními zákony a předpisy týkajícími se používání elektrických koloběžek.
- Děti by měly koloběžku ovládat pouze pod dohledem dospělé osoby.
3. Nastavení a montáž
Your Caroma Electric Scooter D1 comes partially assembled. Follow these steps for final assembly and initial setup:
- Rozbalení: Opatrně vyjměte všechny součásti z obalu. Zkontrolujte, zda během přepravy nedošlo k poškození.
- Instalace řídítek: Attach the handlebar to the main stem. Ensure it is securely fastened with the provided bolts. The handlebar is designed to fold for transport; ensure it is locked in the upright position before riding.
- Nastavení sedadla: Adjust the seat height to a comfortable riding position. Ensure the quick-release lever or bolts are securely tightened.
- Upevnění koše: Secure the rear carry basket to the designated mounting points using the provided hardware.
- Huštění pneumatik: Inflate the 14-inch fat tires to the recommended pressure (check tire sidewall for PSI). The tires are air-filled for better shock absorption.
- Kontrola brzd: Test both front and rear disc brakes to ensure they are functioning correctly. Adjust brake tension if necessary.
- Počáteční poplatek: Fully charge the scooter before its first use. Refer to the "Charging" section for detailed instructions.
Video 1: Konecview of the Caroma D1 Electric Scooter, demonstrating its features and design. This video is provided by the seller and offers a visual guide to the product.
4. Návod k obsluze
To operate your Caroma Electric Scooter D1, follow these steps:
- Zapnutí: Insert the key into the ignition located near the battery compartment and turn it to the "ON" position. The battery level indicator on the handlebar will light up.
- Ovládání škrticí klapky: The scooter features a twist-grip throttle on the right handlebar. Gently twist the throttle towards you to accelerate.
- brzdění: Use the brake levers on both handlebars to slow down or stop. The scooter is equipped with dual mechanical disc brakes for effective stopping power. The rear tail light will illuminate brighter when brakes are applied.
- Světla: Press the headlight button on the left handlebar to turn the front headlight and rear tail light on/off.
- Zvonek: Use the bell on the left handlebar to alert pedestrians or other riders.
- Skládací mechanismus: To fold the handlebar for transport, locate the folding latch near the base of the handlebar stem. Disengage the latch and fold the handlebar down. Ensure it is securely latched when unfolded for riding.
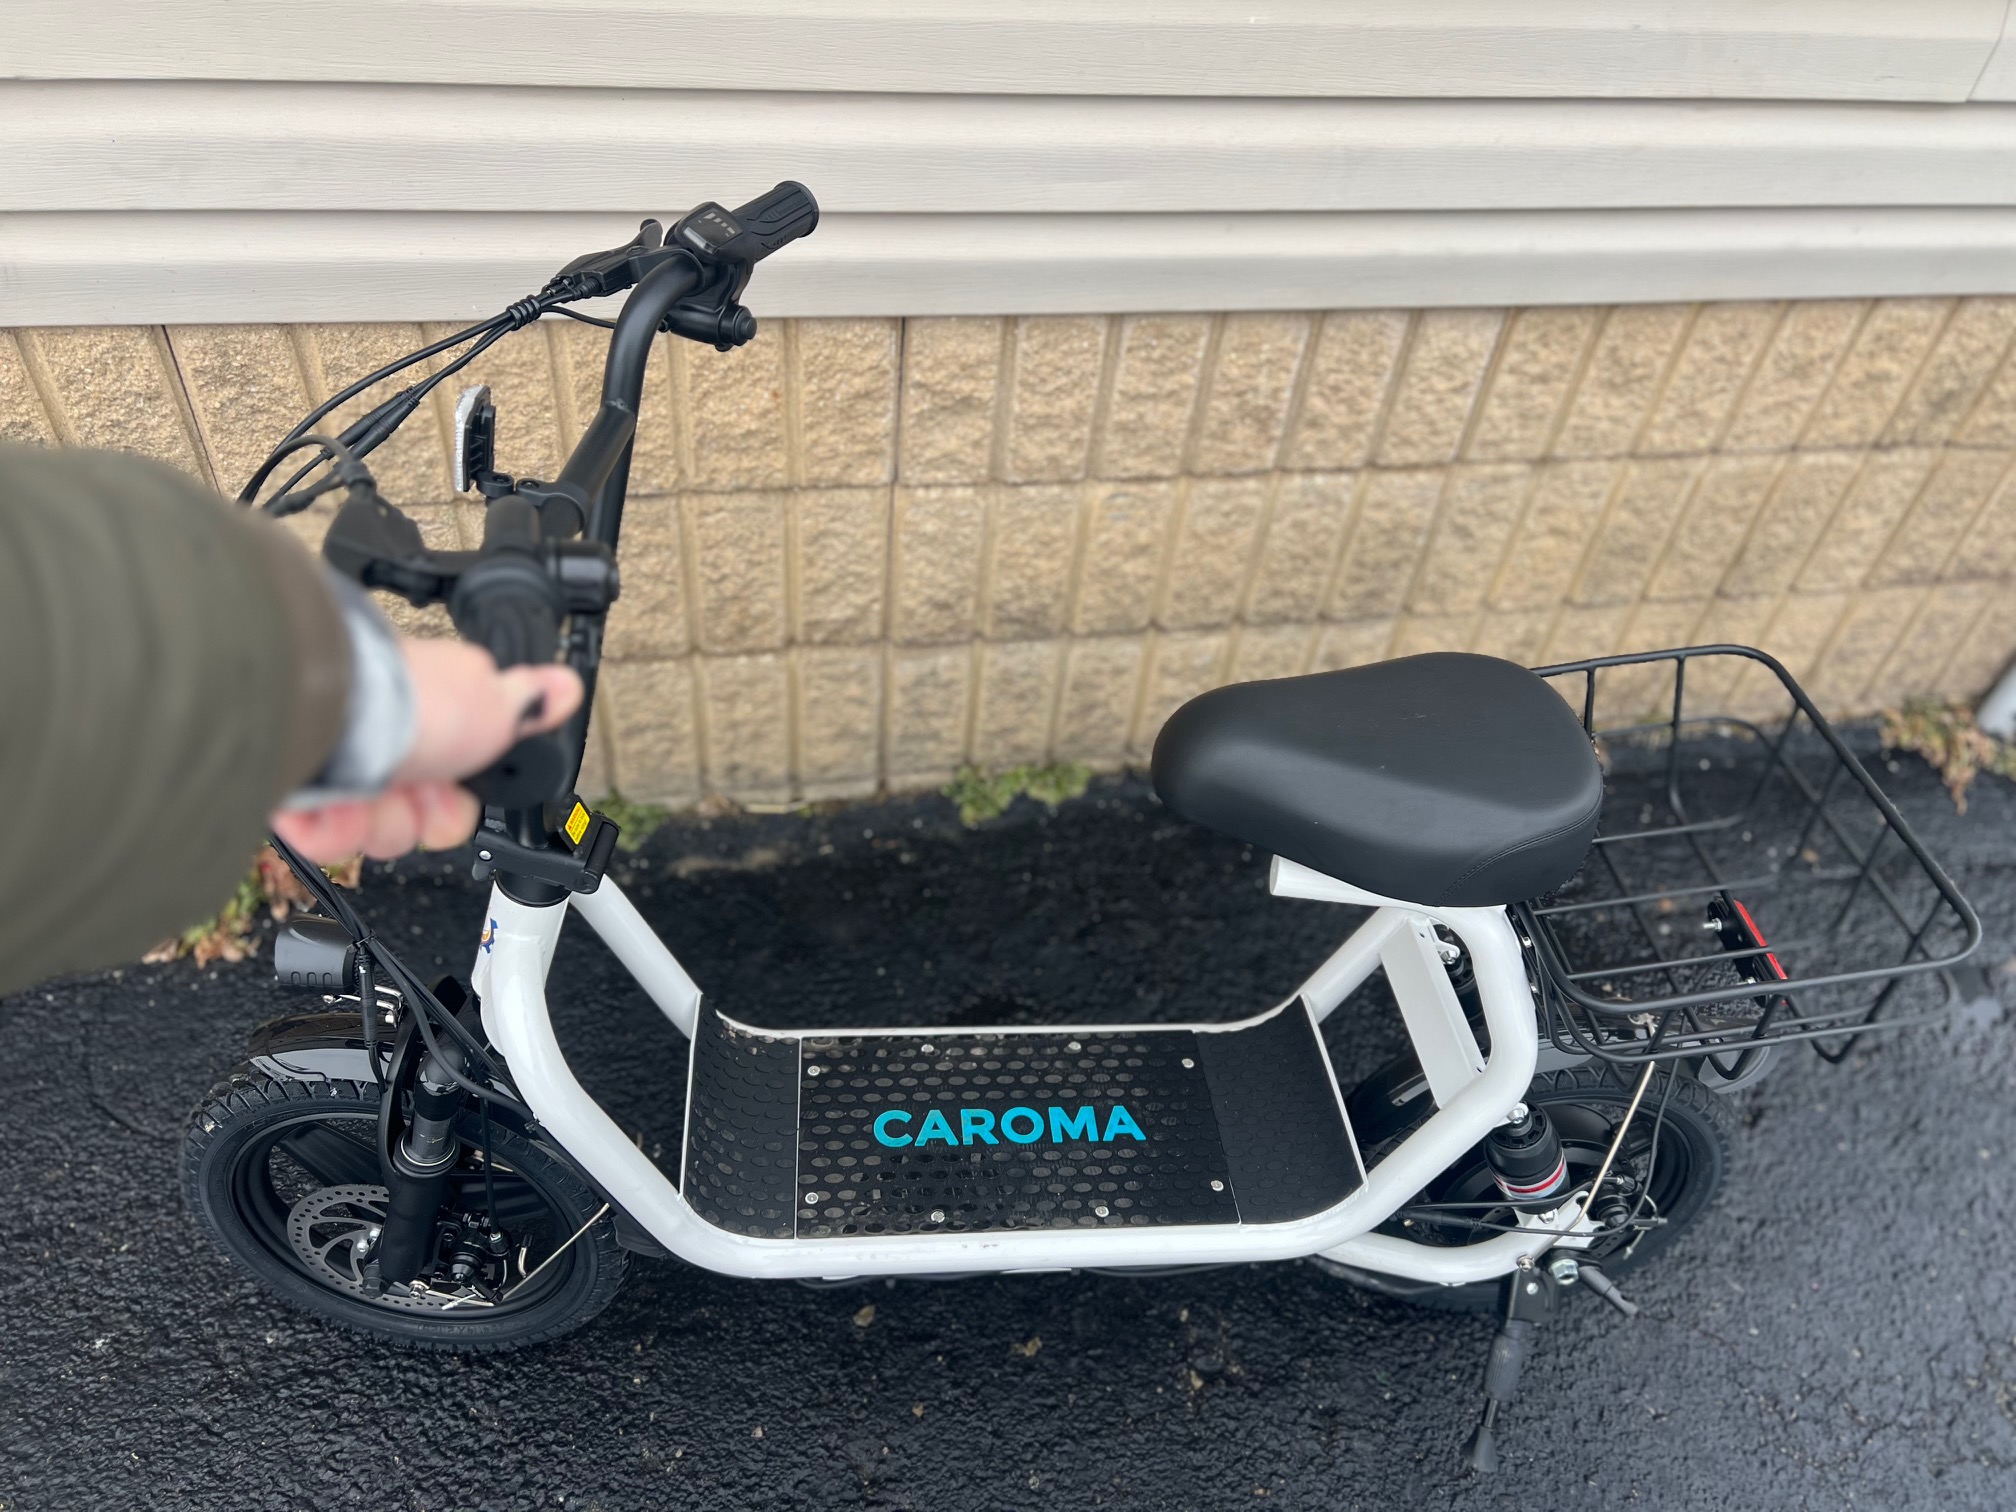
Figure 2: Handlebar Controls and Battery Indicator (Illustrative)
5. Nabíjení baterie
To charge your Caroma Electric Scooter D1:
- Ujistěte se, že je skútr vypnutý.
- Locate the charging port on the side of the battery compartment, near the ignition key.
- Připojte nabíječku k nabíjecímu portu a poté ji zapojte do standardní zásuvky.
- Kontrolka na nabíječce obvykle svítí červeně během nabíjení a po plném nabití se rozsvítí zeleně.
- Doba nabíjení pro plné nabití je přibližně 7-8 hodin.
- Vždy používejte originální nabíječku dodanou s vaší koloběžkou.
Figure 3: Charging Port and Ignition Key (Illustrative)
6. Údržba
- Čištění: Otřete skútr reklamouamp hadříkem. Nepoužívejte tlakovou vodu ani neponořujte koloběžku do vody.
- pneumatiky: Pravidelně kontrolujte tlak v pneumatikách a v případě potřeby je dofukujte. Zkontrolujte pneumatiky, zda nejsou opotřebované.
- brzdy: Periodically check brake pads and cables for wear. Adjust brake tension to ensure responsive braking.
- Péče o baterie: Store the scooter in a cool, dry place. If storing for extended periods, charge the battery to 50-70% and recharge every 2-3 months.
- Spojovací materiál: Pravidelně kontrolujte všechny šrouby, vruty a rychloupínací mechanismy, abyste se ujistili, že jsou pevně utažené a bezpečné.
7. Řešení problémů
| Problém | Možná příčina | Řešení |
|---|---|---|
| Koloběžka se nezapne | Battery is low or dead; Ignition key not in ON position | Charge the battery; Turn the ignition key to ON |
| Motor se nezapíná | Throttle issue; Loose connection | Check throttle for obstruction; Inspect all cable connections |
| Brakes feel loose | Brake cable tension is low; Worn brake pads | Adjust brake cable tension; Replace brake pads |
| Snížený dojezd/rychlost | Low tire pressure; Battery degradation; Heavy load | Inflate tires to recommended PSI; Consult support for battery check; Reduce load |
8. Specifikace
| Funkce | Detail |
|---|---|
| Značka | karoma |
| Model | D1 (B0FSZZL7PR) |
| Výkon motoru | 800W (Rated) / 1200W (Peak) |
| Max Range | Až 30 mil |
| Maximální rychlost | Až 20 mph |
| Velikost pneumatiky | 14-inch Fat Tires |
| Brzdový systém | Dvojité mechanické kotoučové brzdy |
| Suspenze | Dvojité odpružení |
| Maximální zatížení | 300 lb (136 kg) |
| Vlastnosti | Foldable, Seat, Carry Basket, Headlight, Tail Light |
9. Záruka a podpora
For warranty information, technical support, or service inquiries, please refer to the warranty card included with your product or visit the official Caroma webwebu. Uschovejte si účtenku jako doklad o koupi.
Caroma Store: Visit the Caroma Store on Amazon
Ask a question about this manual
Ask about setup, troubleshooting, compatibility, parts, safety, or missing instructions. Manuals+ will review the question and use this page’s manual context to help answer it.