
1. Úvod
Thank you for choosing the Hermitlux Portable Countertop Dishwasher. This manual provides essential information for the safe and efficient operation, installation, and maintenance of your appliance. Please read it thoroughly before use and retain it for future reference.
This compact dishwasher is designed for convenience in small living spaces, offering multiple washing programs and flexible water supply options without requiring permanent installation.
2. Bezpečnostní pokyny
Obecná bezpečnost:
- Před použitím myčky si přečtěte všechny pokyny.
- Ujistěte se, že napájecí zdroj odpovídá objtage specifikováno na typovém štítku.
- Neprovozujte myčku, pokud je poškozen napájecí kabel nebo zástrčka.
- Udržujte děti mimo dosah spotřebiče během provozu a při otevřených dvířkách.
- Neponořujte spotřebič, kabel ani zástrčku do vody nebo jiných kapalin.
- Používejte pouze mycí a oplachovací prostředky speciálně určené pro myčky nádobí.
- Ostré předměty by měly být vkládány hroty dolů, aby se předešlo zranění.
Elektrická bezpečnost:
- Zapojte myčku do uzemněné zásuvky.
- Nepoužívejte prodlužovací kabely ani neuzemněné adaptéry.
- Unplug the dishwasher before cleaning or performing maintenance.
Bezpečnost vody:
- Ujistěte se, že jsou vodovodní přípojky bezpečné, aby nedošlo k únikům.
- Do not use hot water above 140°F (60°C) for the water tank.
3. Konec produktuview
The Hermitlux Portable Countertop Dishwasher is designed for efficient dish cleaning in compact spaces. It features a 5-liter built-in water tank, eliminating the need for a permanent water hookup, and offers multiple washing programs to suit various dish types.

Obrázek 3.1: Celkově view of the Hermitlux Portable Countertop Dishwasher.
Klíčové vlastnosti:
- 5+1 Washing Programs: Includes Standard, Quick, Strong, ECO, Fruit, and an additional Dry function.
- Compact Size, Large Capacity: Measures 16.85"W x 16.73"D x 18.03"H, accommodating 4 full place settings and dishes up to 10.25 inches.
- 360° All-Around Cleaning: Equipped with upper and lower spray arms featuring 14 water jets for thorough cleaning.
- Design šetřící vodu: Uses only 5 liters of water per cycle, saving up to 83% compared to handwashing.
- Není nutná žádná instalace: Offers two water supply modes: a built-in 5L water tank or direct faucet connection.
- Extra Drying & Stay Fresh: Features 60 minutes of hot air drying and 72 hours of automatic ventilation to prevent odors.
- LED Display & Touch Controls: User-friendly interface for easy program selection.
Zahrnuté komponenty:
- Dishwasher Unit
- Koš na příbory
- Vypouštěcí hadice
- Sací hadice
- Uživatelská příručka
- Water Funnel (for tank filling)
4. Nastavení
4.1 Vybalení a umístění
- Z myčky opatrně odstraňte veškerý obalový materiál.
- Place the dishwasher on a flat, stable, and heat-resistant surface. Ensure there is adequate clearance around the unit for ventilation and door opening. A minimum of 19.88 inches between the countertop and wall cabinets is recommended.
- Ensure the drain hose can reach a sink or drain point without kinks.
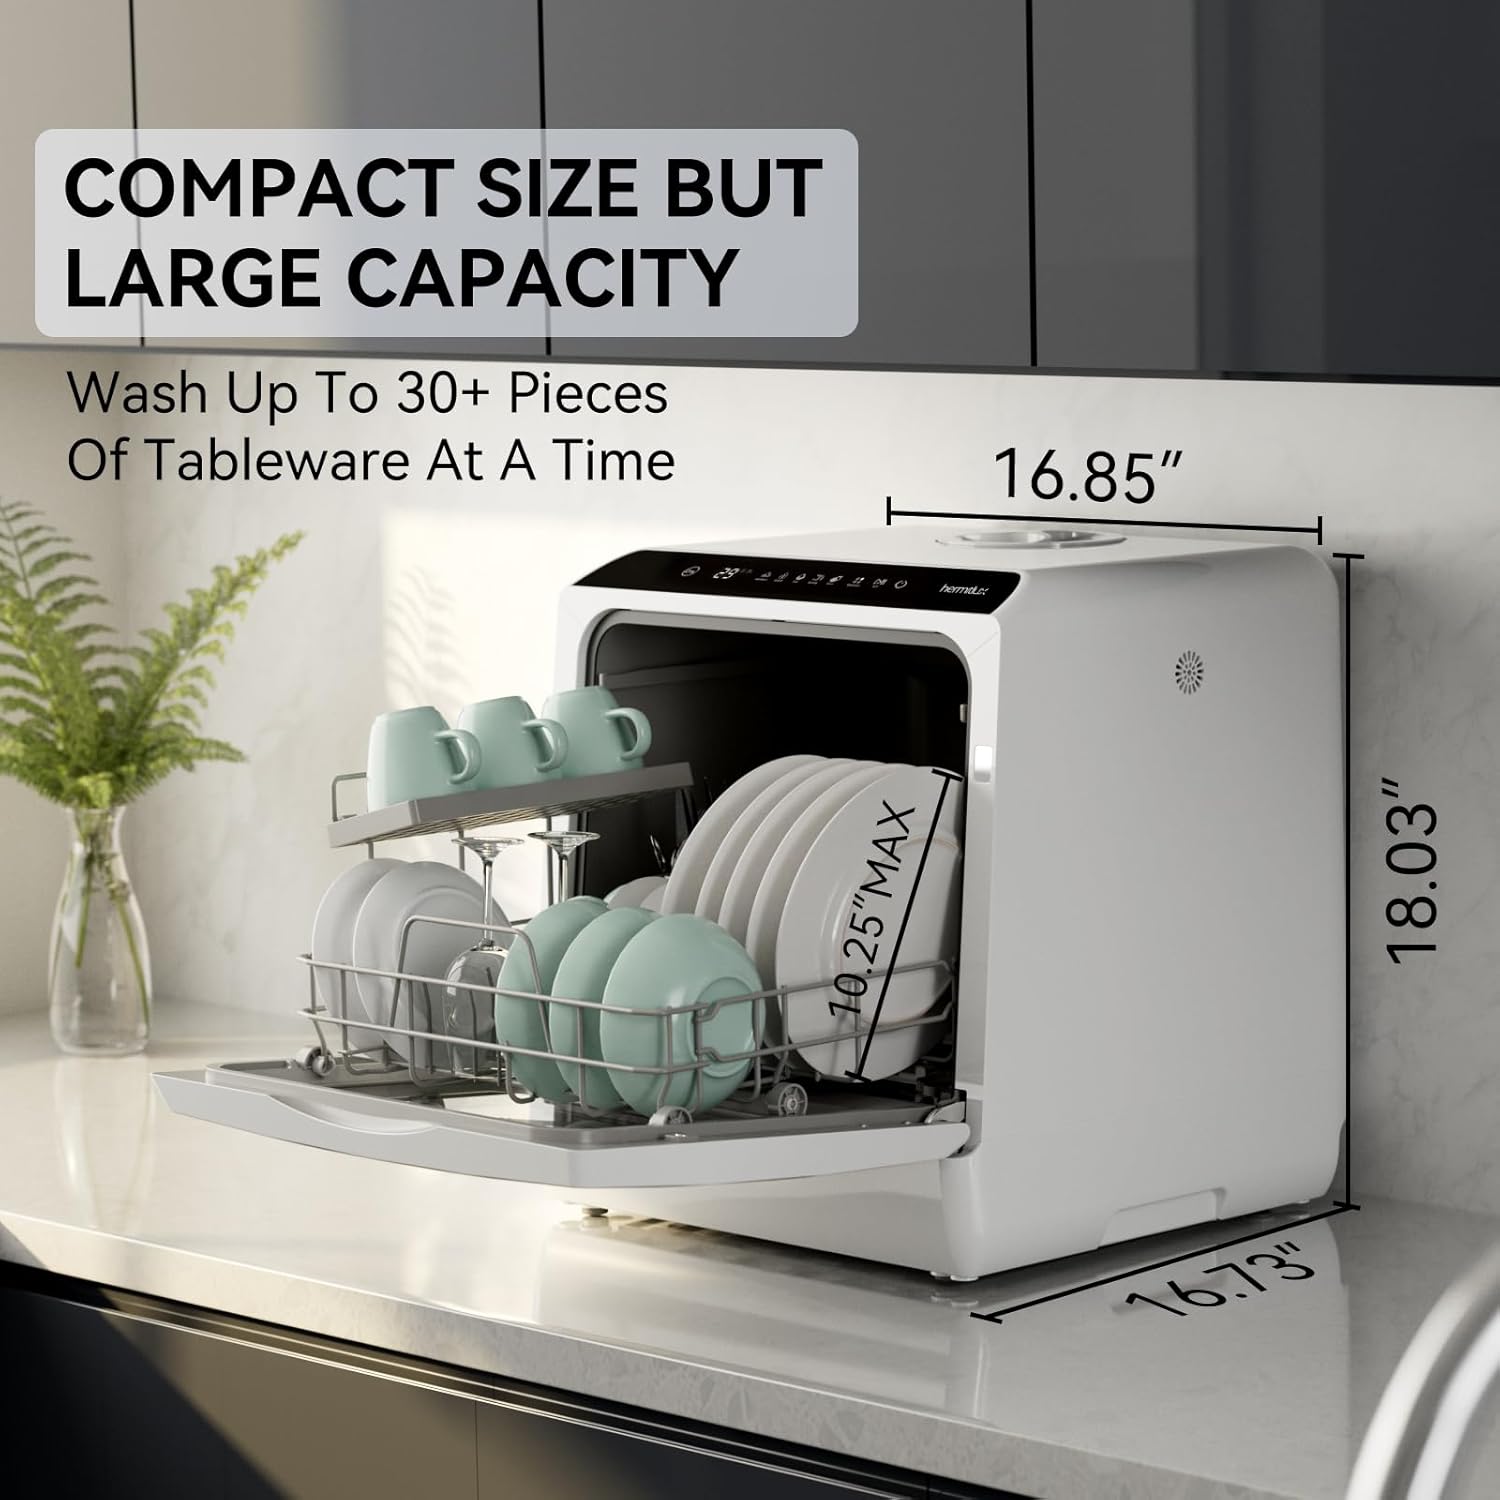
Figure 4.1: Dishwasher dimensions and capacity illustration.
4.2 Možnosti zásobování vodou
Your dishwasher offers two methods for water supply:
Option 1: Built-in Water Tank (No Hookup Needed)
- Open the water tank cover located on the top of the dishwasher.
- Use the provided water funnel to slowly pour up to 5 liters of clean water into the tank.
- The dishwasher will emit a sound when the tank is full. Close the water tank cover.

Figure 4.2: Filling the built-in water tank.
Option 2: Faucet Connection
- Connect the inlet hose to the dishwasher's water inlet port.
- Connect the other end of the inlet hose to a compatible faucet. Ensure the connection is tight to prevent leaks.
- Turn on the faucet to supply water to the dishwasher.
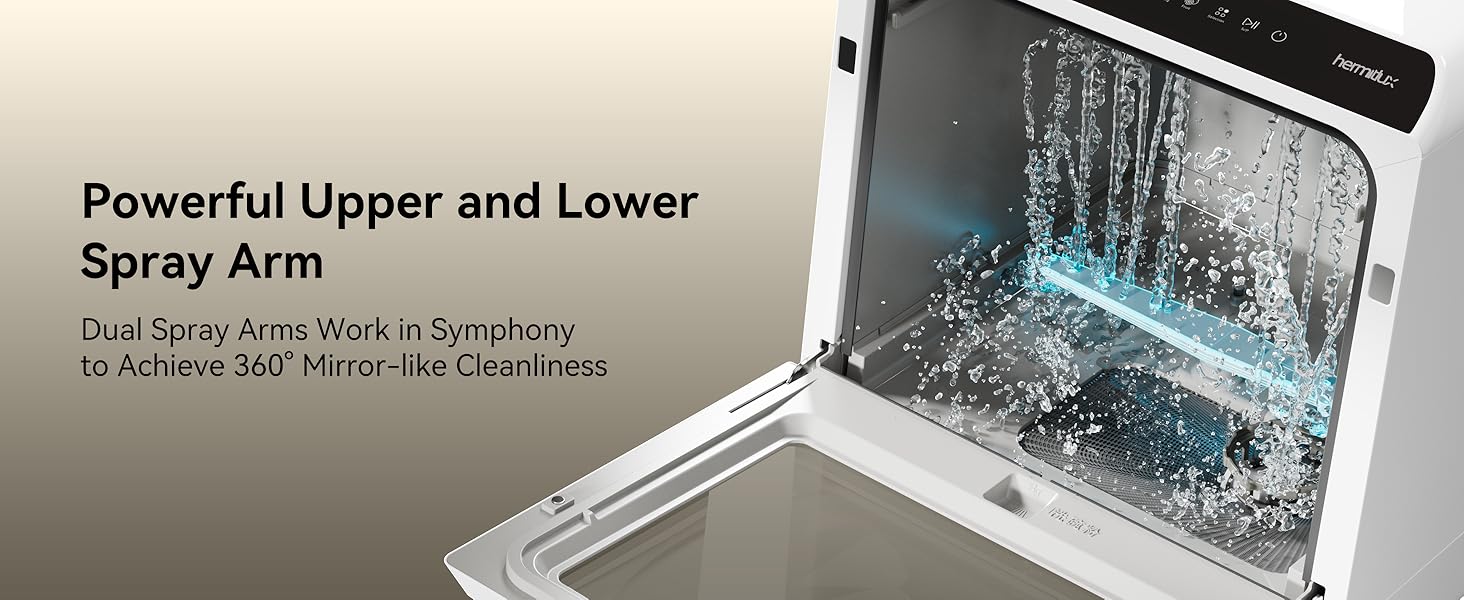
Figure 4.3: Water supply options: tank mode and faucet connection.
5. Návod k obsluze
5.1 Ovládací panel
The dishwasher features an LED display and touch controls on the top panel for easy operation.

Figure 5.1: Clear LED display and touch controls.
5.2 Vkládání nádobí
Proper loading ensures optimal cleaning performance. The dishwasher can accommodate 4 place settings, including plates, cups, bowls, and cutlery.
- Před vložením seškrábněte velké části jídla.
- Place larger items and heavily soiled dishes in the lower rack.
- Cups, glasses, and smaller items go in the upper rack or designated areas.
- Utilize the cutlery basket for forks, spoons, and knives (points down).
- Ujistěte se, že nádobí neblokuje ostřikovací ramena.
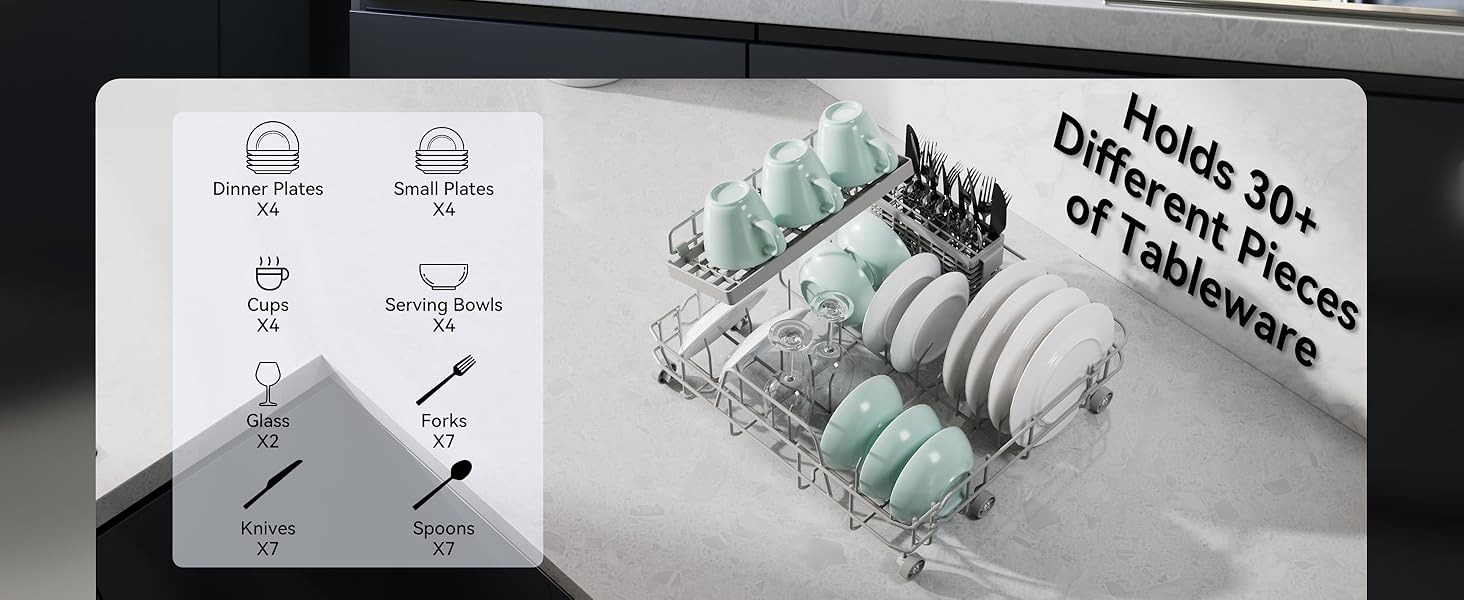
Figure 5.2: Dish loading capacity and arrangement.

Figure 5.3: Rack features including adjustable shelf and foldable tines.
5.3 Přidání mycího prostředku a leštidla
Use only automatic dishwasher detergent. Place the recommended amount into the detergent dispenser. If using rinse aid, fill the rinse aid dispenser according to its indicator.
5.4 Selecting a Washing Program
The dishwasher offers 5 main washing programs and a dedicated Dry function:
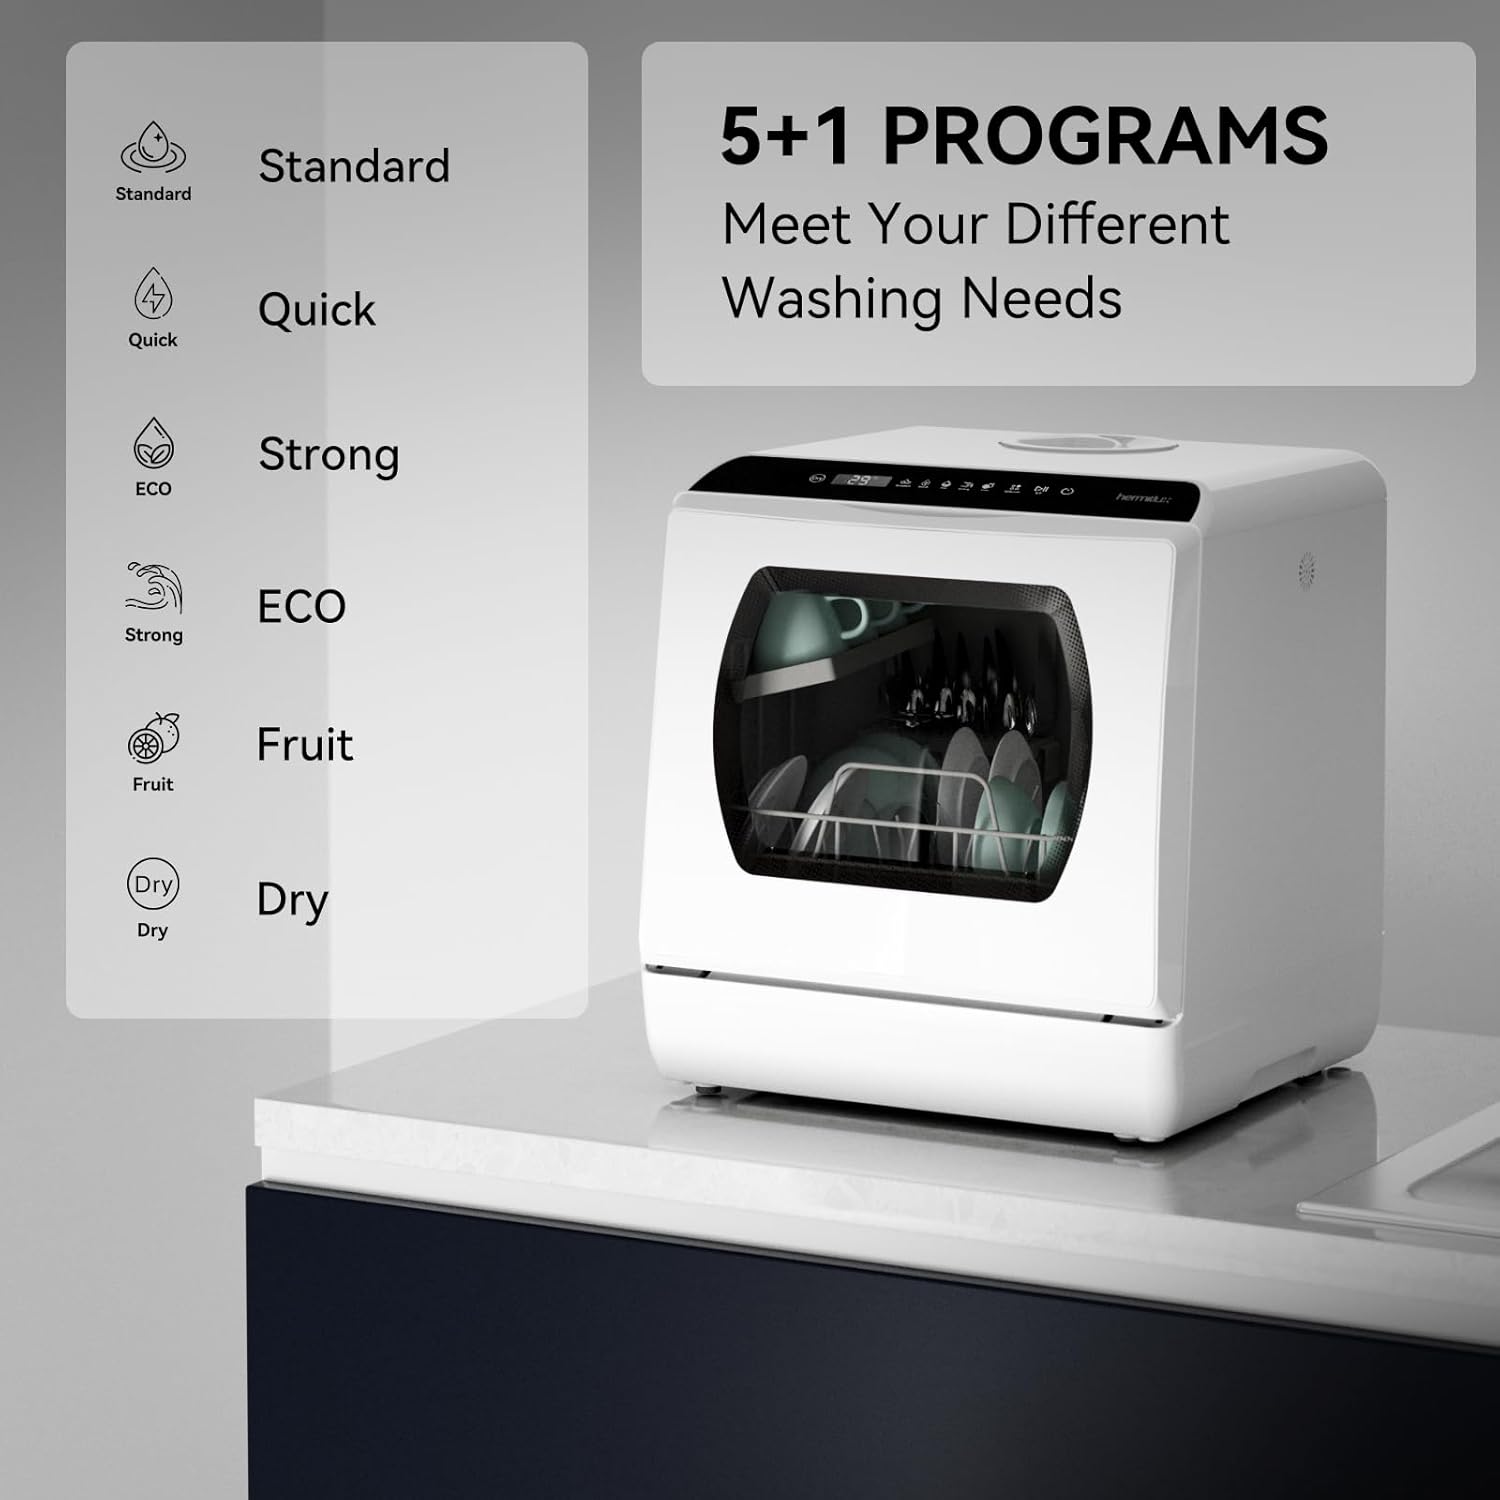
Figure 5.4: Available washing programs.
- Norma: For normal soiled dishes.
- Rychlý: Pro lehce znečištěné nádobí, které vyžaduje rychlé mytí.
- Silný: Pro silně znečištěné nádobí a hrnce.
- ECO: Energy-saving program for daily use.
- Ovoce: A gentle wash cycle for fruits and vegetables.
- Schnout: An additional function for hot air drying.
To select a program, press the 'Selection' button on the control panel until the desired program indicator lights up.
5.5 Spuštění cyklu
- Bezpečně zavřete dvířka myčky.
- Press the 'Power' button to turn on the dishwasher.
- Vyberte požadovaný mycí program.
- Stiskněte tlačítko „Start/Pauza“ pro spuštění cyklu.
5.6 Drying Function
The dishwasher includes a hot air drying function (up to 162°F) and automatic ventilation to ensure dishes are dry and odor-free. The drying mode can be used with any wash cycle (except Fruit) or independently.

Figure 5.5: Hot air drying feature.
5.7 360° Cleaning Coverage
The dishwasher utilizes dual spray arms with 14 water ports to provide comprehensive cleaning from both the top and bottom, ensuring all dishes are thoroughly rinsed.
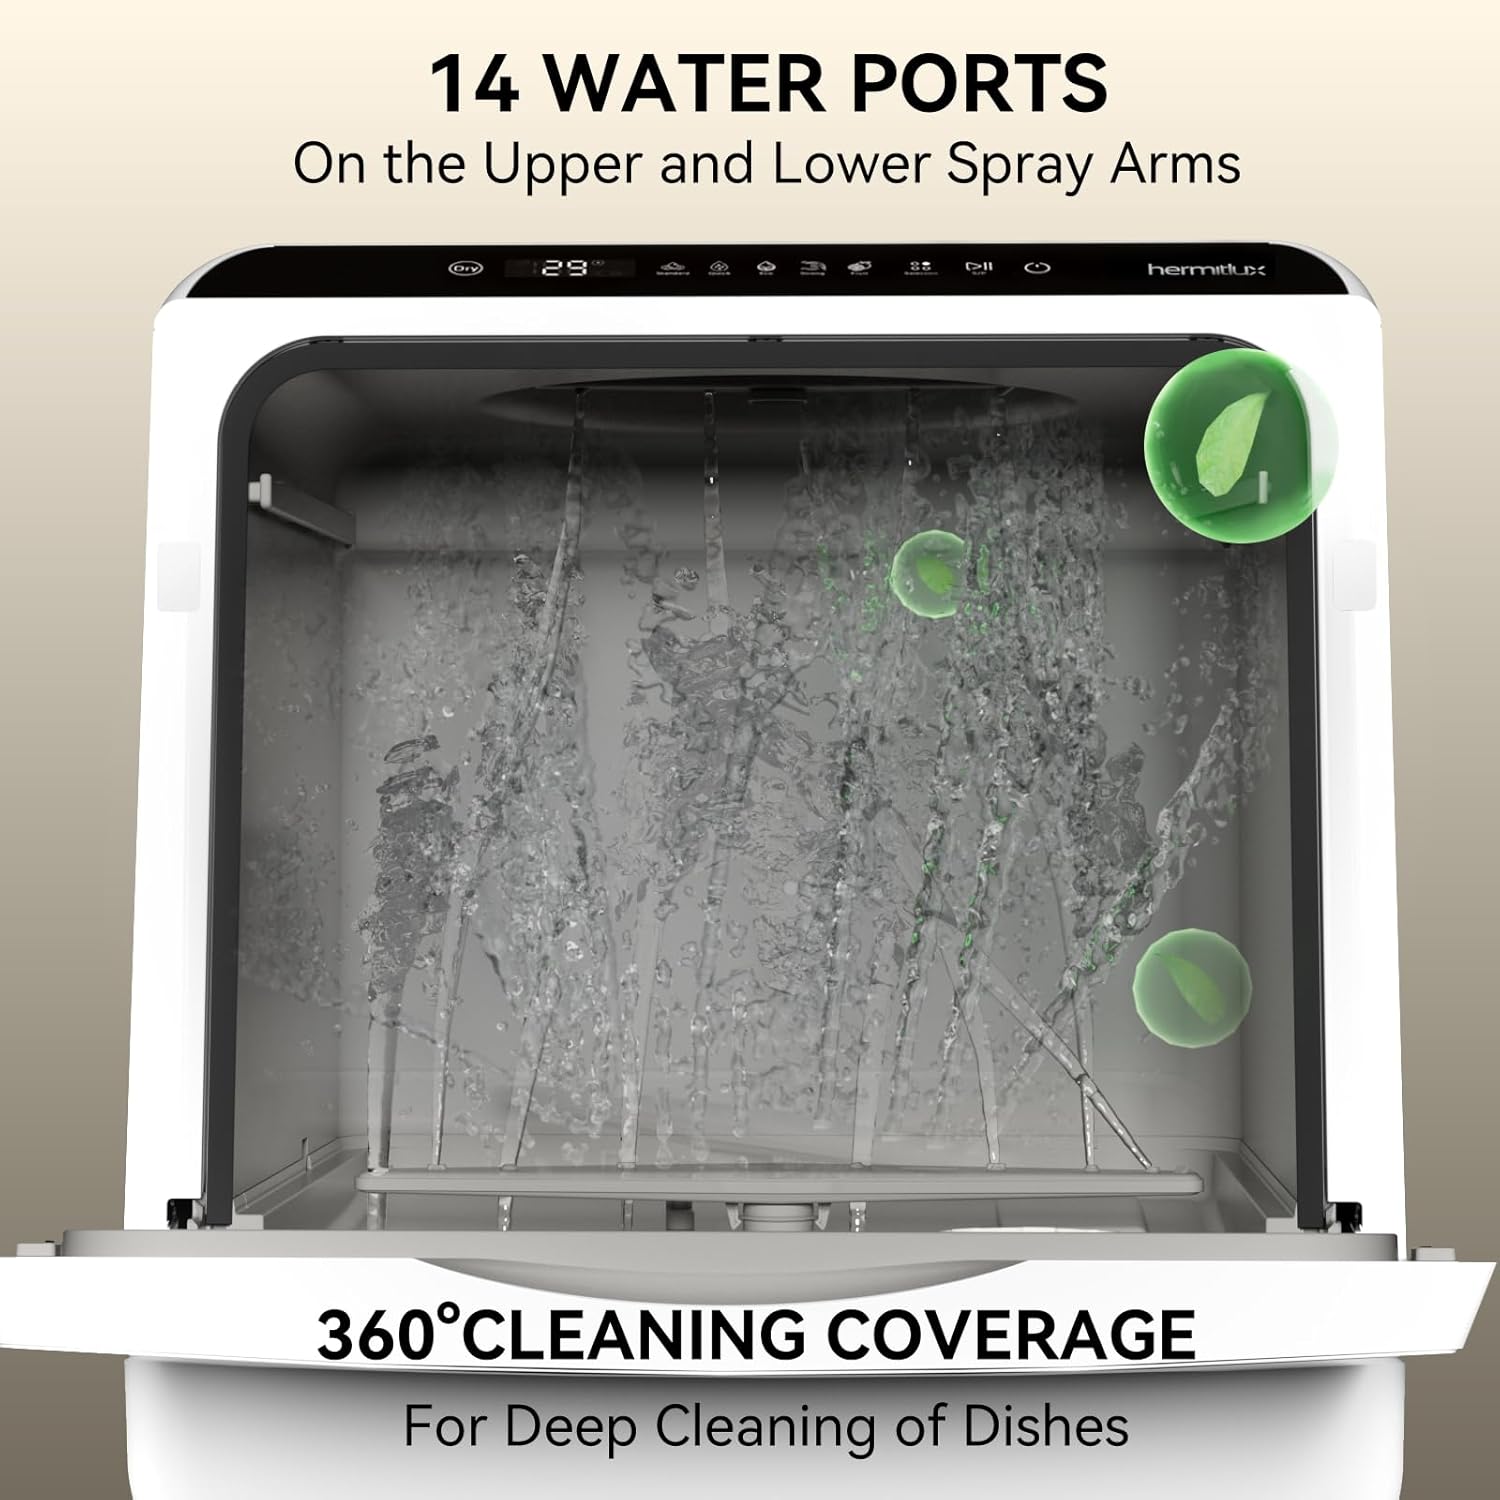
Figure 5.6: Illustration of 360° cleaning coverage.
5.8 Oficiální video produktu
Video 5.1: An official video demonstrating the features and operation of the Hermitlux Portable Countertop Dishwasher, including its water tank and washing capabilities.
6. Údržba
6.1 Čištění filtru
Regularly clean the food debris filter to maintain optimal washing performance and prevent blockages.
- Vypněte a odpojte myčku ze zásuvky.
- Vyhledejte sestavu filtru ve spodní části vany myčky nádobí.
- Twist and lift the filter to remove it.
- Rinse the filter under running water to remove any food particles. Use a brush if necessary.
- Reinsert the filter and twist to secure it in place.
Figure 6.1: Efficient food debris filter for easy cleaning.
6.2 Čištění interiéru a exteriéru
- Vnější povrch otřete měkkým, damp tkanina. Nepoužívejte abrazivní čisticí prostředky.
- Clean the interior periodically with a dishwasher cleaner or a mixture of vinegar and water to remove mineral buildup and odors.
6.3 Vypouštění
Ensure the drain hose is always positioned to allow proper drainage into a sink or bucket. Periodically check the drain hose for blockages.
7. Řešení problémů
Než kontaktujete podporu, znovuview následující běžné problémy a jejich řešení:
| Problém | Možná příčina | Řešení |
|---|---|---|
| Myčka se nespustí | No power; Door not closed properly; Water tank empty (if using tank mode) | Check power connection; Ensure door is latched; Fill water tank. |
| Nádobí není čisté | Improper loading; Clogged spray arms; Insufficient detergent; Clogged filter | Reload dishes correctly; Clean spray arm nozzles; Add more detergent; Clean the filter. |
| Úniky vody | Loose hose connections; Damaged door seal; Overfilling water tank | Tighten hose connections; Inspect and clean door seal; Do not overfill the water tank. |
| Nepříjemný zápach | Food residue in filter or interior; Infrequent cleaning | Clean filter and interior thoroughly; Run a cleaning cycle with dishwasher cleaner. |
8. Specifikace
| Funkce | Specifikace |
|---|---|
| Číslo modelu | US HMX-DW03-1 |
| svtage | 120 voltů |
| Rozměry produktu (D x Š x V) | 16.73 x 16.85 x 18.03 palce |
| Hmotnost položky | 34.3 libry |
| Kapacita vodní nádrže | 5 litrů |
| Kapacita nastavení místa | 4 Nastavení místa |
| Max Dish Size | 10.25 inches (at an angle) |
| Mycí programy | Standardní, Rychlý, Silný, ECO, Ovocný |
| Funkce sušení | Heated Dry (up to 162°F), 72-hour Automatic Ventilation |
| Typ ovládacích prvků | Dotek |
| Typ zobrazení | LED |
| Roční spotřeba energie | 83 kilowatthodin za rok |
| Osvědčení | ETL |
| Materiály | Acrylonitrile Butadiene Styrene (ABS), Glass, Polypropylene (PP), Metal coated with PA powder |
9. Záruka a podpora
This Hermitlux product comes with a standard manufacturer's warranty. For specific warranty details, please refer to the warranty card included with your purchase or contact Hermitlux customer service.
If you encounter any issues or have questions regarding your dishwasher, please contact Hermitlux customer support for assistance. Contact information can typically be found on the product packaging or the official Hermitlux webmísto.