
1. Úvod
Thank you for choosing the Pisichen 24 inch Touch Screen Gaming Monitor. This manual provides essential information for setting up, operating, and maintaining your monitor. Please read it thoroughly before use to ensure optimal performance and safety.
This monitor features a 24-inch QHD (2560x1440P) display with a 165Hz refresh rate, 2ms response time, and 10-point projected capacitive touchscreen functionality. It supports FreeSync and HDR, offering a vibrant and responsive visual experience for both gaming and professional applications.

Image: The Pisichen 24-inch 2K 165Hz Touch Screen Monitor highlighting its key features like HDR, IPS Panel, and 10-point Touch.
2. Obsah balení
Než budete pokračovat v instalaci, ověřte si prosím, zda jsou v balení přítomny všechny komponenty:
- Pisichen 24 inch Touch Screen Monitor
- Stojan na monitor (základna a krk)
- DP kabel
- HDMI kabel
- USB B Touch Cable
- USB CC kabel
- DC napájecí adaptér
- Uživatelská příručka (tento dokument)
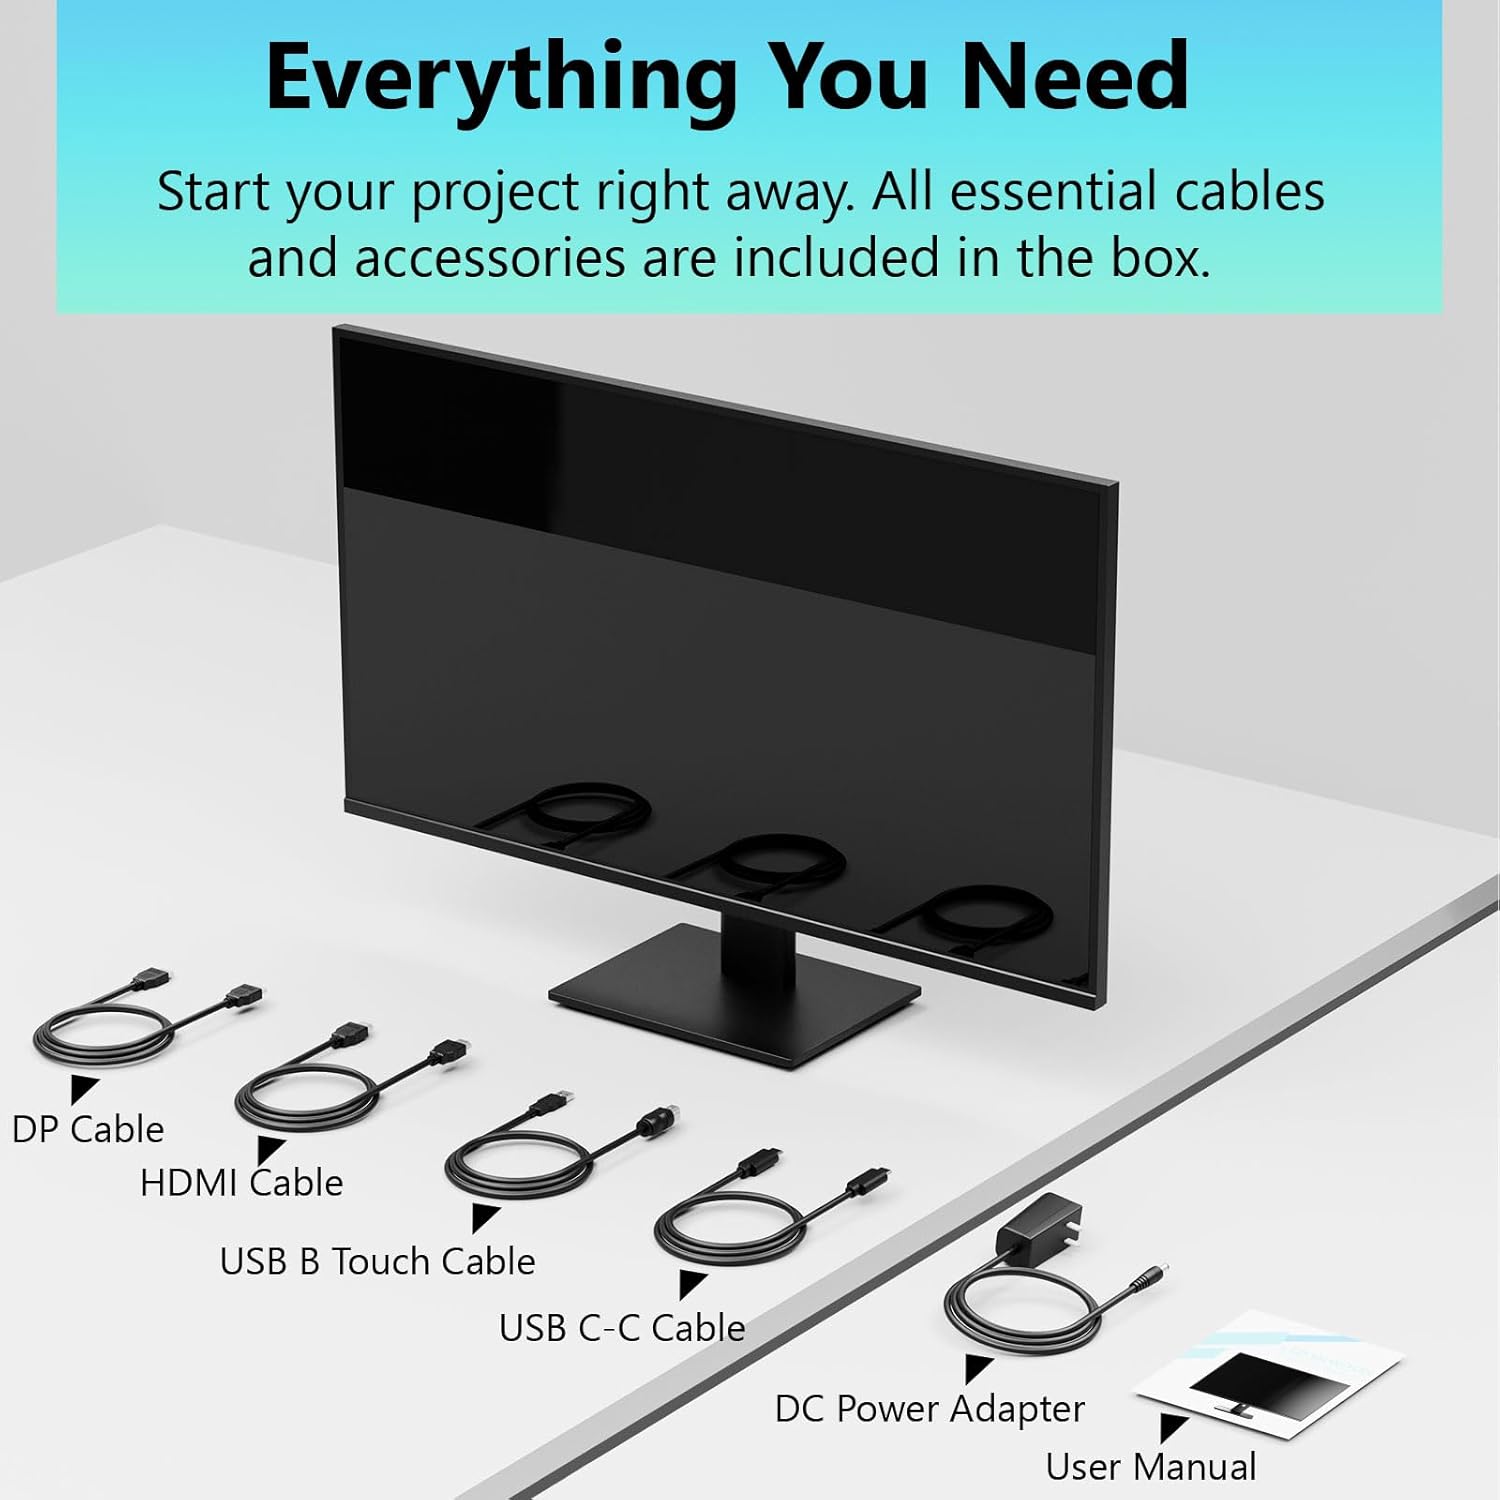
Image: All essential cables and accessories included in the box for the monitor setup.
3. Pokyny k nastavení
3.1 Sestavení stojanu
- Opatrně vyjměte monitor z obalu a položte jej displejem dolů na měkký, čistý povrch, abyste zabránili poškrábání.
- Připevněte krk stojanu k zadnímu panelu monitoru.
- Připevněte základnu stojanu k krku stojanu pomocí dodaných šroubů.
- Ensure all connections are firm before placing the monitor upright.
3.2 Instalace držáku VESA (volitelné)
This monitor supports VESA mounting. If you plan to use a VESA-compatible arm or wall mount, remove the stand and attach the VESA mount according to the mount's instructions. The VESA pattern is typically 75x75mm or 100x100mm (refer to specifications for exact details).
3.3 Připojení k zařízení
Monitor nabízí několik možností připojení:
- HDMI: Připojte jeden konec kabelu HDMI k portu HDMI monitoru a druhý konec k výstupu HDMI počítače.
- DisplayPort (DP): Connect one end of the DP cable to the monitor's DP port and the other end to your computer's DP output.
- USB Type-C: For compatible devices, connect the USB C-C cable to the monitor's USB Type-C port and your device's USB Type-C port. This single cable can transmit video, data, and power (charging).
- USB Type-B (for Touch Functionality): To enable the touch screen feature, connect the USB B Touch Cable from the monitor's USB Type-B port to an available USB Type-A port on your computer.

Image: The monitor's rear panel with various connectivity options, including HDMI, DisplayPort, and USB-C ports.
3.4 Připojení napájení
Connect the DC Power Adapter to the monitor's power input port, then plug the adapter into a power outlet.
3.5 Initial Power On and Touch Compatibility
Press the power button on the monitor. The display should light up. If no image appears, ensure all cables are securely connected and the correct input source is selected on the monitor (via the OSD menu).
For touch functionality, ensure the USB B Touch Cable is connected to your computer. Touch compatibility may vary by operating system and device. Most Windows PCs support multi-touch. For Mac devices, single-touch click is generally supported, but multi-touch may require specific drivers or configurations. Game consoles (PS3/4/5, Xbox, Steam Deck) and some other devices (Fire TV, Apple products like iPhone/iPad) typically do not support touch functionality.

Image: A compatibility chart illustrating which devices support multi-touch or single-touch, and which devices do not support touch functionality with the monitor.
4. Návod k obsluze
4.1 Zapnutí/vypnutí
Stisknutím tlačítka napájení na monitoru jej zapnete nebo vypnete. Kontrolka napájení bude zobrazovat stav monitoru.
4.2 Nabídka na obrazovce (OSD)
The OSD menu allows you to adjust various monitor settings. Use the control buttons (usually located on the back or bottom of the monitor) to navigate the menu. Common menu options include:
- Nastavení obrazu: Brightness, Contrast, Sharpness, Color Temperature, HDR mode.
- Nastavení obrazovky: Aspect Ratio, Input Source selection (HDMI, DP, USB-C).
- Herní nastavení: FreeSync, Response Time (Overdrive), Crosshair.
- Nastavení zvuku: Volume (if internal speakers or audio output are present).
- Nastavení systému: Jazyk, Průhlednost OSD, Obnovení továrního nastavení.
4.3 Funkce dotykové obrazovky
The monitor supports 10-point multi-touch, allowing for intuitive interaction directly on the screen. Ensure the USB B Touch Cable is connected to your computer for this feature to work.
- Jedno klepnutí: Ekvivalent kliknutí levým tlačítkem myši.
- Klepnutí a podržení: Ekvivalent kliknutí pravým tlačítkem myši.
- Přiblížení/zvětšení prsty: Pro přiblížení nebo oddálení použijte dva prsty.
- Výpad: Navigate through content or scroll.

Image: A user interacting with the monitor's touch screen, highlighting its precision and responsiveness for creative tasks.
4.4 Ergonomické úpravy
The monitor stand allows for tilt adjustments to achieve the most comfortable viewing and touch angle. Gently adjust the screen to your preferred position.
4.5 Funkce péče o zrak
The monitor includes advanced eye-comfort features such as Flicker-Free technology and Low Bluelight mode to reduce eye strain during prolonged use. These settings can typically be adjusted within the OSD menu.

Image: Visual representation of the monitor's advanced eye-comfort features, including Flicker-Free and Low Bluelight technologies.
5. Údržba
5.1 Čištění monitoru
- Před čištěním vždy vypněte monitor a odpojte napájecí kabel.
- Lehce používejte měkký hadřík, který nepouští vlákna dampvodou nebo jemným, neabrazivním čističem obrazovek.
- Nestříkejte čistič přímo na obrazovku. Nejprve jej naneste na hadřík.
- Nepoužívejte benzen, ředidlo, čisticí prostředky na bázi amoniaku ani abrazivní materiály, protože by mohly poškodit povrch obrazovky.
5.2 Skladování
When storing the monitor for an extended period, ensure it is powered off, unplugged, and stored in a cool, dry place away from direct sunlight and extreme temperatures. Use the original packaging if available for best protection.
6. Řešení problémů
Pokud narazíte na problémy s monitorem, postupujte podle následujících běžných kroků pro řešení potíží:
- Bez napájení: Ujistěte se, že je napájecí adaptér bezpečně připojen k monitoru i k funkční zásuvce. Zkontrolujte, zda svítí kontrolka napájení.
- Žádný obraz/signál:
- Verify that the video cable (HDMI, DP, or USB-C) is securely connected to both the monitor and your computer.
- Ujistěte se, že je v nabídce OSD monitoru vybrán správný vstupní zdroj.
- Zkontrolujte nastavení zobrazení počítače a ujistěte se, že je monitor detekován a povolen.
- Bezdotyková funkce:
- Confirm the USB B Touch Cable is connected from the monitor to your computer.
- Check your computer's device manager to see if the touch screen driver is installed and functioning correctly.
- Refer to the "Initial Power On and Touch Compatibility" section for device-specific limitations.
- Blikající nebo zkreslený obraz:
- Zkontrolujte video kabel, zda není poškozený nebo zda nejsou uvolněné spoje.
- Zkuste jiný video kabel nebo port.
- Upravte obnovovací frekvenci v nastavení displeje počítače.
- Mrtvé pixely: A small number of bright or dark pixels are common in LCD/LED technology and are not considered a defect unless they exceed manufacturer specifications.
Pokud problém přetrvává i po vyzkoušení těchto kroků, kontaktujte prosím zákaznickou podporu.
7. Specifikace
| Funkce | Specifikace |
|---|---|
| Značka | Pisichen |
| Číslo modelu | 24IN165HZ-QHD |
| Velikost obrazovky | 23.8 palců |
| Rezoluce | QHD širokoúhlý 1440p (2560 x 1440) |
| Poměr stran | 16:9 |
| Obnovovací frekvence | 165 Hz |
| Doba odezvy | 2 milisekund |
| Typ zobrazení | LED IPS |
| Jas | 400 kandel (cd/m²) |
| Kontrastní poměr | 3000:1 |
| Viewúhel | 178 stupňů |
| Barevný gamut | 99 % |
| Picture Quality Enhancement | HDR |
| Adaptivní synchronizace | FreeSync |
| Technologie připojení | DisplayPort, HDMI, USB Type-C, USB Type-B |
| Další funkce | Tilt Adjustment, 10-Point Touchscreen |
| Rozměry položky (D x Š x V) | 0.75"H x 21.5"Š x 12.7"V |
| Hmotnost položky | 5.38 kg |
| Barva | Černý |
8. Informace o záruce
This product comes with a 1-year limited warranty from the date of purchase. The warranty covers manufacturing defects and workmanship under normal use. It does not cover damage caused by misuse, accidents, unauthorized modifications, or external factors. Please retain your proof of purchase for warranty claims.
9. Zákaznická podpora
For technical assistance, warranty claims, or further inquiries, please contact Pisichen customer support. You may find contact information on the official Pisichen webwebu nebo prostřednictvím svého prodejce.
Další zdroje a informace o produktech naleznete na Pisichen Store on Amazon.