
SMARTRO Alarm Clock-03
Uživatelská příručka digitálního budíku SMARTRO-03
Model: Alarm Clock-03 | Brand: SMARTRO
1. Úvod
Thank you for choosing the SMARTRO Digital Alarm Clock-03. This manual provides detailed instructions for setting up, operating, and maintaining your new alarm clock. Please read this manual thoroughly before use to ensure optimal performance and longevity of your device.
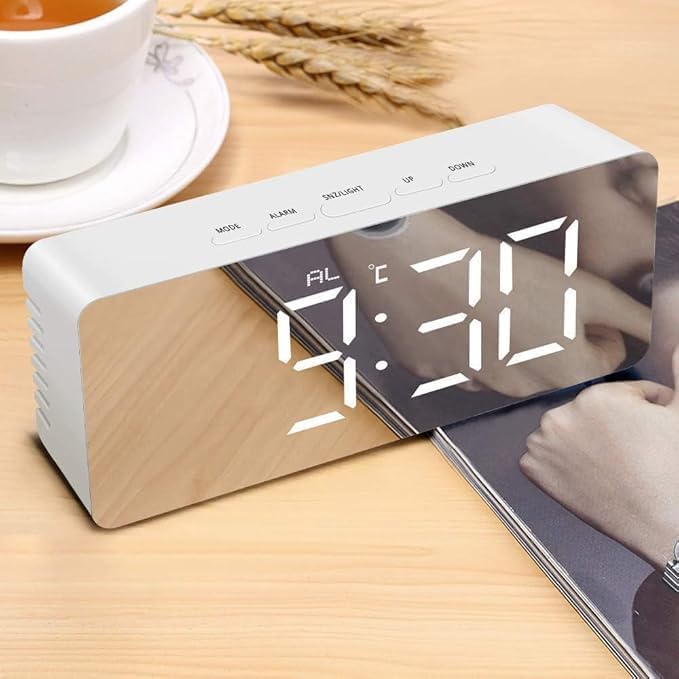
Image 1.1: The SMARTRO Digital Alarm Clock-03 showing the time 9:30 AM on its reflective display.
2. Obsah balení
Ověřte prosím, zda jsou ve vašem balení obsaženy všechny níže uvedené položky:
- 1 x SMARTRO Digital Alarm Clock Unit
- 1 x USB nabíjecí kabel (typ C)
- 1 x Uživatelská příručka (tento dokument)
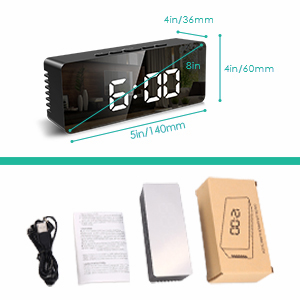
Image 2.1: Visual representation of the package contents, including the alarm clock, USB cable, and user manual.
3. Nastavení
3.1 Připojení napájení
Connect the provided USB Type-C cable to the clock's power input port and plug the other end into a USB power adapter (not included) or a powered USB port. The display will light up.
3.2 Battery Installation (Optional for Power Save Mode)
For power-saving mode and to retain settings during a power outage, install 3 AAA batteries (not included) into the battery compartment located on the back of the clock. Note that the display will only stay on continuously when powered via USB. In battery-only mode, the screen will turn off after 10 seconds of inactivity to conserve power.
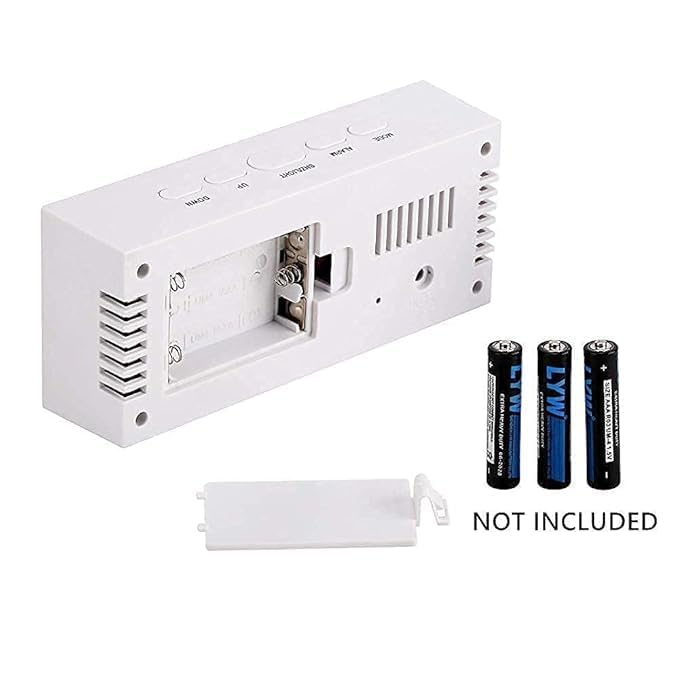
Obrázek 3.1: Zadní strana view of the alarm clock, illustrating the battery compartment for 3 AAA batteries (not included).
3.3 Počáteční nastavení času a data
- Stiskněte tlačítko MODE tlačítko pro vstup do režimu nastavení času. Číslice hodin budou blikat.
- Použijte UP a DOLŮ tlačítka pro nastavení hodiny.
- Stiskněte MODE again to set the minutes, then repeat with UP a DOLŮ.
- Pokračujte v stisknutí MODE to cycle through and set the year, month, and day.
- Stiskněte MODE one more time to exit setting mode, or wait a few seconds for it to automatically save and exit.
- To switch between 12/24H format, press the UP tlačítko v normálním režimu zobrazení času.
4. Návod k obsluze
4.1 Nastavení alarmů
The clock supports two independent alarms. Follow these steps to set an alarm:
- Stiskněte tlačítko POPLACH button to enter Alarm 1 setting mode. The alarm hour digits will flash.
- Použijte UP a DOLŮ tlačítka pro nastavení hodiny budíku.
- Stiskněte POPLACH again to set the alarm minutes, then adjust with UP a DOLŮ.
- Stiskněte POPLACH a third time to select the alarm mode: PO-PÁ (1–5), MON-SAT (1–6), PO-NE (1-7), or SO-NE. Použití UP a DOLŮ vybrat.
- Stiskněte POPLACH again to set the alarm volume (3 levels).
- Repeat the process for Alarm 2 by pressing POPLACH until 'AL2' appears.
- Chcete-li aktivovat/deaktivovat budík, stiskněte tlačítko POPLACH button briefly while in normal time display mode to toggle between alarms. An alarm icon will appear on the display when active.
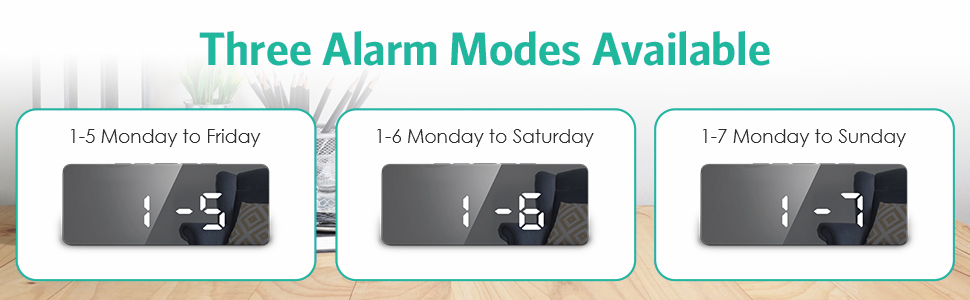
Image 4.1: Illustration of the three available alarm modes: Monday-Friday, Monday-Saturday, and Monday-Sunday.
4.2 Funkce odložení
Když zazní alarm, stiskněte tlačítko SNZ/LIGHT tlačítko pro aktivaci funkce odložení. Budík se na 9 minut pozastaví a poté znovu zazvoní.
4.3 Nastavení jasu displeje
The clock offers 5 levels of adjustable brightness (100%-60%-30%-3%-0%).
- V normálním režimu zobrazení času stiskněte SNZ/LIGHT button repeatedly to cycle through the brightness levels.
- The clock also features an automatic nighttime dimming mode.
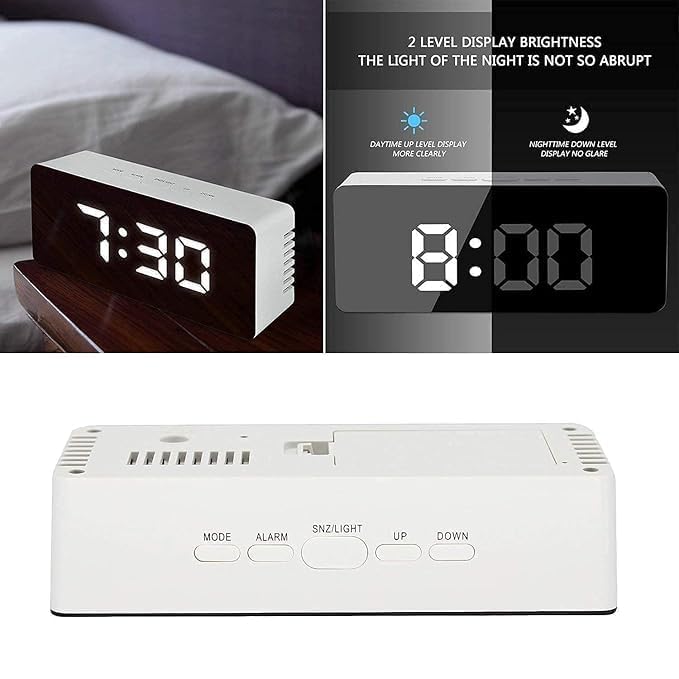
Image 4.2: Demonstrates the difference between daytime (brighter) and nighttime (dimmer) display levels for optimal visibility.
4.4 Noční režim
To activate the automatic nighttime dimming mode, press and hold the SNZ/LIGHT button for 3 seconds. In this mode, the display brightness will automatically dim between 7:00 PM and 7:00 AM.
4.5 USB nabíjecí port
The clock includes a separate USB port that allows you to charge compatible external devices. Connect your device's charging cable to this port.
5. Údržba
- Clean the clock's surface with a soft, dry cloth. Avoid using abrasive cleaners or solvents, as they may damage the finish.
- If using batteries, replace them when the display becomes dim or functions become erratic. Ensure correct polarity when inserting new batteries.
- Chraňte zařízení před extrémními teplotami, přímým slunečním zářením a vysokou vlhkostí.
6. Řešení problémů
- Q: The display is not lighting up.
- A: Ensure the USB Type-C cable is securely connected to both the clock and a working power source. If using batteries, check if they are inserted correctly and have sufficient charge.
- Otázka: Alarm nezvoní.
- A: Verify that the alarm is activated (alarm icon visible on display) and that the alarm volume is set to an audible level. Check the alarm time and day settings.
- Q: The time resets every time the power is disconnected.
- A: This clock requires continuous USB power for the display to remain on. For settings retention during power interruptions, ensure 3 fresh AAA batteries are installed in the battery compartment.
- Q: Buttons are unresponsive.
- A: Disconnect the power cable and remove batteries for a few minutes, then reconnect to perform a soft reset. If the issue persists, contact customer support.
7. Specifikace
| Funkce | Detail |
|---|---|
| Model | Alarm Clock-03 |
| Typ zobrazení | Digitální LED |
| Rozměry (D x V x H) | 140 mm × 60 mm × 36 mm (přibližně 5.5 × 2.4 × 1.4 palce) |
| Hmotnost položky | 199 gramů |
| Zdroj napájení | USB-C (mains power, adapter not included), 3x AAA Batteries (not included) for power-saving mode/memory backup |
| Materiál | Plast |
| Speciální funkce | Large Display, Dual Alarms, Snooze, Adjustable Brightness (5 levels), Automatic Night Mode, USB Charging Port, Date & Temperature Display, 12/24H Format, Daylight Saving Time mode |
Obrázek 7.1: Rozměry nadview of the alarm clock.
8. Záruka a podpora
For warranty information or technical support, please refer to the product packaging or contact SMARTRO customer service directly. You can often find contact details on the official SMARTRO webwebu nebo prostřednictvím svého prodejce.
For general inquiries or to explore other SMARTRO products, visit the SMARTRO Brand Store on Amazon.
Ask a question about this manual
Ask about setup, troubleshooting, compatibility, parts, safety, or missing instructions. Manuals+ will review the question and use this page’s manual context to help answer it.