
1. Úvod
This user manual provides comprehensive instructions for the AOOSTAR R7 2-Bay Desktop NAS Mini PC. It covers the installation, operation, maintenance, and troubleshooting of your device. Please read this manual thoroughly before using the product to ensure proper setup and functionality.
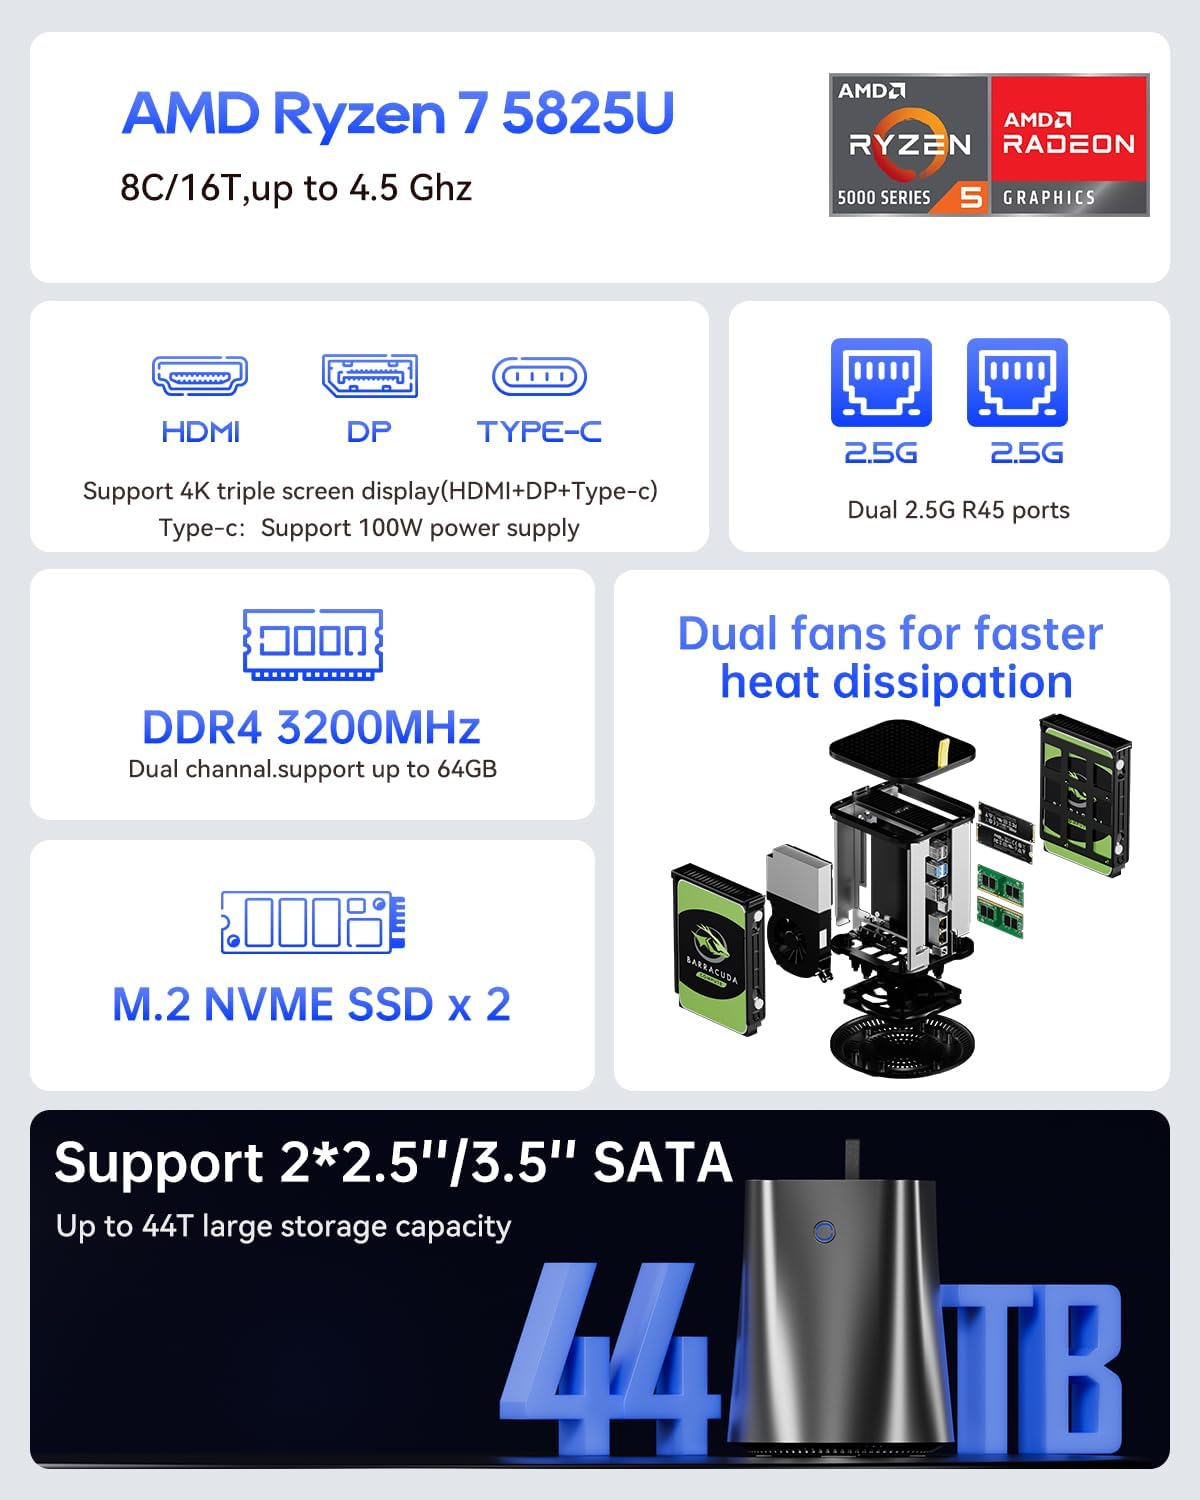
The AOOSTAR R7 is a compact and powerful mini PC designed for various applications, including network-attached storage (NAS), soft routing, and virtualization. It features an AMD Ryzen 7 5825U processor, dual 3.5-inch drive bays for expandable storage, 4K HDMI output, dual 2.5G LAN ports, and WiFi6 connectivity.
2. Bezpečnostní informace
- Ujistěte se, že je zařízení umístěno na stabilním, rovném povrchu, aby nedošlo k náhodnému pádu.
- Nevystavujte zařízení vodě, vlhkosti ani extrémním teplotám.
- Používejte pouze dodaný napájecí adaptér. Použití nesprávného adaptéru může poškodit zařízení a vést ke ztrátě záruky.
- Neblokujte ventilační otvory, aby nedošlo k přehřátí.
- Do not attempt to open or repair the device yourself. Refer to qualified service personnel for assistance.
- Disconnect the power supply before performing any maintenance or hardware installation.
3. Obsah balení
Ověřte, zda jsou v balení přítomny všechny položky:
- 1 x AOOSTAR R7 Mini PC
- 1 x HDMI kabel
- 1 x napájecí adaptér
- 1 x Uživatelská příručka
4. Konec produktuview
The AOOSTAR R7 Mini PC is designed for high performance and versatile connectivity. It features a robust cooling system and supports extensive storage options.
Obrázek 4.1: Přední strana view of the AOOSTAR R7 Mini PC.
4.1. Porty a rozhraní
The device offers a variety of ports for connectivity, including:
- 1 x Type-C port (supports 65W charging)
- 1x DisplayPort (DP)
- 1 x HDMI port
- 2 x USB 3.2 Gen2 ports
- 2 x USB 2.0 porty
- 2 x RJ45 2.5G LAN ports
- 1 x Audio rozhraní
- 1 x MicroSD card slot
- 1 x DC napájecí konektor

Obrázek 4.2: Zadní a boční strana view zobrazující různé porty pro připojení.
4.2. Storage and Expansion
The AOOSTAR R7 supports two 3.5-inch SATA HDDs, with a maximum capacity of up to 2 x 22 TB. It also includes support for M.2 NVMe SSDs for faster storage.
4.3. Display Support
The device supports triple 4K display output via HDMI, DisplayPort, and Type-C, allowing for extensive multi-monitor setups.

Figure 4.3: The AOOSTAR R7 Mini PC supporting a triple 4K display setup.
4.4. Network Capabilities
Equipped with dual 2.5G LAN ports and WiFi6, the AOOSTAR R7 provides stable and high-speed network connectivity for various applications, including soft routing and network-attached storage.

Figure 4.4: Dual 2.5G LAN ports for high-speed network connections.
4.5. Chladicí systém
The device incorporates a dual-fan cooling system to ensure efficient heat dissipation and stable operation, even under heavy loads.

Obrázek 4.5: Vnitřní view highlighting the dual-fan cooling system.
5. Nastavení
5.1. Hardware Installation (RAM, SSD, HDDs)
The AOOSTAR R7 is designed for tool-free installation of 3.5-inch HDDs. For RAM and M.2 NVMe SSD installation, follow these general steps:
- Odpojit napájení: Ensure the device is powered off and unplugged from the power source.
- Přístup k vnitřním komponentám: Carefully open the chassis to access the motherboard and drive bays. Refer to the specific instructions provided with your unit for chassis opening.
- Instalace RAM: Locate the DDR4 SODIMM slots. Align the RAM module with the slot notch and press down firmly until the clips on both sides snap into place. The device supports dual-channel DDR4 3200MHz, expandable up to 64GB.
- Install M.2 NVMe SSD: Locate the M.2 slot(s). Insert the M.2 SSD at an angle into the slot, then gently push it down and secure it with the provided screw.
- Install 3.5-inch HDDs: Slide the 3.5-inch SATA HDDs into the designated drive bays. The bays are designed for tool-free installation. Ensure the drives are securely seated.
- Zavřít podvozek: Carefully close the chassis, ensuring all cables are properly routed and not pinched.

Obrázek 5.1: Vnitřní view showing drive bays and potential areas for RAM/SSD installation.
5.2. Počáteční připojení
- Připojení displeje: Připojte monitor(y) k výstupním video portům HDMI, DisplayPort nebo Type-C.
- Připojení periferií: Připojte klávesnici, myš a další zařízení USB k dostupným portům USB.
- Připojit síť: For wired network access, connect an Ethernet cable from your router or switch to one of the 2.5G LAN ports.
- Připojte napájení: Connect the power adapter to the DC power connector on the device, then plug the adapter into a power outlet.
6. Návod k obsluze
6.1. Zapnutí/vypnutí
- Zapnutí: Press the power button located on the front of the device. The power indicator light will illuminate.
- Vypnout: For a controlled shutdown, use the operating system's shutdown function. To force power off, press and hold the power button for approximately 5 seconds.
6.2. Nastavení BIOSu
To access the BIOS settings, power on the device and repeatedly press the designated key (usually Del or F2) during startup. The BIOS allows for customization of system settings, including CPU power limits (6W, 12W, 15W modes) and boot options.
6.3. Instalace operačního systému
The AOOSTAR R7 supports various operating systems, including Windows 10/11, OPNsense, OpenWrt, and Ubuntu. To install an operating system:
- Prepare a bootable USB drive with your desired operating system installer.
- Connect the USB drive to the Mini PC.
- Access the BIOS/Boot Menu during startup (typically by pressing F7 or F11) and select the USB drive as the boot device.
- Dokončete instalaci operačního systému podle pokynů na obrazovce.
6.4. Konfigurace sítě
After OS installation, configure your network settings:
- Kabelové připojení: The operating system should automatically detect the wired connection. If not, check network adapter drivers.
- Bezdrátové připojení: Enable Wi-Fi in your operating system settings and connect to your desired wireless network using the provided WiFi6 capabilities.
6.5. Správa úložiště
Once HDDs and SSDs are installed, they may need to be initialized and formatted within your operating system's disk management tools before use. For NAS functionality, consider installing a dedicated NAS operating system or software solution.
7. Údržba
7.1. Čištění
Regularly clean the exterior of the device with a soft, dry cloth. Use compressed air to gently clear dust from ventilation openings to maintain optimal airflow and cooling performance.
7.2. Aktualizace firmwaru
Periodically check the AOOSTAR official website for firmware updates. Updating the firmware can improve system stability, performance, and security. Follow the instructions provided with the firmware update package carefully.
8. Řešení problémů
- Bez napájení: Ujistěte se, že je napájecí adaptér bezpečně připojen k zařízení i k funkční zásuvce. Vyzkoušejte zásuvku s jiným zařízením.
- Bez displeje: Check all display cable connections. Ensure the monitor is powered on and set to the correct input source. Try a different display cable or port.
- Operační systém se nespustí: Verify that the boot order in BIOS is correct. Ensure the operating system is properly installed on a recognized drive.
- Problémy s připojením k síti: Check Ethernet cable connections. For Wi-Fi, ensure drivers are installed and the network is selected correctly. Restart your router/modem.
- Přehřívání: Ensure ventilation openings are clear of obstructions. Clean dust from the device.
For further assistance, refer to the support section or contact AOOSTAR customer service.
9. Specifikace
| Funkce | Specifikace |
|---|---|
| Značka | AOOSTAR |
| Název modelu | R7 5825U |
| Model CPU | AMD Ryzen 7 5825U (8 jader, 16 vláken, až 4.5 GHz) |
| Grafika | Grafika AMD Radeon |
| Operační systém | Supports Windows 11 Pro (pre-installed on some models), OPNsense, OpenWrt, Ubuntu |
| Technologie RAM | DDR4 SDRAM (3200 MHz) |
| Maximální kapacita RAM | 64 GB |
| Skladování | 2 x 3.5-inch SATA HDD bays (up to 2 x 22 TB), M.2 NVMe SSD support |
| Video výstup | HDMI, DisplayPort, Type-C (supports triple 4K display) |
| LAN | Dual 2.5G RJ45 ports |
| Bezdrátové připojení | WiFi6 (802.11ax), Bluetooth |
| USB porty | 2 x USB 3.2 Gen2, 2 x USB 2.0 |
| Jiné porty | Audio interface, MicroSD card slot, DC power connector |
| Rozměry | 16.2 x 16.2 x 19.8 cm |
| Způsob chlazení | Air (Dual Fan System) |
| Speciální funkce | Wake on LAN, Auto Power On, Plex server compatibility |
10. Záruka a podpora
The AOOSTAR R7 Mini PC comes with a 12-month warranty from the date of order. For any questions, product defects, or technical support, please contact AOOSTAR customer service via the platform where the product was purchased or through the official AOOSTAR support channels.
Uschovejte si prosím doklad o koupi pro uplatnění záruky.