
Flyrivergo B0FGTZ5FV3
Bench Buffer Polisher & 3" Ball Vise User Manual
Model: B0FGTZ5FV3
1. Úvod
This manual provides essential information for the safe and effective operation of your Flyrivergo Bench Buffer Polisher and 3" Ball Vise. This versatile combination is designed for precision work in jewelry making, metal polishing, engraving, and other detailed crafting tasks. Please read this manual thoroughly before initial use to ensure proper setup, operation, and maintenance.
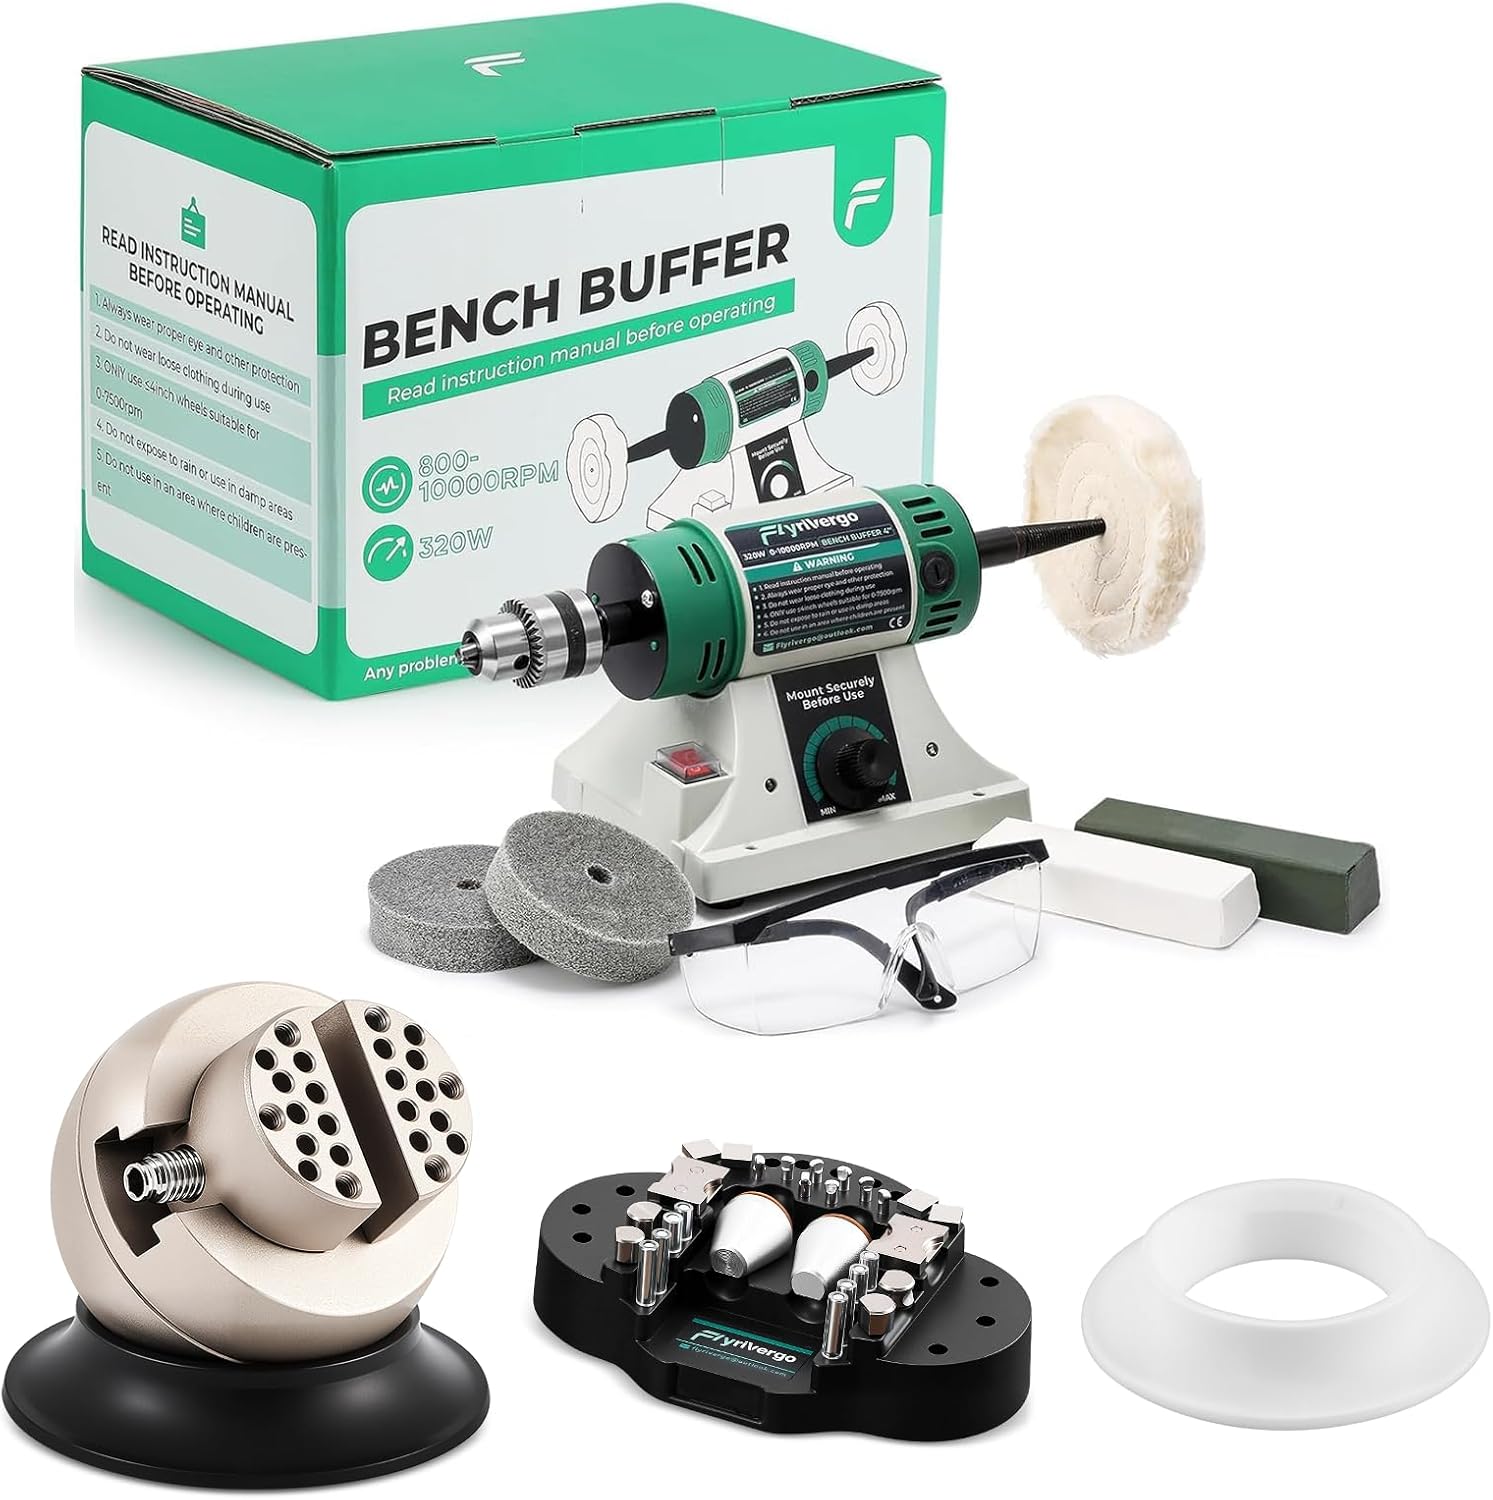
Obrázek 1.1: Complete Bench Buffer Polisher and Ball Vise Kit. This image displays the main components including the bench buffer, ball vise, various polishing wheels, safety glasses, and polishing compounds, all packaged in a green box.
2. Bezpečnostní pokyny
WARNING: Always read and understand all safety warnings and instructions before operating this product.
- Always wear proper eye and chest protection during operation.
- Do not wear loose clothing, jewelry, or long hair that could get caught in moving parts.
- Only use bench wheels suitable for the specified RPM range (0-10000 RPM).
- Do not expose the unit to rain or use in damp nebo vlhké oblasti.
- Během provozu držte děti a domácí zvířata mimo pracovní prostor.
- Ensure the unit is securely mounted to a stable workbench before use to prevent wobbling or vibration.

Obrázek 2.1: Bench Buffer Polisher mounted securely. This image highlights the stability of the polisher when properly affixed to a workbench, emphasizing the 'No Wooble, No Vibration' feature.
3. Obsah balení
Carefully unpack all items and ensure all components are present and undamaged. If any items are missing or damaged, please contact Flyrivergo customer support.
- Bench Buffer Polisher Unit (320W, 800-10000 RPM)
- 3" Ball Vise
- Assorted Polishing Wheels (e.g., Cloth wheels for jewelry, Fiber wheels for metal parts)
- Lešticí směsi
- Ochranné brýle
- Chucks/Mandrels for polisher
- Ball Vise Accessories (e.g., pins, wrenches, base)
- Uživatelská příručka

Obrázek 3.1: Complete Set with All Necessary Accessories. This image shows the bench buffer, ball vise, and a wide array of accessories including various pins, wrenches, and other components for both the polisher and the vise.
4. Nastavení
4.1 Bench Buffer Polisher Setup
- Bezpečná montáž: Place the bench buffer on a sturdy, level workbench. Use clamps or bolts (not included) to securely fasten the unit to prevent movement during operation.
- Attach Polishing Wheels: Select the appropriate polishing wheel (e.g., cloth wheel for jewelry, fiber wheel for metal parts) and securely attach it to the spindle. Ensure it is tightened properly.
- Připojení napájení: Zapojte napájecí kabel do uzemněné elektrické zásuvky.
4.2 3" Ball Vise Setup
- Umístění: Place the ball vise on a stable, flat surface. The rubber base provides stability and prevents scratching.
- Insert Pins/Jaws: Depending on your task, insert the appropriate pins or jaws into the vise head.
5. Návod k obsluze
5.1 Bench Buffer Polisher Operation
- Bezpečnost především: Always put on your safety glasses and ensure no loose clothing or hair is near the machine.
- Apply Compound: Lightly apply the appropriate polishing compound to the spinning wheel.
- Zapnutí: Turn on the polisher using the power switch.
- Upravit rychlost: Use the speed control knob to set the desired RPM (800-10000 RPM). Start with a lower speed and gradually increase as needed.
- Leštění: Gently bring the workpiece into contact with the spinning wheel. Apply light, even pressure. Move the workpiece consistently to achieve a uniform finish. For deep cleaning of ring jewelry, use specialized small polishing buffs.

Obrázek 5.1: Deep Cleaning Ring Jewelry. This image illustrates how to use a small polishing buff to deeply clean the inside of ring jewelry, showing a set of polishing buffing tools.

Obrázek 5.2: Polishing Results. This image shows a 'Before' and 'After' comparison of a ring, demonstrating the effectiveness of polishing in restoring shine and detail. Remember to use the correct buffing wheel and polishing compound.
Obrázek 5.3: Polishing Wheel Types. This image displays two types of polishing wheels: cloth wheels suitable for jewelry and fiber wheels designed for metal parts, illustrating their distinct applications.
5.2 3" Ball Vise Operation
- Poloha obrobku: Place your workpiece securely within the jaws of the ball vise.
- Upravte Clamping Force: Use the included wrench to adjust the clamping force, ensuring the workpiece is held firmly without damage.
- Rotate for Precision: The ball vise features a 360° rotating design, allowing you to adjust the angle to suit complex tasks and achieve optimal precision.

Obrázek 5.4: 360° Rotating Design for Precision. This image highlights the ball vise's ability to rotate 360 degrees, allowing users to adjust the angle for complex tasks and achieve precise results.

Obrázek 5.5: Effortless Operation, Precision Control. This image demonstrates the adjustable clamping force and 360-degree free rotation of the ball vise, showcasing its ease of use and precise control.
The ball vise is ideal for various applications including engraving, jewelry making, watch maintenance, ring grinding, and even rock sample analysis, providing endless possibilities for your projects.

Obrázek 5.6: Ideal for Engraving, Jewelry Making, and More! This image illustrates multiple uses for the ball vise, including watch maintenance, ring grinding, and rock sample analysis, highlighting its versatility.
6. Údržba
- Čištění: After each use, wipe down the polisher and vise with a clean, dry cloth to remove dust and polishing residue.
- Výměna kola: Replace polishing wheels when they become worn or lose their effectiveness.
- Skladování: Store the unit and its accessories in a clean, dry place, away from direct sunlight and moisture.
- Mazání: Periodically apply a small amount of light machine oil to the moving parts of the ball vise to ensure smooth operation.
7. Řešení problémů
If you encounter issues with your Bench Buffer Polisher or Ball Vise, please refer to the following common solutions:
- Jednotka se nezapne:
- Zkontrolujte, zda je napájecí kabel bezpečně zapojený do funkční zásuvky.
- Ujistěte se, že je vypínač v poloze „ON“.
- Excessive Vibration (Polisher):
- Ensure the unit is securely mounted to the workbench.
- Check if the polishing wheel is properly balanced and securely attached.
- Vise Jaws Not Clamping Securely:
- Ensure the adjustment mechanism is clean and free of debris.
- Utáhněte třamping mechanism firmly using the provided wrench.
For issues not covered here, please contact Flyrivergo customer support.
8. Specifikace
| Komponent | Specifikace |
|---|---|
| Název produktu | Bench Buffer Polisher + 3" Ball Vise |
| Značka | Flyrivergo |
| Číslo modelu (ASIN) | B0FGTZ5FV3 |
| Bench Buffer Power | 320W |
| Bench Buffer Speed Range | 800-10000 ot./min |
| Ball Vise Base Diameter | 3.78" (96 mm) |
| Ball Vise Height | 3.35" (85 mm) |
| Ball Vise Jaw Opening | 2" (50 mm) |
| Datum první dostupnosti | 15. února 2025 |
9. Záruka a podpora
For warranty information and customer support, please refer to the product packaging or contact Flyrivergo directly through their official channels. Keep your purchase receipt as proof of purchase.
Pro další pomoc můžete navštívit Flyrivergo Store on Amazon.
Ask a question about this manual
Ask about setup, troubleshooting, compatibility, parts, safety, or missing instructions. Manuals+ will review the question and use this page’s manual context to help answer it.