Zavedení
Thank you for choosing the Electactic Commercial Ice Maker. This manual provides essential information for the safe and efficient operation, maintenance, and troubleshooting of your new ice machine. Please read these instructions thoroughly before installation and use, and retain them for future reference.
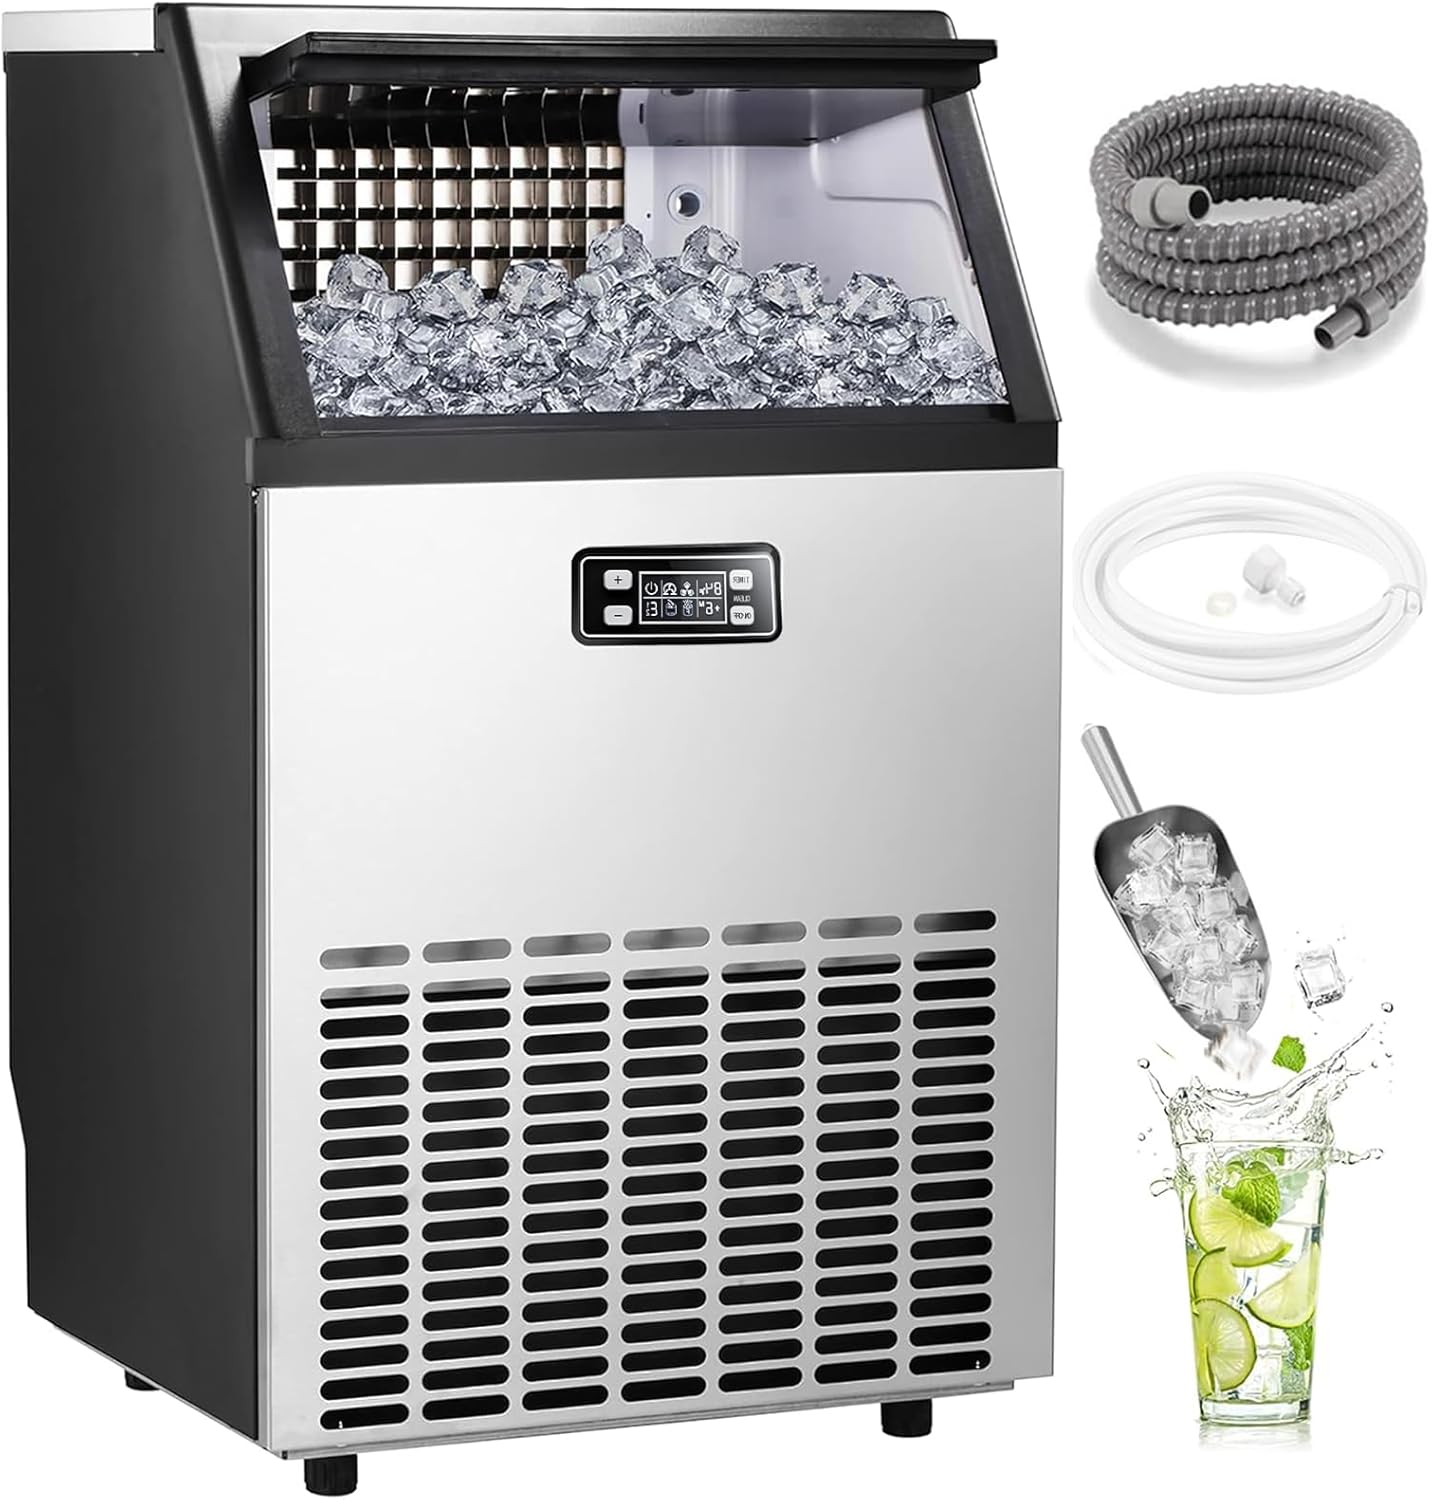
Figure 1: Electactic Commercial Ice Maker and included accessories.
Bezpečnostní pokyny
- Ujistěte se, že je spotřebič řádně uzemněn.
- Nepoužívejte výrobník ledu s poškozeným napájecím kabelem nebo zástrčkou.
- Udržujte výrobník ledu mimo dosah zdrojů tepla a přímého slunečního záření.
- Allow the unit to stand upright for at least 24 hours before initial use to allow refrigerant to settle.
- Pro výrobu ledu používejte pouze pitnou vodu.
- V tomto spotřebiči neskladujte výbušné látky, jako jsou aerosolové plechovky s hořlavou hnací látkou.
- Tento spotřebič není určen pro použití osobami (včetně dětí) se sníženými fyzickými, smyslovými nebo duševními schopnostmi nebo nedostatečnými zkušenostmi a znalostmi, pokud na ně nedohlíží osoba odpovědná za jejich bezpečnost nebo jim nebyla poskytnuta instrukce ohledně používání spotřebiče.
- Děti by měly být pod dozorem, aby bylo zajištěno, že si se spotřebičem nebudou hrát.
Konec produktuview
The Electactic Commercial Ice Maker is designed for high-efficiency ice production, featuring a durable stainless steel construction and an intuitive LED digital display. It produces up to 101 lbs of ice per 24 hours with a storage capacity of 33 lbs.
Klíčové komponenty:
- Ice Maker Unit (Stainless Steel Casing)
- LED Digital Control Panel
- Ice Storage Bin (33 lbs capacity)
- Naběračka ledu
- Hadice pro přívod vody
- Drenážní hadice
- Nastavitelné nožičky
Nastavení
1. Vybalení a umístění:
- Opatrně odstraňte veškerý obalový materiál.
- Place the ice maker on a firm, level surface. Ensure there is adequate ventilation around the unit (at least 5 inches of space on all sides).
- Allow the unit to stand upright for a minimum of 24 hours before plugging it in. This allows the refrigerant to stabilize.
2. Připojení vody:
The ice maker supports two methods for water supply:
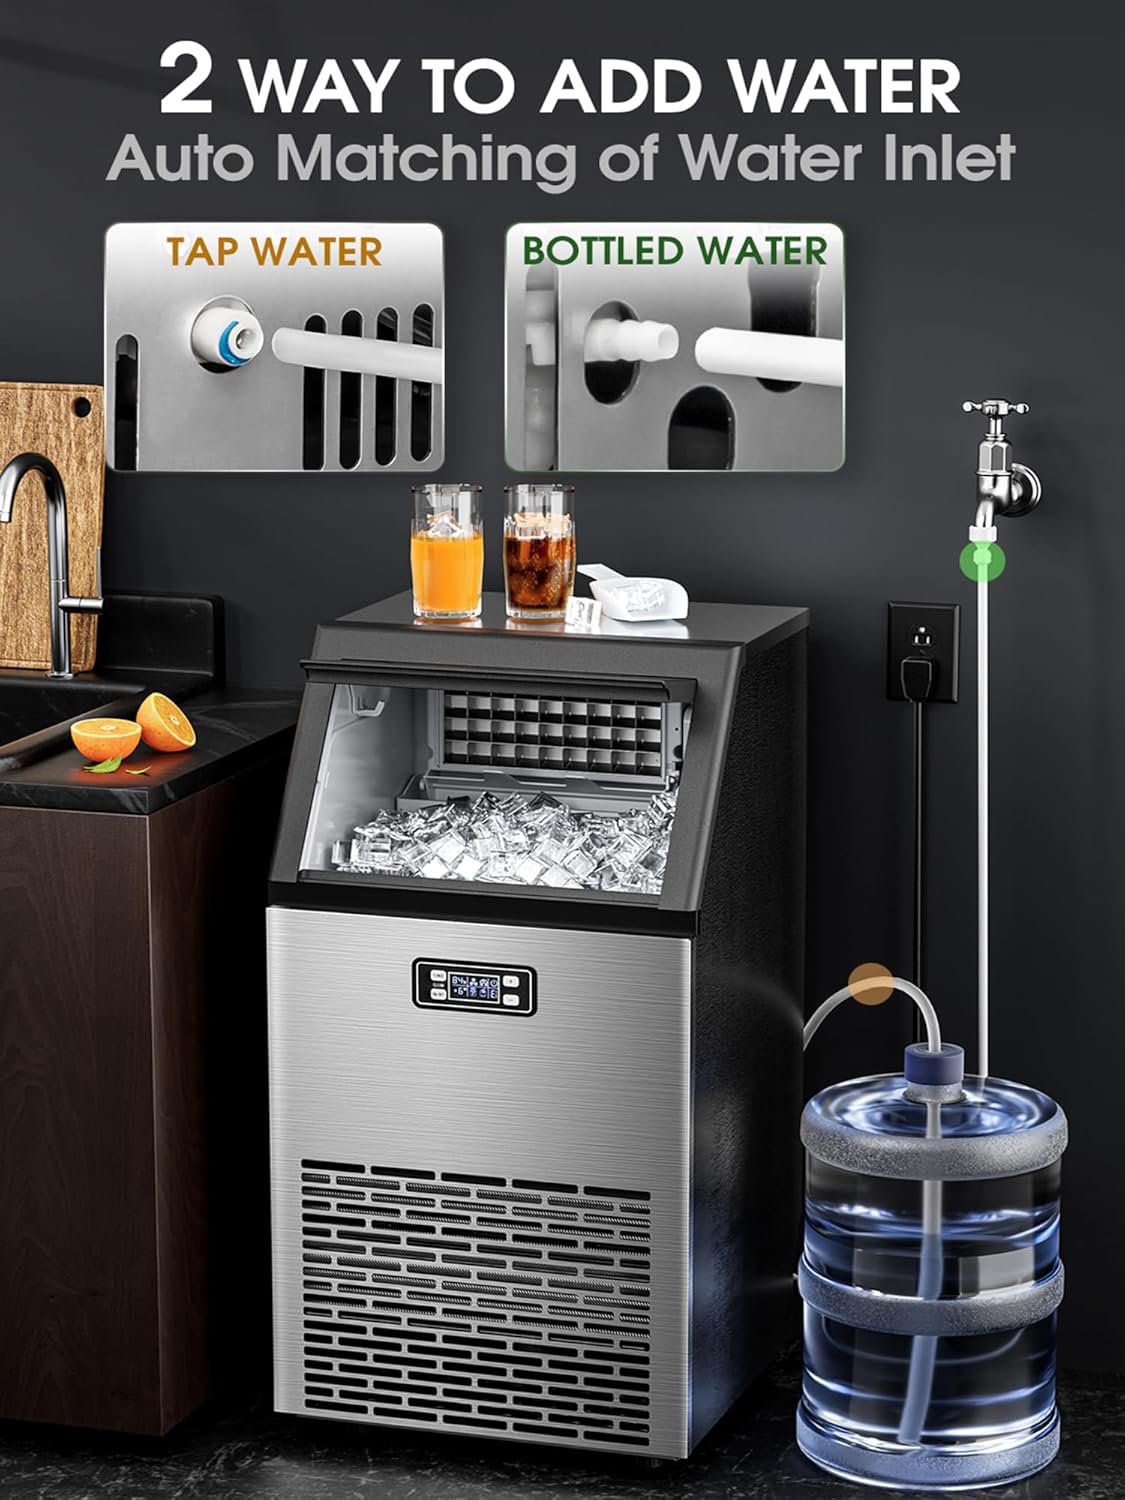
Figure 2: Water inlet options for the ice maker.
- Direct Tap Water Connection: Connect the provided water inlet hose to a potable water supply and the designated inlet on the ice maker. Ensure all connections are secure to prevent leaks.
- Bottled Water Connection: For bottled water, connect the appropriate adapter and hose to a water bottle (e.g., 5-gallon) and the ice maker's water inlet.
3. Drainage Connection:
Connect the drainage hose to the unit's drain outlet and route it to a suitable drain or container. Ensure the drainage hose is positioned lower than the ice maker's drain outlet for proper water flow.
4. Počáteční čištění:
Before first use, it is recommended to clean the interior of the ice maker. Refer to the "Maintenance" section for detailed cleaning instructions. After cleaning, perform a self-cleaning cycle.
Návod k obsluze
1. Ovládací panel Overview:
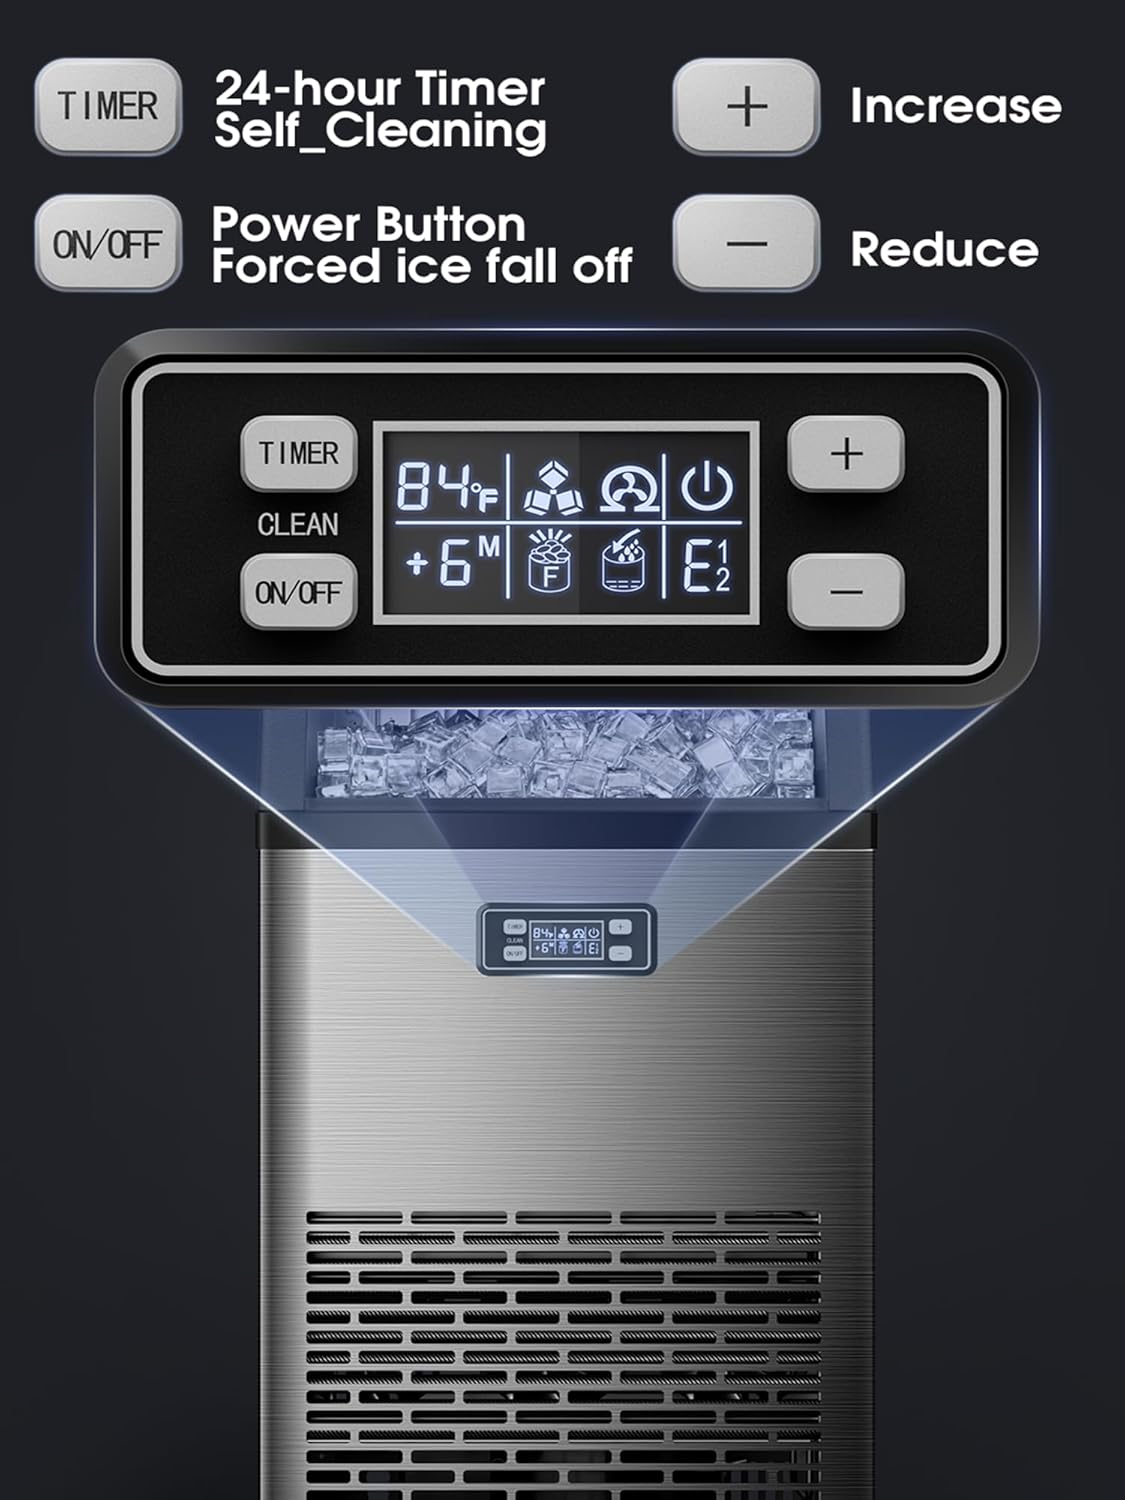
Figure 3: LED Digital Control Panel.
- Tlačítko ON/OFF: Powers the unit on or off. Press and hold to force ice to fall off.
- TIMER/CLEAN Button: Activates the timer function or initiates the self-cleaning cycle (press and hold for 5 seconds).
- Tlačítko „+“: Increases settings (e.g., ice thickness, timer duration).
- Tlačítko '-': Decreases settings (e.g., ice thickness, timer duration).
- LED displej: Shows current status, temperature, error codes, and timer settings.
2. Starting Ice Production:
- Ensure the water supply is connected and the drain hose is properly positioned.
- Zapojte výrobník ledu do uzemněné elektrické zásuvky.
- Stiskněte tlačítko ON/OFF button to start the unit. The machine will automatically begin the ice-making cycle.
- The first batch of ice may take slightly longer. The unit can produce approximately 45 ice cubes in 12-18 minutes.
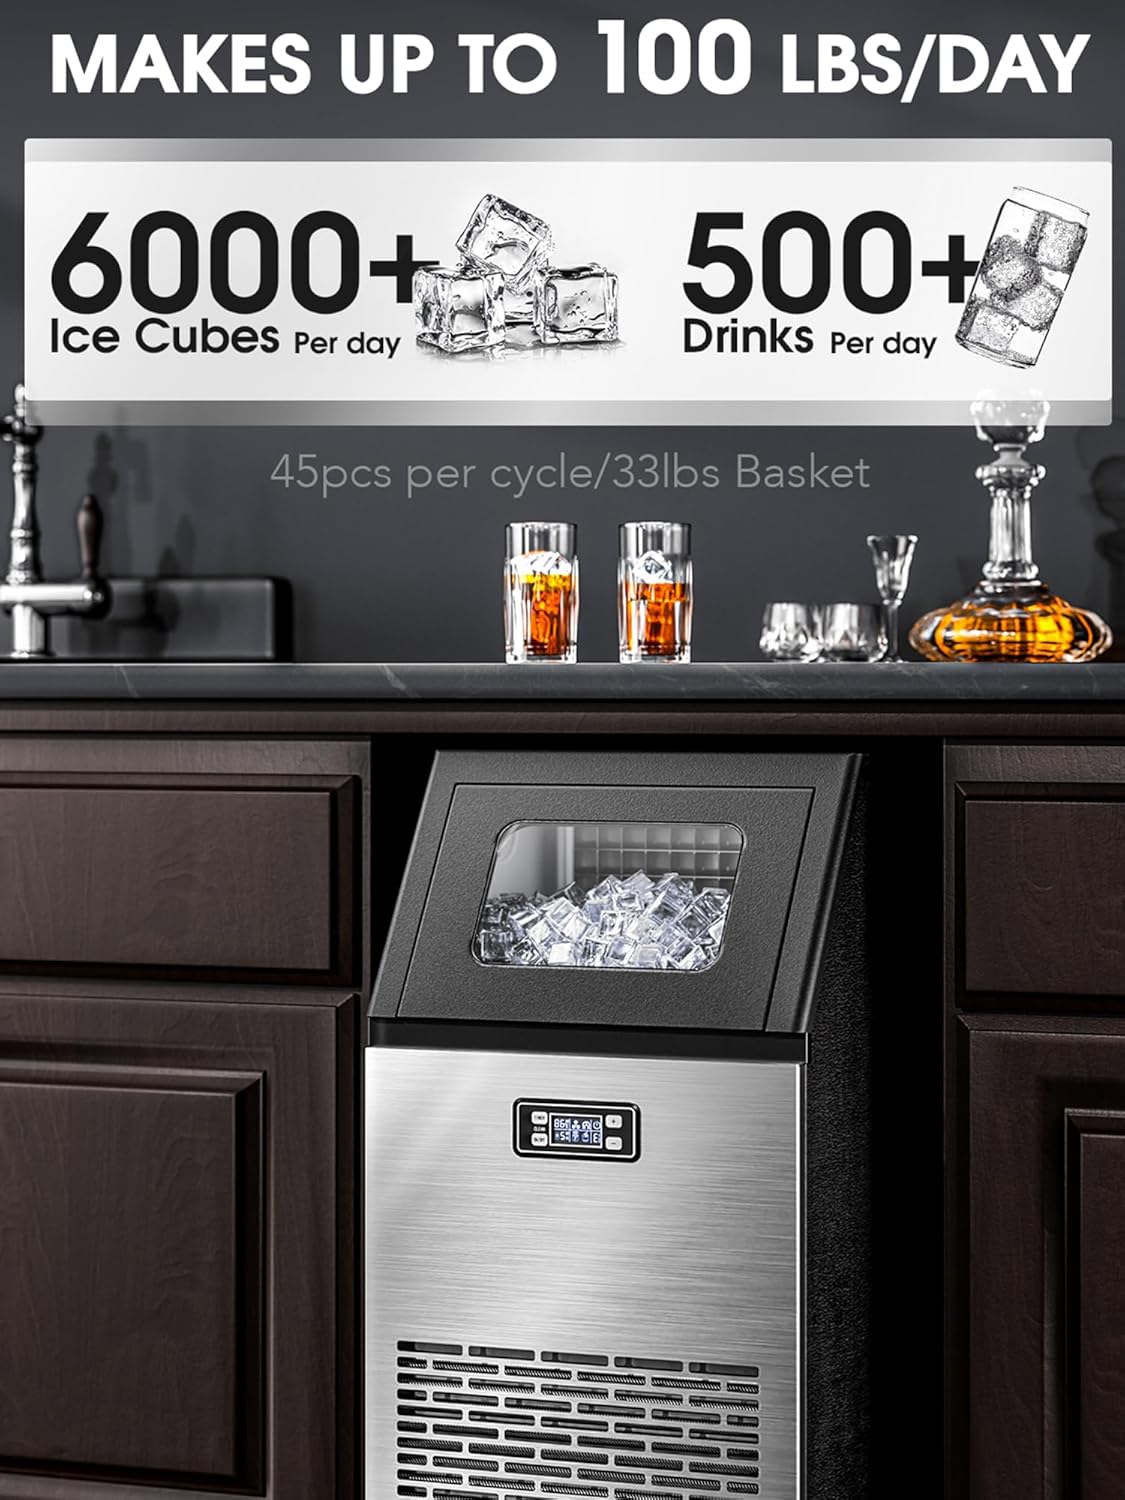
Figure 4: Ice production capacity.
3. Adjusting Ice Thickness:
You can adjust the ice cube thickness to suit your preference:

Obrázek 5: Možnosti úpravy tloušťky ledu.
- While the machine is operating, use the '+' a '-' buttons to cycle through thickness settings.
- A shorter freezing time results in thinner ice, ideal for smoothies.
- A longer freezing time results in thicker ice, suitable for cooling drinks or retaining freshness.
4. Použití funkce časovače:
The 24-hour timer allows you to schedule when the ice maker starts or stops operation.
- Stiskněte tlačítko ČASOVAČ/ČISTIT button once to activate the timer setting.
- Použijte '+' a '-' buttons to set the desired delay time (in hours) for the unit to turn on or off.
- Potvrďte nastavení stisknutím tlačítka ČASOVAČ/ČISTIT button again or waiting a few seconds for it to auto-confirm.
5. Ice Storage:
The ice storage bin is insulated to help preserve ice for a short period. For extended storage, transfer ice to a freezer, as this machine is not a refrigerator and cannot maintain ice in a frozen state indefinitely.
Údržba
1. Auto Self-Cleaning Function:
The ice maker features an automatic self-cleaning function to simplify maintenance.
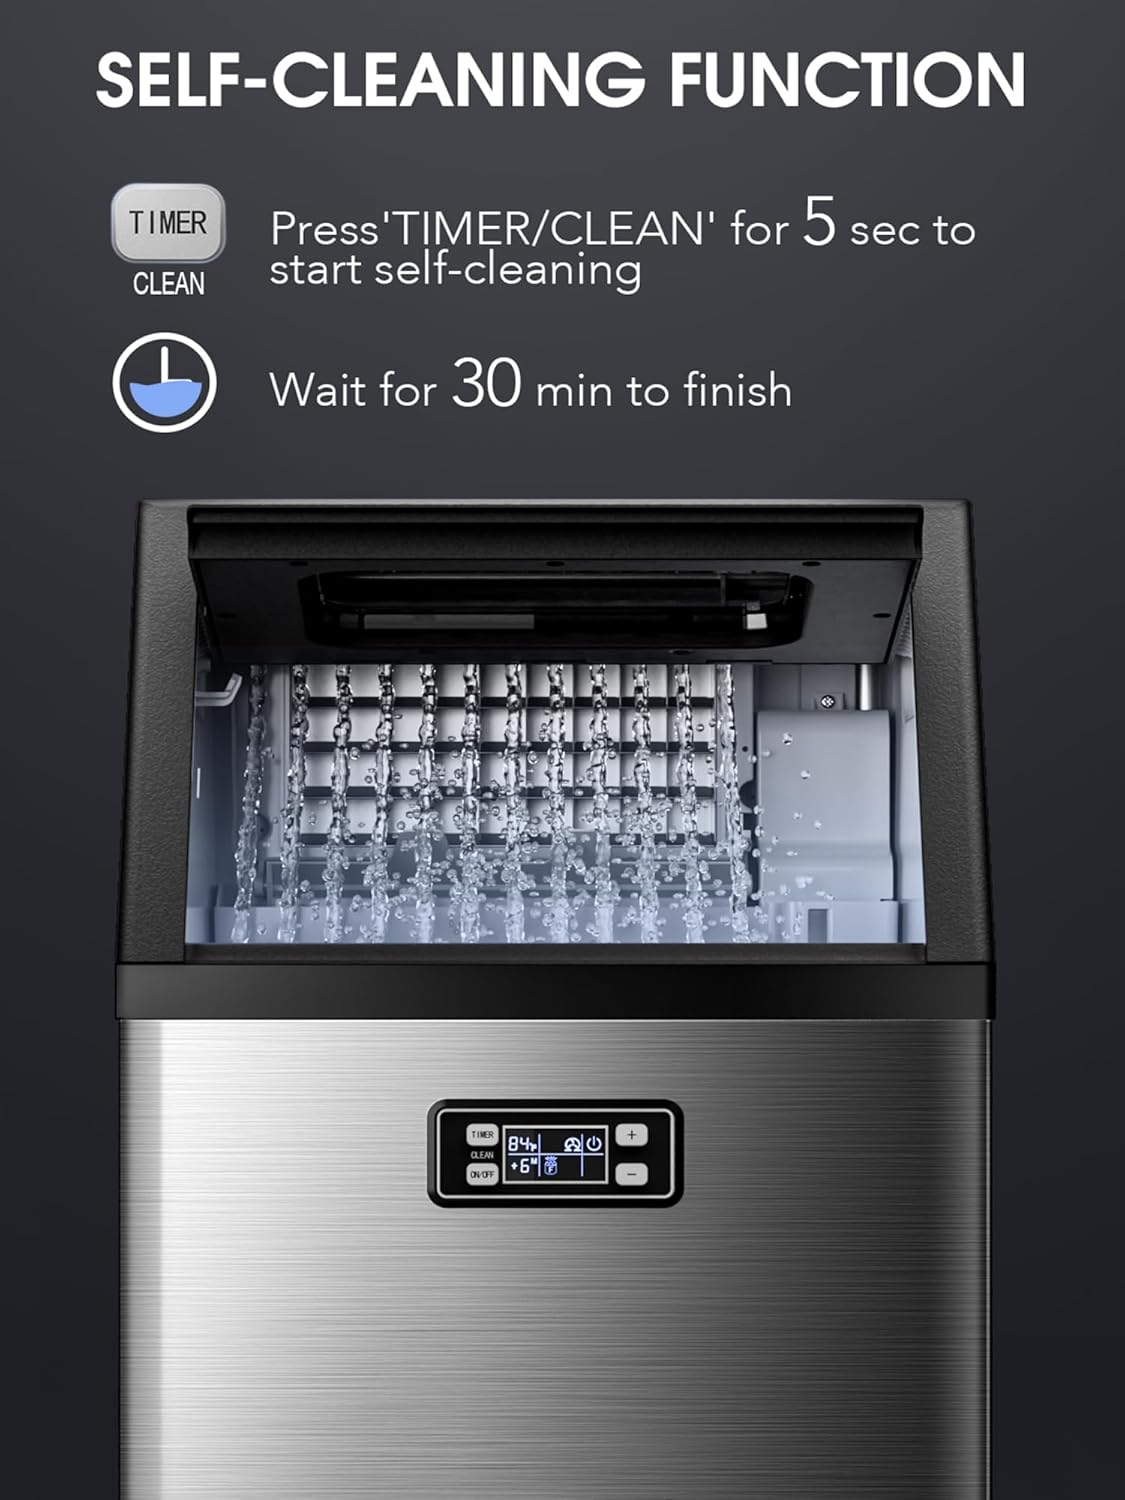
Figure 6: Self-cleaning cycle in progress.
- Ensure the unit is connected to a water supply and the drain hose is properly set up.
- Stiskněte a podržte ČASOVAČ/ČISTIT button for 5 seconds. The display will indicate the cleaning cycle has started.
- The self-cleaning process takes approximately 30 minutes. Do not interrupt the cycle.
- Once complete, the unit will automatically switch off or return to standby mode.
2. Pravidelný úklid:
- Vnější: Wipe the stainless steel exterior with a soft cloth and mild detergent. Avoid abrasive cleaners.
- Interiér: Periodically clean the ice storage bin and other accessible interior surfaces with a solution of warm water and mild soap. Rinse thoroughly and ensure all soap residue is removed.
- Vodní systém: For optimal performance and hygiene, consider using a descaling solution specifically designed for ice makers every few months, especially in areas with hard water. Follow the descaling product's instructions carefully.
3. Draining the Unit:
To drain the water from the unit, locate the drain plug at the bottom of the machine. Place a container beneath it, remove the plug, and allow all water to drain. Reinsert the plug securely after draining.
Odstraňování problémů
| Problém | Možná příčina | Řešení |
|---|---|---|
| Výrobník ledu nevyrábí led. | No water supply; water inlet blocked; ambient temperature too high; refrigerant issue. | Check water connection and supply. Ensure water pressure is adequate. Clean water inlet filter. Move unit to a cooler environment. Contact customer support if refrigerant is suspected. |
| Kostky ledu jsou příliš malé nebo měkké. | Insufficient freezing time; water temperature too high; ambient temperature too high. | Adjust ice thickness setting to a longer freezing time. Use colder water. Ensure proper ventilation and lower ambient temperature. |
| Svítí kontrolka „Přidat vodu“. | Water tank is empty or water supply is interrupted. | Refill water tank or check water supply connection. |
| Jednotka je hlučná. | Unit not level; fan obstruction; normal operation sounds. | Ensure unit is on a level surface. Check for any obstructions around the fan. Some operational noise is normal. |
| Zobrazené chybové kódy (např. E1, E2). | Specifická vnitřní porucha. | Refer to the specific error code in the full product manual (if available) or contact customer support with the error code. |
Specifikace

Obrázek 7: Rozměry produktu a typické aplikace.
| Funkce | Detail |
|---|---|
| Značka | Elektrický |
| Název modelu | HZB-45A |
| Číslo modelu položky | Commercial Ice Maker-5845AS |
| Rozměry produktu (D x Š x V) | 15.28"H x 14.57"Š x 31.42"V |
| Kapacita výroby ledu | 101 liber / 24 hodin |
| Kapacita úložiště ledu | 33 liber |
| Cyklus výroby kostek ledu | 45 kostek za 12-18 minut |
| Materiál | Nerez |
| svtage | 120 voltů |
| Wattage | 200 wattů |
| Chladivo | R600a |
| Hmotnost položky | 71 libry |
Záruka a podpora
For warranty information and customer support, please refer to the warranty card included with your product or visit the official Electactic brand store. You can typically find support resources, FAQs, and contact information there.