
1. Úvod
Thank you for choosing the DEPSTECH DS650-DL Dual-Lens Articulating Industrial Endoscope. This device is designed for detailed visual inspection in hard-to-reach areas, featuring a dual-lens system with 210° bidirectional rotation, a 4.5-inch IPS monitor, and 1080P high-definition imaging. It is an essential tool for home maintenance, vehicle inspection, and machinery checks.
Please read this manual thoroughly before use to ensure proper operation and to maximize the product's lifespan.
2. Bezpečnostní informace
- Do not use the endoscope in environments with flammable or explosive gases.
- The probe is IP67 waterproof, but the main unit is not. Avoid exposing the main unit to water or excessive moisture.
- Nepokoušejte se zařízení rozebírat ani upravovat. Zrušíte tím záruku a může dojít k poškození.
- Udržujte zařízení mimo dosah dětí.
- Zabraňte přímému vystavení očí LED světelům.
- The device features overheat protection. If the temperature exceeds 70°C, a warning will display. If it exceeds 80°C, the device will automatically shut down to prevent damage. Allow the device to cool down before resuming operation.
3. Obsah balení
Po otevření balíku ověřte, zda jsou všechny položky přítomny a v dobrém stavu.
- DEPSTECH DS650-DL Endoscope Unit
- Skladovací pouzdro
- Uživatelská příručka
- Nabíjecí kabel typu C.
- Paměťová karta 32 GB (předinstalovaná nebo dodávaná samostatně)

Image: Contents of the DEPSTECH DS650-DL package.
4. Nastavení
4.1 Nabíjení zařízení
Before first use, fully charge the endoscope unit. Connect the provided Type-C charging cable to the charging port on the device and to a suitable USB power adapter (not included).
4.2 Vložení paměťové karty
If the 32GB memory card is not pre-installed, locate the TF card slot on the side of the monitor unit. Insert the memory card with the contacts facing down until it clicks into place.
4.3 Zapnutí/vypnutí
Press and hold the power button (usually located near the monitor) for a few seconds to turn the device on or off. The IPS monitor will display the startup screen.
5. Provoz
5.1 Pochopení ovládacích prvků

Obrázek: Overview of the endoscope controls and ports.
- Tlačítko OK/Potvrdit: Potvrzuje výběry v nabídkách.
- Up/Zoom In Button: Navigates up in menus or zooms in on the image.
- Down/Zoom Out Button: Navigates down in menus or zooms out on the image.
- Tlačítko pro rotaci o 180°: Rotates the real-time image on the screen by 180 degrees.
- Lens Switch Button: Toggles between front camera, side camera, and dual-view režimu.
- Tlačítko Foto/Video: Krátkým stisknutím pořídíte fotografii, dlouhým stisknutím spustíte/zastavíte nahrávání videa.
- Power Button/LED Adjustment: Short press to adjust LED brightness (3 levels), long press to power on/off.
- Articulating Angle Dial: Controls the 210° bidirectional rotation of the probe tip.
- Slot na kartu TF: Pro vložení paměťové karty.
- Port typu C: Pro nabíjení a přenos dat.
- Resetovací tlačítko: Resets the device (use a pin to press).
5.2 Using the Dual-Lens and Articulation
The DS650-DL features both a front camera and a side camera, allowing for a wider inspection range. The probe tip can be articulated up to 210° in two directions for comprehensive viewIng.
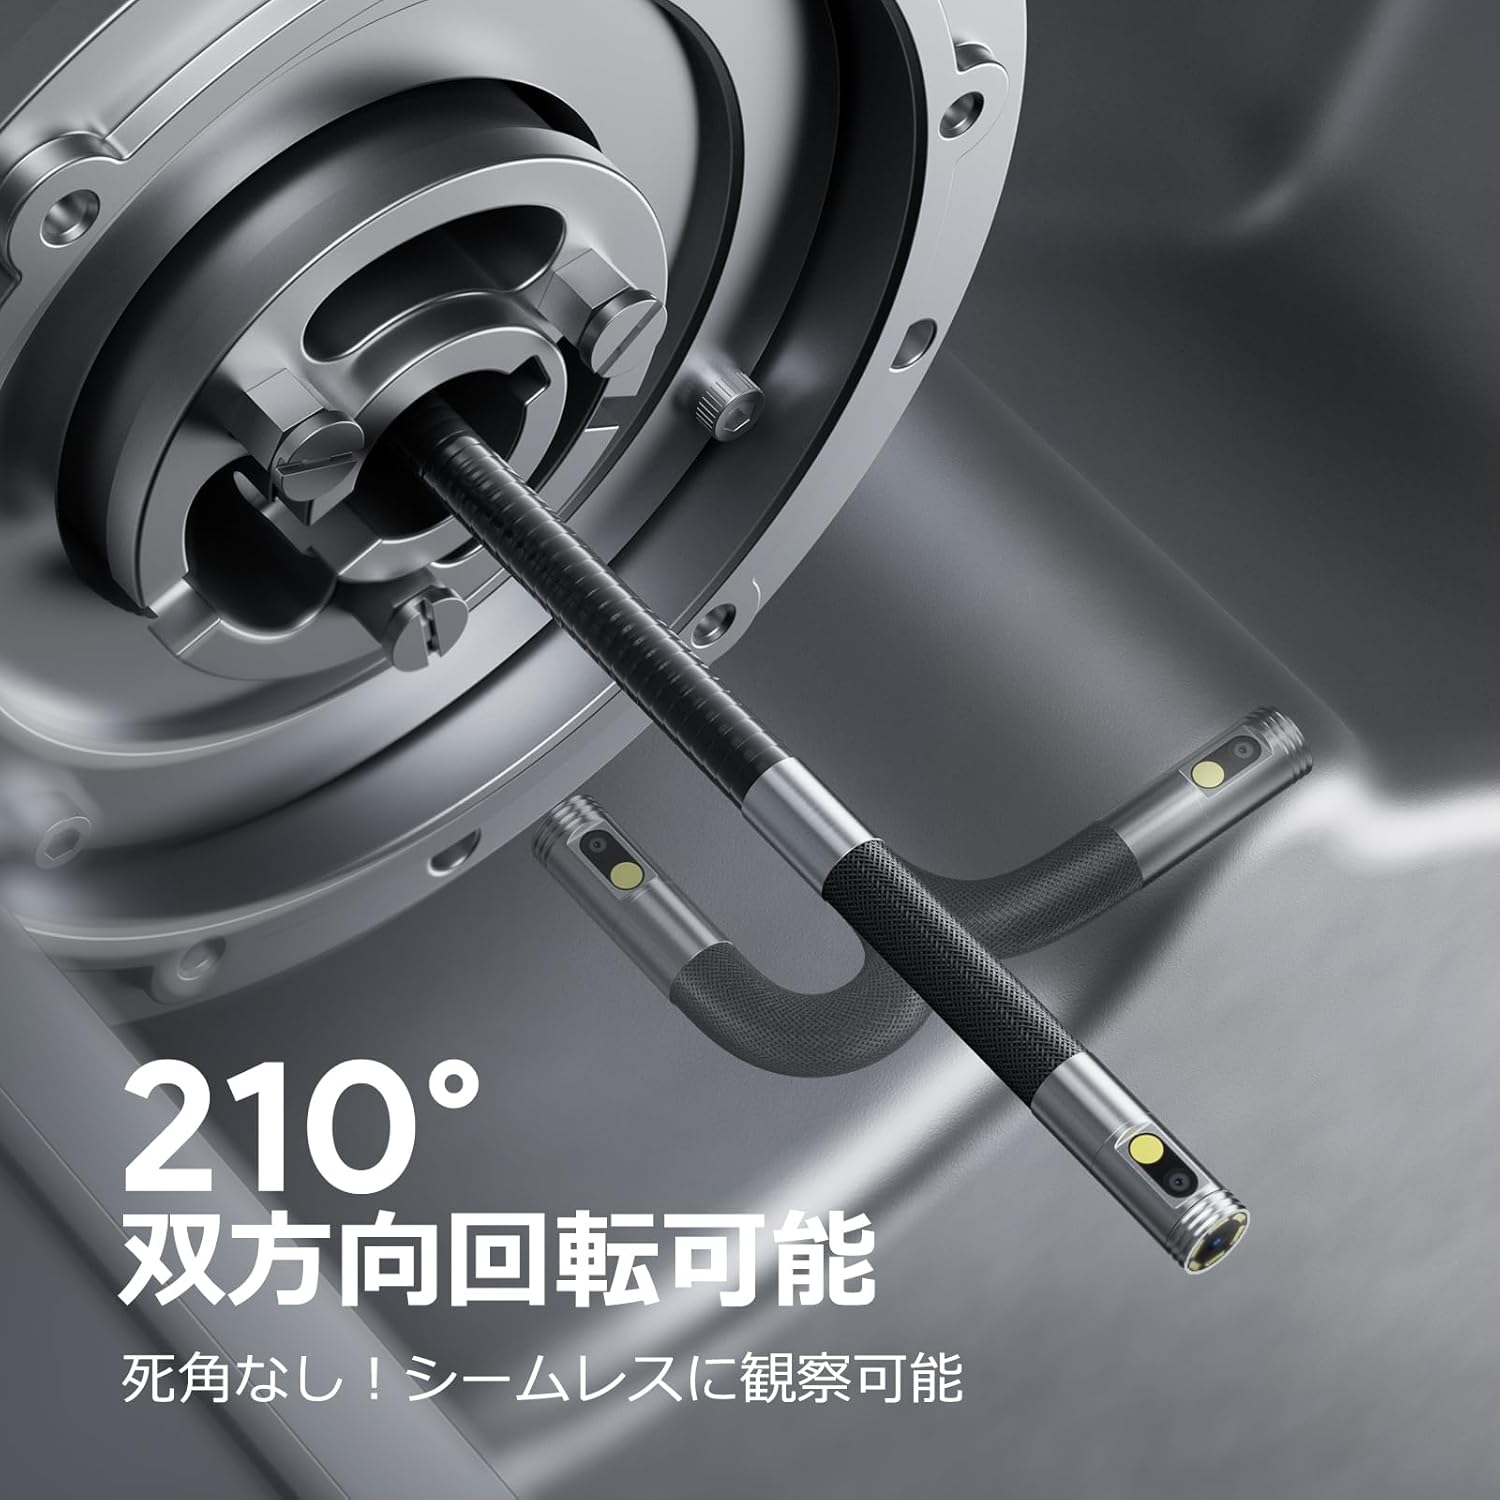
Image: Endoscope probe demonstrating 210° bidirectional articulation.
- Použijte Tlačítko pro přepínání objektivu to cycle between the front camera, side camera, or a split-screen dual-view režimu.
- Otočte Articulating Angle Dial to precisely adjust the direction of the probe tip. This allows you to navigate around obstacles and view areas from multiple angles without repositioning the entire cable.
5.3 Pořizování obrázků a videí
The device supports capturing both still images and video recordings directly to the inserted 32GB memory card.

Image: Monitor display showing photo and video capture features.
- Chcete-li pořídit fotografii: Krátce stiskněte Tlačítko Foto/Video.
- Nahrávání videa: Dlouze stiskněte Tlačítko Foto/Video to start recording. Long press again to stop recording.
- Zachyceno files are saved to the 32GB memory card. You can store approximately 10,000 images or 50 videos.
5.4 Nastavení jasu LED diod
The probe is equipped with high-brightness LED lights to illuminate dark inspection areas. Short press the Power Button/LED Adjustment button to cycle through 3 levels of LED brightness.

Image: IP67 waterproof probe with adjustable LED illumination.
5.5 Přenos dat
You can transfer captured images and videos to a computer via the Type-C cable or by directly accessing the memory card.

Image: High-speed data transfer from endoscope to PC.
6. Údržba
- Čištění sondy: After use, especially in dirty or wet environments, gently wipe the probe with a soft, damp cloth. Ensure no debris remains on the camera lenses.
- Čištění monitoru: Use a soft, dry cloth to clean the IPS monitor. Avoid abrasive cleaners or solvents.
- Skladování: Store the endoscope in its provided storage case in a cool, dry place, away from direct sunlight and extreme temperatures. This prevents damage from improper storage and moisture.
- Péče o baterie: Chcete-li prodloužit životnost baterie, vyhněte se častému úplnému vybíjení zařízení. Pravidelně jej nabíjejte, i když jej delší dobu nepoužíváte.
7. Řešení problémů
| Problém | Možná příčina | Řešení |
|---|---|---|
| Zařízení se nezapne. | Slabá baterie; porucha zařízení. | Zařízení plně nabijte. Pokud problém přetrvává, kontaktujte podporu. |
| Žádný obraz na obrazovce. | Kabel není správně připojen; objektiv kamery je zakrytý. | Ensure the probe cable is securely connected. Check for obstructions on the lens. |
| Obraz je rozmazaný nebo nejasný. | Lens is dirty; focus distance incorrect. | Clean the camera lens. Ensure the object is within the optimal focal range (3-10cm). |
| Nelze nahrávat fotografie/videa. | Paměťová karta je plná nebo není správně vložena. | Check if the 32GB memory card is inserted correctly. Delete old filenebo kartu vyměňte, pokud je plná. |
| Device shuts down automatically. | Aktivována ochrana proti přehřátí. | Allow the device to cool down. Avoid using in excessively hot environments. |
8. Specifikace
| Funkce | Detail |
|---|---|
| Značka | DEPSTECH |
| Číslo modelu | DS650DJ |
| Zobrazit | 4.5-inch IPS LCD Monitor |
| Rozlišení fotoaparátu | 1080P |
| Průměr sondy | 8.5 mm |
| Úhel natočení | 210° obousměrný |
| Typ kabelu | 1.5M Semi-rigid |
| Hodnocení voděodolnosti | IP67 (pouze sonda) |
| Osvětlení | Nastavitelná LED světla |
| Skladování | 32GB Micro SD karta (součástí balení) |
| Baterie je součástí dodávky | Ano |
| Rozměry balení | 43.1 x 21.4 x 7.4 cm |
| Hmotnost balení | 1.33 kg |
9. Záruka a podpora
9.1 Záruka výrobce
This DEPSTECH product comes with a 24měsíční záruka výrobce. Your order number serves as your proof of purchase for warranty claims. Please retain it.
9.2 Zákaznická podpora
For any questions, technical assistance, or warranty inquiries, please contact our professional support team:
E-mail: support.jp@depstech.com
We aim to respond to all inquiries within 24 hours (excluding weekends and public holidays, where responses will be provided on the next business day).

Image: DEPSTECH customer support and warranty information.