
1. Úvod
Thank you for choosing the Crelander HY310PRO Mini Projector. This portable smart projector is designed to deliver a high-quality viewing experience with native 1080P support, auto-focus, and advanced connectivity options like Wi-Fi and Bluetooth. This manual provides essential information for setting up, operating, and maintaining your projector to ensure optimal performance and longevity.

Image 1.1: The Crelander HY310PRO Mini Projector and its remote control, showcasinjeho kompaktní design a uživatelské rozhraní.

Obrázek 1.2: Konecview of key features including 0.8:1 ultra short throw, auto focus, dual band Wi-Fi 6 & BT5.4, native 1080P, 260 ANSI lumens, and 180° free projection.
2. Obsah balení
Pečlivě zkontrolujte balení, zda jsou všechny položky přítomny a v dobrém stavu. Pokud některé položky chybí nebo jsou poškozeny, kontaktujte prosím zákaznickou podporu.

Image 2.1: Illustration of the items included in the product package: the projector unit, remote control, user manual, and power cord with adapter.
- Crelander HY310PRO Mini Projector
- Dálkové ovládání (baterie nejsou součástí balení)
- Napájecí kabel a adaptér
- Uživatelská příručka (tento dokument)
Poznámka: For transport safety reasons, batteries are not included in the remote control package. Please insert two AAA batteries (not supplied) before use.
3. Nastavení
- Připojení napájení: Připojte napájecí adaptér ke vstupnímu portu projektoru a poté jej zapojte do elektrické zásuvky.
- Umístění: Place the projector on a stable, flat surface. Ensure there are no obstructions in front of the lens. The projector supports 180° free projection, allowing it to project onto walls, ceilings, or floors.
- Počáteční zapnutí: Stisknutím tlačítka napájení na projektoru nebo na dálkovém ovladači zapněte zařízení.
- Nastavení dálkového ovládání: Insert two AAA batteries into the remote control. The remote combines traditional remote functions with a mouse pointer for easier navigation.
4. Návod k obsluze
4.1. Auto Focus and Keystone Correction
The HY310PRO projector features automatic focus and keystone correction to ensure a clear and properly shaped image without manual adjustments.
- Automatické ostření: The projector automatically adjusts the lens to achieve a sharp image. You do not need to manually adjust the focus.
- Automatická horizontální korekce lichoběžníkového zkreslení: The projector automatically corrects horizontal image distortion.
- Čtyřbodová oprava: For more precise adjustments, the projector offers four-point correction to fine-tune the image shape.
- Electronic Upper and Lower Trapezoid Correction: This feature allows for electronic adjustment of vertical image distortion.

Image 4.1: Visual representation of the auto horizontal keystone correction and four-point correction capabilities, demonstrating how the projector adjusts the image to a perfect rectangle.

Image 4.2: Diagram illustrating the electronic upper and lower trapezoid correction feature, which helps in rectifying vertical image distortions.
4.2. Konektivita
The projector supports both Wi-Fi and Bluetooth for versatile connectivity.
- Wi-Fi: Connect to your home network to access built-in streaming applications and online content. Navigate to the settings menu to configure Wi-Fi.
- Bluetooth: Pair with external Bluetooth speakers or headphones for enhanced audio. Access Bluetooth settings through the main menu.
4.3. Projection and Screen Size
The HY310PRO offers flexible projection options for various environments.
- Projekční poměr: Features a 0.8:1 ultra short throw ratio.
- Velikost projekce: Supports screen sizes from 40 to 260 inches.
- Projekční vzdálenost: Optimal projection distances range from 2 feet to 8.2 feet.
- 180° Free Projection: The projector's design allows for projection at various angles, including ceilings and floors, providing flexibility in placement.

Image 4.3: Chart illustrating the relationship between projection distance and screen size, showing examples for 40, 85, and 130-inch screens.

Image 4.4: Visual demonstration of the projector's 180-degree free projection feature, allowing it to project images onto various surfaces and angles.

Image 4.5: The projector positioned to project images onto a wall and a ceiling, highlighting its versatility in different room setups.
4.4. Built-in Applications
The projector comes with multiple built-in applications, providing seamless access to a wide range of video content. Ensure your software is up-to-date for the best experience.
- Aktualizace softwaru: Pokud váš viewing software is outdated, visit the product's inbuilt software store to upgrade to the latest firmware.
5. Údržba
- Čištění objektivu: Používejte měkký hadřík bez žmolků, speciálně určený pro optické čočky. Nepoužívejte abrazivní čisticí prostředky ani agresivní chemikálie.
- Čištění exteriéru: Otřete vnější povrch projektoru měkkým, suchým hadříkem. Nepoužívejte tekuté čisticí prostředky přímo na zařízení.
- Větrání: Ensure the projector's ventilation ports are clear of dust and obstructions to prevent overheating.
- Skladování: Pokud projektor delší dobu nepoužíváte, skladujte jej na chladném a suchém místě, mimo dosah přímého slunečního záření a extrémních teplot.
6. Řešení problémů
| Problém | Možná příčina | Řešení |
|---|---|---|
| Žádný promítaný obraz | Power not connected, projector off, input source not selected. | Check power connection, turn on projector, select correct input source. |
| Obraz je rozmazaný | Auto-focus issue, projector too close/far from screen. | Ensure projector is on a stable surface. If issue persists, restart the projector. |
| Obraz je zkreslený (lichoběžníkový tvar) | Projektor není kolmý k promítací ploše. | The projector has auto keystone correction. If manual adjustment is needed, check settings for four-point or electronic trapezoid correction. |
| Žádný zvuk | Příliš nízká hlasitost, externí audio zařízení není připojeno, Bluetooth není spárováno. | Increase volume, check audio cable connections, ensure Bluetooth device is paired and connected. |
| Dálkové ovládání nefunguje | Baterie jsou vybité nebo nesprávně vložené. | Replace batteries (AAA), ensure correct polarity. |
| Nelze se připojit k Wi-Fi | Incorrect password, router issue, out of range. | Verify Wi-Fi password, restart router, move projector closer to router. |
If you encounter issues not listed here or if the problem persists, please contact our Customer Support Centre for assistance.
7. Specifikace
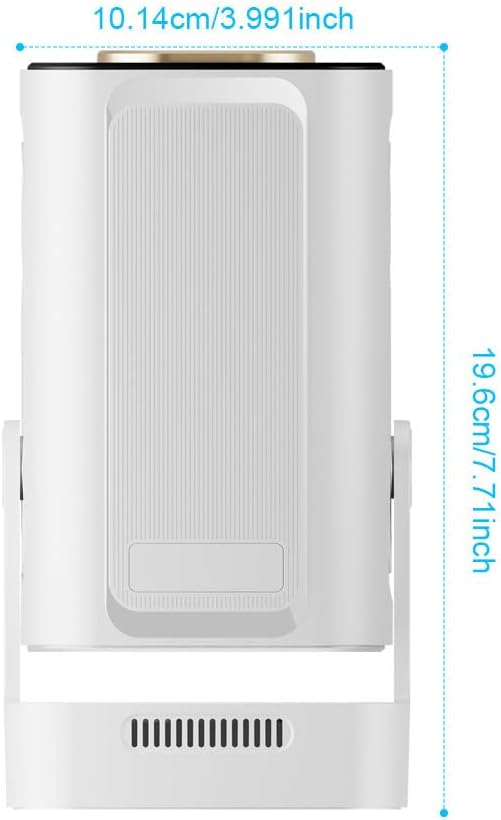
Image 7.1: Diagram showing the physical dimensions of the Crelander HY310PRO Mini Projector: approximately 10.14 cm (3.991 inches) in width and 19.6 cm (7.71 inches) in height.
| Funkce | Detail |
|---|---|
| Značka | Crelander |
| Model | HY310PRO |
| Doporučené použití | Domácí kino |
| Speciální funkce | Automatické ostření |
| Technologie připojení | Bluetooth, Wi-Fi (Dual Band Wi-Fi 6 & BT5.4) |
| Rozlišení displeje | Nativní 1920 x 1080 (1080P) |
| Jas | 260 ANSI Lumens |
| Kontrastní poměr | 10,000:1 |
| Projekční poměr | 0.8:1 Ultra Short Throw |
| Velikost projekce | 40 až 260 palců |
| Projekční vzdálenost | 2 stop až 8.2 stop |
| Zvuk | Upgraded 5W Speakers |
| Korekce lichoběžníkového zkreslení | Auto Horizontal, Four-Point, Electronic Upper/Lower Trapezoid |
| Úhel projekce | 180° volná projekce |
8. Záruka a podpora
For any questions, technical assistance, or warranty inquiries, please do not hesitate to contact our Customer Support Centre. Refer to your purchase documentation for specific warranty terms and contact details.
We recommend checking the version of your viewing software regularly. If the version is outdated, please visit the product's inbuilt software store to upgrade to the latest firmware for the best viewzkušenosti.