
Antec 0-761345-10176-9
Antec VX300M ARGB Mini Tower PC Case User Manual
Model: 0-761345-10176-9
1. Úvod
Thank you for choosing the Antec VX300M ARGB Mini Tower PC Case. This manual provides essential information for the proper installation, operation, and maintenance of your new PC case. Designed for Micro ATX and ITX motherboards, the VX300M ARGB offers excellent airflow and stunning aesthetics with its pre-installed ARGB fans. Please read this manual thoroughly before beginning your build to ensure optimal performance and longevity of your system.
2. Obsah balení
- Antec VX300M ARGB Mini Tower PC Case
- Pre-installed 120mm ARGB Fans (4x)
- Accessory Box (Screws, standoffs, cable ties, etc.)
- Uživatelská příručka (tento dokument)
3. Vlastnosti
- Compact Mini Tower Design: Optimized for Micro ATX and ITX motherboards, saving space without compromising performance.
- Vylepšené proudění vzduchu: Features a perforated mesh front panel and support for multiple fans to ensure efficient cooling.
- Živé ARGB osvětlení: Comes with four pre-installed 120mm ARGB fans for customizable lighting effects.
- Boční panel z tvrzeného skla: Showcases your internal components and ARGB lighting.
- AmpMožnosti úložiště: Supports multiple 2.5" and 3.5" drives.
- Pohodlné přední I/O: Easy access to USB ports and audio jacks.
4. Nastavení
Follow these steps to set up your Antec VX300M ARGB PC case and install your components.
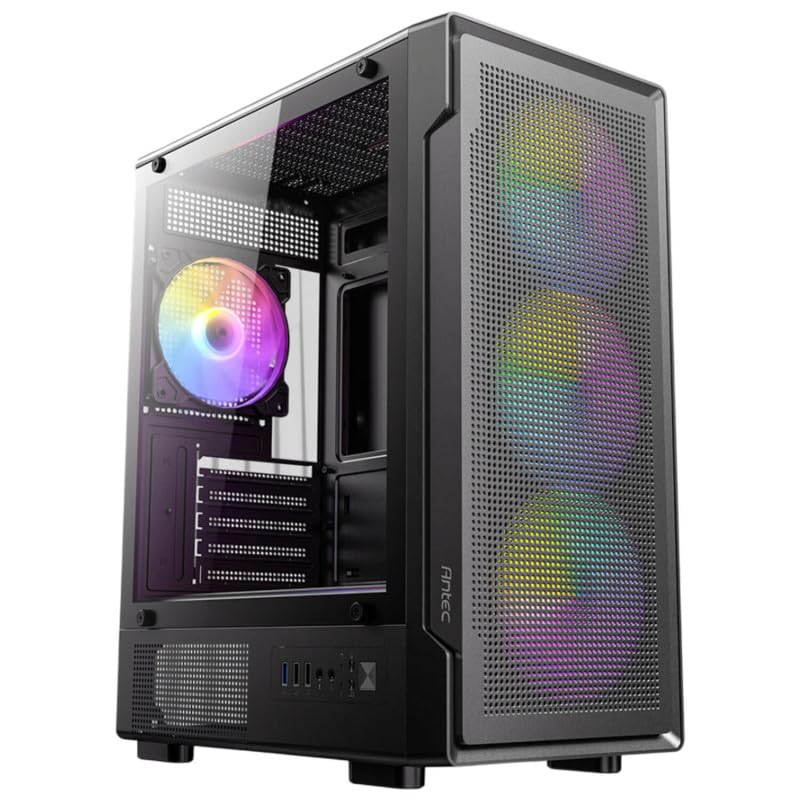
This image displays the Antec VX300M ARGB Mini Tower PC case from a front-left perspective. The case features a black finish, a perforated mesh front panel allowing airflow and showcasing the vibrant ARGB lighting of the pre-installed fans. A tempered glass side panel provides a clear view of the interior, including the rear ARGB fan and internal component mounting areas. The front I/O ports are visible at the bottom front.
4.1 Příprava případu
- Umístěte pouzdro na rovný a stabilní povrch.
- Carefully remove the tempered glass side panel by unscrewing the thumb screws. Set it aside in a safe place.
- Remove the rear side panel (solid metal panel) to access the cable management area.
4.2 Instalace základní desky
- Nainstalujte kryt I/O do otvoru v přihrádce základní desky zevnitř skříně.
- Align your Micro ATX or ITX motherboard with the pre-installed standoffs. Additional standoffs may be required depending on your motherboard's form factor; install them as needed.
- Zajistěte základní desku pomocí příslušných šroubů z krabice s příslušenstvím.
4.3 Instalace napájecího zdroje
- Position your ATX power supply unit (PSU) in the dedicated PSU shroud area at the bottom rear of the case.
- Secure the PSU to the case using screws from the accessory box, typically from the rear exterior.
4.4 Instalace úložného disku
- 3.5" pevné disky: Locate the drive cage usually beneath the PSU shroud. Slide the HDDs into the trays and secure them with screws.
- 2.5" SSD disky: Mount SSDs to the designated mounting points on the motherboard tray or drive cage using screws.
4.5 Grafická karta a rozšiřující karty
- Odstraňte potřebné kryty slotů PCIe ze zadní strany skříně.
- Vložte grafickou kartu nebo jiné rozšiřující karty do slotů PCIe na základní desce.
- Karty zajistěte šrouby.
4.6 Cable Management and Connections
- Connect all necessary power cables from the PSU to your motherboard, CPU, graphics card, and storage drives.
- Connect the front panel I/O cables (USB, audio, power switch, reset switch, HDD LED, Power LED) to their respective headers on the motherboard. Refer to your motherboard manual for exact pinouts.
- Connect the ARGB fan cables to your motherboard's ARGB header (5V 3-pin) or a dedicated ARGB controller. Ensure correct polarity.
- Route cables through the cutouts in the motherboard tray to the rear of the case for a clean build and improved airflow. Use cable ties to secure them.
4.7 Závěrečná montáž
- Once all components are installed and cables are managed, reattach the rear side panel.
- Carefully reattach the tempered glass side panel and secure it with the thumb screws.
5. Provoz
After completing the setup, connect your monitor, keyboard, mouse, and power cable to your PC. Press the power button on the front panel to start your system. The pre-installed ARGB fans will illuminate, and your system should boot up.
5.1 Ovládání osvětlení ARGB
The ARGB lighting of the fans can be controlled via your motherboard's ARGB software (e.g., ASUS Aura Sync, MSI Mystic Light Sync, Gigabyte RGB Fusion, ASRock Polychrome Sync) if connected to a compatible header. Refer to your motherboard's manual for specific instructions on software control.
6. Údržba
Pravidelná údržba pomáhá zajistit optimální výkon a prodlužuje životnost komponent vašeho počítače.
6.1 Čištění prachu
- Vnější: Vnější povrchy otřete měkkým, damp tkanina. Vyhněte se abrazivním čisticím prostředkům.
- Prachové filtry: The Antec VX300M ARGB case may include removable dust filters (e.g., top, front, bottom). Periodically remove and clean these filters by rinsing them with water and allowing them to dry completely before reinstallation.
- Interiér: Use compressed air to blow dust out of the case interior, especially from fans, heatsinks, and ventilation areas. Perform this in a well-ventilated area.
6.2 Údržba ventilátoru
Ensure that all fans are spinning freely and are not obstructed. If a fan becomes noisy or stops spinning, inspect it for dust buildup or damage. Do not attempt to lubricate sealed fan bearings.
7. Řešení problémů
Pokud narazíte na problémy s sestavením počítače, zvažte následující běžné kroky pro řešení potíží:
- Bez napájení: Ensure the power supply is switched on, the power cable is securely connected to both the PSU and the wall outlet, and all internal power cables (24-pin ATX, 8-pin CPU, PCIe) are correctly seated.
- Fans Not Spinning / No ARGB: Check fan power connections to the motherboard or fan controller. Verify ARGB connections are secure and connected to the correct 5V 3-pin header (not 12V 4-pin RGB). Ensure ARGB software is configured correctly.
- Bez displeje: Zkontrolujte, zda je kabel monitoru připojen ke grafické kartě (nikoli k integrovanému grafickému portu základní desky, pokud nepoužíváte integrovanou grafiku). Znovu vložte grafickou kartu a moduly RAM.
- Nestabilita systému: Check all component connections. Ensure adequate cooling and airflow within the case.
- Problémy s I/O na předním panelu: Double-check the front panel header connections on the motherboard against your motherboard manual.
For more complex issues, consult your individual component manuals (motherboard, GPU, PSU) or seek assistance from a qualified technician.
8. Specifikace
| Funkce | Specifikace |
|---|---|
| Název modelu | VX300M ARGB |
| Typ pouzdra | Mini-Tower |
| Kompatibilita základní desky | Micro-ATX, Mini-ITX |
| Předinstalované ventilátory | 4x 120mm ARGB ventilátory |
| Způsob chlazení | Vzduch |
| Barva | Černý |
| Rozměry (D x Š x V) | 48 x 24.5 x 41.5 cm |
| Hmotnost | 11 kg |
| Doporučené použití | Gaming PC and General Computing |
9. Záruka a podpora
Antec products are manufactured to the highest quality standards. For information regarding warranty coverage and terms, please refer to the warranty card included with your product or visit the official Antec website. If you require technical assistance or have questions not covered in this manual, please contact Antec customer support through their official channels.
Antec Official Webmísto: www.antec.com
Ask a question about this manual
Ask about setup, troubleshooting, compatibility, parts, safety, or missing instructions. Manuals+ will review the question and use this page’s manual context to help answer it.