1. Důležité bezpečnostní informace
- Do not immerse the timer in water. The device is IPX5 water-resistant, designed for outdoor use, but not for submersion.
- Use only 2 x AA 1.5V alkaline batteries. Do not mix old and new batteries or different battery types.
- Pokud časovač nebudete delší dobu používat, vyjměte baterie, abyste zabránili vytečení.
- Uchovávejte mimo dosah dětí.
- Do not disassemble or attempt to repair the unit. Contact support if issues arise.
- Ujistěte se, že všechny spoje jsou těsné, aby nedošlo k úniku.
2. Obsah balení
Prosím, ověřte, zda jsou v balení přítomny všechny položky:
- 1 x Walfront SGW01 Sprinkler Timer
- 1 x Converter (for 3/4in male thread)
- 1 x PTFE Tape (Thread Seal Tape)
- 1 x Waterproof Gasket
- 1 x Uživatelská příručka

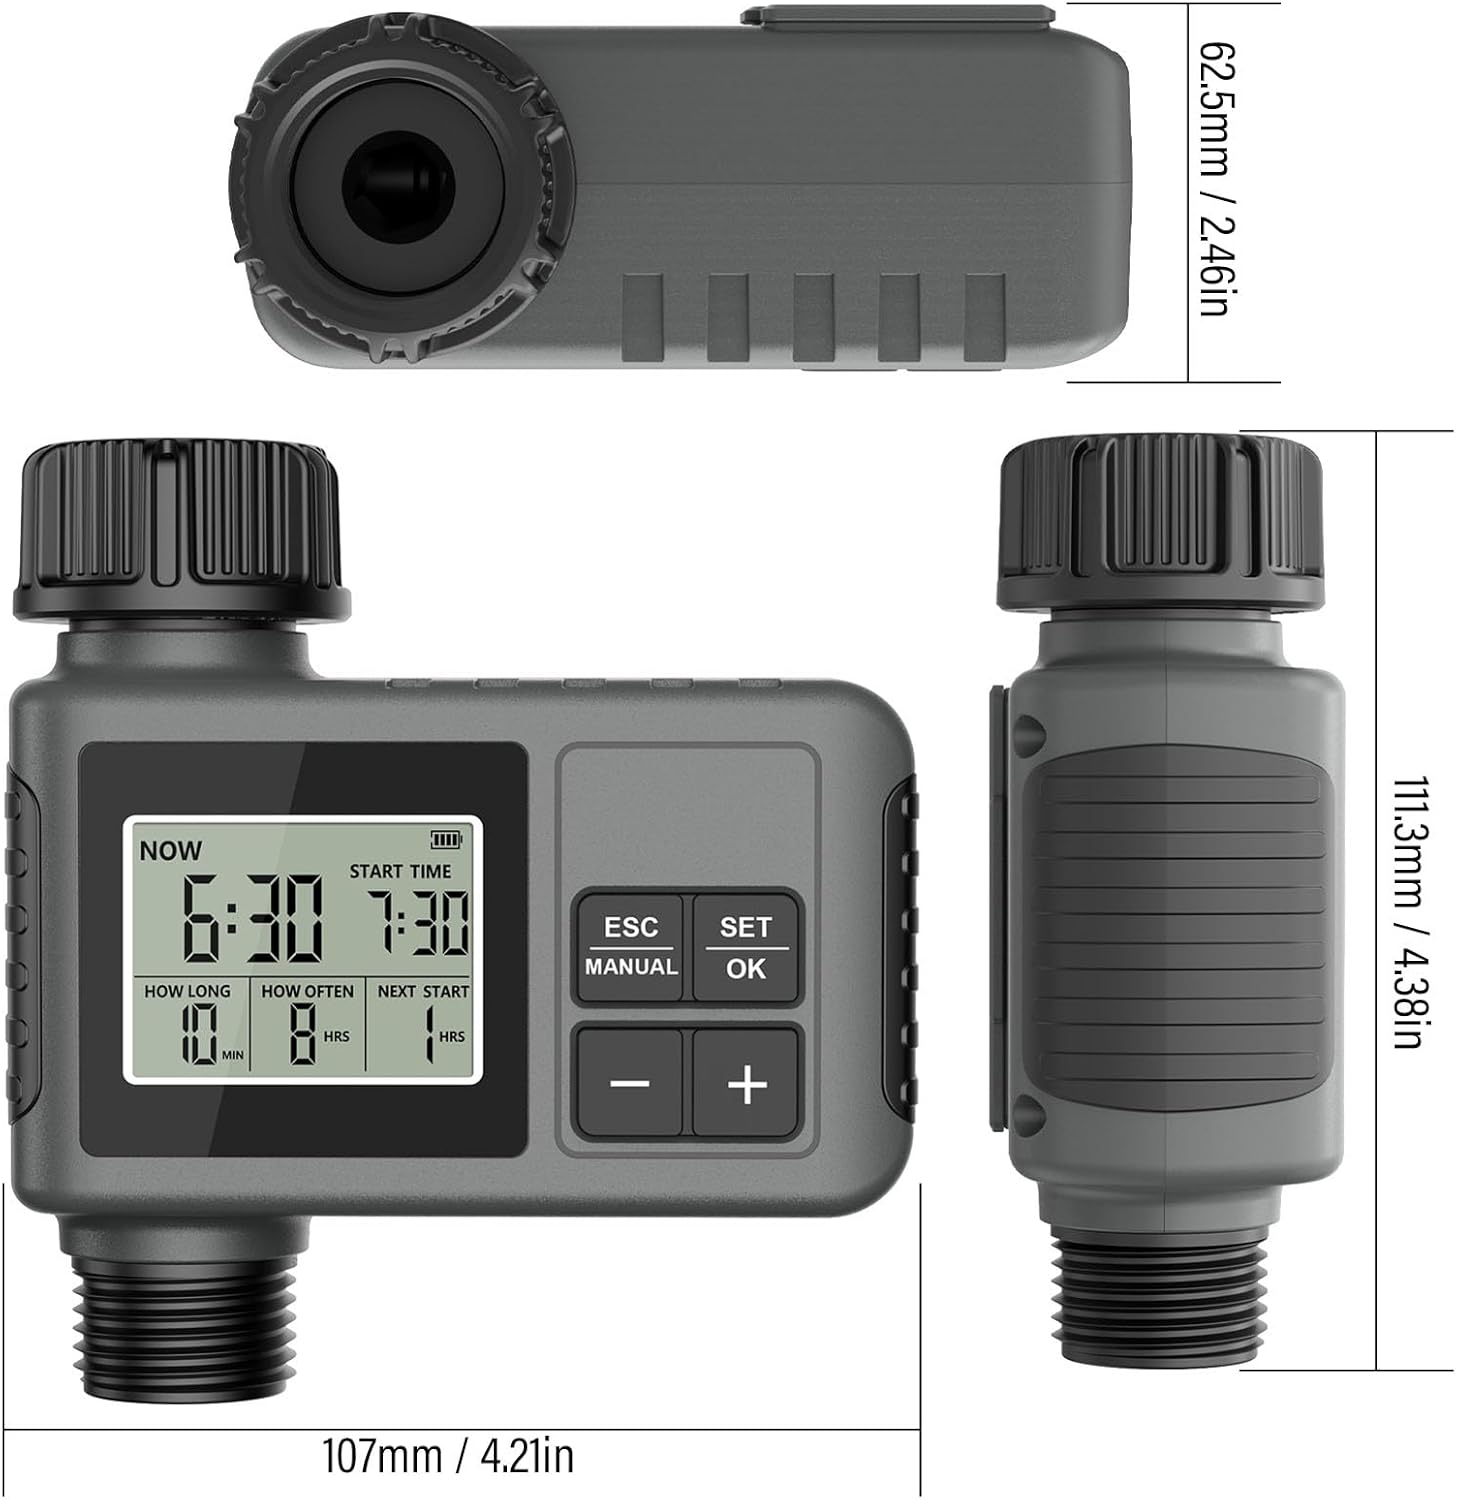
3. Konec produktuview
The Walfront SGW01 Smart Sprinkler Timer is designed to automate your watering schedule for lawns, gardens, and drip irrigation systems. It features a large LCD display, flexible programming options, and a rain delay function for water conservation.

4. Instalace a nastavení
4.1 Instalace baterie
- Vyhledejte přihrádku na baterie na zadní straně časovače.
- Twist and remove the battery cover.
- Insert 2 x AA 1.5V alkaline batteries, ensuring correct polarity (+/-).
- Replace the battery cover and twist to secure it, ensuring the sealing loop is properly seated for waterproofing.
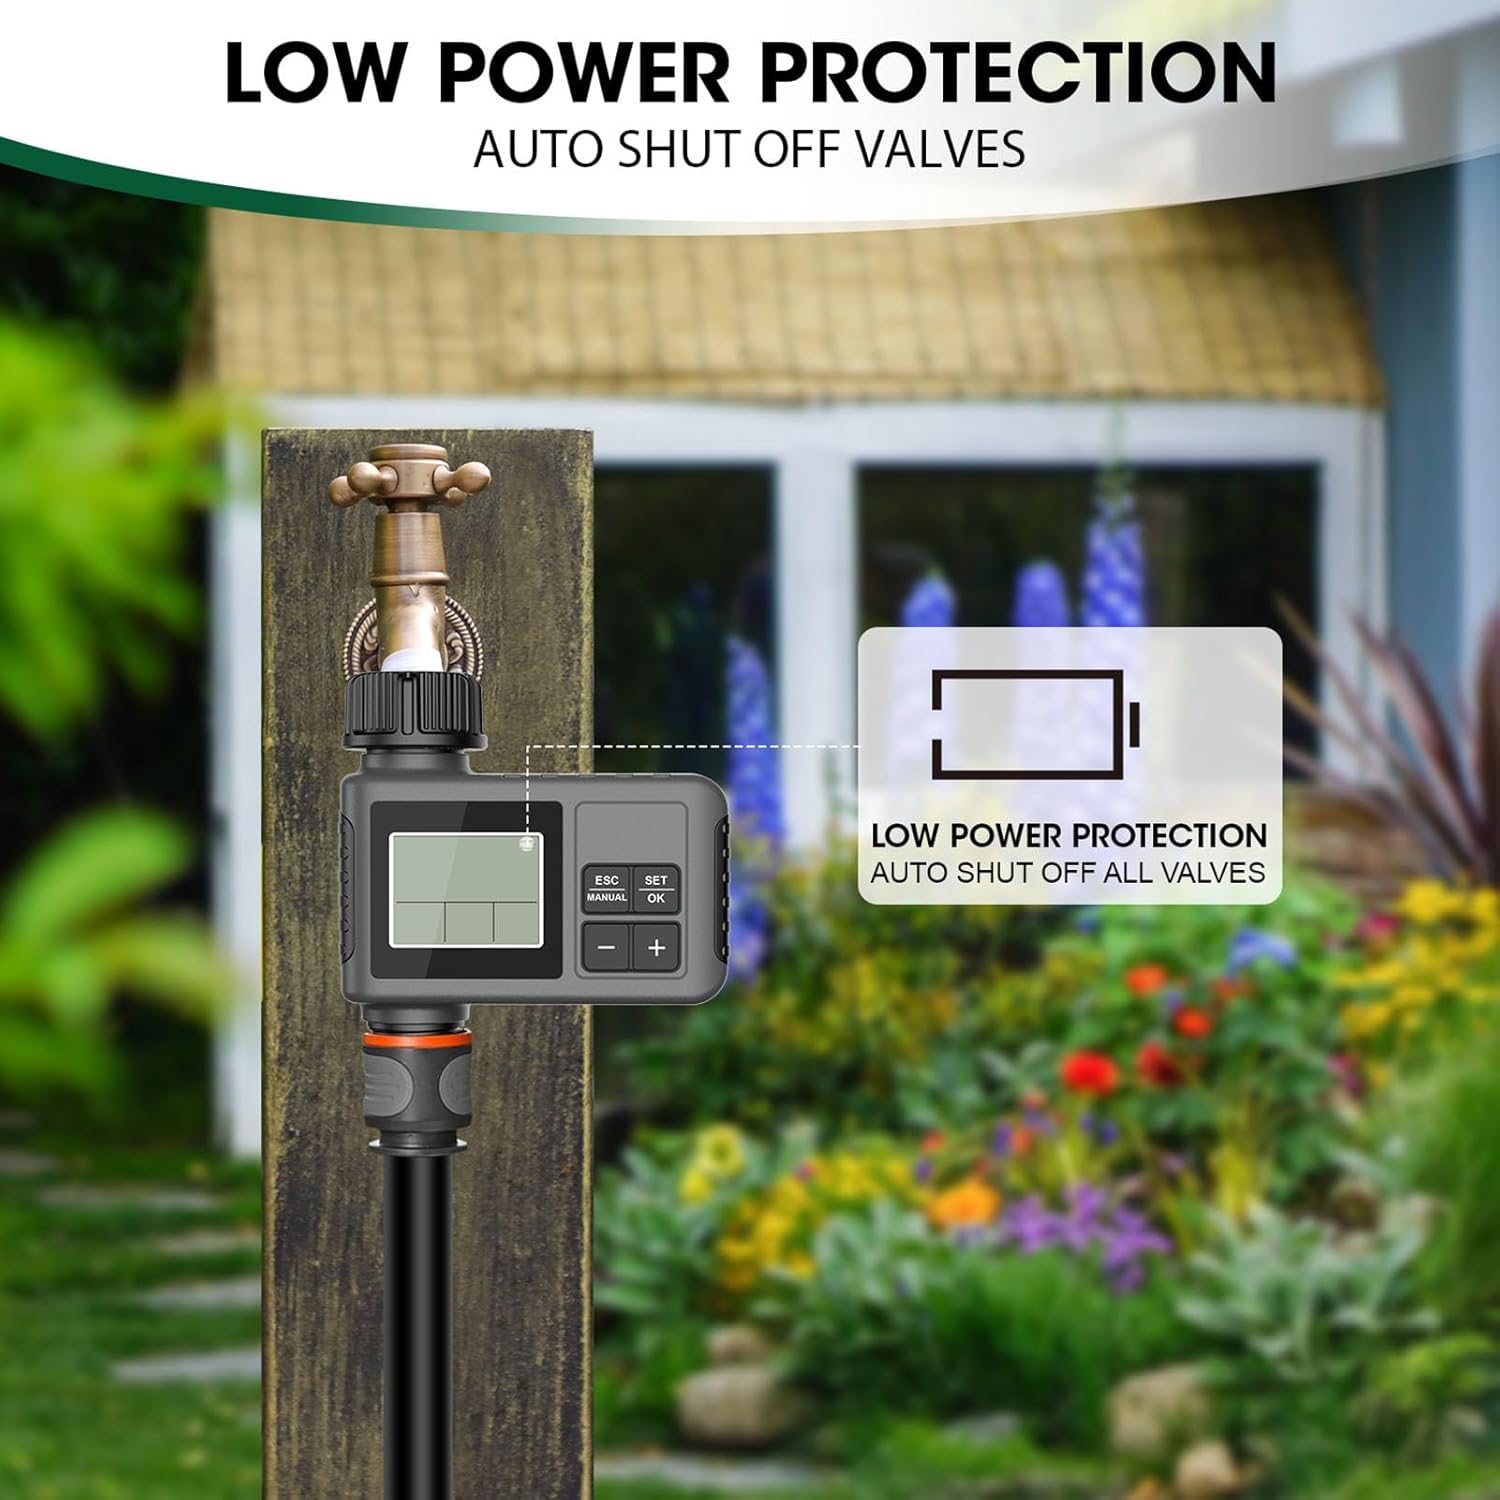
4.2 Attaching to Faucet
- Ensure your outdoor faucet has a 3/4-inch male thread. If not, use the provided converter.
- Wrap the PTFE tape (thread seal tape) clockwise around the faucet threads 3-5 times for a watertight seal.
- Screw the timer onto the faucet by hand until it is snug. Do not overtighten.
- Attach your garden hose or irrigation system to the outlet of the timer.

5. Návod k obsluze
5.1 Nastavení aktuálního času
- Press the 'SET/OK' button to enter time setting mode. The 'NOW' time will flash.
- Use the '+' and '-' buttons to adjust the current hour.
- Press 'SET/OK' again to move to minutes, then adjust with '+' and '-'.
- Press 'SET/OK' to confirm and exit.
5.2 Programming Watering Schedule
The timer allows you to set a start time, watering duration, and frequency.
- Nastavit čas zahájení: Press 'SET/OK' until 'START TIME' flashes. Use '+' and '-' to set the desired start hour and minute. Press 'SET/OK' to confirm.
- Set Watering Duration ('HOW LONG'): Press 'SET/OK' until 'HOW LONG' flashes. Use '+' and '-' to set the watering duration from 1 minute to 360 minutes. Press 'SET/OK' to confirm.
- Set Watering Frequency ('HOW OFTEN'): Press 'SET/OK' until 'HOW OFTEN' flashes. Use '+' and '-' to set the frequency:
- Hour Mode: 1 minute to 23 hours 59 minutes.
- Denní režim: 1 day to 15 days (To switch to day mode, set frequency to 23 hours 59 minutes, then press '+' again).

5.3 Ruční zavlažování
Manual mode allows temporary watering without interrupting your preset schedule.
- Press the 'MANUAL' button. The 'HOW LONG' setting will flash.
- Use '+' and '-' to set the desired manual watering duration.
- Press 'SET/OK' to start manual watering. The timer will display 'ON'.
- To stop manual watering, press 'MANUAL' again or wait for the set duration to complete.

5.4 Funkce zpoždění deště
The rain delay feature helps conserve water by pausing your watering schedule during rainy periods.
- Press the 'ESC' button. The rain delay icon will appear, and the delay duration will flash.
- Use '+' and '-' to select a delay period of 24, 48, or 72 hours.
- Press 'SET/OK' to activate the rain delay. The timer will display the remaining delay time.
- The watering schedule will automatically resume after the delay period ends.
6. Údržba
6.1 Čištění a skladování
- Vyčistěte časovač pomocí reklamyamp tkanina. Nepoužívejte abrazivní čisticí prostředky nebo rozpouštědla.
- Regularly check the filter washer at the inlet for debris and clean if necessary to ensure proper water flow.
- Before freezing temperatures, disconnect the timer from the faucet, remove batteries, and store it indoors in a dry, protected location.
6.2 Low Power Protection
When battery power is low, the timer will automatically shut off all valves to prevent continuous watering and conserve remaining battery life. Replace batteries promptly when the low battery indicator appears on the LCD screen.

7. Řešení problémů
| Problém | Možná příčina | Řešení |
|---|---|---|
| Timer does not turn on/LCD is blank | Vybité nebo nesprávně vložené baterie. | Replace batteries with new AA 1.5V alkaline batteries. Ensure correct polarity. |
| Voda neteče | Faucet is off; low water pressure; clogged filter; timer not programmed or in manual mode. | Ensure faucet is fully open. Check water pressure. Clean the filter washer. Verify programming or activate manual mode. |
| Úniky časovače z připojení | Loose connection; missing or damaged washer/PTFE tape. | Tighten connections. Ensure the waterproof gasket is properly seated. Reapply PTFE tape if necessary. |
| Watering schedule is inconsistent | Incorrect programming; rain delay activated. | Review and re-program the schedule. Check if rain delay is active and wait for it to expire or manually cancel. |
8. Specifikace
| Funkce | Specifikace |
|---|---|
| Model | SGW01 |
| Výstupní závit | 3/4 inch male thread |
| Pracovní tlak | 7.25 - 116 psi |
| Pracovní teplota | 4.5 - 45 ℃ (40.1 - 113 ℉) |
| Zdroj napájení | 2 x AA 1.5V baterie (nejsou součástí balení) |
| Hodnocení voděodolnosti | IPX5 |
| Délka zavlažování | 1–360 minut |
| Frekvence zalévání | 1 - 23 Hours, 1 - 15 Days |
9. Záruka a podpora
This Walfront product is covered by a manufacturer's warranty. Please refer to the product packaging or your purchase documentation for specific warranty terms and conditions.
For technical support, troubleshooting assistance, or warranty claims, please contact your retailer or the Walfront customer service department. Contact information can typically be found on the product packaging or the official Walfront webmísto.