
1. Úvod
This manual provides essential instructions for the safe and efficient operation, setup, and maintenance of your OMTech 60W CO2 Laser Engraver, Model SH-G570. Please read this manual thoroughly before operating the machine to ensure proper usage and to prevent damage or injury.
2. Bezpečnostní informace
VAROVÁNÍ: Laserové záření může způsobit vážná zranění. Vždy dodržujte bezpečnostní pokyny.
- Ochrana očí: Always wear certified laser safety glasses when operating or observing the laser engraver. Never look directly into the laser beam.
- Větrání: Ensure adequate ventilation is in place to remove fumes and particulate matter generated during engraving and cutting. Some materials produce toxic fumes.
- Požární bezpečnost: Keep a fire extinguisher nearby. Do not leave the machine unattended during operation, especially when processing flammable materials.
- Materiálová kompatibilita: Only engrave or cut materials approved for CO2 lasers. Avoid materials containing PVC/vinyl, as they produce corrosive chlorine gas.
- Elektrická bezpečnost: Ujistěte se, že je stroj řádně uzemněn. Neobsluhujte ho s mokrýma rukama nebo vamp conditions. Disconnect power before performing maintenance.
- Nouzové zastavení: Seznamte se s umístěním a funkcí tlačítka nouzového zastavení.
- Dozor: This machine is not intended for use by persons with reduced physical, sensory, or mental capabilities unless supervised or instructed by a responsible person.
3. Konec produktuview
The OMTech 60W CO2 Laser Engraver (SH-G570) is designed for precise cutting and engraving across a variety of materials. Key features include a 60W CO2 laser tube, a 28"x20" working area, autofocus, air assist, and 4-way pass-through capabilities.

Obrázek 3.1: Přední strana view of the OMTech 60W CO2 Laser Engraver.
3.1. Klíčové vlastnosti
- 60W CO2 laserová trubice: Provides sufficient power for engraving and cutting various materials.
- 28"x20" Working Area: Accommodates a wide range of project sizes.
- Autofocus Function: Automatically adjusts the laser head to the correct focal distance for optimal results.
- Vzduchová asistence: Reduces flare-ups and removes debris from the cutting/engraving area, resulting in cleaner edges.
- 4-Way Pass-Through: Allows for processing materials larger than the workbed.
- Kompatibilita softwaru: Supports RDWorks, LightBurn, CorelDRAW, and AutoCAD.

Obrázek 3.2: Přesview of the laser engraver's key specifications and features.
3.2. Ovládací panel
The digital control panel provides an interface for machine operation, including job loading, parameter adjustment, and manual control of the laser head.

Figure 3.3: The machine's digital control panel and software compatibility.
4. Nastavení
4.1. Vybalení a umístění
- Opatrně vyjměte stroj z obalu. Uschovejte si veškerý obalový materiál pro případnou budoucí přepravu.
- Place the laser engraver on a stable, level surface capable of supporting its weight. Ensure sufficient clearance around the machine for ventilation and access.
- Install the included honeycomb and blade workbeds as required for your specific application.
4.2. Connecting the Water Chiller
A water chiller is essential for cooling the CO2 laser tube. Proper cooling prevents overheating and extends the tube's lifespan.
- Fill the water chiller with distilled water or a recommended coolant solution.
- Connect the chiller's inlet and outlet hoses to the corresponding ports on the laser engraver. Ensure connections are secure to prevent leaks.
- Power on the chiller and verify that water is circulating properly before operating the laser.
4.3. Connecting Air Assist and Exhaust System
The air assist system helps to clear debris and reduce charring, while the exhaust system removes fumes.
- Connect the air pump to the air assist inlet on the machine.
- Attach the exhaust hose to the machine's exhaust port and direct it to an appropriate external ventilation system.
4.4. Připojení napájení
- Ujistěte se, že je vypínač stroje v poloze VYPNUTO.
- Connect the power cable to the machine and then to a grounded electrical outlet.
4.5. Instalace softwaru
Install the necessary software (e.g., LightBurn, RDWorks) on your computer. Refer to the software-specific documentation for detailed installation and setup instructions.
5. Návod k obsluze
5.1. Příprava na provoz
- Power on the water chiller and verify water flow.
- Power on the air assist pump and exhaust fan.
- Power on the laser engraver.
- Place your material securely on the workbed. For larger materials, utilize the 4-way pass-through feature as needed.
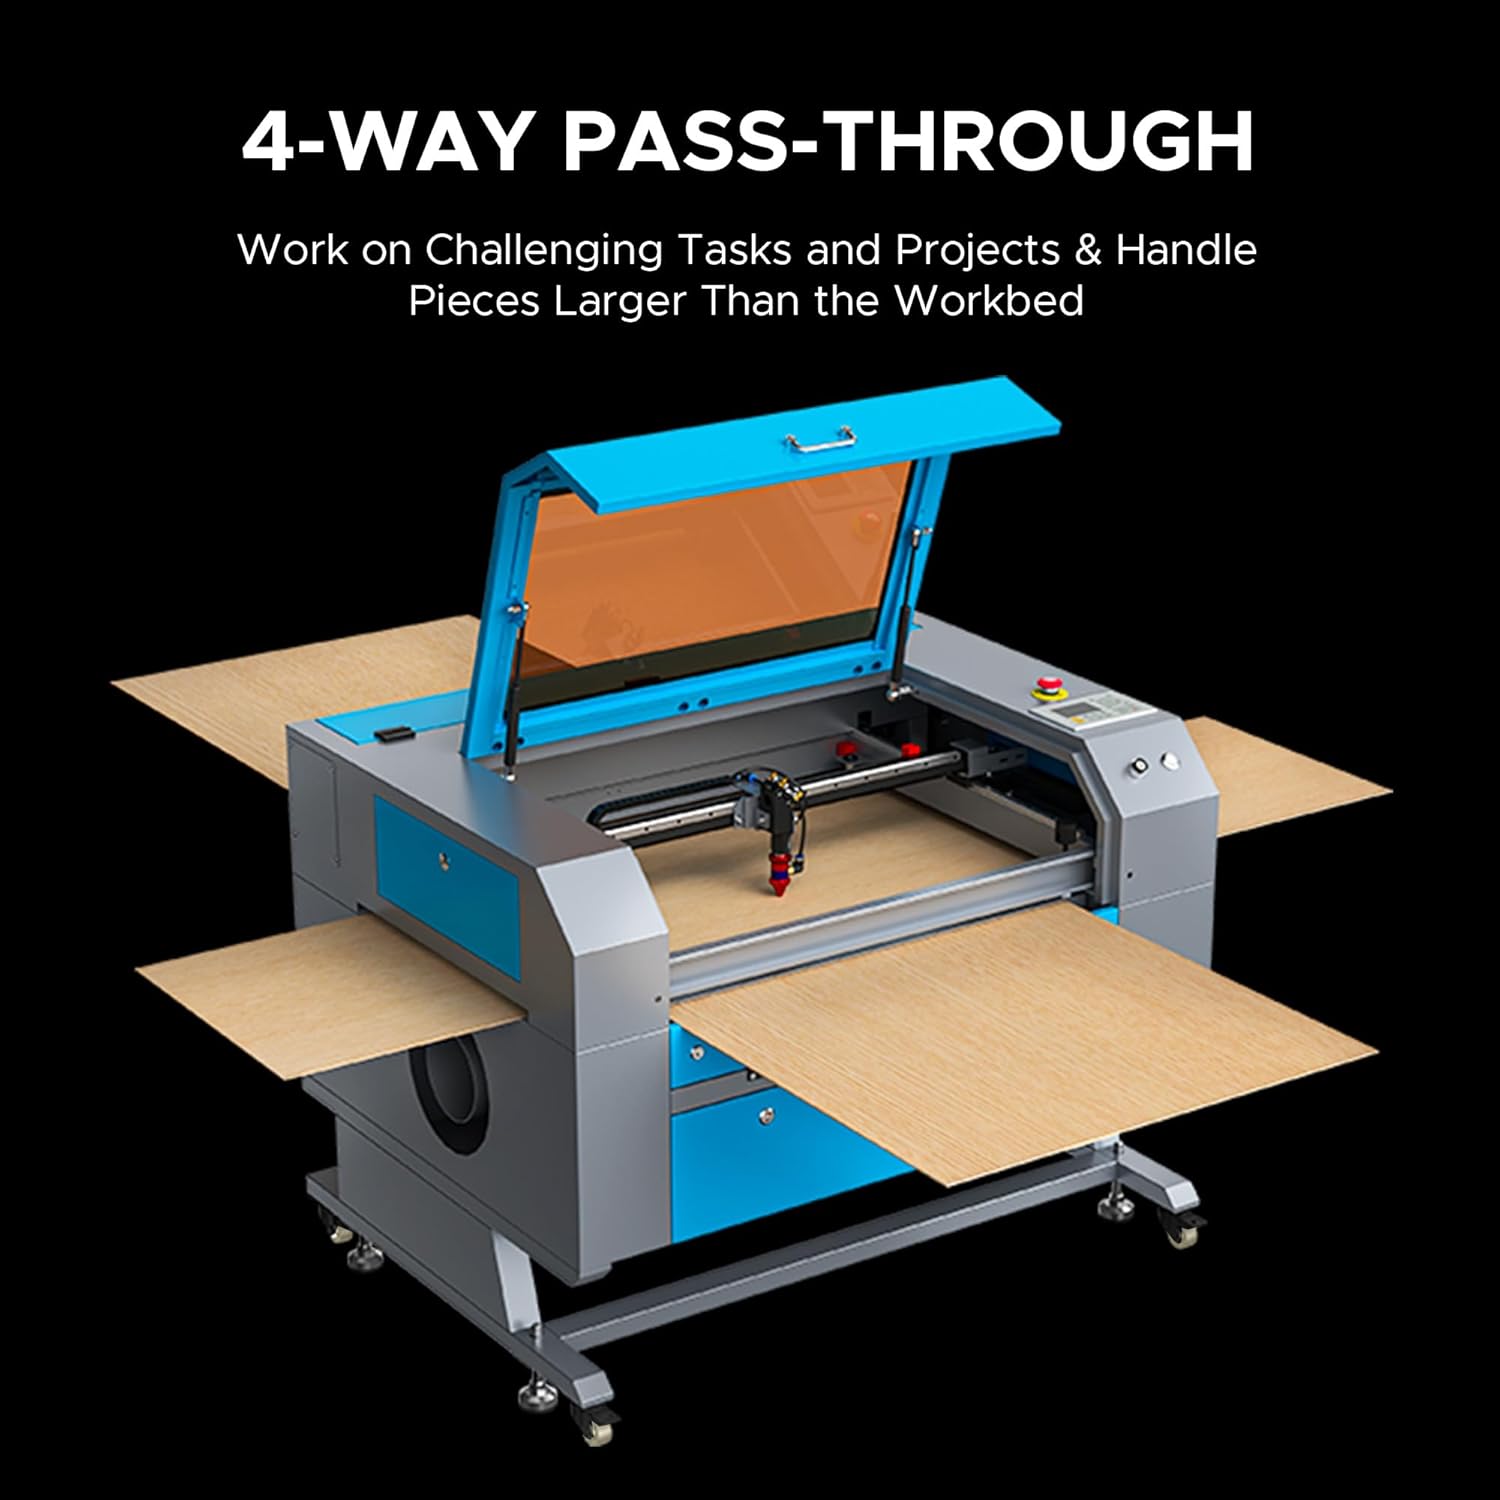
Figure 5.1: Utilizing the 4-way pass-through for oversized materials.
5.2. Using Autofocus
The autofocus function simplifies setting the correct focal distance.
- Position the laser head over the material.
- Press the 'Autofocus' button on the control panel or initiate it via software. The laser head will automatically adjust to the optimal focal height.

Figure 5.2: Built-in autofocus and air assist mechanism.
5.3. Software Workflow
- Design: Create or import your design in compatible software (e.g., LightBurn).
- Nastavení: Adjust laser power, speed, and other parameters according to the material type and desired effect. Refer to material test guides for recommended settings.
- Předview: Použijte předběžné nastavení softwaruview function to verify the job path and estimated time.
- Odeslat do stroje: Transfer the job to the laser engraver via USB or network connection.
5.4. Starting and Monitoring a Job
- On the machine's control panel, select the job and press 'Start' or 'Run'.
- Monitor the engraving/cutting process through the flame-resistant observation window. Do not leave the machine unattended.
- In case of emergency or malfunction, press the emergency stop button immediately.

Obrázek 5.3: Přample of precise cutting on wood.
6. Údržba
WARNING: Always disconnect power to the machine before performing any maintenance.
6.1. Cleaning the Optical Path (Lens and Mirrors)
Regular cleaning of the laser lens and mirrors is crucial for maintaining laser performance and beam quality.
- Use only lens cleaning solution and specialized optical wipes.
- Gently wipe the lens and mirrors to remove dust and debris. Avoid touching optical surfaces with bare hands.
6.2. Water Chiller Maintenance
- Výměna vody: Change the distilled water or coolant every 1-3 months, or as recommended by the chiller manufacturer, to prevent algae growth and maintain cooling efficiency.
- Čištění filtru: Clean the chiller's filter regularly to ensure proper water flow.
6.3. Workbed and Interior Cleaning
- Remove the workbed and clean it of any accumulated debris or residue.
- Wipe down the interior of the machine, including the rails and gantry, to remove dust and particulate matter.
6.4. Mazání
Periodically lubricate the linear rails and bearings with appropriate lubricant to ensure smooth movement of the laser head.
7. Řešení problémů
| Problém | Možná příčina | Řešení |
|---|---|---|
| Laser nestřílí | Water chiller not running or insufficient water flow; laser tube fault; power supply issue; emergency stop engaged. | Check chiller operation and water level; inspect laser tube for damage; verify power supply connections; disengage emergency stop. |
| Špatná kvalita gravírování/řezání | Incorrect focus; dirty lens/mirrors; incorrect power/speed settings; material inconsistency. | Perform autofocus; clean optical components; adjust power/speed settings; test on a scrap piece of material. |
| Stroj se nepřipojuje k počítači | USB cable issue; driver not installed; incorrect software settings. | Try a different USB port/cable; reinstall drivers; verify software communication settings. |
| Machine stops mid-job | Overheating (chiller issue); power interruption; software error. | Check chiller temperature and flow; ensure stable power supply; restart software and machine. |
8. Specifikace
- Číslo modelu: SH-G570
- Výkon laseru: 60W CO2
- Pracovní oblast: 28" × 20" (700 mm × 500 mm)
- Max. rychlost gravírování: 600 mm/s
- Max. Hloubka řezu: Up to 0.4" (10mm) in wood (material dependent)
- Třída laseru: Class 2, 0.874 mW output power
- Laser Tube Lifespan: Up to 12,000 hours (Yongli H2 tube)
- Zaměření: Autofokus
- Material Pass-Through: 4-cestný
- Kompatibilita softwaru: RDWorks, LightBurn, CorelDRAW, AutoCAD

Figure 8.1: Work area dimensions.
8.1. Applicable Materials
The OMTech 60W CO2 Laser Engraver is suitable for a wide range of materials. Refer to the table below for engraving and cutting capabilities.

Figure 8.2: Material compatibility chart for engraving and cutting.
9. Záruka a podpora
OMTech provides comprehensive support for your laser engraver.
- Záruka: This product includes a two-year support period. Specific warranty terms and conditions apply. Please refer to your purchase documentation for full details.
- Technická podpora: U.S.-based technical support is available to assist with any issues or questions you may encounter.
- Služby zákazníkům: 24/7 online customer service is provided for your convenience.
For support, please visit the official OMTech webwebu nebo se přímo obraťte na jejich zákaznický servis.