Truman TM-I VISION PRO
Uživatelská příručka k satelitnímu přijímači Truman TM-I VISION PRO
Model: TM-I VISION PRO | Brand: Truman
1. Úvod
1.1 Konec produktuview
The Truman TM-I VISION PRO is a Full HD digital satellite receiver designed to provide a comprehensive entertainment experience. It features a powerful Sunplus 1506HV processor, ensuring smooth performance and high-quality video output. With multiple connectivity options including USB, HDMI, and Ethernet, it offers versatility for various home entertainment setups. The device supports Full HD resolution, multi-language interfaces, and includes parental control features for a family-friendly viewing environment. It also comes with a one-year activated IPTV service.

Obrázek 1.1: Přední strana view of the Truman TM-I VISION PRO Satellite Receiver, showing its compact design and front-facing USB ports.
1.2 Obsah balení
Ověřte prosím, zda jsou ve vašem balení obsaženy všechny níže uvedené položky:
- Truman TM-I VISION PRO Satellite Receiver
- Napájecí adaptér
- Standardní dálkové ovládání
- Digital LED Lens
- HDMI kabel
- Návod k použití

Figure 1.2: Marketing image highlighting key features such as Wi-Fi, Ultra HD support, ISO 9001 certification, and 5G compatibility.
2. Bezpečnostní informace
Pro zajištění bezpečného provozu a prevenci poškození si prosím přečtěte a dodržujte následující bezpečnostní pokyny:
- Nevystavujte zařízení vodě nebo vlhkosti.
- Avoid placing the receiver in direct sunlight or near heat sources.
- Zajistěte dostatečné větrání kolem zařízení, aby nedošlo k přehřátí.
- Používejte pouze dodaný napájecí adaptér.
- Nepokoušejte se zařízení sami otevírat ani opravovat. Obraťte se na kvalifikovaný servisní personál.
- Udržujte zařízení a příslušenství mimo dosah dětí.
- Odpojte zástrčku ze zásuvky během bouřek nebo pokud jej delší dobu nepoužíváte.
3. Nastavení
3.1 Připojení přijímače
- Připojení satelitní antény: Connect your satellite dish cable to the "LNB IN" port on the back of the receiver.
- Připojení k televizi (HDMI): Use the provided HDMI cable to connect the receiver's HDMI OUT port to an available HDMI IN port on your television.

Figure 3.1: The included HDMI cable for connecting the receiver to your television.
- Připojte napájení: Connect the power adapter to the DC IN port on the receiver, then plug the adapter into a wall outlet.
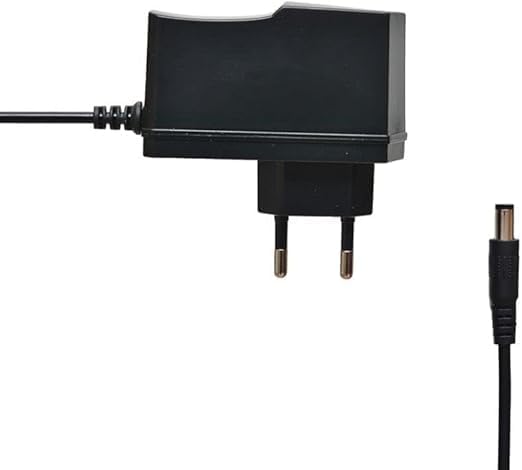
Figure 3.2: The power adapter supplied with the receiver.
- Connect Digital LED Lens: Plug the digital LED lens into its dedicated port on the receiver. This lens displays channel numbers and receives remote control signals.
- Optional: Connect Ethernet/USB: If you plan to use wired internet or external storage, connect an Ethernet cable to the LAN port or a USB drive to one of the USB ports.

Obrázek 3.3: Zadní view of the receiver showing the LNB IN, HDMI OUT, USB, Ethernet, and DC IN ports.
3.2 Průvodce počátečním nastavením
Po prvním zapnutí vás přijímač provede průvodcem počátečním nastavením:
- Výběr jazyka: Choose your preferred language for the on-screen display.
- Nastavení časového pásma: Nastavte správné časové pásmo pro váš region.
- Nastavení antény: Select your satellite (e.g., Nilesat, Hotbird) and configure LNB settings if necessary.
- Skenování kanálu: Perform an automatic or manual channel scan to find available TV and radio channels.
- Network Setup (Optional): Configure Wi-Fi or Ethernet connection for internet-based features like IPTV.
4. Návod k obsluze
4.1 Základní funkce
- Zapnutí/vypnutí: Stiskněte tlačítko MOC tlačítko na dálkovém ovladači.
- Navigace kanálu: Použijte CH + / CH- tlačítky pro postupné přepínání kanálů nebo zadejte číslo kanálu přímo pomocí numerické klávesnice.
- Ovládání hlasitosti: Použijte VOL + / VOL- tlačítka pro nastavení hlasitosti.
- Ztlumit: Stiskněte tlačítko ZTLUMIT tlačítko pro ztlumení zvuku.
- Přístup do menu: Stiskněte tlačítko MENU tlačítko pro přístup do hlavní nabídky s nastaveními a funkcemi.
- Tlačítko OK: Confirms selections in menus or displays channel information during viewIng.
- Výstup: Stiskněte tlačítko EXIT tlačítko pro návrat na předchozí obrazovku nebo živé televizní vysílání.
4.2 Pokročilé funkce
- Rodičovská kontrola: Access the Parental Control menu to set age restrictions for channels or lock specific programs. A default PIN (usually 0000 or 1234) may be required.
- Podpora více jazyků: Change audio languages (if available) or subtitle languages via the audio/subtitle options in the menu.
- IPTV: The receiver includes a pre-activated IPTV service for one year. Access this feature through the main menu. Ensure your receiver is connected to the internet for IPTV functionality.
- Přehrávání médií USB: Insert a USB drive into one of the USB ports to play media files (videos, music, photos) or record TV programs.
- Aktualizace softwaru: Regularly check for software updates via USB or network to ensure optimal performance and access to new features. (Refer to Section 5.2 for details).
5. Údržba
5.1 Čištění
To clean the receiver, disconnect it from the power supply. Use a soft, dry cloth to wipe the exterior. Do not use liquid cleaners or abrasive materials.
5.2 Aktualizace softwaru
Keeping your receiver's software updated is crucial for performance and security. Updates can be performed via USB or over the network (if connected to the internet).
- Aktualizace USB: Download the latest firmware (.bin file) from the official Truman website to a USB flash drive. Insert the USB drive into the receiver and navigate to the "System Update" or "Software Upgrade" option in the menu. Follow the on-screen instructions.
- Aktualizace sítě: If your receiver is connected to the internet, navigate to the "Network Upgrade" or "Online Update" option in the system settings. The receiver will check for available updates and prompt you to install them.
Pozor: Do not power off the receiver during a software update, as this may cause permanent damage.
6. Řešení problémů
If you encounter issues with your Truman TM-I VISION PRO, refer to the following common problems and solutions:
| Problém | Možná příčina | Řešení |
|---|---|---|
| Žádná síla | Napájecí adaptér není připojen; Vadná zásuvka. | Ensure power adapter is securely connected to the receiver and a working power outlet. |
| Žádný signál / Černá obrazovka | Antenna cable loose; Incorrect satellite selected; TV input not set to HDMI. | Check antenna cable connection. Verify satellite settings in menu. Ensure TV input is set to the correct HDMI port. |
| Dálkové ovládání nefunguje | Batteries low/dead; Obstruction between remote and receiver's LED lens. | Replace remote control batteries. Ensure clear line of sight to the digital LED lens. |
| Frozen Picture / Lagging | Weak signal; Overheating; Software issue. | Check signal strength in menu. Ensure proper ventilation. Try a software update or factory reset (last resort). |
| IPTV Not Working | No internet connection; IPTV service expired. | Verify internet connection (Ethernet or Wi-Fi). Contact support if service is within the one-year period and still not working. |
7. Specifikace
| Funkce | Detail |
|---|---|
| Model | TM-I VISION PRO |
| Procesor | Sunplus 1506HV |
| Typ krabice | Full HD Digital |
| Flash paměť | 4 MB (SPI SOP8/SOIC8) |
| Video výstup | HDMI (Full HD Resolution Support) |
| Režim zvukového výstupu | Stereo (Dolby Digital, DTS, PCM supported) |
| Konektivita | USB, HDMI, Ethernet |
| Kompatibilní zařízení | Televize, osobní počítač |
| Speciální funkce | User-friendly display, Remote Control, Multi-language support, Parental Control, 1-year IPTV activation. |
| Hmotnost položky | 10 gramů |
| Výrobce | Trumane |
8. Záruka a podpora
For warranty information, please refer to the warranty card included with your product or contact your point of purchase. The receiver includes a 1-year activated IPTV service.
For technical support or further assistance, please contact Truman customer service or visit their official website. Contact details are typically provided in the product packaging or on the manufacturer's webmísto.
Ask a question about this manual
Ask about setup, troubleshooting, compatibility, parts, safety, or missing instructions. Manuals+ will review the question and use this page’s manual context to help answer it.