
1. Úvod
This manual provides detailed instructions for the installation, operation, and maintenance of your Haloview Byte Tango BT6 Touch RV Backup Camera System. Please read this manual thoroughly before using the product to ensure proper function and safety.
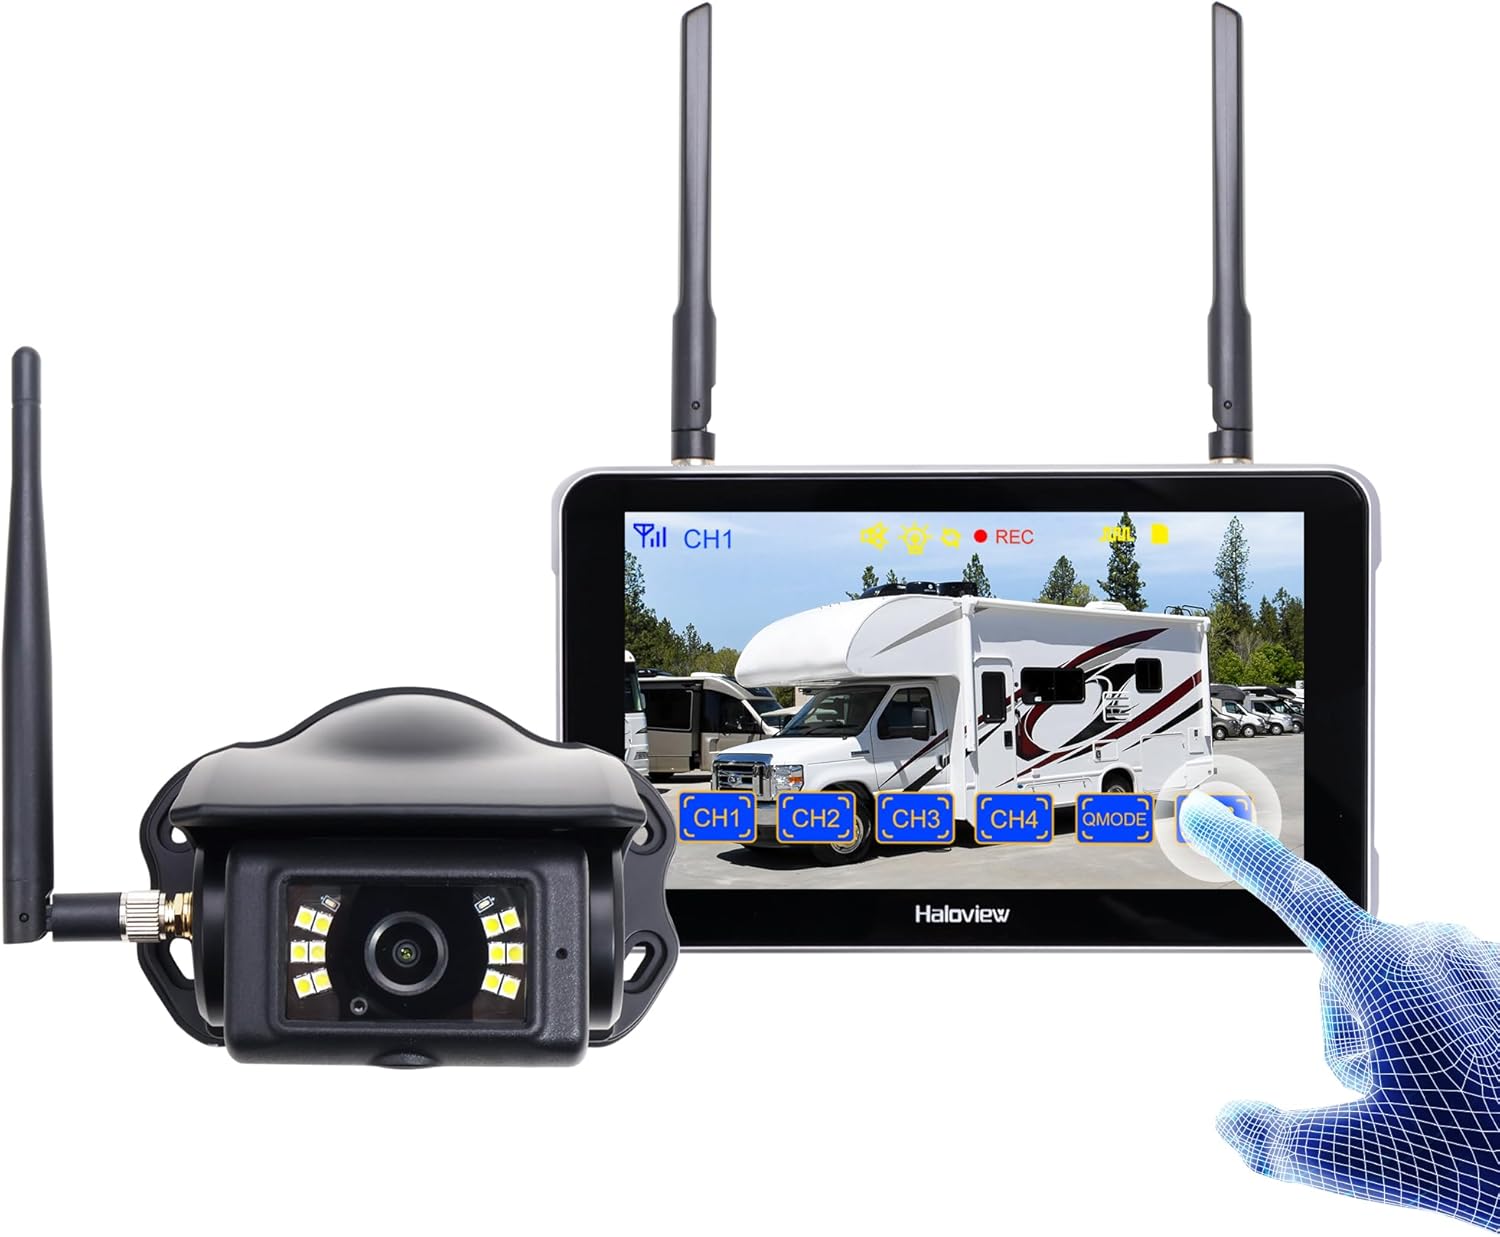
Image 1.1: Haloview Byte Tango BT6 Touch RV Backup Camera System components, including the 5.5-inch touch screen monitor and the wireless camera.
Klíčové vlastnosti:
- 2.5D Curved Glass 5.5'' Touch Screen: Offers a smooth and responsive user interface.
- Low Latency Wireless Technology: Ensures minimal lag and interference-free signal transmission, supporting vehicles up to 65ft in length (e.g., RVs, travel trailers, trucks, campers, vans, pickups, tractors, fifth wheels, motorhomes).
- Plně barevné noční vidění s tlumeným světlem: Advanced image sensors provide full-color video even in low-light conditions. Night Vision Fill Lights can be activated or deactivated remotely via the monitor.
- Záznam zvuku: Built-in speaker alerts users to pedestrians, animals, or unusual sounds in the surroundings.
- Built-in DVR: Supports real-time recording and video playback with 1080P@30fps FHD resolution.
2. Co je v krabici
Ověřte, zda jsou v balení obsaženy všechny níže uvedené položky:

Image 2.1: All components included in the Haloview Byte Tango BT6 Touch system package.
- BT6 Touch Screen Monitor
- Fotoaparát BTC128
- Držák na přísavku
- Montážní držák 3M
- Kabel typu C
- Konverzní kabel fotoaparátu
- Napájecí adaptér pro Furrion Pre-wired RV
- Párovací kabel
- Napájecí adaptér do zapalovače
3. Nastavení a instalace
3.1 Instalace kamery
- Vyberte místo montáže: Select a suitable surface mount location at the rear of your vehicle, ensuring a clear view and protection from direct impact.
- Zabezpečte kameru: Mount the BTC128 camera securely using appropriate fasteners. Ensure the antenna is positioned for optimal signal reception.
- Připojení napájení: Connect the camera to a 12V DC power source. If your RV is pre-wired for Furrion, use the provided power adapter. Otherwise, connect to your vehicle's reverse light circuit or another suitable 12V power source.
3.2 Instalace monitoru
- Montáž monitoru: Attach the 5.5-inch monitor to your dashboard or windshield using either the suction cup mount bracket or the 3M adhesive mount bracket. Ensure the monitor is positioned for easy viewaniž by vám bránily v řízení view.
- Power the Monitor: Connect the monitor to power using the provided cigarette lighter power adapter or the Type-C cable for USB power.
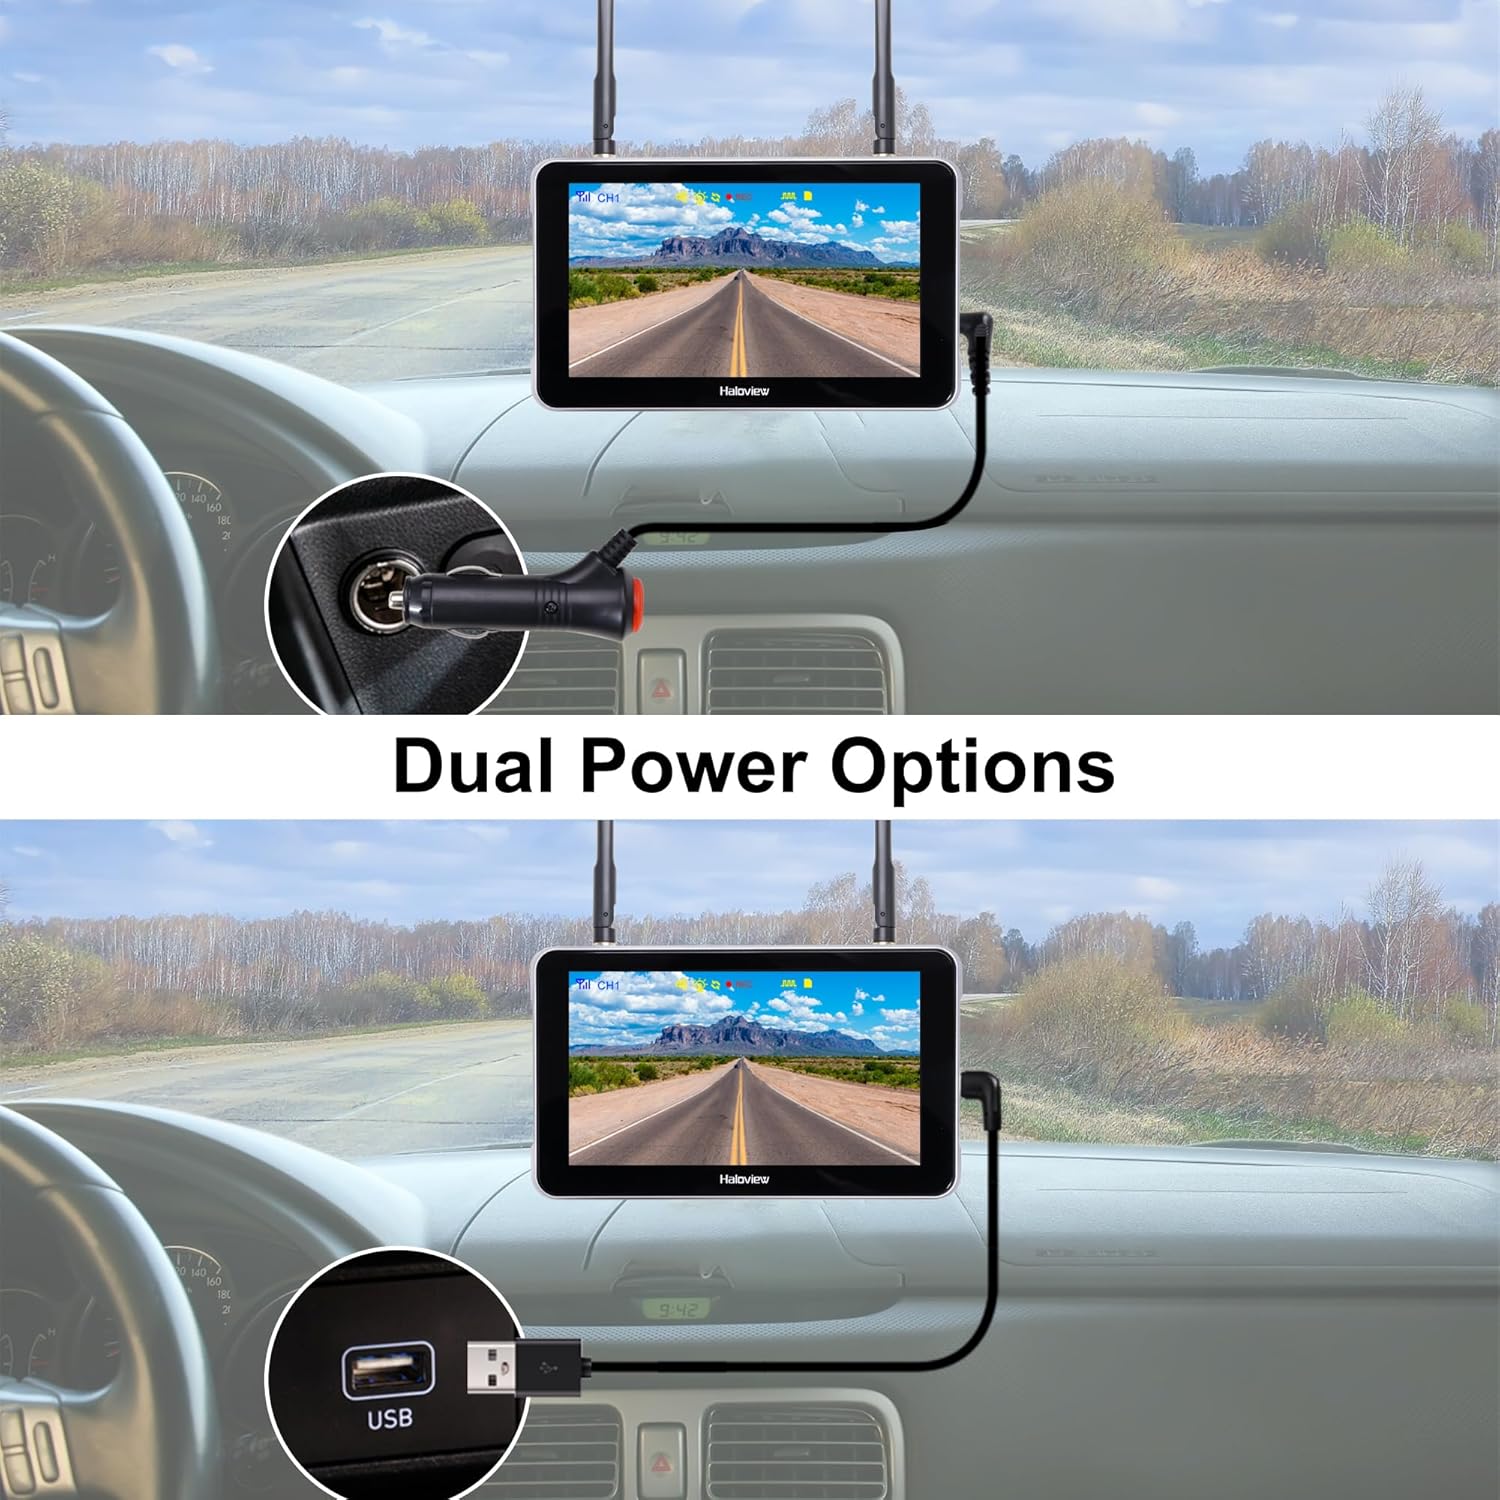
Image 3.1: The monitor can be powered via a cigarette lighter adapter or a USB Type-C cable.
3.3 Pairing the Camera and Monitor
The camera and monitor are typically pre-paired from the factory. If no image appears or you are adding additional cameras, follow these steps:
- Zapněte fotoaparát i monitor.
- On the monitor, navigate to the pairing menu (refer to the operating section for menu access).
- Select an available channel for pairing.
- Press the pairing button on the camera (if applicable, consult camera-specific instructions) or follow the on-screen prompts on the monitor to initiate pairing.
- Po spárování se na monitoru zobrazí videozáznam z kamery.

Image 3.2: Wireless signal transmission between the camera and monitor.
4. Návod k obsluze
4.1 Základní obsluha
- Zapnutí/vypnutí: Press and hold the power button on the monitor to turn it on or off.
- Rozhraní dotykové obrazovky: Procházejte nabídkami a nastaveními klepáním a přejetím prstem po 5.5palcové dotykové obrazovce.
- Přepínání kanálů: If multiple cameras are connected, tap the channel buttons (CH1, CH2, etc.) on the screen to switch between camera views.

Image 4.1: The touch screen allows for intuitive control of the system.
4.2 Pokročilé funkce
- Převrácení obrázku: Access the settings menu to adjust the image orientation (horizontal/vertical flip) to match your camera's mounting position.

Image 4.2: The image flip function allows for various display orientations.
- Noční vidění: The system automatically adjusts for low-light conditions. Night Vision Fill Lights can be manually controlled via the monitor settings if ambient light is extremely low.

Image 4.3: The camera provides full-color images even in dim light conditions.
- Nahrávání DVR: Insert a Micro-SD card (not included) into the monitor's slot to enable continuous recording. Access recorded footage through the playback menu. The system records in 1080P at 30 frames per second.

Image 4.4: The monitor supports Micro-SD card recording for continuous video capture.
- Rear Assist Marker Lines: Customizable parking guidelines can be activated and adjusted via the monitor settings to aid in reversing and parking maneuvers.
Image 4.5: Customizable rear assist marker lines for precise maneuvering.
5. Údržba
- Čištění: Use a soft, dry cloth to clean the monitor screen and camera lens. For stubborn dirt, slightly damphadřík vodou. Nepoužívejte abrazivní čisticí prostředky ani rozpouštědla.
- Připojení kabelů: Periodically check all cable connections for tightness and signs of wear. Ensure power cables are securely plugged in.
- Objektiv fotoaparátu: Keep the camera lens clear of dirt, snow, or ice to maintain optimal image quality.
- Antén: Ensure antennas on both the camera and monitor are securely attached and positioned for best signal.
6. Řešení problémů
- Žádný obraz na monitoru:
- Ensure both the camera and monitor are powered on.
- Zkontrolujte všechna připojení napájení.
- Verify that the camera and monitor are properly paired (refer to Section 3.3).
- Check for obstructions between the camera and monitor that might block the wireless signal.
- Špatná kvalita obrazu:
- Vyčistěte čočku fotoaparátu.
- Ujistěte se, že je kamera bezpečně upevněna a nevibruje.
- Zkontrolujte, zda se v blízkosti nenacházejí silné zdroje rušení.
- Problémy s nahráváním:
- Ensure a compatible Micro-SD card is inserted correctly.
- Check if the Micro-SD card is full; format it if necessary (this will erase all data).
- Verify recording settings in the monitor menu.
- Monitor Not Responding to Touch:
- Restart the monitor by powering it off and on again.
- Ujistěte se, že je obrazovka čistá a bez nečistot.
7. Specifikace
| Funkce | Specifikace |
|---|---|
| Rozměry produktu (monitor) | 6.1 x 1 x 8.8 palce (155 mm D x 25 mm Š x 88 mm V) |
| Hmotnost položky | 2.7 libry |
| Velikost obrazovky | 5.5 palce |
| Technologie displeje | LCD |
| Bezdrátové připojení | 2.4G digitální bezdrátové |
| Kompatibilní zařízení | BTC128, BTC129, BTC126, BTC125, BTC131 |
| Typ instalace | Povrchová montáž |
| Provozní svtage | 12 V (DC) |
| Technologie optických senzorů | CMOS |
| Typ objektivu | Fixed Wide Angle |
| Skutečný úhel View | 120 stupňů |
| Rozlišení záznamu videa | 1080P@30fps FHD |

Image 7.1: Physical dimensions of the Haloview monitor and a summary of key features.
8. Záruka a podpora
8.1 Informace o záruce
Svatozářview products are covered by a limited warranty. Please refer to the warranty card included with your product or visit the official Haloview webPodrobné záruční podmínky naleznete na webových stránkách. Uschovejte si účtenku jako doklad o koupi pro případ reklamace.
8.2 Zákaznická podpora
For technical assistance, troubleshooting, or product inquiries, please contact Haloview zákaznická podpora prostřednictvím následujících kanálů:
- Webmísto: Visit the official Haloview webweb s nejčastějšími dotazy, zdroji podpory a kontaktními formuláři.
- E-mail: Refer to your product packaging or the Haloview webweb s e-mailovou adresou zákaznické podpory.
- Telefon: Kontaktní čísla mohou být k dispozici na oficiálních stránkách webstránky pro přímou podporu.
When contacting support, please have your product model (BT6 Touch) and purchase information ready.