1. Úvod
This manual provides detailed instructions for the setup, operation, and maintenance of your MakerHawk ESP32 LoRa V3 Development Board. This kit includes the ESP32-S3FN8 dual-core processor board, a 1100mAh battery, and an N30 protective case, designed for IoT projects requiring Wi-Fi, LoRa, and Bluetooth connectivity.
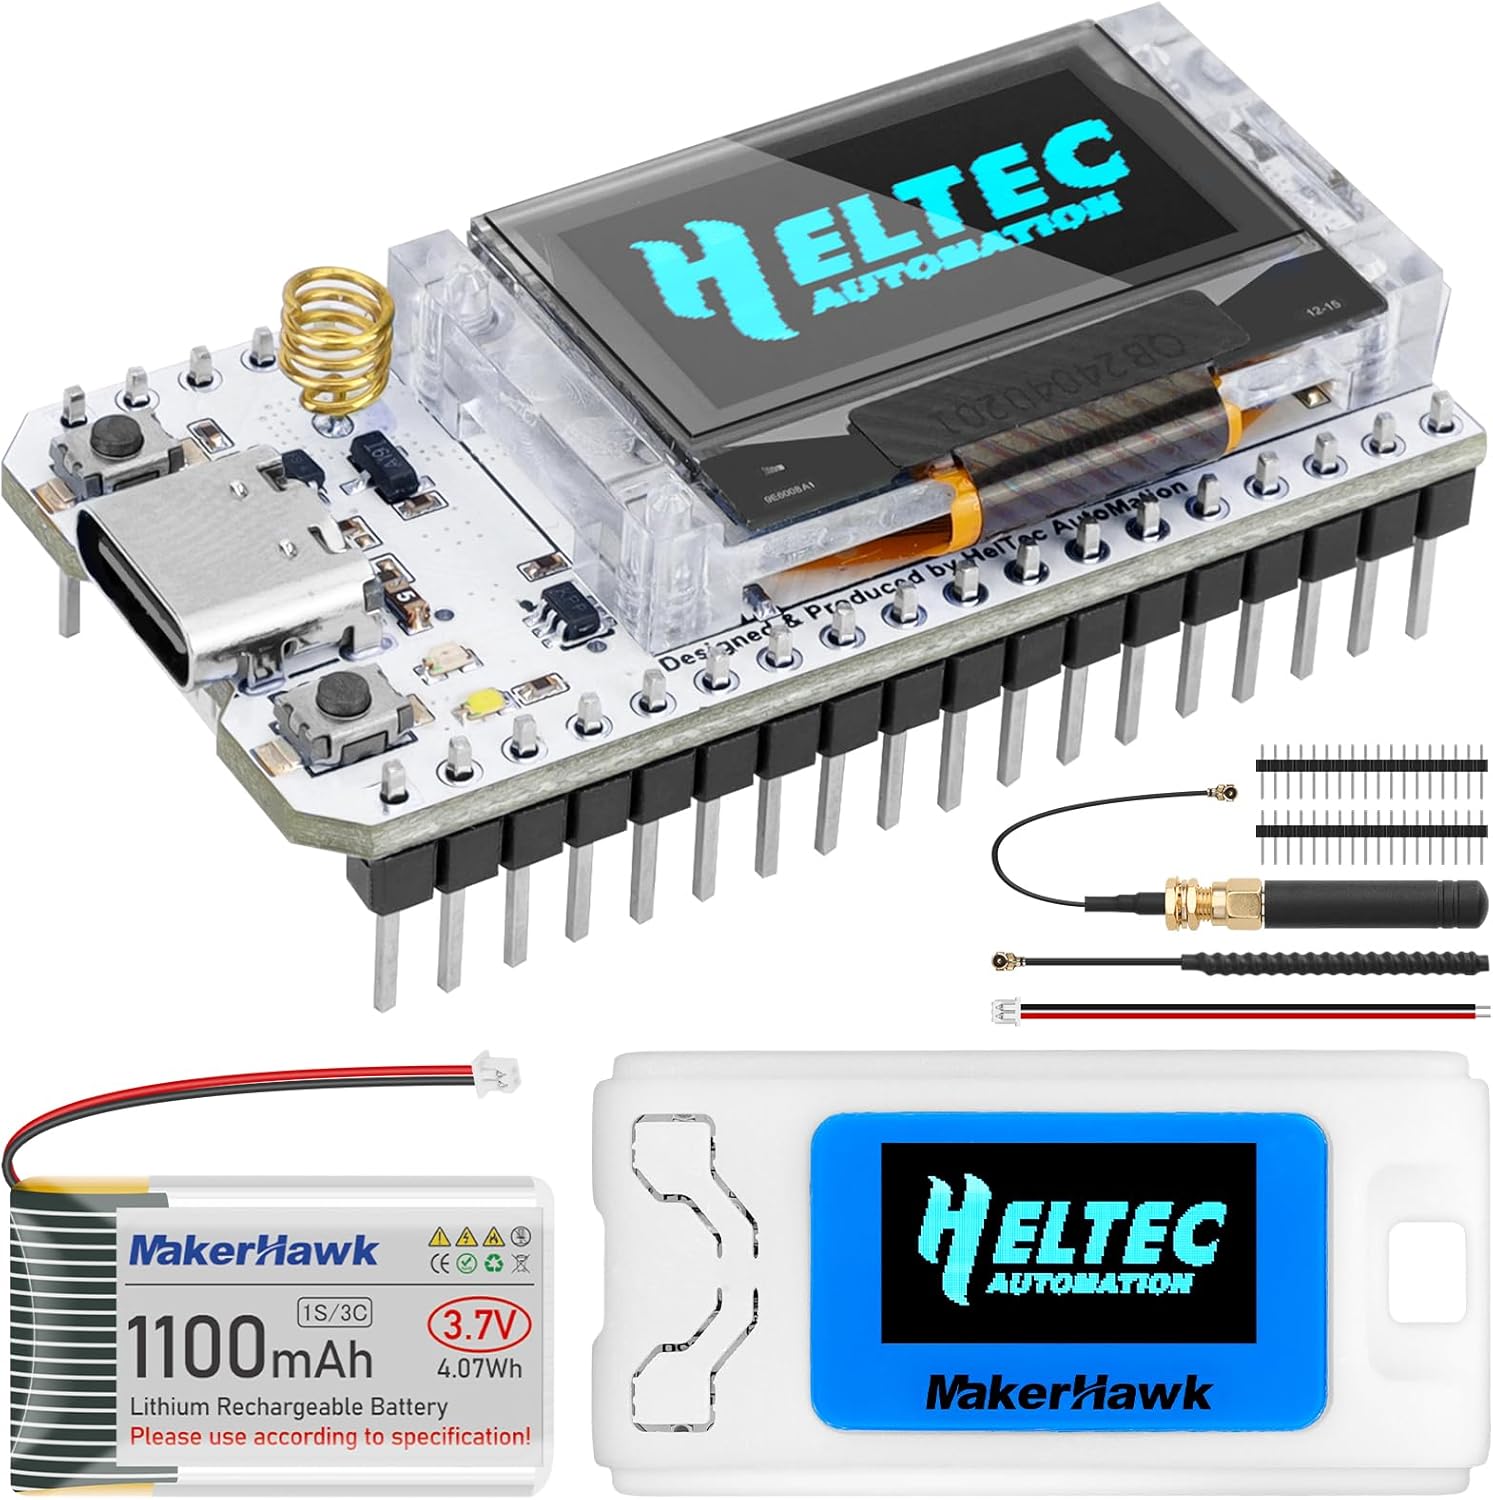
Image 1.1: Contents of the MakerHawk ESP32 LoRa V3 Development Board kit, showing the board, battery, N30 case, and antenna.
2. Obsah balení
Ověřte, zda jsou v balení přítomny všechny níže uvedené položky:
- ESP32 LoRa V3 Development Board
- 1100mAh lithium-polymerová baterie
- N30 Protective Case
- 915MHz LoRa Antenna
- 2.4GHz Wi-Fi/Bluetooth Antenna (metal spring type)
- Pin Headers (for board connection)

Obrázek 2.1: Vizuální znázornění kompletního obsahu balení.
3. Nastavení a montáž
Follow these steps to assemble your ESP32 LoRa V3 Development Board with the N30 protective case and battery.
- Otevřete pouzdro: Carefully pry open the N30 protective case. A small tool or screwdriver may be used.
- Nainstalujte baterii: Place the 1100mAh battery into the designated compartment within the case. Secure it with the provided adhesive if available.
- Install V3 Board: Insert the ESP32 LoRa V3 development board into the case, ensuring it aligns correctly with the internal standoffs and ports.
- Připojení antén: Connect the LoRa antenna to the U.FL connector on the board. The 2.4GHz metal spring antenna is typically pre-soldered or integrated.
- Zavřít případ: Carefully close the lid of the N30 case, ensuring all components are securely seated and no wires are pinched.
- Bezpečná anténa: If applicable, tighten the external antenna screw connector.
- Attach Screen Protector: Apply the transparent screen protector to the OLED display window on the case.
- Kompletní: Sestavení je nyní dokončeno.

Image 3.1: Visual guide for assembling the development board, battery, and case.
3.1. Pinout diagram
Refer to the pinout diagram for detailed information on the board's GPIOs and interfaces.

Image 3.2: Detailed pinout diagram for the ESP32 LoRa V3 Development Board.
4. Návod k obsluze
4.1. Zapnutí
Connect the board to a power source via the Type-C USB port or rely on the installed 1100mAh battery. The board features automatic switching between USB and battery power.
4.2. Vývojové prostředí
The ESP32 LoRa V3 Development Board supports the Arduino development environment. Use the integrated CP2102 USB-to-serial chip for programming and debugging. Ensure the necessary drivers are installed on your computer for proper recognition of the device.
For Meshtastic applications, refer to the official Meshtastic documentation for firmware flashing and configuration.
4.3. Konektivita
- Wi-Fi: The board supports 802.11ax and 802.11n standards.
- LoRa: Utilizes the SX1262 LoRa chip for long-range communication. Ensure the 915MHz antenna is properly connected.
- Bluetooth: Supports both Classic Bluetooth and BLE (Bluetooth Low Energy).
4.4. OLED displej
The 0.96-inch 128x64 dot matrix OLED display can be used to show debugging information, battery levels, and other relevant data from your application.

Image 4.1: The assembled device displaying operational information on its OLED screen.
5. Údržba
5.1. Péče o baterie
The 1100mAh Lithium Polymer battery has an integrated management system for charge, discharge, and overcharge protection. To prolong battery life:
- Vyhněte se častému úplnému vybíjení baterie.
- Pokud zařízení delší dobu nepoužíváte, skladujte jej na chladném a suchém místě.
- Charge the battery using a standard USB power adapter.
5.2. Case Cleaning
Clean the N30 protective case with a soft, dry cloth. Avoid using harsh chemicals or abrasive materials that could damage the plastic or screen protector.
5.3. Aktualizace firmwaru
Regularly check for firmware updates from the official MakerHawk or relevant project (e.g., Meshtastic) websites to ensure optimal performance and access to new features.
6. Řešení problémů
- Zařízení nebylo počítačem rozpoznáno: Ensure the CP2102 USB-to-serial driver is installed. Search online for "CP2102 driver" and install the appropriate version for your operating system.
- Failed to flash firmware: Verify the correct drivers are installed. Ensure the board is in bootloader mode (often by holding a "BOOT" button while connecting USB or resetting). Check your development environment settings.
- Poor Bluetooth/LoRa range: Ensure antennas are securely connected. For Bluetooth, the onboard metal spring antenna is used. For LoRa, the external antenna must be connected to the U.FL port. Environmental factors can also affect range.
- OLED displej nefunguje: Check connections to the board. Ensure your code initializes and writes to the OLED correctly.
- Baterie se nenabíjí: Verify the USB-C cable and power adapter are functional. Check the battery connection to the board. The board has overcharge protection.
7. Specifikace
| Funkce | Detail |
|---|---|
| Procesor | ESP32-S3FN8 (Xtensa 32-bit LX7 dual-core) |
| Hlavní frekvence | 240 MHz |
| Čip LoRa | SX1262 |
| Bezdrátový typ | Wi-Fi (802.11ax, 802.11n), LoRa, Bluetooth (Classic & BLE) |
| Provozní svtage | 3.3-7V |
| Paměť | 384KB ROM, 512KB SRAM, 16KB RTC SRAM, 8MB SIP Flash |
| USB Adapter Chip | CP2102 |
| Vývojové prostředí | Arduino IDE compatible |
| Rozhraní | Type-C USB, SH1.25-2 battery interface, LoRa ANT, 2*18*2.54 Header Pin |
| Zobrazit | 0.96-inch 128x64 OLED |
| Baterie | 1100mAh lithium-polymerová baterie (součástí balení) |
| Provozní teplota | -20 °C až 70 °C |
| Hmotnost položky | 2.89 unce |
| Rozměry balení | 6.14 x 2.95 x 1.46 palce |

Image 7.1: Detailed technical specifications of the ESP32 LoRa V3 Development Board.

Image 7.2: Dimensional drawing of the ESP32 LoRa V3 Development Board.
8. Záruka a podpora
For warranty information and technical support, please contact MakerHawk customer service through their official channels or the retailer where the product was purchased. Keep your proof of purchase for warranty claims.
For additional resources and community support related to ESP32, LoRa, and Meshtastic, refer to online forums and official documentation for these technologies.