
1. Úvod a konecview
This manual provides comprehensive instructions for the safe and effective operation, maintenance, and troubleshooting of your HITBOX 160A Stick Welder. This versatile 2-in-1 machine supports both Lift TIG and MMA (ARC) welding, making it suitable for a wide range of applications from beginner projects to professional tasks. Its compact and portable design ensures convenience for various welding needs.

Figure 1: HITBOX 160A Stick Welder, a compact and portable welding machine.
2. Bezpečnostní informace
Welding can be hazardous if proper safety precautions are not observed. Always prioritize your safety and the safety of others in the work area. This machine incorporates multiple safety features including over-heating, over-current, over-loading protection, and Voltage Reduction Device (VRD) for enhanced user safety.
- Ochrana očí a obličeje: Always wear a welding helmet with appropriate shade lenses to protect your eyes and face from arc flash and sparks.
- Ochrana těla: Wear flame-resistant clothing, welding gloves, and sturdy footwear to protect against burns and electrical shock.
- Větrání: Ensure adequate ventilation to remove welding fumes, which can be harmful if inhaled. Work in a well-ventilated area or use fume extraction equipment.
- Elektrická bezpečnost: Ensure the welding machine is properly grounded. Do not operate in wet conditions. Inspect cables and connections for damage before each use.
- Požární prevence: Mějte po ruce hasicí přístroj. Odstraňte všechny hořlavé materiály z prostoru svařování. Dávejte si pozor na horký kov a jiskry.
- Pracovní oblast: Udržujte pracovní prostor čistý a bez nepořádku. Zajistěte stabilní postoj.
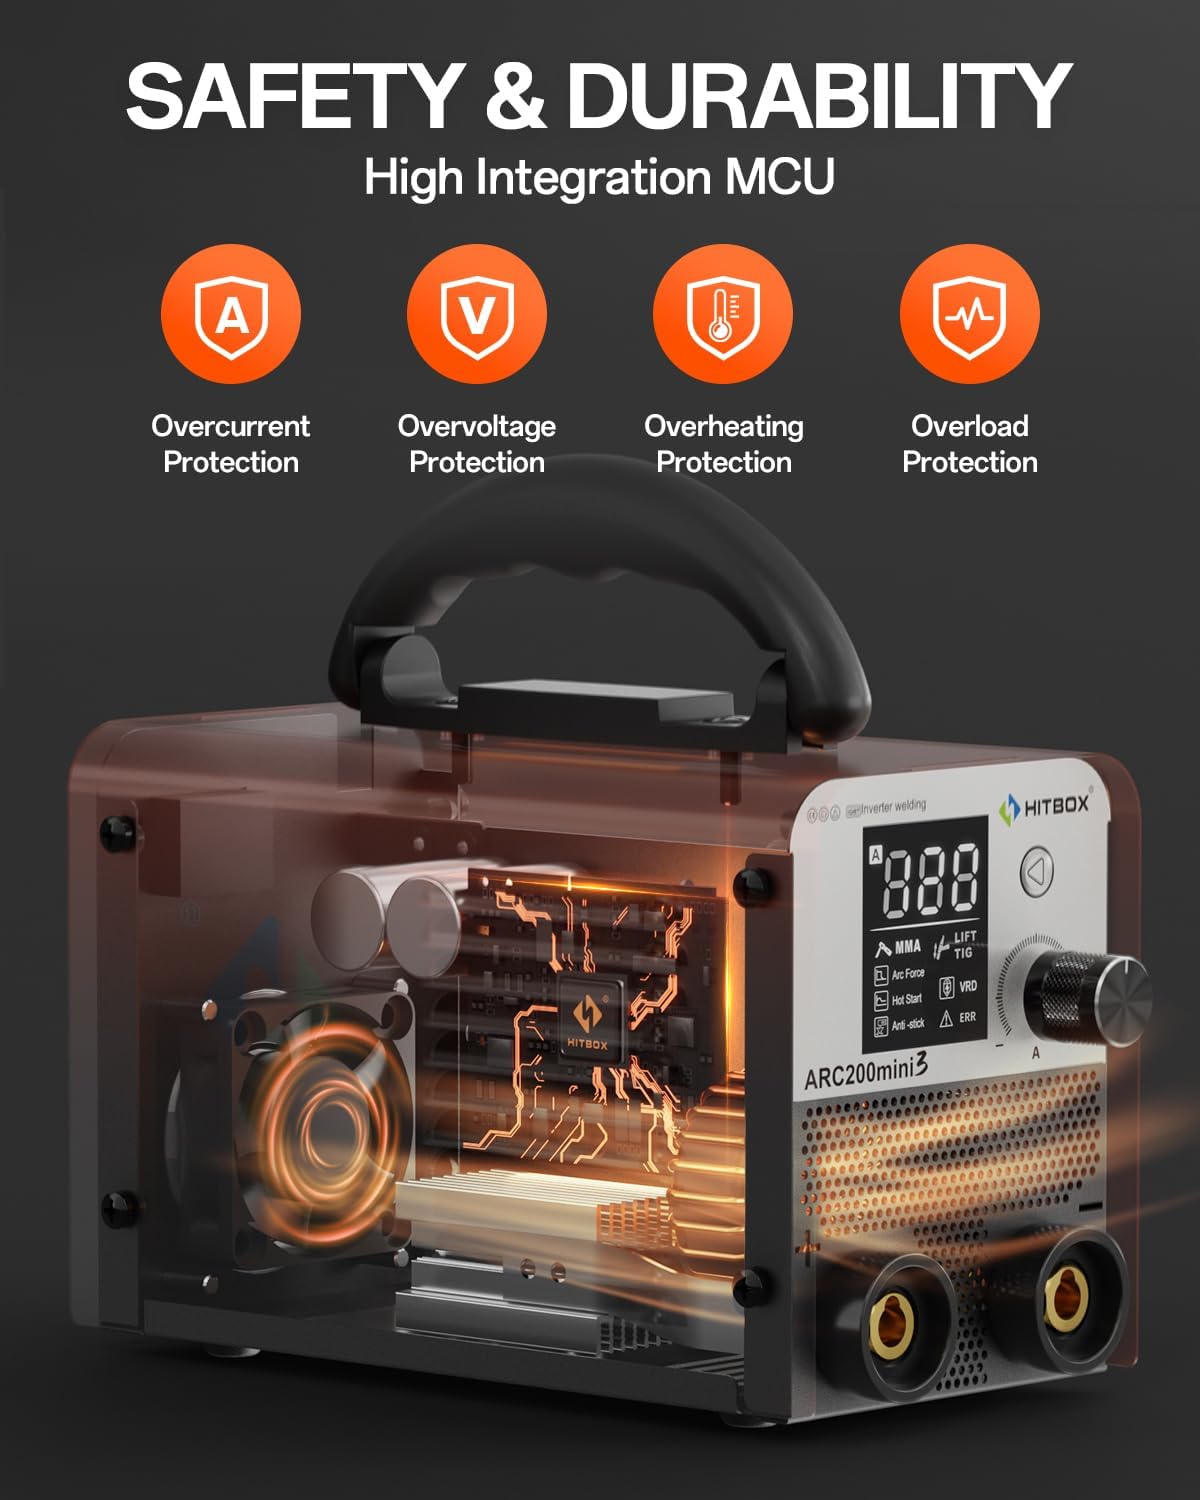
Obrázek 2: Vnitřní view highlighting safety features such as Overcurrent, Overvoltage, Overheating, and Overload Protection.
3. Vlastnosti produktu
- Beginner-Friendly Operation: Simple setup and adjustable current via a single knob make this welder ideal for new users.
- Ultrakompaktní a přenosný: Measuring 4.5x5.9x9.2 inches and weighing only 5.9 lbs, it is designed for easy transport and use in various locations, including outdoor maintenance, farming, and home repairs.
- Powerful Welding Capabilities: Features superior Anti-Stick, Arc Force, and Hot Start functions for reliable ignition of welding rods up to 3.2 mm. Compatible with E6010, E6011, and E6013 rods.
- Všestranná kompatibilita materiálů: Capable of welding various metals including cast iron, mild steel, sheet metal, carbon steel, square pipe, and stainless steel, up to 6mm thick.
- Intuitivní LCD rozhraní: Equipped with a smart LCD display, alarm LED, and clear welding current readout for simplified operation.
- Integrované bezpečnostní prvky: Includes over-heating, over-current, over-loading protection, and VRD (Voltage Reduction Device) for enhanced user safety.

Figure 3: The large digital display provides clear and easy-to-read information for precise control.
4. Obsah balení
Po vybalení se prosím ujistěte, že jsou všechny níže uvedené položky přítomny a nepoškozené:
- 1x HITBOX 160A Stick Welder (ARC200D MINI3-CA)
- 1x Návod k použití
- 1x Pozemní Clamp (4.9 stop kabel)
- 1x Electrode Holder (4.9 ft cable)
- 5x Welding Rods (2.0 mm)
- 1x čisticí kartáček

Figure 4: Visual representation of the included accessories: Instruction Manual, Ground Clamp, Electrode Holder, Welding Rods, and Cleaning Brush.
5. Nastavení
Follow these steps to set up your welding machine for operation:
- Připojení napájení: Ensure the welder is connected to a stable 110V power supply. Verify that the power outlet can handle the required ampvymazat.
- Připojení držáku elektrody: Connect the electrode holder cable to the negative ("-") terminal on the front panel of the welder. Securely twist the connector into place.
- Pozemní Clamp Spojení: Připojte zem třamp cable to the positive ("+") terminal on the front panel of the welder. Securely twist the connector into place.
- Vložte elektrodu: Insert the welding electrode (rod) into the electrode holder. Ensure it is firmly gripped.
- (Optional) TIG Torch Connection: If performing Lift TIG welding, connect the WP17V TIG Torch (sold separately) to the positive ("+") terminal and the gas line (if applicable) to the appropriate gas inlet.
Video 1: Demonstrates the setup process for the HITBOX Stick Welder, including connecting the electrode holder and ground clamp, and preparing for welding operations.
6. Návod k obsluze
6.1 Ovládací panel Overview
The welder features a user-friendly control panel with a digital LCD screen and a multi-function knob for mode selection and parameter adjustment.
- Digitální LCD obrazovka: Displays current welding parameters (amperage), selected mode (MMA/Lift TIG), and status indicators (Arc Force, Hot Start, Anti-Stick, VRD, ERR).
- Rotate and Confirm Knob: Used to navigate through settings and adjust amperage. Press to confirm selections.
6.2 Svařování MMA (obloukové)
This mode is used for stick welding with coated electrodes.
- Vyberte režim MMA: Use the control knob to select "MMA" on the digital display.
- Soubor Amperage: Upravte amperage according to the electrode type and thickness of the material being welded. Recommended rods are E6010/E6011/E6013, below 3.2 mm.
- Příprava obrobku: Ensure the workpiece is clean and the ground clamp is securely attached to it, providing good electrical contact.
- Začněte svařovat: Strike the arc by lightly touching the electrode to the workpiece and quickly lifting it slightly to establish the arc. Maintain a consistent arc length and travel speed.
- Vlastnosti: The built-in Hot Start, Arc Force, and Anti-Stick features will assist in smooth arc ignition, stable arc, and preventing electrode sticking.
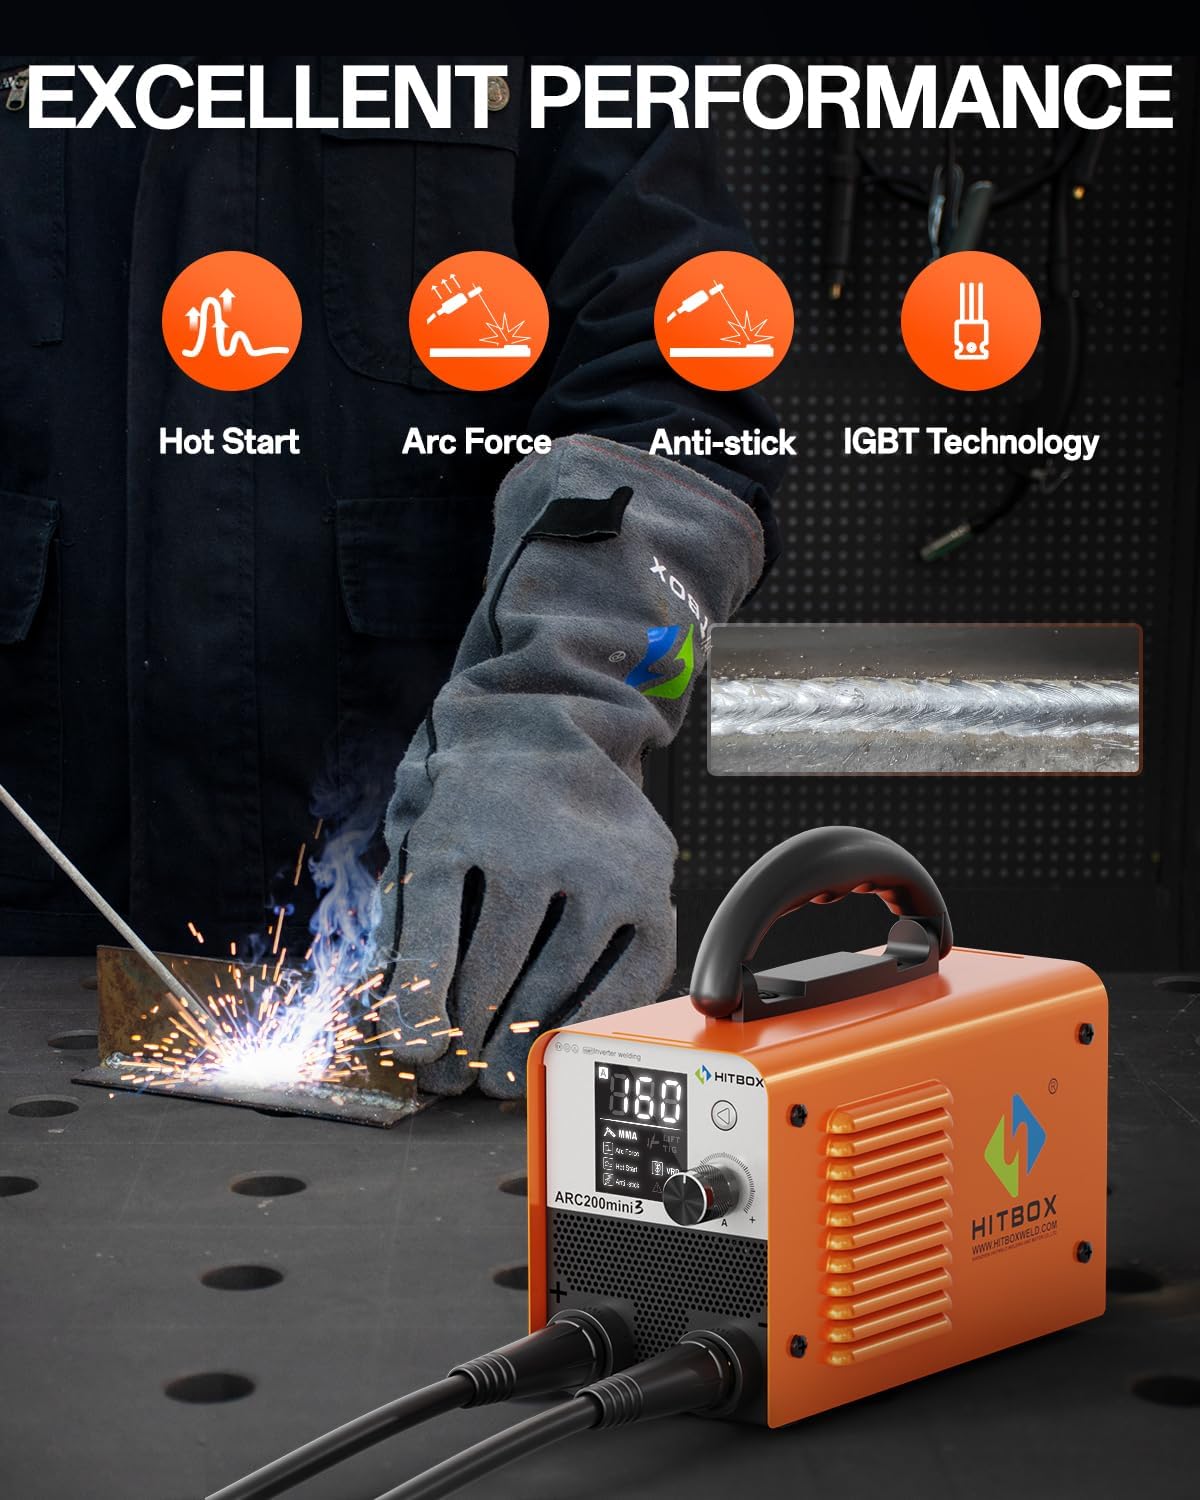
Figure 5: Demonstrates the welding process using the MMA (ARC) mode, highlighting the quality of the weld bead.
6.3 Svařování TIG s liftingem
This mode allows for precise TIG welding, requiring a separate TIG torch and gas supply (not included).
- Connect TIG Torch: Ensure the WP17V TIG Torch is correctly connected to the positive ("+") terminal and the gas line is connected to your argon gas cylinder.
- Select Lift TIG Mode: Use the control knob to select "Lift TIG" on the digital display.
- Soubor Amperage: Upravte amperage suitable for your material and desired weld.
- Příprava obrobku: Ensure the workpiece is clean and the ground clamp je bezpečně připevněn.
- Začněte svařovat: Gently touch the tungsten electrode to the workpiece to initiate the arc, then lift it slightly to establish the arc. Maintain a consistent arc length and feed filler rod as needed.

Figure 6: Comparison of setup for Stick welding (left) and Lift TIG welding (right), showing the optional TIG torch connection.
7. Údržba
Pravidelná údržba zajišťuje dlouhou životnost a optimální výkon vašeho svářecího stroje.
- Čištění: Periodically clean the exterior of the machine with a dry cloth. Use compressed air to clear dust from the ventilation openings.
- Kontrola kabelů: Pravidelně kontrolujte kabel držáku elektrody, uzemňovací vodičamp cable, and power cord for any signs of damage, cuts, or frayed insulation. Replace damaged cables immediately.
- Kontrola připojení: Ensure all connections (electrode holder, ground clamp, power plug) are tight and free from corrosion.
- Skladování: Store the welder in a dry, clean environment, away from excessive dust, moisture, and extreme temperatures.
8. Řešení problémů
Tato část obsahuje řešení běžných problémů, se kterými se můžete setkat.
| Problém | Možná příčina | Řešení |
|---|---|---|
| Žádný oblouk / Slabý oblouk |
|
|
| Overheating / Machine Shuts Off |
|
|
| "ERR" Indicator on Display |
|
|
9. Specifikace
| Atribut | Detail |
|---|---|
| Výrobce | HITBOX |
| Číslo modelu | ARC200D MINI3-CA |
| Číslo dílu | H1012012 |
| Zdroj napájení | DC (110V input) |
| Hmotnost položky | 3.49 kg (cca 7.7 lb) |
| Rozměry balíku | 33.4 x 25.3 x 15.1 cm |
| Zahrnuté komponenty | Welder, Ground Clamp, Electrode Holder, Welding Rods, Cleaning Brush |
| Jsou vyžadovány baterie? | Žádný |
| Země původu | Čína |
10. Záruka a podpora
HITBOX provides 2 years of quality support for this welding machine. For any technical assistance, warranty claims, or inquiries, please contact HITBOX customer service through your purchase platform or the official HITBOX webmísto.
Uschovejte si prosím doklad o koupi pro ověření záruky.