
1. Úvod
This manual provides detailed instructions for the safe installation, operation, and maintenance of your MENCOLULU 22-inch Farmhouse Chandelier (Model: CH001-WD-4). This 4-light hanging pendant fixture features a distressed wood oak orb design, suitable for various indoor spaces such as dining rooms, kitchen islands, living rooms, bedrooms, foyers, entryways, and hallways. Please read this manual thoroughly before installation and retain it for future reference.
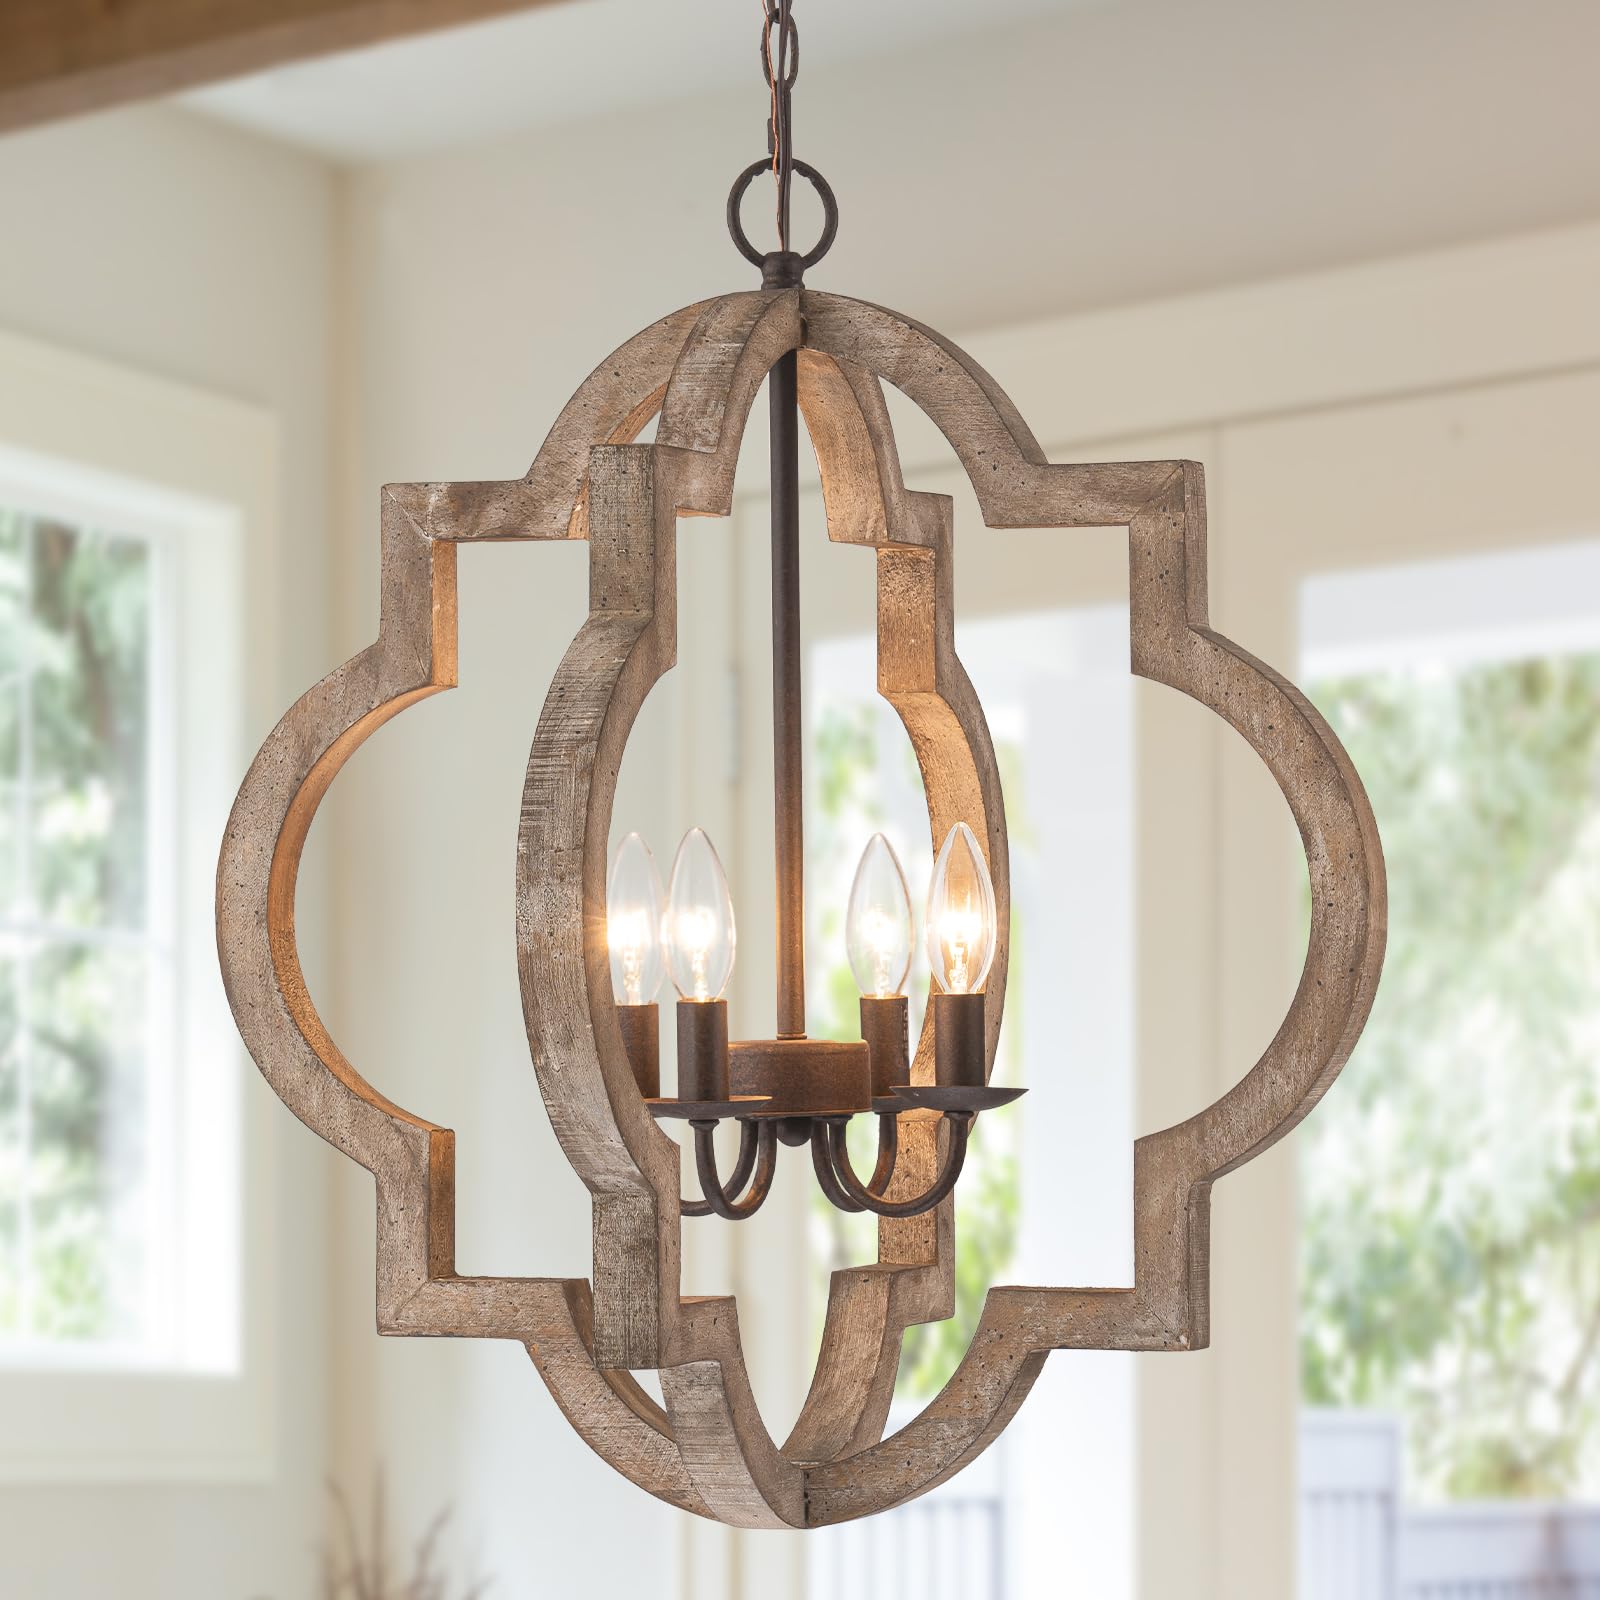
Figure 1: MENCOLULU 22-inch Farmhouse Chandelier, Distressed Oak Large.
2. Bezpečnostní informace
VAROVÁNÍ: Abyste snížili riziko požáru, úrazu elektrickým proudem nebo zranění osob, vždy dodržujte tato bezpečnostní opatření:
- Always disconnect power at the main circuit breaker before installation, removal, or servicing.
- Instalaci musí provést kvalifikovaný elektrikář nebo osoba obeznámená s konstrukcí a provozem výrobku a s riziky, která s ním souvisejí.
- Ujistěte se, že všechna elektrická připojení splňují místní předpisy a vyhlášky, stejně jako Národní elektrotechnický předpis (NEC).
- Neinstalujte toto svítidlo do vlhkého neboamp locations. It is designed for indoor use only.
- Používejte pouze specifikovaný typ žárovky a výkontage (4 x E12, Max 40W per bulb). Exceeding the maximum wattagmůže způsobit přehřátí a poškození.
- S přístrojem zacházejte opatrně. Zabraňte jeho pádu nebo nárazům.
- Nepřipojujte zařízení k neuzemněnému elektrickému systému.
- Keep flammable materials away from the light bulbs.
3. Obsah balení
Před zahájením instalace ověřte, zda jsou všechny součásti přítomny a nepoškozené. Pokud některé součásti chybí nebo jsou poškozené, kontaktujte zákaznickou podporu.
- Chandelier Body (Distressed Oak Orb)
- Montáž Canopy
- Adjustable Hanging Chain (59 inches)
- Mounting Hardware (Crossbar, Screws, Wire Nuts)
- Návod k použití
4. Specifikace
| Značka | MENCOLULU |
| Číslo modelu | CH001-WD-4 |
| Rozměry (D x Š x V) | 21.7"L x 21.7"W x 84.6"H (Max Height) |
| Velikost | Průměr 21.7 palců |
| Materiál | Metal, Wood (Distressed Oak) |
| Barva | Distressed Oak Large |
| Světelný zdroj | 4 x žárovky E12 (nejsou součástí balení) |
| Max Wattage na žárovku | 40W |
| svtage | 110 voltů |
| Nastavitelná výška | Yes, Max 85 inches (with 59-inch chain) |
| Typ montáže | Hanging, Semi Flush Mount |
| Compatible Ceiling Types | Flat, Sloped, Vaulted |
| Kontrolní metoda | App (requires compatible smart bulbs/system) |
| Vnitřní/venkovní použití | Pouze uvnitř |

Figure 2: Chandelier dimensions and ceiling compatibility.

Figure 3: Detail of solid wood distressed oak and rust brown finish.
5. Nastavení a instalace
Before installation, ensure the power is turned off at the circuit breaker. It is recommended to have two people for installation. This fixture comes with pre-assembled wiring for simplified setup.
- Připravte si místo pro montáž: Turn off power at the main circuit breaker. Ensure the junction box is securely mounted and capable of supporting the fixture's weight.
- Install the Mounting Crossbar: Attach the mounting crossbar to the junction box using the provided screws.
- Nastavení délky řetězu: Determine the desired hanging height for your chandelier. The chain is adjustable up to 59 inches. Use pliers to open and remove excess chain links as needed. Thread the electrical wires through the chain and canopy.
- Proveďte elektrické připojení: Connect the fixture's wires to the corresponding wires from the junction box using the provided wire nuts. Connect the black wire (live) to the black wire, the white wire (neutral) to the white wire, and the ground wire to the ground wire. Ensure all connections are secure.
- Zajistěte vrchlík: Carefully push the canopy up to the ceiling, covering the junction box and wiring. Secure it in place with the provided screws or nuts.
- Instalace žárovek: Screw four E12 base bulbs (not included) into the sockets. Do not exceed 40W per bulb.
- Obnovit napájení: Po dokončení instalace znovu zapněte napájení jističem.
For a visual guide to the installation process, please refer to the video below:
Video 1: Installation guide for the Farmhouse Chandelier. This video demonstrates the steps for assembling and mounting the light fixture.
6. Návod k obsluze
Once installed and powered, the chandelier operates via your standard wall switch. For dimming functionality, ensure you use dimmable E12 bulbs and a compatible dimmer switch (both sold separately). The fixture supports various E12 bulb types including LED, CFL, Edison, and Smart bulbs.
If using smart bulbs with app control, follow the instructions provided with your smart bulbs for pairing and operation.
Video 2: Produkt přesview of the Wood Farmhouse Chandelier. This video highlights key features and design aspects of the light fixture.
7. Údržba
Regular maintenance helps prolong the life and appearance of your chandelier.
- Čištění: Before cleaning, ensure the power is off. Wipe the fixture with a soft, dry cloth. Do not use abrasive cleaners, solvents, or polishes as they may damage the finish.
- Výměna žárovky: Always turn off power before replacing bulbs. Allow bulbs to cool completely before touching. Replace with E12 base bulbs, not exceeding 40W.
- Inspekce: Pravidelně kontrolujte všechna připojení a montážní prvky, abyste se ujistili, že jsou bezpečně upevněny.
8. Řešení problémů
Pokud narazíte na problémy s lustrem, podívejte se na následující běžné problémy a jejich řešení:
| Problém | Možná příčina | Řešení |
|---|---|---|
| Světlo se nerozsvítí | 1. Napájení je vypnuto 2. Uvolněné zapojení kabeláže 3. Vadná žárovka | 1. Check circuit breaker and wall switch 2. Turn off power, check all wire connections 3. Replace bulb with a new one |
| Světlo bliká | 1. Uvolněná žárovka 2. Incorrect bulb type for dimmer 3. Uvolněné zapojení | 1. Utáhněte žárovku 2. Ensure dimmable bulbs are used with a dimmer switch 3. Turn off power, check wire connections |
| Bzučivý hluk | Incompatible dimmer switch or bulbs | Ensure dimmer switch and bulbs are compatible with each other and the fixture. Consult a qualified electrician if needed. |
9. Záruka a podpora
This MENCOLULU product is covered by a 1letá záruka výrobce od data nákupu. Tato záruka se vztahuje na vady materiálu a zpracování při běžném používání.
For warranty claims, technical support, or any questions regarding your product, please contact MENCOLULU customer service. Keep your proof of purchase for warranty validation.