
1. Úvod
This manual provides detailed instructions for the installation, setup, operation, and maintenance of your AkaGear DS10 Mini Keyless Entry Door Lock. Please read this manual thoroughly before installation and use to ensure proper function and safety.
2. Bezpečnostní informace
- Use only 4xAA alkaline (non-rechargeable) batteries. Do not mix old and new batteries or different types of batteries.
- Ensure all components are securely installed before operating the lock.
- Keep physical keys in a secure location outside the home to prevent lockout.
- Avoid exposing the lock to extreme temperatures or direct water spray, although it features IP54 weather resistance.
- Regularly check battery levels and replace batteries promptly when indicated.
3. Obsah balení
Ověřte, zda jsou v balení přítomny všechny položky:
- Keyless Entry Keypad Assembly
- Montáž interiéru
- Západka závory
- Montážní deska
- Úderová deska
- 2 fyzické klávesy
- Instalační šrouby
- Uživatelská příručka
4. Konec produktuview
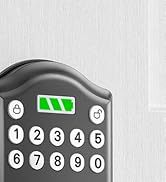
The AkaGear DS10 Mini is a smart deadbolt designed for convenient keyless entry. It features a backlit keypad, a battery power indicator, and supports up to 300 user codes.

Obraz: The AkaGear DS10 Mini lock highlighting its capacity for up to 300 user codes, one-time PIN codes, and inclusion of 2 physical keys.

Obraz: Features demonstrating low power consumption, including a backlit keypad, battery power indicator, and an estimated 1 year or 5000 uses battery life.
5. Instalace
The AkaGear DS10 Mini is designed for easy installation, typically within 10 minutes. Ensure your door meets the specified dimensions before proceeding.
5.1 Kontrola kompatibility dveří

Obraz: Important door dimensions for installation: Hole Diameter: 2-1/8" (54mm), Backset: 2-3/8" or 2-3/4" (60mm or 70mm), Door Thickness: 1-3/8" to 2" (35mm to 50mm). The lock is compatible with both left-handed and right-handed doors.
5.2 Postup instalace
Follow these steps for a smooth installation:
- Odstranění stávajícího hardwaru: Carefully remove your old deadbolt and any associated hardware.
- Install Latch: Insert the new deadbolt latch into the door edge. Ensure it is oriented correctly for your door's swing. Secure with screws.
- Install Keypad Assembly: Pass the cable from the keypad assembly through the door hole and align the keypad with the latch.
- Instalace montážní desky: Attach the mounting plate to the interior side of the door, securing it with screws through the door hole and into the keypad assembly. Ensure the cable passes through the plate.
- Připojit kabely: Connect the cable from the keypad to the interior assembly.
- Instalace vnitřní sestavy: Mount the interior assembly onto the mounting plate, ensuring the thumb turn spindle engages with the latch mechanism. Secure with screws.
- Testovací provoz: Before closing the door, manually test the deadbolt by turning the thumb turn to ensure smooth operation.

Obraz: The installation process of the AkaGear DS10 Mini, demonstrating how the keypad and interior components fit together.
Video: An unboxing and installation guide for the ApeStellar Keyless Entry Door Lock, demonstrating the physical steps to install the lock on a door.
6. Nastavení a programování
After installation, you will need to program your lock with user codes and configure settings.
6.1 Programming Instructions
Refer to the included user manual for detailed programming steps. This typically involves entering a master code followed by specific sequences to add or delete user codes.

Obraz: Illustration of using a one-time code for temporary access, ideal for guests or service providers.
6.2 Setting User Codes
The lock supports up to 300 user codes. You can create permanent codes for family members and temporary one-time codes for visitors. Consult your user manual for the exact sequence to add or delete codes.
6.3 Automatic Lock Function
The automatic lock feature can be configured to lock the door after a set period (5, 10, 20, 30, or 60 seconds) once closed. This feature can be enabled or disabled as needed. Refer to your user manual for activation steps.
7. Návod k obsluze
7.1 Unlocking with a Code
To unlock the door, press any key to wake up the keypad, enter your valid user code, and then press the '#' key. The deadbolt will retract, allowing you to open the door.
7.2 Zamykání dveří
To lock the door, simply press the '#' key. The deadbolt will extend. If the auto-lock feature is enabled, the door will lock automatically after the set delay.

Obraz: Demonstrates the auto-lock feature, which can be set to engage after 5, 10, 20, 30, or 60 seconds, and the manual lock option.
7.3 Heslo proti peepingu
For enhanced security, you can enter random digits before or after your actual code. This feature prevents others from guessing your code by observing your hand movements.

Obraz: Illustrates the anti-peeping password feature, where random digits can be added before or after the actual code for privacy.
7.4 Using Physical Keys
In case of battery depletion or forgotten codes, the lock can always be opened using the provided physical keys.
8. Údržba
8.1 Výměna baterie
The lock requires 4xAA alkaline (non-rechargeable) batteries. The battery indicator light will alert you when power is low. To replace, remove the interior cover, replace the old batteries with new ones, and reattach the cover.

Obraz: The interior assembly with the battery cover removed, showing the placement of 4xAA batteries.
8.2 Backup Power
If batteries completely drain, the lock features a backup power option. Connect a 9V battery to the terminals on the bottom of the keypad to temporarily power the lock and enter your code.
Obraz: The lock's backup power feature, allowing temporary power via a 9V battery in case of full battery depletion.
8.3 Obecná péče
Clean the keypad with a soft, dry cloth. Avoid abrasive cleaners or solvents that could damage the finish or electronic components.
9. Řešení problémů
If you encounter issues with your AkaGear DS10 Mini lock, try the following:
- Zámek nereaguje: Zkontrolujte stav baterií a v případě potřeby je vyměňte. Ujistěte se, že jsou baterie vloženy se správnou polaritou.
- Kód nefunguje: Verify you are entering the correct code. Try resetting the lock to factory settings (refer to your user manual for instructions on 'Deleting All User Codes' and reprogramming).
- Závora se nevysouvá/nezasouvá: Ensure the latch is installed correctly and moves freely. Check for any obstructions in the door frame.
- Klávesnice se nerozsvítí: To může znamenat slabé baterie. Vyměňte je.
10. Specifikace
| Funkce | Specifikace |
|---|---|
| Značka | AkaGear |
| Název modelu | DS10 Mini |
| Typ zámku | Závora |
| Materiál | Hliník |
| Rozměry položky (D x Š x V) | 2.83 x 0.59 x 4.84 palce |
| Hmotnost položky | 1.64 liber (0.75 kilogramů) |
| Speciální funkce | Auto-Lock, Easy Installation, Keyless Entry |
| Typ ovladače | Klávesnice |
| Kontrolní metoda | Dotek |
| Protokol připojení | Wi-Fi |
| Jsou vyžadovány baterie | Yes (4xAA, not included) |
| Odolnost vůči povětrnostním vlivům | IP54 |
11. Záruka a podpora
AkaGear offers a 30-day customer commitment and a 1-year product warranty on all parts. Lifetime after-sales customer service is available, including online phone support from Monday to Friday 9 AM to 5 PM PST and 24/7 online email service. For support, please refer to the contact information provided in your product packaging or visit the official AkaGear webmísto.