
GSEICE GSE-Y150
Uživatelská příručka pro komerční výrobník ledu GSEICE
Model: GSE-Y150
Značka: GSEICE
1. Úvod a konecview
Thank you for choosing the GSEICE Commercial Ice Maker Machine. This manual provides essential information for the safe and efficient operation, maintenance, and troubleshooting of your new ice maker. Please read it thoroughly before installation and use.
This commercial-grade ice maker is designed for high efficiency, capable of producing up to 150 lbs of ice per day with a 70 lbs storage bin. It features a versatile 2-way water inlet system (tap water or bottled water) and a built-in self-priming drain pump for convenient wastewater management. The intuitive LCD control panel allows for easy operation and monitoring of ice production and machine status. The unit is ETL and NSF certified, ensuring safety and sanitation for commercial applications.
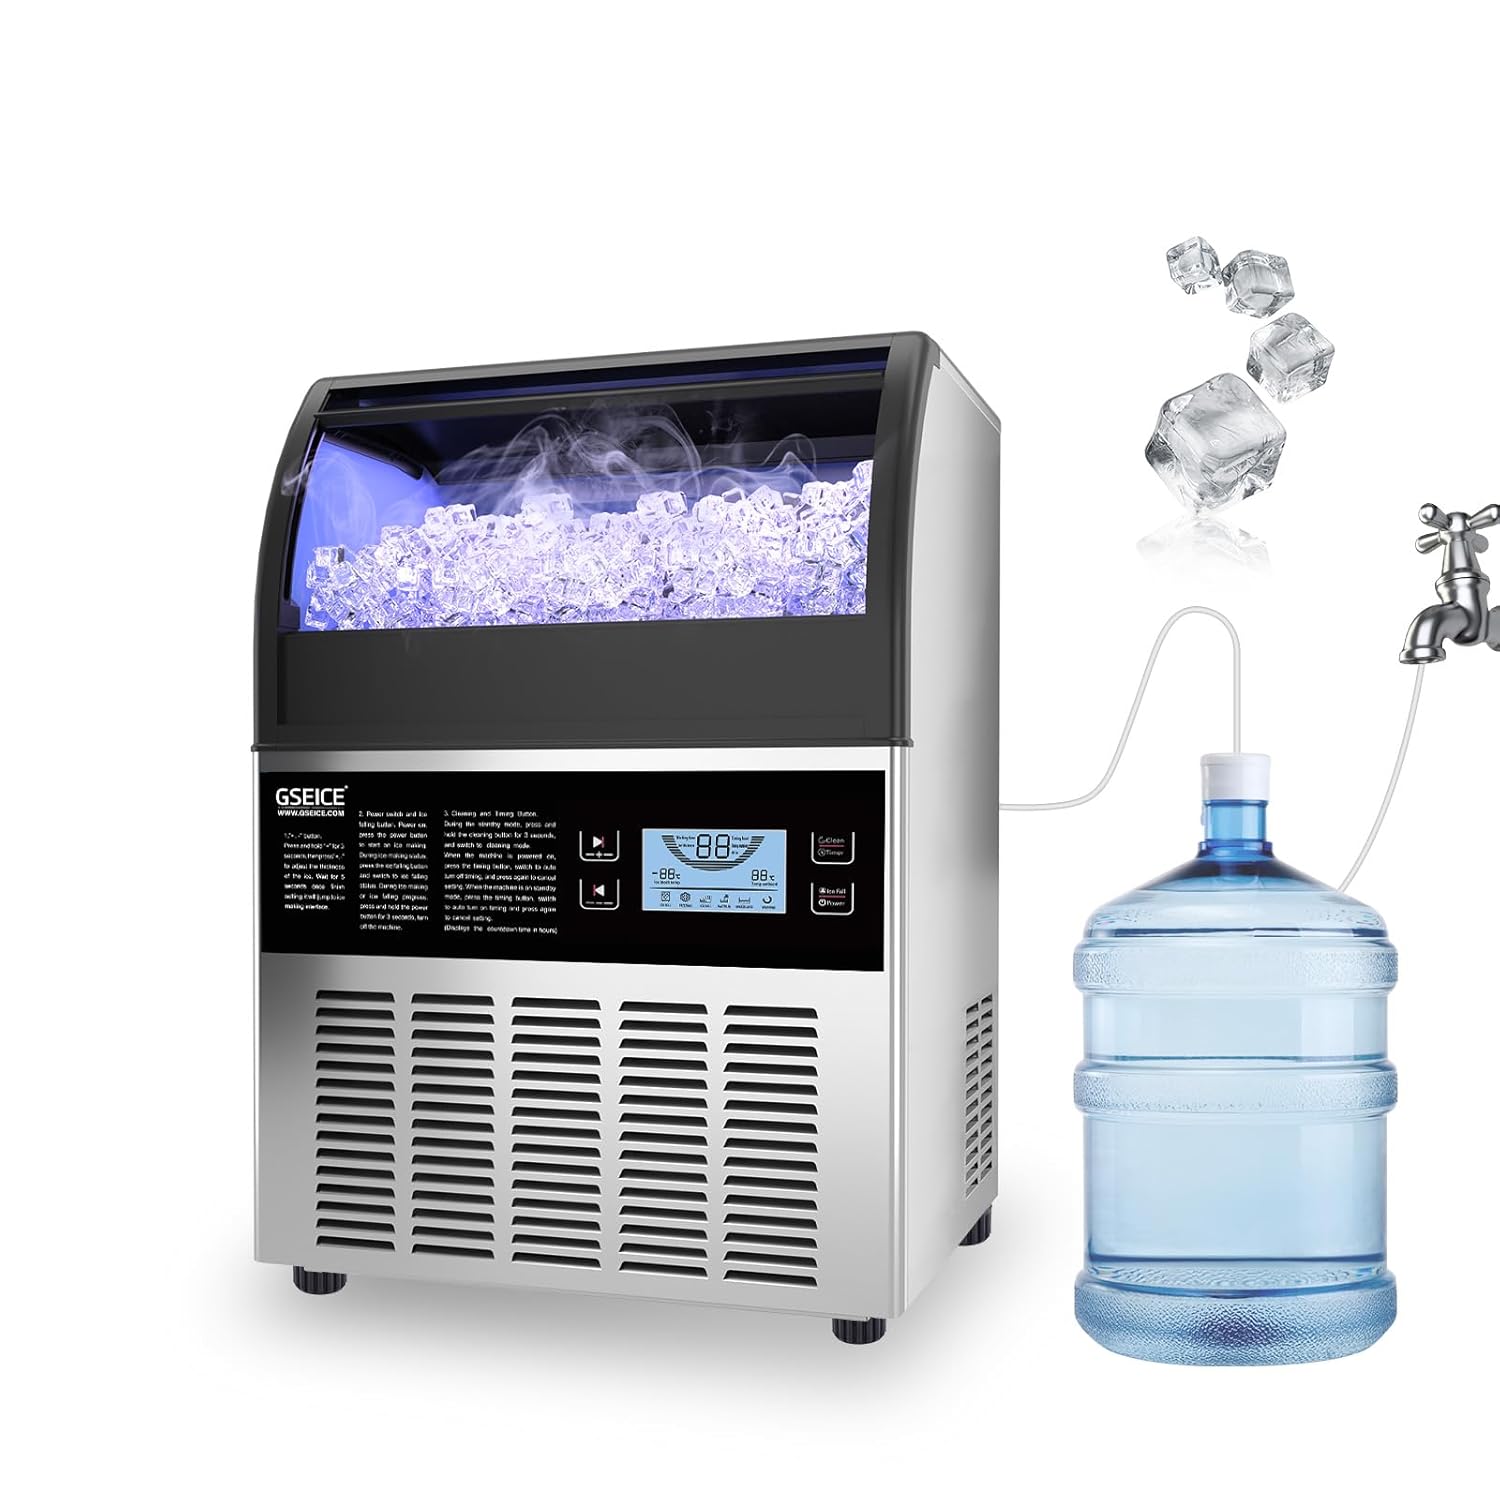
Figure 1.1: GSEICE Commercial Ice Maker Machine with bottled water supply setup.
2. Bezpečnostní informace
Při používání elektrických spotřebičů vždy dodržujte základní bezpečnostní opatření, abyste snížili riziko požáru, úrazu elektrickým proudem a zranění.
- Ujistěte se, že napájecí zdroj odpovídá objtage požadavky uvedené na štítku výrobku.
- Neprovozujte stroj s poškozeným kabelem nebo zástrčkou.
- Během provozu držte ruce a cizí předměty mimo zásobník na led a oblast výroby ledu.
- Před čištěním, údržbou nebo pokud nebudete stroj delší dobu používat, odpojte jej ze zásuvky.
- Neponořujte spotřebič, kabel ani zástrčku do vody nebo jiných kapalin.
- Ensure proper ventilation around the unit. Maintain recommended clearance from walls and other objects.
- This appliance is intended for commercial and household use as described in this manual.
3. Obsah balení
Ověřte, zda jsou v balení obsaženy všechny položky:
- GSEICE 150LBS Commercial Ice Maker Machine
- Vodní filtr
- Hadice pro přívod vody
- Drain Water Pipe
- Naběračka ledu
- Uživatelská příručka (tento dokument)

Obrázek 3.1: Dodávané příslušenství a rozměry produktu.
4. Nastavení
4.1 Vybalení a počáteční umístění
- Opatrně vyjměte výrobník ledu z obalu.
- Place the unit on a flat, stable surface. Ensure it is kept upright for at least 24 hours before plugging it in to allow refrigerants to settle.
- Maintain a recommended clearance of at least 6 inches around the unit for proper ventilation. The unit can be used freestanding or built-in under a counter.
4.2 Elektrické připojení
This unit comes with a NEMA 5-15P plug. Connect it to a properly grounded electrical outlet that meets the specified voltage a aktuální požadavky.
4.3 Připojení vody
The ice maker supports two water intake modes: tap water and gallon bottled water. It includes a built-in drain pump to manage wastewater.
- Připojení vody z kohoutku: Connect the provided 1/4" water supply hose to a potable water source. Ensure the connection is secure to prevent leaks.
- Bottled Water Connection: Insert the bottled water inlet line into a standard gallon bottled water container. The self-priming pump will boost water flow from the bottle.
- odvodnění: Connect the drain water pipe to a suitable drain. The built-in drain pump will automatically remove wastewater, reducing residue.

Figure 4.1: Rear connections for power, water supply, and drainage.
5. Návod k obsluze
5.1 Ovládací panel Overview
The ice maker is equipped with an intuitive LCD control panel for easy operation. The panel displays environmental temperature, ice core temperature, and various status indicators.
- +/- tlačítka: Press and hold for 3 seconds to adjust ice thickness. A short press adjusts other settings.
- Clean/Timer Button: In standby mode, press to set the turn-on time. Press and hold for 3 seconds to enter self-cleaning mode. During power-on, press to set the turn-off time.
- Ice Fall/Power Button: Press 'Power' to start ice making. During ice making, press to initiate ice falling.
- Indikátory: Ice Full Warning, Water Lack Warning, Water In Open, Freezing, Washing.
Poznámka: When the machine is in self-priming pump mode (for bottled water supply), press and hold the "Clean and Timer" and "+" buttons together for 3 seconds to enter the self-priming mode.

Obrázek 5.1: Detailní view of the LCD Control Panel.
5.2 Nastavení tloušťky ledu
You can adjust the thickness of the ice cubes to suit your needs:
- Press and hold the "+" or "-" buttons for 3 seconds.
- Use the "+" button to increase ice thickness (longer freezing time).
- Use the "-" button to decrease ice thickness (shorter freezing time).

Obrázek 5.2: Možnosti úpravy tloušťky ledu.
5.3 Oficiální video produktu
Video 5.1: This video demonstrates the GSEICE 2-Way Water Inlet Commercial Ice Maker, showcasing its features, operation, and water supply options. It provides a visual guide to the machine's functionality.
6. Údržba
Regular cleaning and maintenance are crucial for the longevity and optimal performance of your ice maker. It is recommended to clean the machine regularly based on usage frequency.
6.1 Denní čištění
- It is suggested to drain water once a day by pulling out the small hose on the right side of the water tank. This helps prevent mineral buildup.
- Vnější povrch otřete měkkým, damp tkanina.
6.2 režimy samočištění
The machine features a self-cleaning function:
- In standby mode, press and hold the 'Clean/Timer' button for 3 seconds to activate the self-cleaning cycle.
- Follow any on-screen prompts or indicators during the cleaning process.

Figure 6.1: Automatic cleaning feature in action.
7. Řešení problémů
If you encounter issues with your ice maker, please refer to the following common problems and solutions before contacting customer support.
| Problém | Možná příčina | Řešení |
|---|---|---|
| Výrobník ledu nevyrábí led. | No water supply; Water tank empty; Power issue; Ambient temperature too high. | Check water connections and supply; Refill bottled water; Ensure unit is plugged in; Operate in recommended temperature range (41-100.4°F / 5-38°C). |
| Kostky ledu jsou příliš tenké/tlusté. | Nesprávné nastavení tloušťky ledu. | Tloušťku ledu upravte pomocí tlačítek +/- na ovládacím panelu. |
Ask a question about this manualAsk about setup, troubleshooting, compatibility, parts, safety, or missing instructions. Manuals+ will review the question and use this page’s manual context to help answer it. |