
Důležité bezpečnostní informace
Please read all instructions carefully before installation and use. Failure to follow these instructions could result in serious injury or death. Keep this manual for future reference.
- This safety gate is designed for use with children from 6 to 24 months.
- Never use this gate at the top of stairs without using the hardware mounting option.
- Regularly check all parts for proper installation and security.
- Nepoužívejte, pokud některé součásti chybí nebo jsou poškozené.
- This gate is not a substitute for adult supervision.
Obsah balení
Verify that all components are present before beginning installation. Refer to the diagram below for identification.

Popis obrázku: An exploded diagram showing all parts of the Cumbor S7V2 baby gate. Labels include Main Gate (A), Extension (B), Tension Bolt (C), Wall Cup (D), Pedal (E), Position Plate (F), Stair Tension Bolt (G), Up Cup (H), Wall Anchor (I), Screw (J), Sticky Pad (K), and Wrench (L), along with their respective quantities.
| Položka | Popis | Množství |
|---|---|---|
| A | Hlavní brána | 1 |
| B | Rozšíření | 3 |
| C | Napínací šroub | 4 |
| D | Nástěnný pohár | 4 |
| E | Pedál | 1 |
| F | Polohovací deska | 1 |
| G | Stair Tension Bolt | 2 |
| H | Up Cup | 2 |
| I | Kotva na zeď | 4 |
| J | Šroub | 4 |
| K | Lepicí podložka | 4 |
| L | Klíč | 1 |
Nastavení a instalace
The Cumbor S7V2 gate offers both pressure-mount and hardware-mount installation options. Choose the method appropriate for your location.
Pressure-Mount Installation (No Drilling)
This method is ideal for doorways and hallways. It holds up to 150 lbs. No tools are required for this method.
- Počáteční umístění: Position the gate in the desired opening. Note that there will be a gap between the gate frame and the door initially. This is normal and will close as the tension bolts are tightened.
- Insert Tension Bolts: Insert the four tension bolts (C) into the holes at each corner of the gate.
- Attach Wall Cups (Optional for added stability): For enhanced grip, you can attach the wall cups (D) to the wall using the sticky pads (K) before inserting the tension bolts.
- Utáhněte napínací šrouby: Rotate the tension bolts until the gate is securely held in place and the initial gap between the lock and door frame disappears. Ensure the gate is level and stable.
- Remove Zip Tie: Once the gate is fully secured and stable, carefully cut and remove the zip tie connecting the door and frame.

Popis obrázku: A close-up of a hand rotating a tension bolt against a wall, demonstrating the pressure-mount installation method. The bolt is white and has a textured grip.

Popis obrázku: A sequence of three images illustrating the gate's initial gap, the gap closing as tension is applied, and the final step of removing the zip tie after installation is complete.
Hardware-Mount Installation (For Stairs and Active Pets)
This method provides maximum security and is recommended for use at the top of stairs or in areas with active pets. It secures the gate against impacts over 210 lbs.
- Marking Position: Place the gate in the desired location. Use a pencil to mark the positions for the wall anchors (I) and screws (J).
- Instalace nástěnných kotev: Use a drill to create pilot holes at the marked positions. Insert the wall anchors (I) into the holes and gently tap them flush with a hammer.
- Attach Wall Cups: Secure the wall cups (D) to the wall using the screws (J) and a screwdriver or drill.
- Insert and Tighten Tension Bolts: Insert the tension bolts (C) into the gate and then into the attached wall cups. Rotate the tension bolts to increase pressure and secure the gate firmly.
- Stair Railing Installation (Y-shaped bolts): For round stair railings, use the Y-shaped stair tension bolts (G) and Up Cups (H) instead of standard tension bolts and wall cups. These allow secure installation without drilling into the railing.
- Remove Zip Tie: Once the gate is fully secured and stable, carefully cut and remove the zip tie connecting the door and frame.

Popis obrázku: A hand holding a drill, preparing to install a wall anchor into a wall, demonstrating the first step of hardware installation.

Popis obrázku: A hand using a drill to attach a wall cup to the wall, illustrating the second step of hardware installation.

Popis obrázku: A Cumbor baby gate installed at the bottom of a wooden staircase, showing the use of Y-shaped bolts for secure attachment to rounded banisters. A baby is sitting safely behind the gate.
Obsluha brány
Opening the Gate (One-Handed Operation)
The Cumbor S7V2 gate is designed for convenient one-handed operation by adults.
- Stiskněte: Locate the button on the top of the gate handle and press it down.
- Výtah: While holding the button, lift the gate handle upwards.
- OTEVŘENO: Otevřete dveře brány v obou směrech.
Popis obrázku: A series of three images demonstrating the steps for one-handed gate operation: Pressing a button, lifting the handle, and swinging the gate open. A woman holding a baby is shown next to the gate.
Auto-Close Feature
The gate features an auto-close mechanism for added safety. If the gate is opened less than 90 degrees, it will automatically swing shut and lock.

Popis obrázku: An overhead diagram illustrating the gate's auto-close function (closing when opened less than 90 degrees) and its ability to stay open when pushed past 90 degrees. The gate is shown in a doorway.
Hold-Open Feature
If the gate is opened past 90 degrees, it will remain open, allowing for continuous passage. To close, simply push it gently until it engages the auto-close mechanism or manually close it.
Accessible Ramp
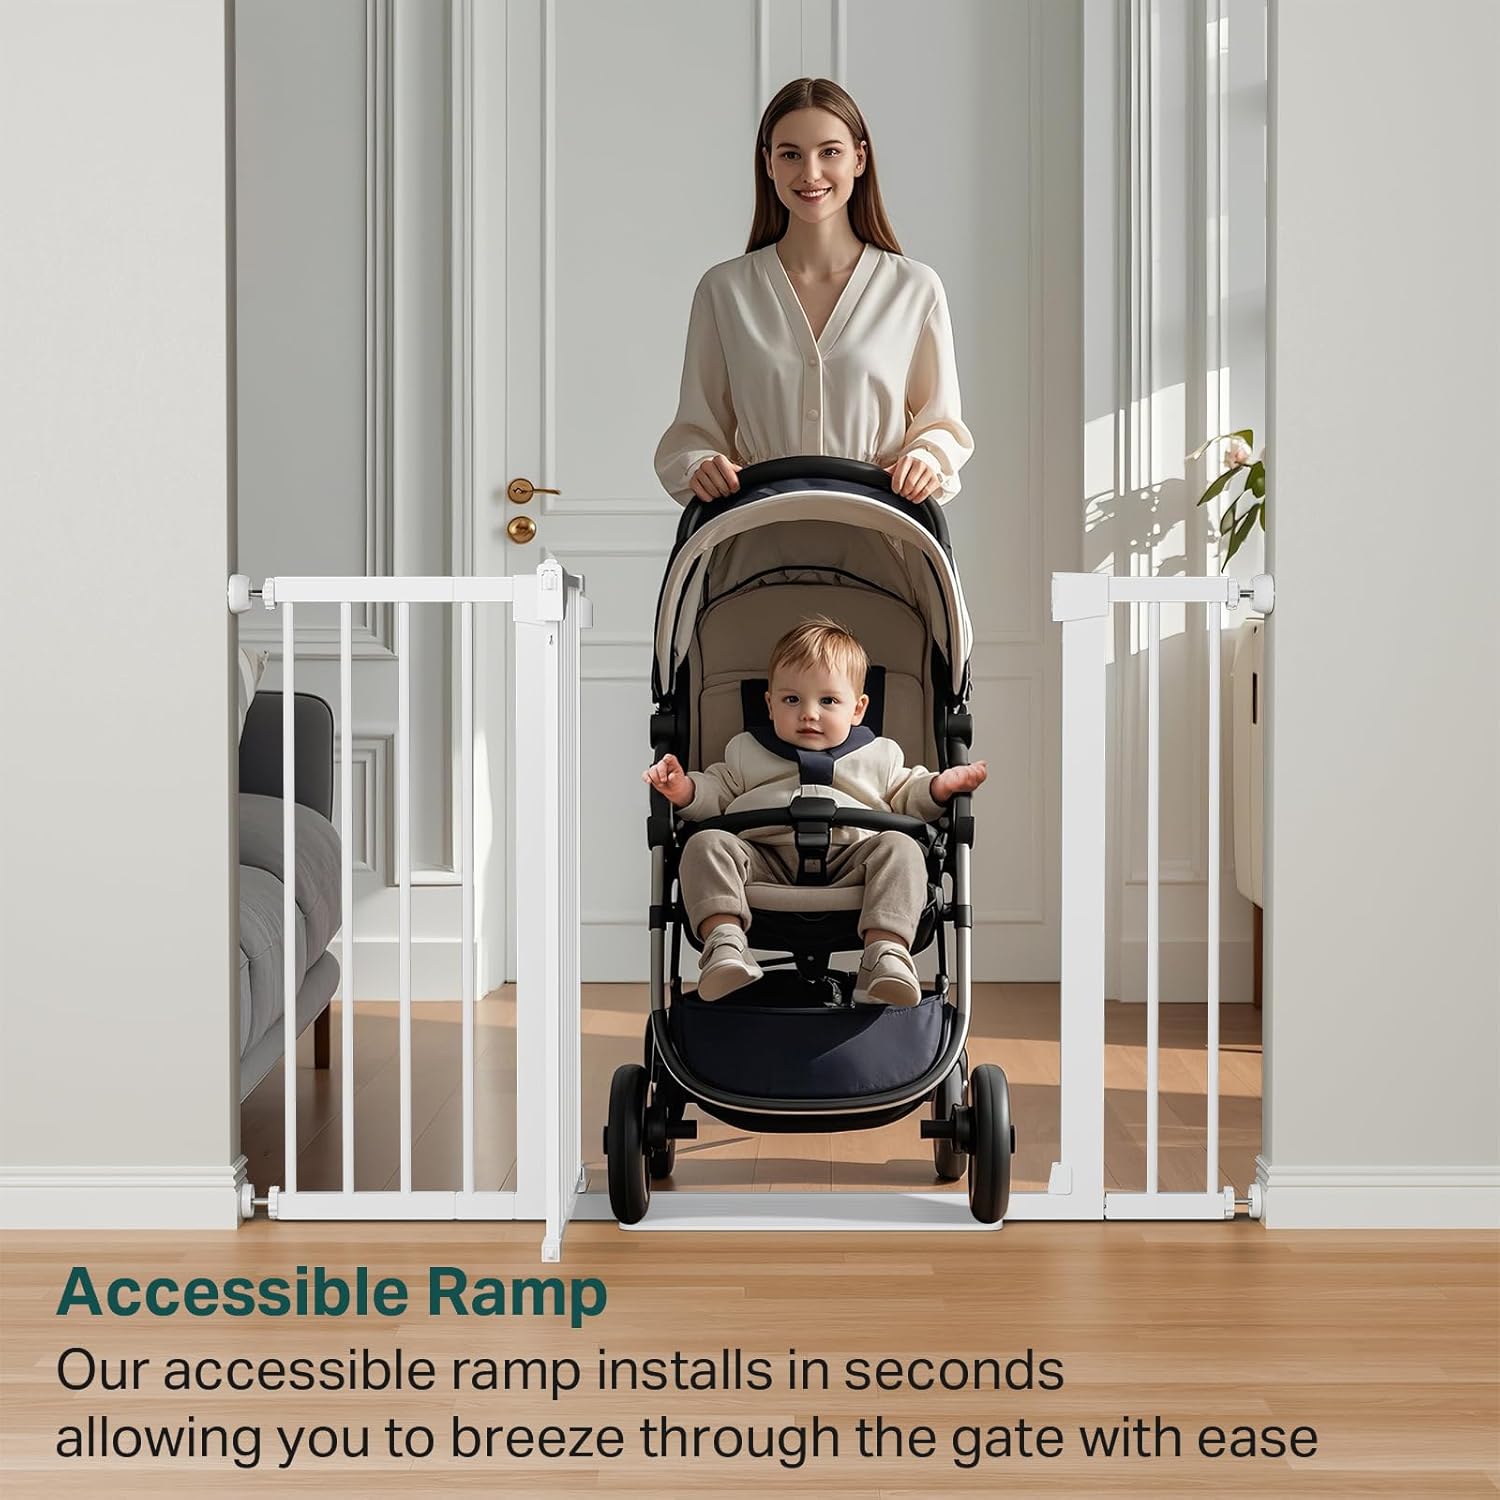
The gate includes an accessible ramp (E) that can be installed at the bottom to facilitate easy passage with strollers or for pets, reducing tripping hazards.

Popis obrázku: A woman pushing a baby in a stroller through the Cumbor baby gate, which has an accessible ramp at the bottom to ensure smooth passage.
Údržba
- Čištění: Wipe the gate regularly with a damp hadříkem a jemným mýdlem. Nepoužívejte abrazivní čisticí prostředky ani agresivní chemikálie.
- Inspekce: Periodically check all connections, bolts, and locking mechanisms to ensure they are secure and functioning correctly. Tighten any loose bolts.
- Mazání: If the gate hinges become stiff, apply a small amount of silicone-based lubricant.
Odstraňování problémů
- Problem: The gate does not close properly or feels loose.
- Řešení: Ensure all tension bolts are tightened sufficiently. If using pressure mount, check that the wall cups are firmly in place. If hardware mounted, verify screws are tight. The initial gap between the lock and door frame should disappear once fully tightened.
- Problem: The gate is difficult to open or close.
- Řešení: Check for any obstructions around the gate's swing path. Ensure the gate is level. If hinges are stiff, apply a silicone lubricant. Verify that the one-handed operation steps (press and lift) are being followed correctly.
- Problem: The gate is not stable on stairs.
- Řešení: For stair use, hardware mounting is strongly recommended. Ensure the wall anchors and screws are properly installed. If using Y-shaped bolts for round banisters, confirm they are securely tightened.
Specifikace
| Funkce | Detail |
|---|---|
| Značka | Cumbor |
| Číslo modelu | S7V2 |
| Typ montáže | Pressure Mount / Hardware Mount |
| Věkové rozmezí | 6-24 měsíců |
| Materiál | Kov |
| Barva | Bílý |
| Rozměry produktu | 29.7-48"W x 30.5"H |
| Hmotnost položky | 13.07 libry |
| UPC | 850055912229 |
| Jsou vyžadovány baterie | Žádný |
Záruka a podpora
Cumbor products are manufactured with quality and durability in mind. For specific warranty details, please refer to the product packaging or contact Cumbor customer support.
Zákaznická podpora: For assistance with installation, troubleshooting, or warranty claims, please visit the official Cumbor webnebo kontaktujte jejich oddělení zákaznických služeb. Kontaktní informace obvykle naleznete na obalu produktu nebo na jejich webmísto.
Můžete také navštívit Cumbor Store on Amazon pro více informací.