
Flashpoint R2 Nano
Flashpoint R2 Nano Touchscreen TTL Wireless Flash Trigger User Manual
For Panasonic and Olympus Cameras
1. Úvod
The Flashpoint R2 Nano Remote is a compact and advanced wireless flash trigger designed for Panasonic and Olympus camera systems. It offers precise control over your flash settings through an intuitive touchscreen interface and OLED display, enhancing your photography experience with seamless integration and reliable performance.
Mezi klíčové vlastnosti patří:
- Bezproblémová integrace: Full TTL compatibility with Olympus/Panasonic cameras for optimal exposure.
- Ultimate Reliability: Stable 2.4 GHz radio frequency with 32 channels, ensuring consistent triggering up to 328 feet (100 meters).
- Vysokorychlostní synchronizace (HSS): Achieve sync speeds up to 1/8000s for creative effects and motion freezing.
- Intuitivní ovládání dotykovou obrazovkou: Responsive interface for quick and easy adjustments.
- Versatile Group Control: Manage up to 16 groups (A-F, 0-9) independently for complex lighting setups.
2. Co je v krabici
Upon unboxing your Flashpoint R2 Nano, please verify that all components are present:
- Flashpoint R2 Nano Remote
- Nabíjecí kabel USB-C
- Skladovací taška
- Uživatelská příručka (tento dokument)
3. Konec produktuview
Familiarize yourself with the components and controls of your R2 Nano remote.
Obrázek 3.1: Přední a boční strana View of the R2 Nano with Key Components Labeled.
- Dotyková obrazovka: Main interface for settings and control.
- Vyberte vytočení: Pro navigaci v menu a úpravu hodnot.
- Vypínač: Zapíná/vypíná zařízení.
- Testovací tlačítko: Spustí zkušební blesk.
- Installing/Detaching Button: Releases the remote from the hotshoe.
- Montážní štěrbina: Connects to the camera's hotshoe.
- Nabíjecí port USB-C: Pro nabíjení baterie.

Figure 3.2: R2 Nano Touchscreen Interface Details.
- Kanál (CH): Displays the current wireless channel (e.g., CH6).
- Group (A, B, C, etc.): Indicates the active flash groups.
- Úroveň výstupního výkonu: Shows the flash power setting (e.g., +0.0, 1/128).
- Parameters - / +: Touch controls for decreasing/přírůstekasinhodnoty g.
- Režimy synchronizace: Icons indicating sync modes (e.g., HSS, front curtain, rear curtain).
- Modelování L.amp: Icon for modeling lamp postavení.
- Indikátor baterie: Zobrazuje aktuální stav baterie.
4. Nastavení
4.1 Nabíjení baterie
The R2 Nano is equipped with a built-in rechargeable lithium battery. Before first use, fully charge the device.
- Locate the USB-C charging port on the side of the R2 Nano.
- Připojte dodaný nabíjecí kabel USB-C k portu.
- Druhý konec kabelu připojte k napájecímu adaptéru USB (není součástí balení) nebo k portu USB počítače.
- The battery indicator on the screen will show charging status. A full charge from 0% to 100% typically takes approximately 2 hours.

Figure 4.1: Charging the R2 Nano via USB-C.
4.2 Montáž na kameru
The R2 Nano features an easy-mounting, durable hotshoe design for secure attachment to your camera.
- Ujistěte se, že je fotoaparát vypnutý.
- Slide the R2 Nano's mounting slot onto your camera's hotshoe.
- Gently push until it clicks into place, ensuring a secure connection.
- To detach, press the Installing/Detaching Button and slide the remote off.

Figure 4.2: Mounting the R2 Nano on a Camera Hotshoe.
5. Návod k obsluze
5.1 Zapnutí/vypnutí
- To power on, press and hold the Power Switch until the screen illuminates.
- To power off, press and hold the Power Switch until the screen turns off.
5.2 Navigace v rozhraní dotykové obrazovky
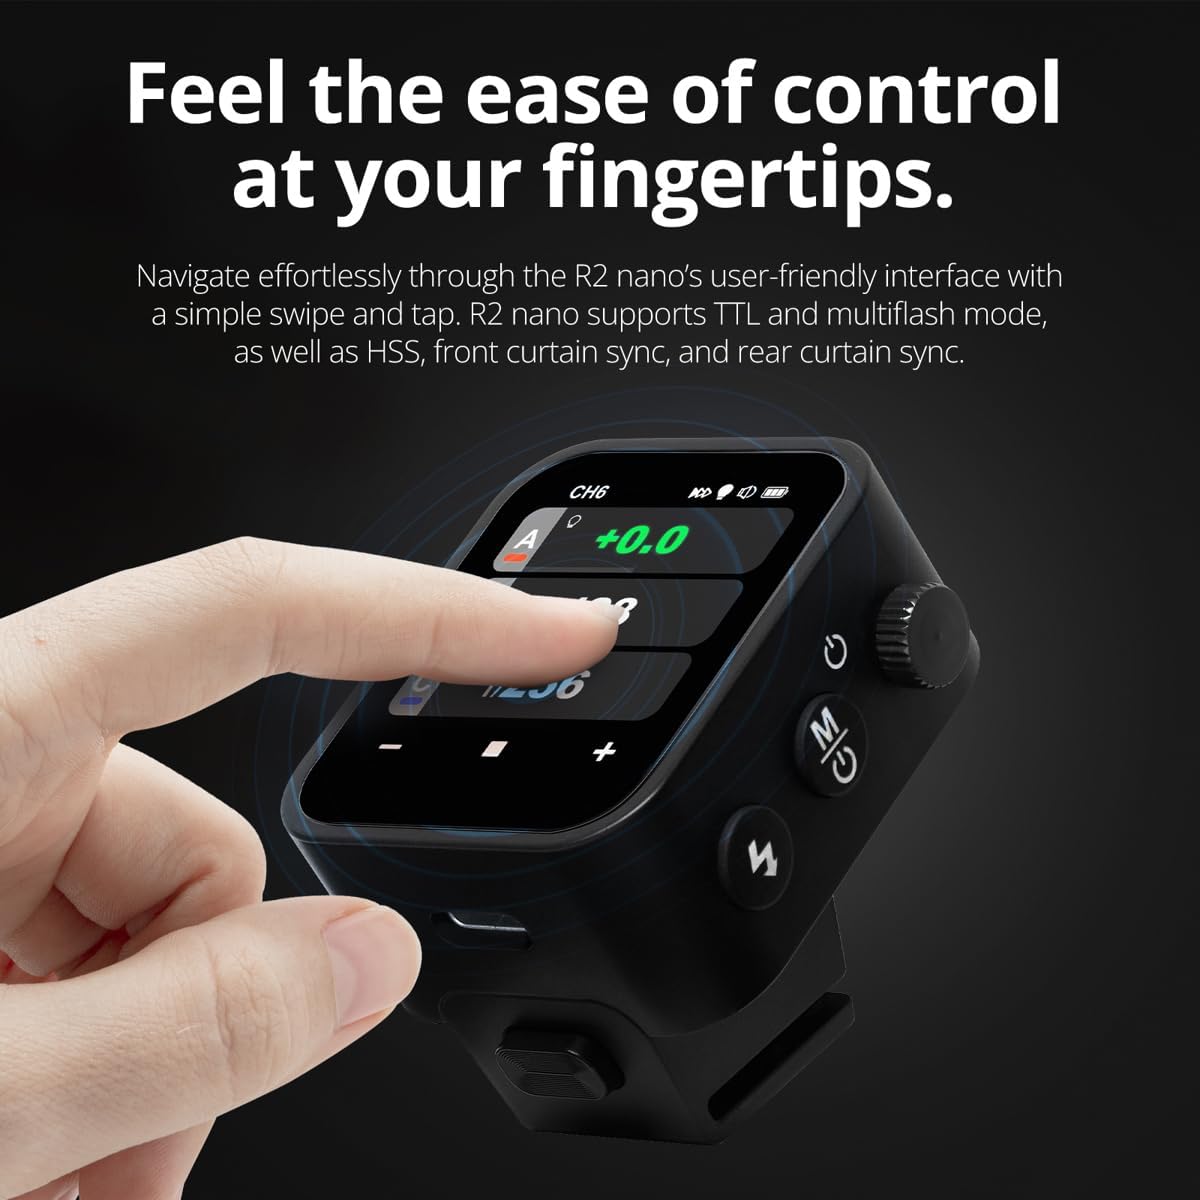
The R2 Nano features a responsive touchscreen and a select dial for intuitive control.

Figure 5.1: High Definition OLED Screen Interface.
- Dotyková interakce: Tap on a group (A, B, C, etc.) to select it for adjustment. Tap on parameters like power level to modify them.
- Vyberte vytočení: Rotate the dial to scroll through options or adjust values. Press the dial to confirm selections.
- Úprava parametrů: Use the on-screen '-' and '+' buttons or the Select Dial to change flash power, exposure compensation, or other settings.

Figure 5.2: Touchscreen Interaction for Settings Adjustment.
5.3 Setting Channels and Groups
To avoid interference and control multiple flashes, set appropriate channels and groups.
- Access the channel settings through the touchscreen menu. Select a channel from 1 to 32. Ensure your flash units are set to the same channel.
- Assign flash units to different groups (A-F, 0-9) to control them independently. The R2 Nano allows control of up to 16 groups.
5.4 Flash Modes (TTL, Manual, Multi-flash)
The R2 Nano supports various flash modes to suit different shooting scenarios.
- TTL (Skrz objektiv): Automatically adjusts flash output for correct exposure. Ideal for fast-paced shooting where lighting conditions change frequently.
- Manuál (M): Allows precise control over flash power output (e.g., 1/1 to 1/256). Suitable for consistent lighting setups and creative control.
- Multi-flash (Stroboscopic): Během jedné expozice odpálí sérii rychlých záblesků pro zachycení více pohybů objektu.
5.5 Sync Modes (HSS, Front Curtain, Rear Curtain)
Select the appropriate sync mode based on your shutter speed and desired effect.
- HSS (Vysokorychlostní synchronizace): Enables flash synchronization at shutter speeds faster than the camera's native sync speed (up to 1/8000s). Useful for overpowering ambient light or using wide apertures in bright conditions.
- Synchronizace na přední lamelu: The flash fires at the beginning of the exposure. This is the standard sync mode.
- Synchronizace na zadní lamelu: The flash fires just before the second curtain closes. This creates a streaking effect behind moving subjects, giving a sense of motion.
6. Údržba
Proper maintenance ensures the longevity and optimal performance of your R2 Nano remote.
- Čištění: Use a soft, dry cloth to clean the exterior of the device. For the touchscreen, use a microfiber cloth specifically designed for electronics. Avoid using harsh chemicals or abrasive materials.
- Skladování: When not in use, store the R2 Nano in its provided storage bag to protect it from dust and scratches. Store in a cool, dry place away from direct sunlight and extreme temperatures.
- Péče o baterie: To maintain battery health, avoid fully discharging the battery frequently. If storing for extended periods, charge the battery to approximately 50% every few months.
- Hotshoe Contacts: Keep the hotshoe contacts clean and free of debris to ensure reliable communication with your camera.
7. Řešení problémů
If you encounter issues with your Flashpoint R2 Nano, refer to the following common problems and solutions.
| Problém | Možná příčina | Řešení |
|---|---|---|
| Zařízení se nezapne. | Baterie je vybitá. | Nabijte zařízení pomocí kabelu USB-C. |
| Blesky se neaktivují. | Incorrect channel or group settings. | Ensure the R2 Nano and flash units are set to the same channel and correct groups. |
| Blesky se neaktivují. | Remote not securely mounted. | Ensure the R2 Nano is fully seated in the camera's hotshoe. |
| Inconsistent flash triggering. | Rušení prostředí. | Change the wireless channel to one with less interference. Ensure no obstructions between remote and flash. |
| Dotykový displej nereaguje. | Dočasná softwarová závada. | Vypněte zařízení, počkejte několik sekund a poté jej znovu zapněte. |
| HSS nefunguje. | Camera or flash not set to HSS mode. | Verify HSS is enabled on both the R2 Nano and your compatible flash unit. Ensure camera shutter speed is above sync speed. |
8. Specifikace
| Funkce | Detail |
|---|---|
| Model | Flashpoint R2 Nano |
| Kompatibilita | Panasonic and Olympus Cameras |
| Bezdrátová frekvence | 2.4 GHz |
| Kanály | 32 |
| Skupiny | 16 (AF, 0-9) |
| Bezdrátové Dosah | Až 100 metrů (328 stop) |
| Rychlost synchronizace | Až 1/8000 s (HSS) |
| Zobrazit | Touchscreen OLED |
| Baterie | Vestavěná dobíjecí lithiová baterie |
| Nabíjecí port | USB-C |
| Rozměry produktu | 5.25 x 4.25 x 2.5 palce |
| Hmotnost položky | 6.4 unce |
| Výrobce | Bod vzplanutí |
| Datum první dostupnosti | 19. června 2024 |
9. Záruka a podpora
Flashpoint products are designed for reliability and performance. For warranty information, technical support, or service inquiries, please refer to the official Flashpoint webstránky nebo se obraťte na svého autorizovaného prodejce.
Uschovejte si prosím doklad o koupi pro případné reklamace.
Ask a question about this manual
Ask about setup, troubleshooting, compatibility, parts, safety, or missing instructions. Manuals+ will review the question and use this page’s manual context to help answer it.