
MakeSkyBlue 60A-V123+CloudBOX
MakeSkyBlue 60A MPPT Solar Charge Controller with CloudBOX
Model: 60A-V123+CloudBOX User Manual
1. Úvod
This manual provides detailed instructions for the installation, operation, and maintenance of your MakeSkyBlue 60A MPPT Solar Charge Controller with CloudBOX. This device is designed to efficiently manage power flow from your solar panels to your battery bank, ensuring optimal charging and system longevity. Please read this manual thoroughly before installation and use to ensure proper function and safety.
2. Bezpečnostní informace
- Vždy připojte baterii k regulátoru nabíjení první, then connect the solar panels. Disconnect in the reverse order.
- Ensure all wiring is correctly polarized (positive to positive, negative to negative). Incorrect wiring can damage the controller and other components.
- Use appropriate wire gauges for your system's current and distance to prevent overheating.
- Regulátor instalujte v dobře větraném prostoru, mimo dosah hořlavých materiálů a vlhkosti.
- Do not attempt to repair or modify the controller. Contact qualified personnel for service.
- Během instalace používejte vhodné osobní ochranné prostředky (OOP), včetně ochrany očí a izolačních rukavic.
3. Klíčové vlastnosti
- Technologie MPPT: Advanced Maximum Power Point Tracking algorithm extracts up to 30% more solar energy compared to traditional PWM controllers.
- Automatický systémový objemtage Detekce: Automatically identifies 12V, 24V, or 48V battery systems.
- Široká kompatibilita baterií: Supports Sealed, Gel, AGM, Flooded, and Lithium batteries.
- Integrated CloudBOX: Enables real-time remote monitoring and control via a mobile application (iOS & Android).
- Multifunkční LCD displej: Provides cumulative power generation, error codes, temperature, voltage, and current data.
- Intelligent Battery Protection: Guards against overcharging, overvoltage, a nízký objemtage to extend battery life.
- Efektivní chlazení: Features smart cooling mechanisms to maintain optimal operating temperature.
4. Konec produktuview

Obrázek 1: MakeSkyBlue 60A MPPT Solar Charge Controller with CloudBOX. The image shows the front of the charge controller with its LCD display and control buttons, along with the included CloudBOX module and connecting cable.
4.1 Obsah balení
- MakeSkyBlue 60A MPPT Solar Charge Controller
- CloudBOX Module
- Connecting Cable for CloudBOX
- Uživatelská příručka (tento dokument)
4.2 Fyzický popis
The controller features a robust aluminum casing for durability and heat dissipation. The front panel includes an LCD display and control buttons for configuration and monitoring. Connection terminals for solar panels, batteries, and load are located at the bottom of the unit.

Obrázek 2: Product dimensions. The image displays the front view of the charge controller with measurements indicating its height (21.65 units), width (14.96 units), and depth (8.66 units).
5. Instalační příručka
5.1 Místo montáže
- Mount the controller vertically on a non-flammable surface to allow for proper airflow and cooling.
- Ensure adequate clearance around the unit (at least 6 inches on all sides) for ventilation.
- Avoid direct sunlight, high temperatures, and humid environments.
5.2 Schéma zapojení

Obrázek 3: MPPT Charge Controller Wiring Diagram. This diagram illustrates the correct connection sequence: Solar Panel to Charge Controller, Charge Controller to Battery, and Battery to Inverter/Appliances. Ensure proper polarity for all connections.
5.3 Kroky připojení
- Připojte baterii: Connect the positive and negative terminals of your battery bank to the corresponding battery terminals on the charge controller (BT+ and BT-). Ensure correct polarity. The controller will automatically detect the battery voltage (12 V/24 V/48 V).
- Připojení solárních panelů: Connect the positive and negative terminals of your solar panel array to the corresponding PV input terminals on the charge controller (PV+ and PV-). Ensure correct polarity.
- Připojení stejnosměrné zátěže (volitelné): If using a DC load directly from the controller, connect its positive and negative terminals to the load output terminals (OUT+ and OUT-). Note that the load output is typically for smaller DC loads and may not be present on all models or used in all configurations.
- Connect CloudBOX: Plug the CloudBOX module into the designated communication port on the charge controller.
Důležité: Always follow the connection order: Battery > Solar Panel > Load. Disconnect in the reverse order: Load > Solar Panel > Battery.
6. Provoz
6.1 LCD displej Overview
The LCD display provides real-time system status and allows for parameter configuration. Use the 'PROG/ESC', 'UP', 'DOWN', and 'ENTER' buttons to navigate and adjust settings.
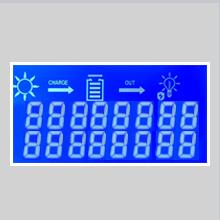
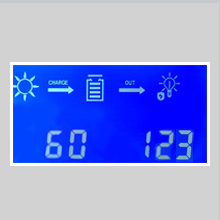
Obrázek 4: Example LCD screens. These images show various display modes, including icons for solar input, charging status, battery, load output, and numerical values for current and voltage.
6.2 Navigace na displeji
- Press the 'UP' or 'DOWN' buttons to cycle through different display screens, showing parameters like PV voltage, objem baterietage, charging current, load current, accumulated power, and internal temperature.
- Press 'PROG/ESC' to enter or exit programming mode.
- In programming mode, use 'UP'/'DOWN' to change values and 'ENTER' to confirm.
6.3 Nastavení typu baterie
The controller supports various battery types. It is crucial to set the correct battery type for optimal charging and battery longevity. The default setting is for lead-acid batteries.

Obrázek 5: Compatible Battery Types. The image illustrates the charge controller's compatibility with GEL, Flooded, and AGM battery types, indicating its versatility for various solar power setups.
To change battery type:
- Enter programming mode by pressing 'PROG/ESC'.
- Navigate to the battery type setting (often indicated by 'b00' or similar on the LCD).
- Use 'UP'/'DOWN' to select your battery type (e.g., Gel, Flooded, AGM, Lithium). Refer to the controller's specific menu for exact options.
- Press 'ENTER' to confirm your selection.
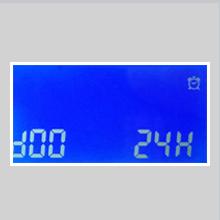
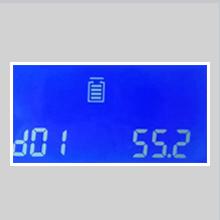
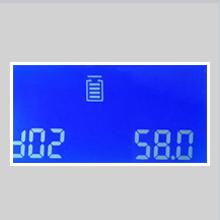
Obrázek 6: Battery Parameter Settings. These images show LCD screens for adjusting battery-related parameters such as battery type ('b00'), overcharge voltage ('b01'), and charge recovery voltage ('b02').
You can also adjust specific voltage parameters (e.g., overcharging protection voltage, nabíjení obnovy voltage, nízký objemtage disconnect) for fine-tuning, especially for custom lithium battery configurations. Refer to your battery manufacturer's specifications for recommended values.
7. CloudBOX and Mobile App
The included CloudBOX module allows for remote monitoring and control of your solar system via a dedicated mobile application (available for iOS and Android). This feature provides convenience for checking system status, performance data, and adjusting settings from your smartphone or tablet.
7.1 Nastavení a připojení
- Ensure the CloudBOX is securely connected to the charge controller's communication port.
- Download the official MakeSkyBlue mobile application from your device's app store.
- Follow the in-app instructions to register your device and connect to the CloudBOX. This typically involves scanning a QR code or entering a device ID.
- Ensure your mobile device has an active internet connection for remote access.
7.2 Funkce aplikace
- View real-time data: PV voltage, objem baterietage, charging current, load current, power generation.
- Access historical data and performance graphs.
- Receive alerts and notifications for system events or errors.
- Adjust certain controller parameters remotely.
8. Specifikace
| Parametr | Hodnota |
|---|---|
| Model | 60A-V123+CloudBOX |
| Jmenovitý nabíjecí proud | 60A |
| System Voltage | 12V/24V/48V Auto-Detect |
| Max PV Array Power (12V Battery) | ≤ 720 XNUMX W |
| Max PV Array Power (24V Battery) | ≤ 1440 XNUMX W |
| Max PV Array Power (48V Battery) | ≤ 2800 XNUMX W |
| PV Array Open Circuit Voltage (Voc) (12V Battery) | 20V-80V |
| PV Array Open Circuit Voltage (Voc) (24V Battery) | 37V-105V |
| PV Array Open Circuit Voltage (Voc) (48V Battery) | 72V-160V |
| Podporované typy baterií | Sealed, Gel, AGM, Flooded, Lithium |
| Ochrana proti přebití Voltage (12V baterie) | 15V |
| Ochrana proti přebití Voltage (24V baterie) | 30V |
| Ochrana proti přebití Voltage (48V baterie) | 60V |
| Limited Current Protection | 61A |
| Provozní teplota | Do 75°C |
| Fan-on Temperature | >45 °C |
| Fan-off Temperature | <40 °C |
| Typ zobrazení | LCD |
| Rozměry (D x Š x V) | Approx. 14.96 x 8.66 x 21.65 inches (based on image) |
| Hmotnost položky | 2.9 libry |
9. Řešení problémů
This section addresses common issues you might encounter with your charge controller.
- Žádný displej/Žádné napájení:
- Zkontrolujte připojení baterie a ujistěte se, že jsou bezpečně zapojeny a mají správnou polaritu.
- Ověřte objem baterietage is within the operating range (12V/24V/48V).
- Ensure any inline fuses or circuit breakers are not tripped.
- Žádné nabíjení ze solárních panelů:
- Zkontrolujte zapojení a polaritu solárních panelů.
- Verify PV array open circuit voltage (Voc) is within the specified range for your battery system (e.g., 20V-80V for 12V battery).
- Ensure there is sufficient sunlight reaching the panels.
- Zkontrolujte, zda na solárních panelech není žádné zastínění.
- Baterie se plně nenabíjí:
- Ověřte, zda je v nastavení ovladače vybrán správný typ baterie.
- Check the maximum PV array power. If it's too low for your battery bank, charging will be slow.
- Inspect battery health. Old or damaged batteries may not hold a full charge.
- Overcharging/High Voltage Spike:
- Ensure the battery type and overcharging protection voltage settings are correctly configured for your battery chemistry and voltage.
- If experiencing voltage spikes, especially when batteries reach full charge, verify all connections are robust and consider adding external overvoltage protection if the issue persists. Consult with a qualified solar technician.
- Chybové kódy na displeji:
- Refer to the specific error code displayed on the LCD. Consult the manufacturer's support resources or contact customer service for detailed explanations and solutions for each code.
10. Údržba
- Pravidelná kontrola: Pravidelně kontrolujte těsnost a korozi všech kabelových spojů.
- Čistota: Udržujte regulátor čistý a bez prachu a nečistot. Zajistěte, aby větrací otvory nebyly zablokované.
- Stav baterie: Monitor your battery bank's health and performance. Ensure proper ventilation for flooded lead-acid batteries.
- Aktualizace firmwaru: Zkontrolujte výrobce website or mobile app for any available firmware updates for the controller or CloudBOX.
11. Zákaznická podpora
For technical assistance, warranty information, or further inquiries, please contact MakeSkyBlue customer support through their official webnebo kontaktní informace poskytnuté při nákupu.
Online zdroje: Navštivte MakeSkyBlue Store on Amazon pro informace o produktech a aktualizace.
Související dokumenty - 60A-V123+CloudBOX
 |
MakeSkyBlue MPPT Solar Charge Controller User Manual (V123 Series) Comprehensive user manual for MakeSkyBlue MPPT Solar Charge Controllers (30A, 40A, 60A V123 models). Includes installation steps, wiring guides, troubleshooting, and SmartLife app configuration. |
 |
MakeSkyBlue S3 Series MPPT solární regulátor nabíjení V117 Uživatelská příručka Podrobný uživatelský manuál pro solární regulátor nabíjení MakeSkyBlue řady S3 MPPT (modely S3-30A, S3-40A, S3-50A, S3-60A, V117). Zahrnuje funkce, instalaci, požadavky, řešení problémů a nastavení pro efektivní správu solární energie. |
 |
Uživatelská příručka MPPT solárního regulátoru nabíjení pro řadu S3 Komplexní uživatelská příručka pro solární regulátory nabíjení MakeSkyBlue řady S3 MPPT (S3-30A, S3-40A, S3-50A, S3-60A). Zahrnuje funkce, specifikace, instalaci, provoz, řešení problémů a referenční informace o nabíjení baterií. |
 |
Tycon TP-SC48-60-MPPT Solar Charge Controller User Manual User manual for the Tycon TP-SC48-60-MPPT MPPT solar charge controller. Includes installation instructions, wiring diagrams, operation guides, protection functions, and technical specifications. |
 |
Instalační a provozní manuál pro solární regulátor nabíjení MPPT 60A ECO-WORTHY Podrobný návod k instalaci a obsluze pro ekologický solární regulátor nabíjení MPPT 12V/24V/36V/48V 60A. Seznamte se s bezpečností, funkcemi produktu, postupem instalace a řešením problémů. |
 |
Uživatelská příručka k solárnímu MPPT regulátoru nabíjení Renogy RCC60RVRE This user manual provides comprehensive instructions for the Renogy RCC60RVRE Solar MPPT Charge Controller, covering installation, operation, features, specifications, maintenance, safety guidelines, and support information. |
Ask a question about this manual
Ask about setup, troubleshooting, compatibility, parts, safety, or missing instructions. Manuals+ will review the question and use this page’s manual context to help answer it.