
1. Úvod
The PWAYTEK HDMI KVM USB Ethernet Extender allows for the transmission of HDMI video, USB keyboard, and mouse signals over a single Cat5e/6/7/8 network cable. This device supports 1080p@60Hz resolution, features a 3D HD loop-out function, and Power over Cable (POC) for simplified installation. It is designed for extending signals up to 50 meters (164 feet), making it suitable for various applications including offices, classrooms, and home entertainment systems.

Image 1.1: PWAYTEK HDMI KVM USB Ethernet Extender (Transmitter and Receiver)
This image displays the two main components of the PWAYTEK HDMI KVM USB Ethernet Extender: the Transmitter (TX) and Receiver (RX) units. Both units are compact, black rectangular devices with ventilation slots and various ports for connectivity. The TX unit has HDMI In, HDMI Out, and an Ethernet port. The RX unit has HDMI Out, USB ports for KVM, and an Ethernet port. The branding 'PWAY HD KVM EXTENDER' is visible on both units.
2. Obsah balení
Po otevření balíku si prosím ověřte, zda jsou všechny položky přítomny a v dobrém stavu:
- Transmitter (TX) Unit x 1
- Receiver (RX) Unit x 1
- Napájecí adaptér x 1
3. Konec produktuview
Familiarize yourself with the ports and indicators on both the Transmitter (TX) and Receiver (RX) units.

Image 3.1: Port Layout and Dimensions
Tento obrázek poskytuje detailní view of the ports and dimensions for both the Transmitter (TX) and Receiver (RX) units. The TX unit features a USB-C port, a UTP (Ethernet) port, an HDMI In port, an HDMI Out port, and LED indicators for STA (Status) and PWR (Power). The RX unit includes a DC 5-12V power input, a UTP (Ethernet) port, KVM USB ports, an HDMI Out port, and LED indicators for STA and PWR. Dimensions are also shown, indicating a compact design.
Vysílací (TX) jednotka
- HDMI vstup: Connects to the HDMI source device (e.g., PC, game console).
- HDMI VÝSTUP: Local loop-out port for connecting a local display.
- Nezávislá topologická karta (UTP): RJ45 port for connecting to the Receiver unit via Cat5e/6/7/8 cable.
- USB-C: For KVM signal input from the source device.
- PWR LED: Indikuje stav napájení.
- LED dioda STA: Indicates signal status.
Přijímací (RX) jednotka
- HDMI VÝSTUP: Connects to the remote display.
- KVM (USB Ports): Connects to USB keyboard and mouse for remote control.
- Nezávislá topologická karta (UTP): RJ45 port for connecting to the Transmitter unit via Cat5e/6/7/8 cable.
- Stejnosměrné napětí 5–12 V: Port napájení.
- PWR LED: Indikuje stav napájení.
- LED dioda STA: Indicates signal status.
4. Pokyny k nastavení
Follow these steps to set up your PWAYTEK HDMI KVM USB Ethernet Extender:
- Connect the HDMI Source to the Transmitter (TX): Use an HDMI cable to connect your source device (e.g., computer, Blu-ray player) to the HDMI IN port on the TX unit.
- Připojení lokálního displeje (volitelné): If you wish to have a local display near your source, connect an HDMI cable from the HDMI OUT port on the TX unit to your local monitor.
- Connect KVM Source to Transmitter (TX): Connect a USB-C cable from your source device to the USB-C port on the TX unit. This transmits the KVM signal.
- Connect Transmitter (TX) to Receiver (RX): Use a single Cat5e/6/7/8 Ethernet cable to connect the UTP port on the TX unit to the UTP port on the RX unit. Ensure the cable length does not exceed 50 meters (164 feet) for optimal performance.
- Connect Remote Display to Receiver (RX): Use an HDMI cable to connect your remote display to the HDMI OUT port on the RX unit.
- Connect KVM Devices to Receiver (RX): Plug your USB keyboard and mouse into the KVM USB ports on the RX unit.
- Použít napájení: Connect the provided power adapter to the DC 5-12V port on the RX unit. The Power over Cable (POC) feature means only the RX unit requires external power, which then powers the TX unit through the Ethernet cable.
- Zapnutí zařízení: Power on your HDMI source device and all connected displays. The STA and PWR LEDs on both units should illuminate, indicating a successful connection.

Image 4.1: Typical Connection Diagram
This diagram illustrates a typical setup for the PWAYTEK HDMI KVM USB Ethernet Extender. A computer (source) is connected to the Transmitter (TX) unit via HDMI and USB-C cables. The TX unit is then connected to the Receiver (RX) unit using a Cat6 Ethernet cable. The RX unit is powered by a DC12V adapter and connected to a remote display via an HDMI cable, with a keyboard and mouse connected to the RX unit's KVM ports. The diagram also specifies recommended cable lengths for Cat5, Cat5e, and Cat6/7/8 cables.
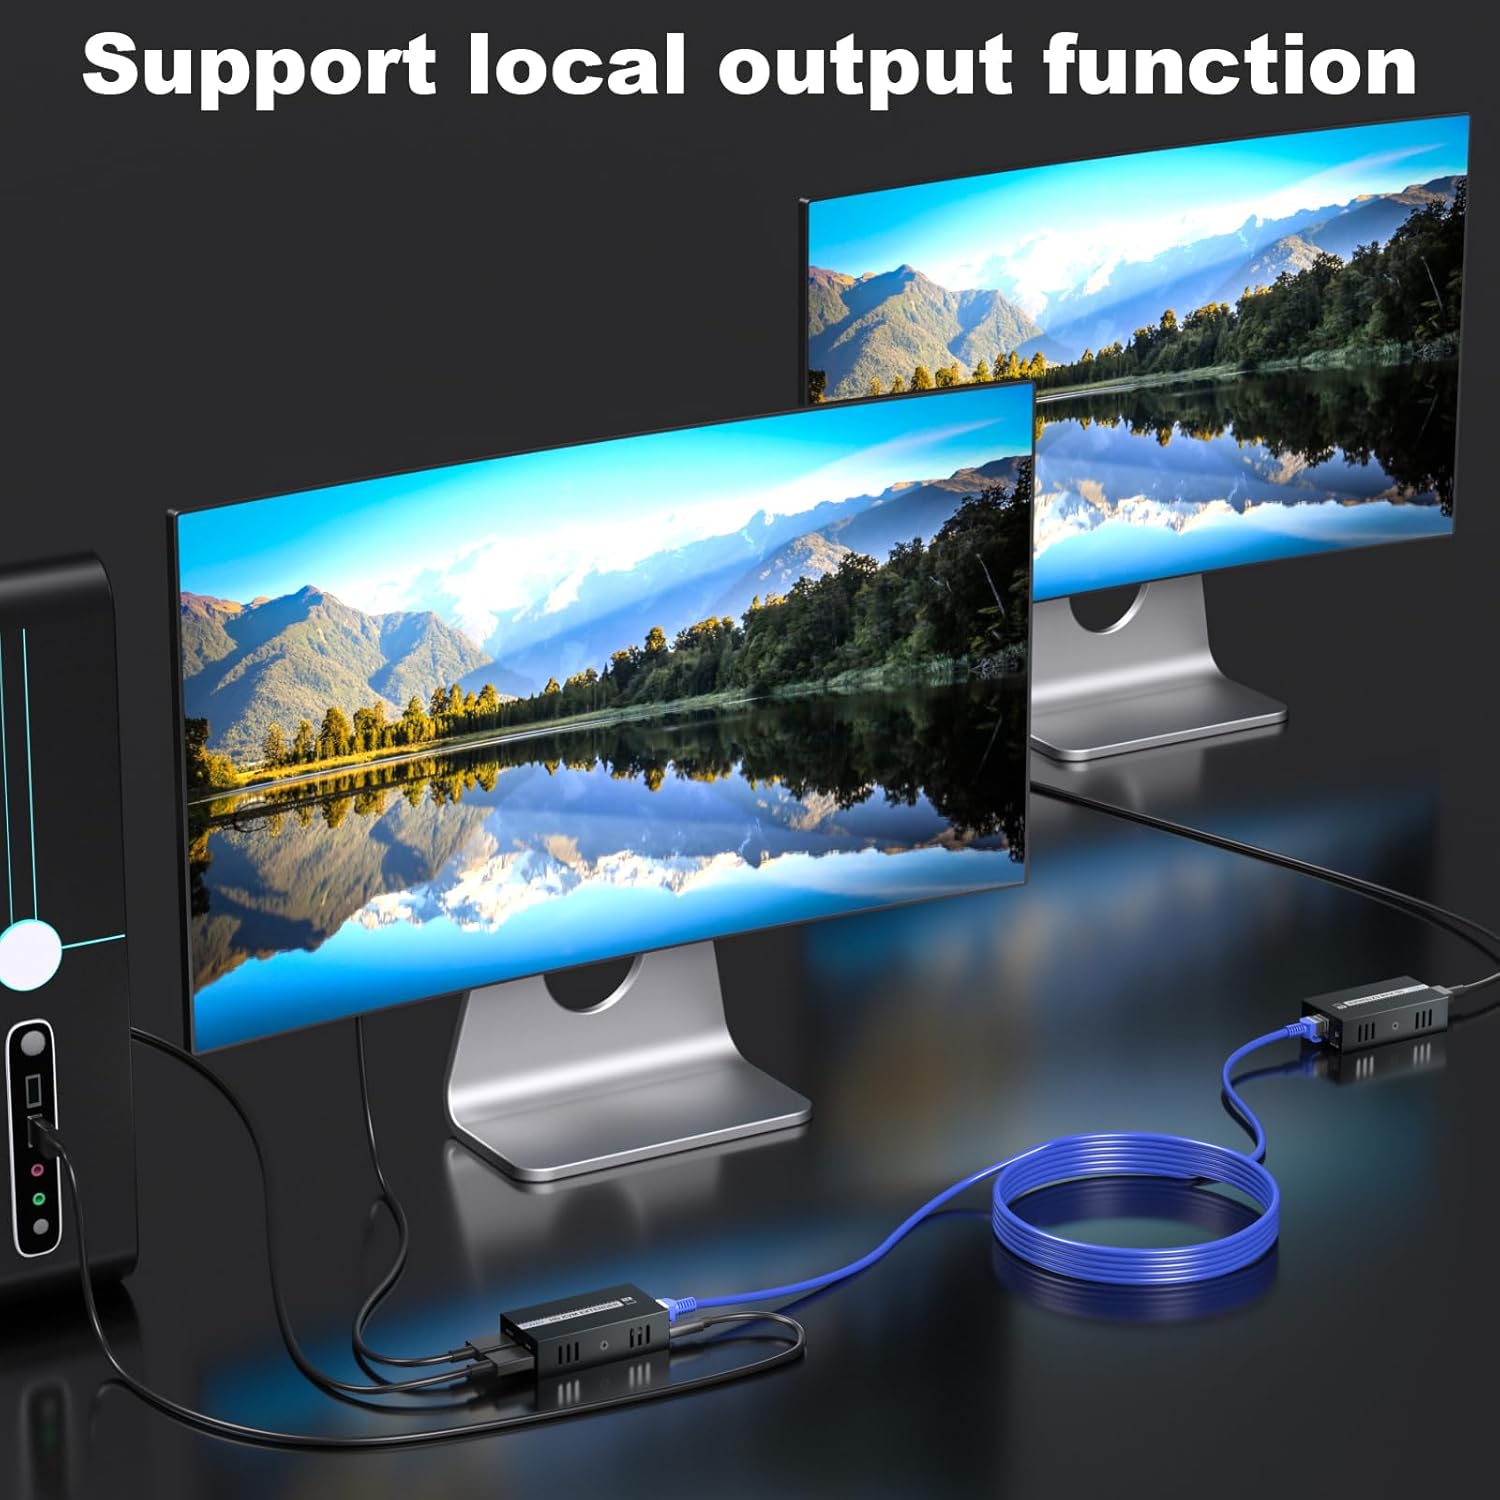
Image 4.2: Local Output Function
This image demonstrates the local output function of the extender. A source device (laptop) is connected to the Transmitter (TX) unit. The TX unit then outputs the video signal to two displays simultaneously: one directly connected to the TX unit's HDMI OUT port (local loop-out) and another connected remotely via the Receiver (RX) unit and an Ethernet cable. This allows for monitoring the source content locally while extending it to a distant display.
5. Návod k obsluze
Ovládání KVM
Once connected, the USB keyboard and mouse plugged into the RX unit will control the source device connected to the TX unit. This allows for remote operation of your computer or other KVM-enabled devices.

Image 5.1: Keyboard and Mouse Remote Control
This image illustrates the KVM functionality, showing a keyboard and mouse connected to the Receiver (RX) unit, which is linked to a remote display. The setup enables remote control of the signal source, typically a computer, allowing users to interact with the extended display using their keyboard and mouse without being physically present at the source location.
HD Loop-Out Function
The HDMI OUT port on the TX unit provides a local loop-out, allowing you to connect a monitor near the source device. This enables simultaneous viewing of the content on both the local and remote displays without signal degradation.
Power over Cable (POC)
The POC feature simplifies installation by requiring only one power adapter for the entire system. The RX unit powers the TX unit through the Ethernet cable, reducing cable clutter and the need for an additional power outlet at the TX location.
Video 5.2: HDMI KVM USB Extender Demonstration
This video demonstrates the PWAYTEK HDMI KVM USB Extender in action. It shows a laptop acting as the signal source, with its display mirrored to a local monitor and extended to a larger remote display. The video highlights the local loop-out capability and the use of a mouse and keyboard connected to the receiver unit to control the content on the remote display, confirming the KVM functionality and extended range.
6. Řešení problémů
If you encounter issues with your extender, please refer to the following common solutions:
- Žádný video signál:
- Ujistěte se, že jsou všechny kabely HDMI a Ethernet bezpečně připojeny.
- Verify that the power adapter is correctly connected to the RX unit and that the PWR LEDs on both TX and RX units are illuminated.
- Check the length and quality of your Ethernet cable. Cat5e/6/7/8 cables are recommended, and exceeding 50 meters (164 feet) may result in signal loss.
- Test with a different HDMI source or display to rule out compatibility issues.
- Ensure the source device's resolution is set to a supported format (e.g., 1080p@60Hz).
- Poor Video Quality (Fuzzy, Greyed Out, Flickering):
- Replace the Ethernet cable with a higher quality Cat6/7/8 cable.
- Reduce the length of the Ethernet cable if possible.
- Ensure there are no strong electromagnetic interference sources near the cables.
- KVM (Keyboard/Mouse) Not Responding:
- Ensure the USB-C cable is securely connected from your source to the TX unit.
- Verify that the keyboard and mouse are properly plugged into the KVM USB ports on the RX unit.
- The extender supports USB 1.1 for keyboard and mouse. Some advanced gaming peripherals or devices requiring higher USB bandwidth may not function correctly.
- Try connecting a different keyboard and mouse to rule out device-specific issues.
- Žádný zvuk:
- Zkontrolujte nastavení zvuku na zdrojovém zařízení a displeji.
- Ujistěte se, že kabely HDMI podporují přenos zvuku.
- Note that this extender is primarily designed for video and basic KVM. Advanced audio formats like surround sound may not be fully supported.
7. Specifikace
| Funkce | Detail |
|---|---|
| Číslo modelu | HT259HK-1215 |
| Přenosová vzdálenost | Up to 50 meters (164 feet) over Cat5e/6/7/8 |
| Podporované rozlišení | 1080p@60Hz |
| Speciální funkce | 3D HD Loop Out, POC (Power Over Cable), KVM (Mouse & Keyboard Support) |
| Podpora USB | USB 1.1 for mouse and keyboard |
| Kompatibilní zařízení | PC, Game Consoles, Blu-ray Players, Media Players, etc. |
| Rozměry produktu | 7.09 x 4.72 x 1.57 palce |
| Hmotnost položky | 13.76 unce |
8. Údržba
To ensure the longevity and optimal performance of your PWAYTEK HDMI KVM USB Ethernet Extender, follow these maintenance guidelines:
- Čištění: K čištění vnější strany jednotek používejte měkký, suchý hadřík. Nepoužívejte tekuté čisticí prostředky ani rozpouštědla.
- Prostředí: Operate the device in a well-ventilated area, away from direct sunlight, excessive heat, moisture, and dust.
- Správa kabelů: Ensure all cables are neatly organized and not under excessive tension or sharp bends, which can damage them over time.
- Moc: Always use the provided power adapter. Disconnect power during electrical storms or when the device is not in use for extended periods.
9. Záruka a podpora
PWAYTEK stands behind its products with a 1letá bezplatná záruka from the date of purchase. This warranty covers manufacturing defects and ensures your satisfaction and peace of mind.
For any questions, concerns, or technical support, please contact our customer service team. We are always ready to assist you with further information or support related to your PWAYTEK HDMI KVM USB Ethernet Extender.
Contact information can typically be found on the product packaging or the official PWAYTEK webmísto.