1. Úvod
This manual provides detailed instructions for the installation, operation, and maintenance of your ELUSH 100A MPPT Solar Charge Controller. This advanced controller is designed to efficiently manage power from your solar panels to your battery bank, ensuring optimal charging and system protection. It automatically recognizes 12V, 24V, 36V, and 48V systems and features dual USB 5V charging ports.
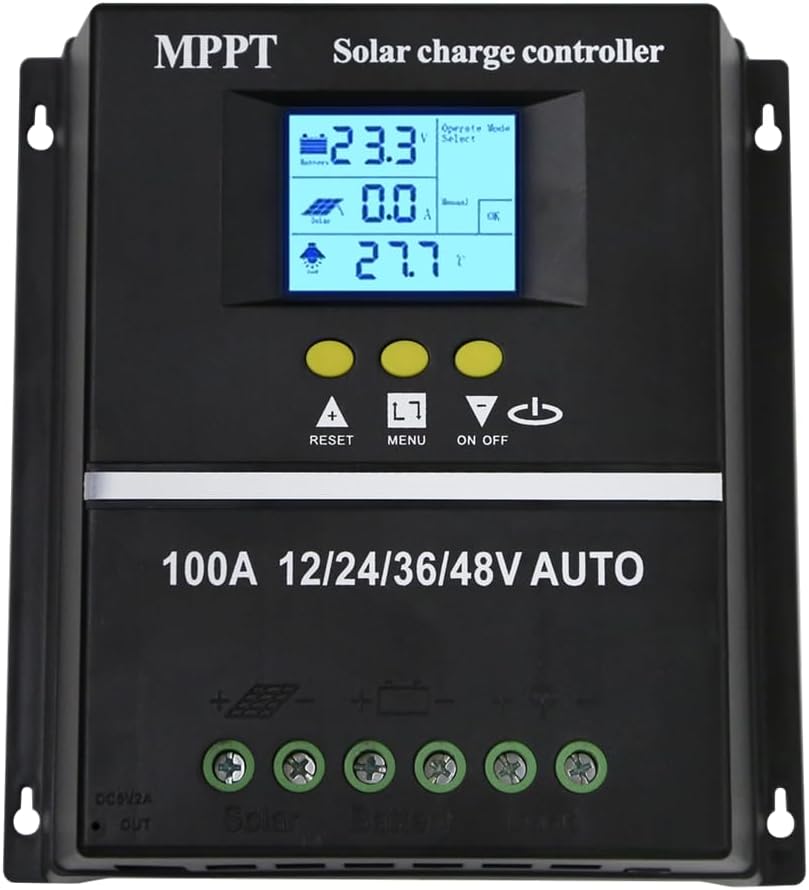
Obrázek 1.1: Přední strana view of the ELUSH 100A MPPT Solar Charge Controller.
2. Bezpečnostní pokyny
Please read all instructions carefully before installation and operation. Failure to follow these instructions may result in damage to the unit, personal injury, or property damage.
- Před zapnutím systému se ujistěte, že jsou všechna připojení bezpečná a správná.
- Nerozebírejte ani se nepokoušejte o opravu ovladače sami. Pro servis se obraťte na kvalifikovaný personál.
- Regulátor instalujte v dobře větraném prostoru, mimo dosah hořlavých materiálů a přímého slunečního záření.
- The controller provides comprehensive voltage protection, including safeguards against battery over-voltage, over-current, power failure, overcharge, deep discharge, reverse connection, and overheating.
- Device Startup Reminder: When connecting the equipment, first connect the rechargeable battery and ensure it has power. After successful startup, then connect the solar panel. This sequence ensures proper operation.
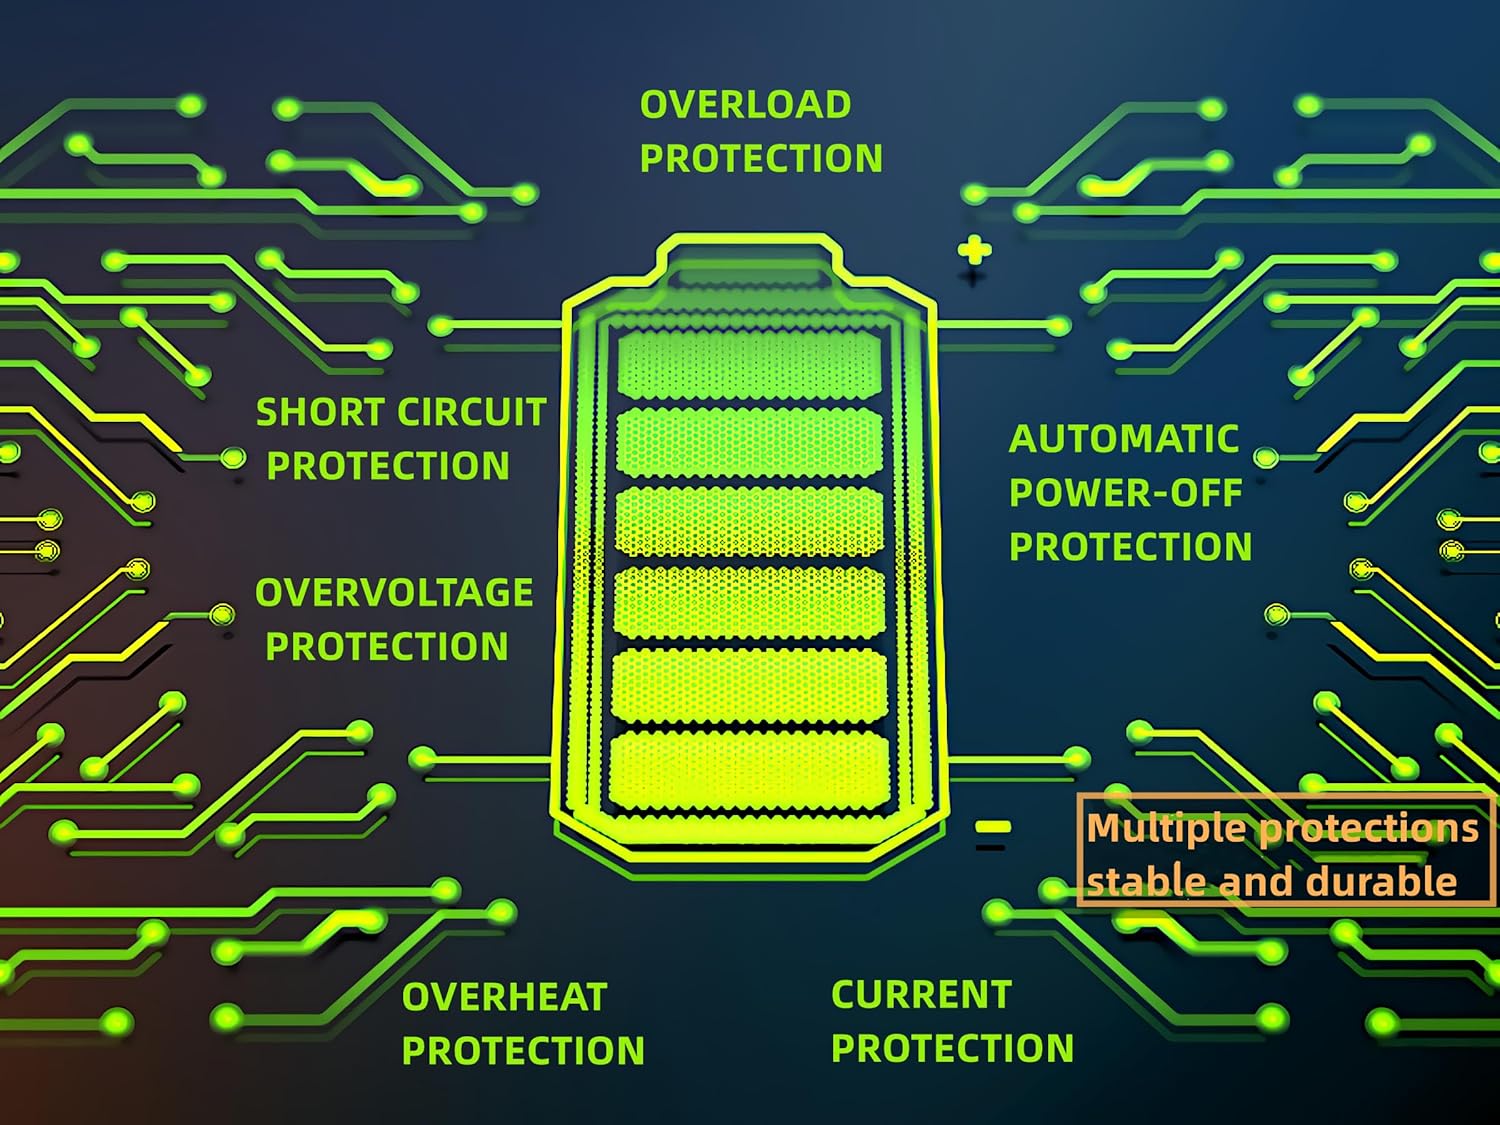
Figure 2.1: Built-in protection features for enhanced safety and durability.
3. Vlastnosti produktu
The ELUSH MPPT Solar Charge Controller offers a range of features designed for efficient and reliable solar power management:
- Superior MPPT Technology: Equipped with an advanced Maximum Power Point Tracking algorithm, ensuring tracking efficiency of no less than 99.5% for enhanced energy utilization.
- Automatické rozpoznání systému: Automatically recognizes 12V, 24V, 36V, and 48V battery systems.
- Všestranné provozní režimy: Features seven operating modes including charging mode, light control mode, light control + time delay control mode, universal control mode, manual control mode, and timing control mode.
- Multifunkční LCD displej: Dynamically displays operational data such as working mode, battery voltage, PV charging current, battery discharging current, product working temperature, and delay time.
- Duální USB porty: Includes dual USB 5V charging ports for convenient device charging.
- Široká kompatibilita baterií: Compatible with various battery types, including Sealed, GEL, Flooded, and LifePO4.
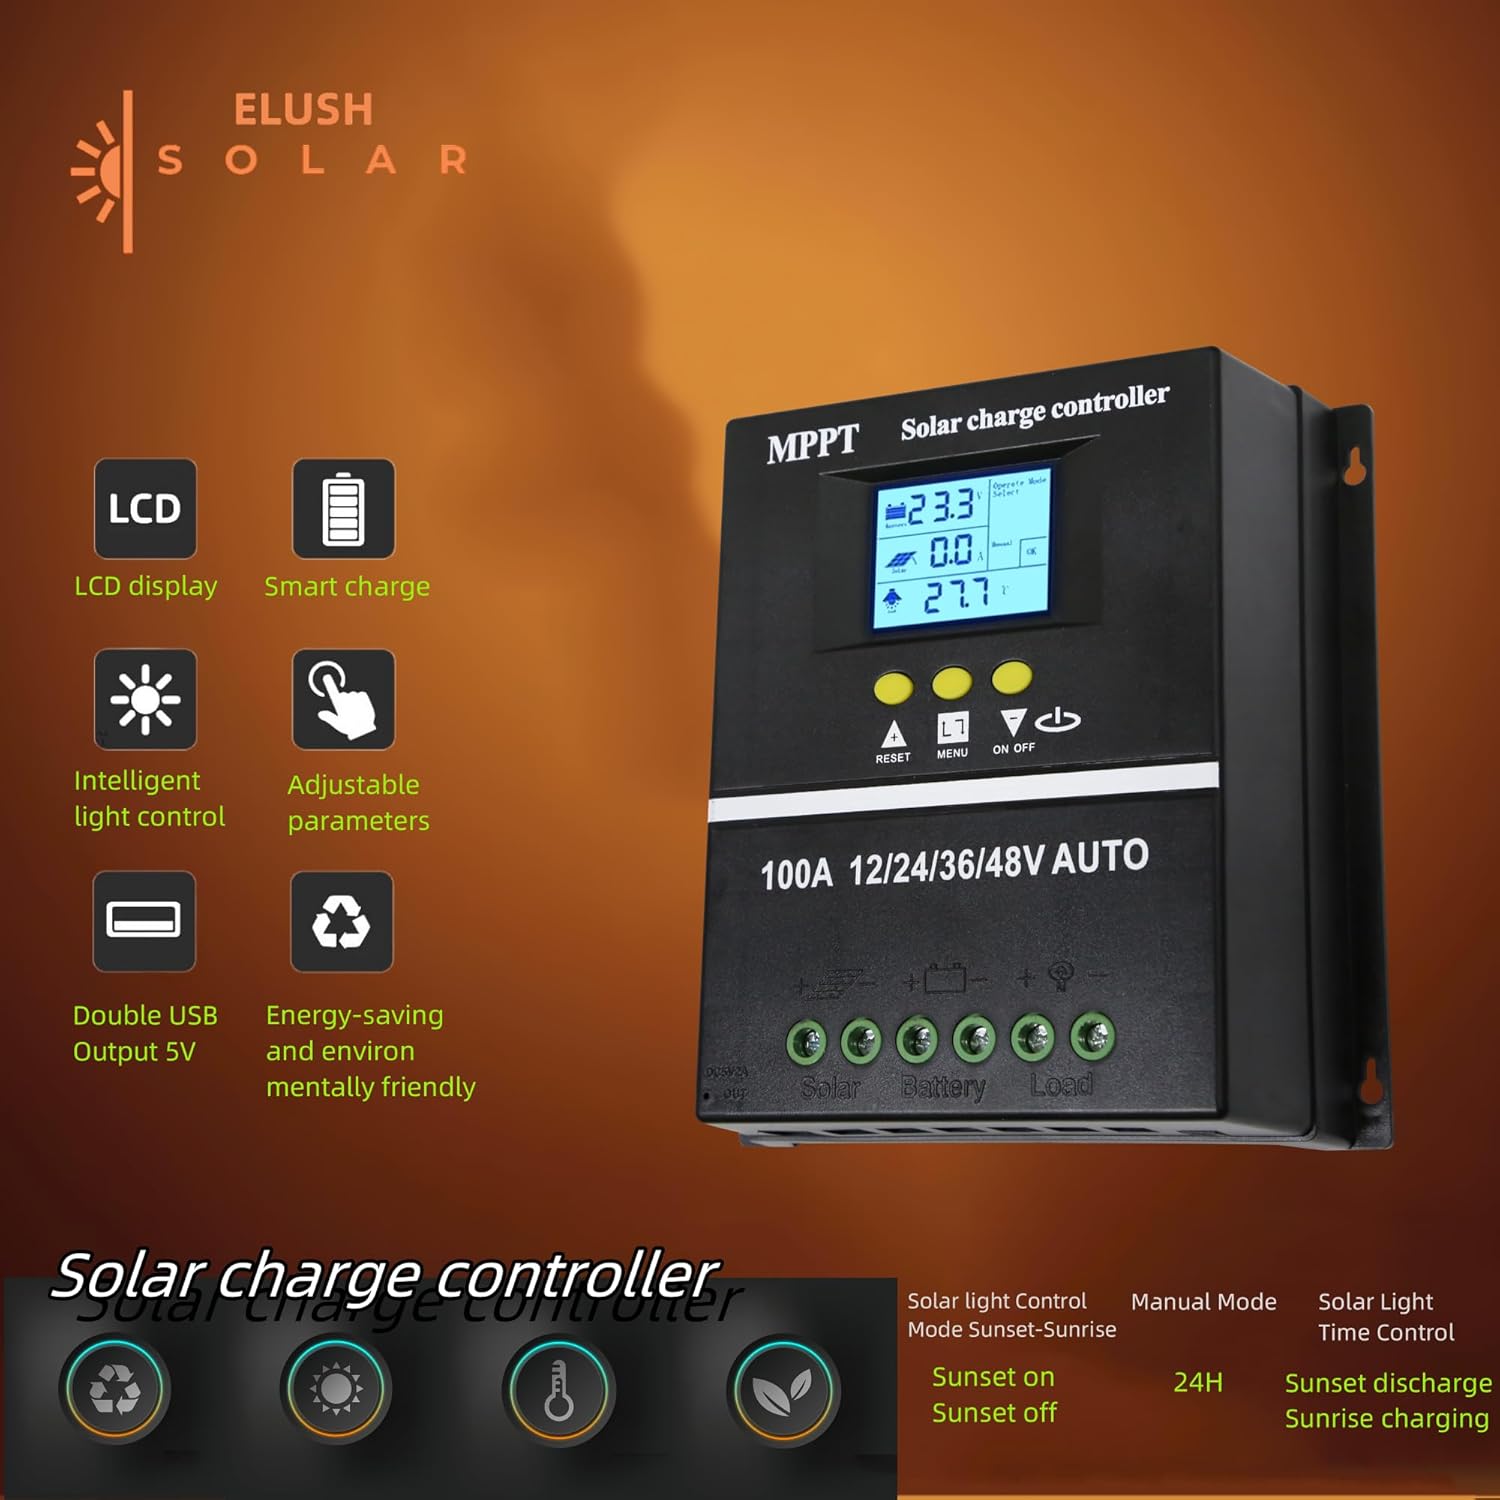
Figure 3.1: Key features of the ELUSH Solar Charge Controller.

Obrázek 3.2: Detailní view of connection ports and heat dissipation design.
4. Nastavení a instalace
Pro správnou instalaci solárního regulátoru nabíjení postupujte podle těchto kroků:
- Připravte si místo pro montáž: Choose a dry, well-ventilated area, protected from direct sunlight and moisture. Ensure there is enough space around the controller for proper heat dissipation.
- Připojte baterii: First, connect the positive and negative terminals of your battery to the corresponding battery terminals on the controller. Ensure the battery has sufficient charge to power the controller's display.
- Připojení solárních panelů: Next, connect the positive and negative terminals of your solar panel array to the corresponding solar panel terminals on the controller.
- Připojení zátěže (volitelné): If you are connecting a DC load directly to the controller, connect its positive and negative terminals to the load terminals on the controller.
- Ověřte připojení: Dvakrát zkontrolujte všechna připojení, zda jsou bezpečná a správně polarizovaná.

Figure 4.1: Typical connection diagram for the solar charge controller.
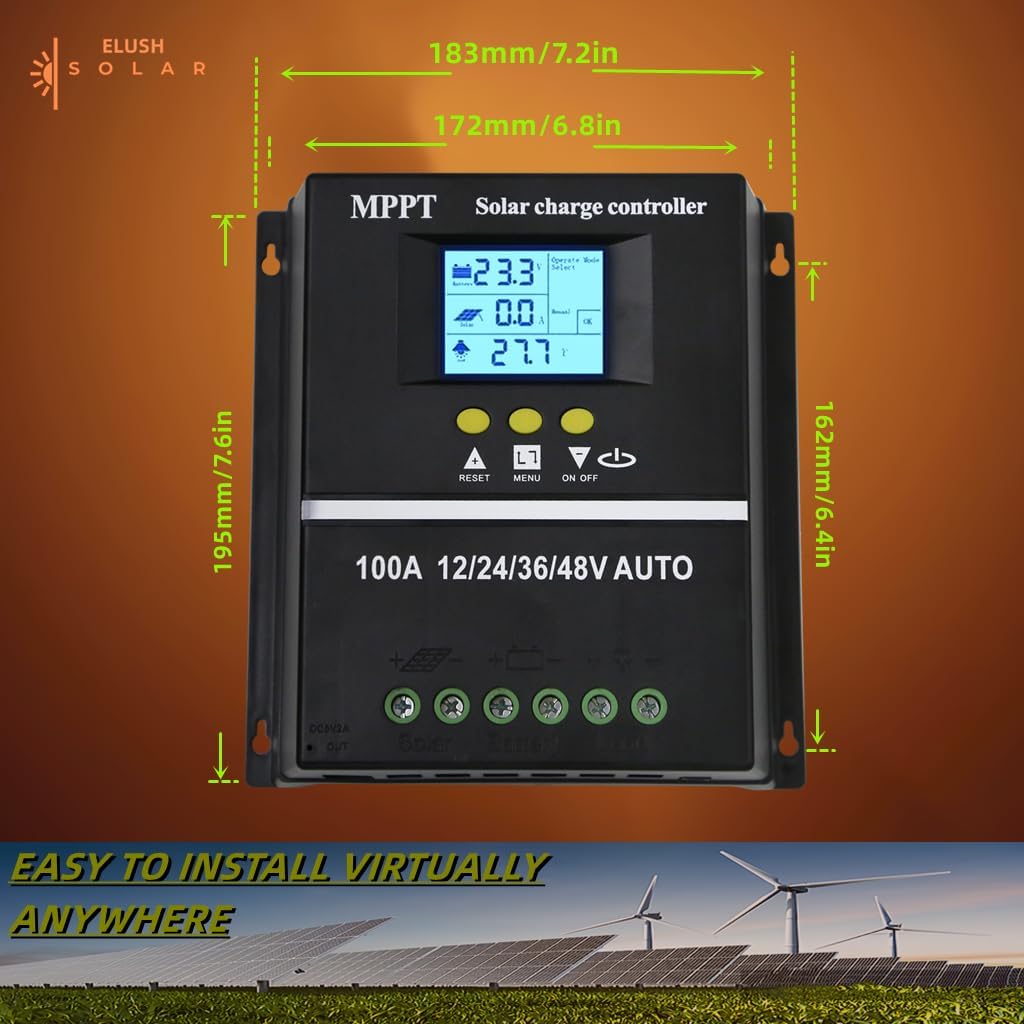
Obrázek 4.2: Rozměry produktu pro plánování instalace.
5. Návod k obsluze
The controller's LCD display provides real-time information and allows for configuration of various settings.
5.1 LCD displej a tlačítka
The LCD dynamically displays operational data. Use the buttons below the screen to navigate menus and adjust settings:
- RESETOVÁNÍ: Resets certain parameters or enters settings mode.
- JÍDELNÍ LÍSTEK: Navigates through different display screens and settings.
- Šipky NAHORU/DOLŮ: Adjust values or select options within menus.
- ON/OFF: Controls the DC load output.
5.2 režimy nabíjení
The controller supports a rapid, efficient, and safe battery charging algorithm with four stages:
- Hromadný poplatek: Počáteční stage where the battery receives maximum current.
- Boost Charge: Nabíjí baterii na vyšší hlasitosttage pro zajištění plného nabití.
- Plovoucí poplatek: Maintains the battery at a constant voltage, aby se zabránilo přebíjení.
- Vyrovnávací poplatek: Pravidelně přebíjí baterii pro vyrovnání objemu článkůtages (for certain battery types).

Figure 5.1: Four-stage battery charging process.
5.3 Výběr typu baterie
The controller is compatible with Sealed, GEL, Flooded, and LifePO4 batteries. Ensure you select the correct battery type in the settings for optimal charging and battery longevity.

Figure 5.2: Compatible battery types.
5.4 Aplikační scénáře
The ELUSH MPPT Solar Charge Controller is suitable for various applications, including:
- Residential solar power systems
- Solární systémy pro obytné vozy a lodě
- Off-grid cabins and remote power solutions
- Portable solar power kits
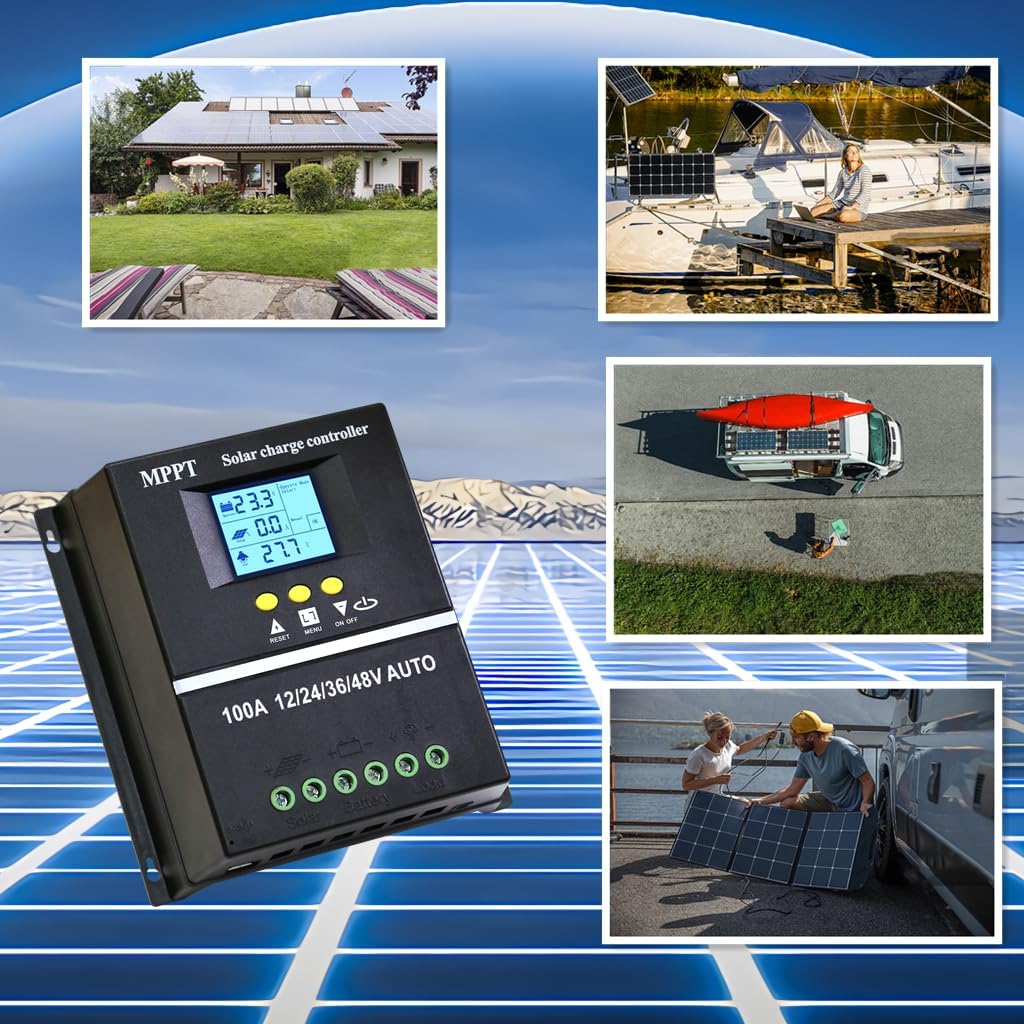
Figure 5.3: Diverse application scenarios for the solar charge controller.
6. Údržba
Pravidelná údržba zajišťuje dlouhou životnost a optimální výkon vašeho solárního regulátoru nabíjení:
- Čistota: Keep the controller clean and free from dust and debris. Use a dry, soft cloth for cleaning.
- Spojení: Pravidelně kontrolujte všechna zapojení, zda jsou pevná a bez koroze. Volná spojení mohou vést ke ztrátě napájení nebo přehřátí.
- Větrání: Ensure the installation area remains well-ventilated to prevent overheating, especially during peak operation.
- Aktualizace firmwaru: Zkontrolujte výrobce webNavštivte webové stránky, kde najdete veškeré dostupné aktualizace firmwaru, abyste zajistili, že váš ovladač bude mít nejnovější funkce a opravy chyb.
7. Řešení problémů
Pokud narazíte na problémy se solárním regulátorem nabíjení, podívejte se na následující běžné problémy a jejich řešení:
| Problém | Možná příčina | Řešení |
|---|---|---|
| Controller not powering on / No display | Battery not connected or insufficient battery voltage. | Ensure battery is connected first and has adequate charge (minimum 9V for 12V systems). Charge battery externally if completely depleted. |
| No solar charging current | Solar panels not connected, insufficient sunlight, or panel issues. | Check solar panel connections. Ensure panels are receiving direct sunlight. Verify panel voltage. |
| Baterie se plně nenabíjí | Incorrect battery type setting, insufficient solar input, or battery degradation. | Verify battery type setting on the controller. Increase solar panel capacity if needed. Test battery health. |
| Zatížení nefunguje | Load output disabled, overload, or low battery voltage. | Check load output setting (ON/OFF button). Reduce load if overloaded. Charge battery. |
| Přehřívání | Poor ventilation or excessive load/charging current. | Zajistěte dostatečné proudění vzduchu kolem regulátoru. Snižte zátěž nebo zkontrolujte, zda nedošlo ke zkratům. |
8. Specifikace
Detailed technical specifications for the ELUSH 100A MPPT Solar Charge Controller:
| Parametr | Hodnota |
|---|---|
| Baterie Voltage | 12V/24V/36V/48V Auto |
| Nabíjecí proud | 100A |
| Max Solar Input (Voc) | 15-25V (12V Battery); 30-50V (24V Battery); 45-75V (36V Battery); 60-100V (48V Battery) |
| Maximální FV vstupní výkon | 1200W (12V Battery); 2400W (24V Battery); 3600W (36V Battery); 4800W (48V Battery) |
| USB port | DC 5V/1.5A x 2 USB |
| Provozní teplota | -25 °C ~ 55 °C |
| Výrobce | ELUSH |
| Hmotnost položky | 1.79 libry |
| Rozměry balení | 8.11 x 8.03 x 2.91 palce |

Figure 8.1: Detailed specifications of the 100A model.
9. Záruka a podpora
ELUSH offers a 1-year warranty for this product. For technical support or any issues you may encounter, please feel free to contact our team. Our engineers are available to provide advice and solutions.
Pro více informací a produktů navštivte ELUSH Store.